Hello! Picture this situation: you’ve been dreaming of giving your home a fresh look, but the thought of spending endless days with a paintbrush seems overwhelming. But fear not! In this article, I will show you how you can easily paint your house using an airless sprayer.
I’ll walk you through the whole process, from prepping the surface to choosing the right materials and equipment. We’ll also dive into proper technique and planning your painting strategy to ensure maximum efficiency.
If you’re wondering about the importance of using a primer or how to clean and maintain your equipment, I’ve got you covered. And of course, I’ll share tips on allowing the paint to dry, inspecting for touch-ups, and finally, reveling in the beauty of your freshly painted home.
So, let’s get started on this exciting journey to transform your house into the envy of the neighborhood!
Key Takeaways
- Adjust spray pattern and pressure to minimize overspray and avoid paint drips
- Use a primer for a smooth and long-lasting paint job
- Consider fast-drying paint or hire professional painters for quicker results
- Regularly clean and maintain equipment for optimal performance
Prepare the Surface
Now, you’re ready to tackle the most important step: prepping the surface like a pro! Surface preparation techniques are crucial for achieving a flawless paint job.
First, thoroughly clean the surface by removing any dirt, grime, or loose paint using a pressure washer or a scrub brush with a mild detergent.
Next, repair any cracks, holes, or damaged areas with a suitable filler or putty. Don’t forget to sand the surface to create a smooth and even finish.
Cover any nearby surfaces or objects that you don’t want to get paint on with drop cloths or plastic sheets.
Lastly, prime the surface to ensure better paint adhesion and durability. Common mistakes to avoid include skipping the cleaning step, neglecting to repair damages, and forgetting to prime.
With the surface properly prepped, we can now move on to gathering the right materials and equipment for the next phase.
Gather the Right Materials and Equipment
When it comes to painting a house fast with an airless sprayer, there are three key points to consider.
First, it’s crucial to choose the right paint that will adhere well to the surface and provide long-lasting results.
Second, investing in a quality airless sprayer will ensure a smooth and efficient application of the paint.
Lastly, don’t forget to wear protective gear, such as goggles, a respirator, and gloves, to keep yourself safe from any potential hazards.
Choose the Right Paint
To achieve a speedy paint job with an airless sprayer, make sure you’ve picked the perfect paint for the task. Choosing the right paint involves considering factors such as color selection and paint finishes. When it comes to color, opt for a shade that complements your home’s exterior or desired aesthetic. As for paint finishes, choose one that suits the surface you’ll be painting. For example, a flat or satin finish works well for siding, while a gloss or semi-gloss finish is ideal for doors and trim. Remember, the right paint can make a significant difference in the overall appearance and longevity of your paint job. With the right paint in hand, you’ll be ready to move on to the next step and invest in a quality airless sprayer.
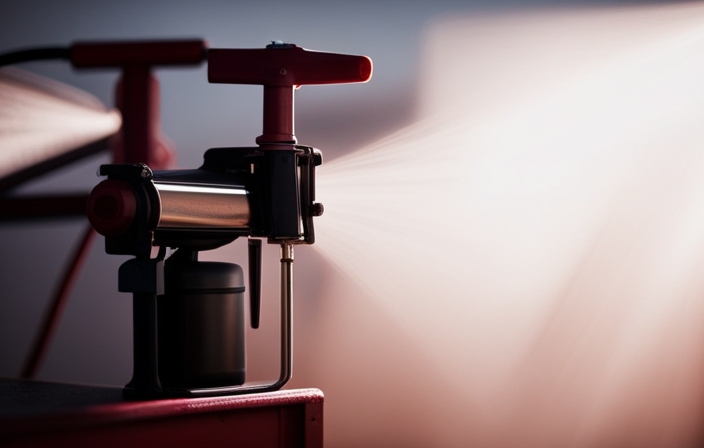
Invest in a Quality Airless Sprayer
Ready to take your painting game to the next level? It’s time to invest in a top-notch airless sprayer that will make your job a breeze. Here are some reasons why investing in a quality airless sprayer is beneficial:
-
Time-saving: Airless sprayers are known for their efficiency in covering large areas quickly, allowing you to paint a house in a fraction of the time compared to traditional methods.
-
Smooth and even finish: The high-pressure spray from an airless sprayer ensures a uniform coat of paint, eliminating streaks and brush marks.
-
Versatility: Airless sprayers can handle a variety of paint types, from latex to oil-based, making them suitable for any painting project.
-
Reduced overspray: Unlike traditional methods, airless sprayers minimize overspray, resulting in less wasted paint and a cleaner work area.
-
Easy maintenance: Airless sprayers are relatively easy to clean and maintain, requiring simple flushing with water or solvent after each use.
With your top-notch airless sprayer ready to go, now it’s time to ensure your safety by wearing protective gear.
Wear Protective Gear
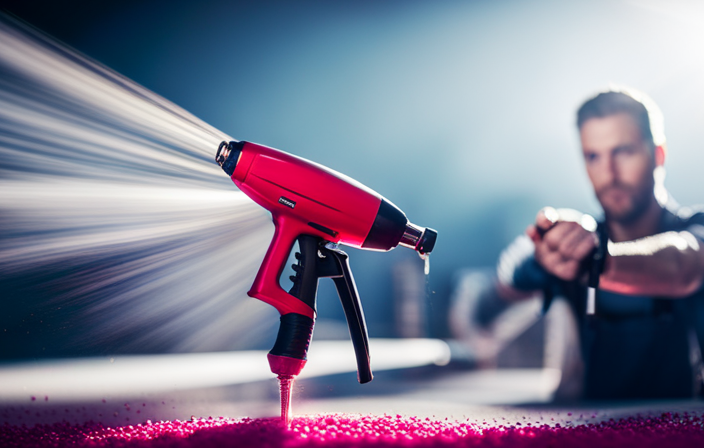
Ensure your safety and elevate your painting experience by donning the necessary protective gear. Safety precautions are crucial when using an airless sprayer, as the high-pressure nature of the device can cause serious injuries if not handled properly. It is essential to wear protective eyewear to shield your eyes from paint particles and debris. Additionally, a respirator mask should be worn to protect your lungs from harmful fumes and chemicals. Proper ventilation is also important to prevent the buildup of paint vapors, which can be hazardous. Adequate airflow can be achieved by opening windows or using fans. By taking these safety measures, you can paint your house efficiently without compromising your well-being. Transitioning into the next section, it is equally important to practice proper technique to ensure a flawless finish.
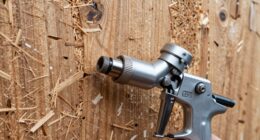
Practice Proper Technique
Mastering the proper technique of using an airless sprayer is like unleashing a magical wand that transforms the process of painting a house into a lightning-fast masterpiece. Here are five key tips to achieve efficient paint application and proper brushstrokes:
- Hold the sprayer nozzle perpendicular to the surface for even coverage.
- Start each stroke before pulling the trigger and release it after finishing the stroke to avoid excess paint buildup.
- Move the sprayer in a smooth, steady motion to prevent streaks or drips.
- Overlap each stroke by 50% to ensure consistent color and eliminate any missed spots.
- Maintain a consistent distance of 12-18 inches from the surface for optimal paint distribution.
By practicing these techniques, you’ll be able to achieve professional-quality results in no time.
Now that you’ve mastered the proper technique, it’s time to plan your painting strategy.
Plan Your Painting Strategy
When planning my painting strategy, I always make sure to work from top to bottom to ensure a smooth and even finish. By starting at the highest point, I can avoid any drips or streaks from falling onto previously painted areas.
Additionally, I like to paint in small sections to maintain control and ensure thorough coverage. This allows me to focus on one area at a time and ensures that the paint doesn’t dry before I can properly blend it.
Lastly, I always keep overspray in mind and take precautions to prevent it. This includes using drop cloths or masking off areas that I don’t want to be painted, as well as adjusting the sprayer settings to minimize overspray.
Work from Top to Bottom
To speed up the painting process and work efficiently, start at the top of the house and work your way down using an airless sprayer. This strategy helps you avoid drips or splatters on areas you’ve already painted. Begin by spraying the eaves and topmost part of the walls, then gradually move down, section by section. This maintains a consistent flow and coverage for a smooth finish. Working from top to bottom also prevents streaks or runs in the paint. Once the top section is done, transition easily into the next step of painting in small sections.
Paint in Small Sections
Start at the top and work your way down, ensuring a smooth and even finish by painting in small sections. This technique not only saves time but also allows for better control over the paint application. Here are some painting techniques and time-saving tips to consider:
- Divide the wall into manageable sections, approximately 3 feet by 3 feet.
- Use smooth, steady strokes with the airless sprayer, overlapping each section slightly.
- Keep the sprayer moving at a consistent speed to avoid heavy buildup in one spot.
- Pay attention to the edges and corners, ensuring they are properly covered.
- Work systematically from one side of the wall to the other, maintaining a consistent pattern.
By following these painting techniques and time-saving tips, you can efficiently paint your house using an airless sprayer. However, it’s important to be mindful of overspray, as it can affect surrounding surfaces and objects.
Be Mindful of Overspray
Now that we’ve discussed the importance of painting in small sections, let’s move on to another important aspect of using an airless sprayer: being mindful of overspray.
Overspray occurs when the paint mist spreads beyond the intended area, resulting in wasted paint and potential damage to surrounding surfaces. To avoid this, it’s essential to adjust the spray pattern and pressure according to the size of the area you’re painting.
Additionally, make sure to cover nearby furniture, plants, and windows with plastic sheets or drop cloths to protect them from overspray. Another tip is to maintain a consistent distance from the surface and move the sprayer in a steady, controlled motion.
By minimizing overspray and avoiding paint drips, you’ll achieve a faster and more efficient painting process.
Now, let’s delve into the next section about using a primer if needed.
Use a Primer if Needed
Using a primer with an airless sprayer is a time-saving step that ensures a smooth and long-lasting paint job.
A primer has several advantages. It creates a clean and even surface for the paint to adhere to, resulting in a more professional finish. Additionally, it helps hide any imperfections on the surface and prevents the paint from peeling or chipping.
However, using a primer does add an extra step to the painting process and requires additional drying time. On the other hand, painting without a primer may save time and effort, but it can result in a less durable and less attractive finish.
Now that we understand the importance of using a primer, let’s move on to applying the paint.
Apply the Paint
Get ready to transform your space with a flawless, professional finish that will leave you feeling proud and inspired. To apply the paint quickly and efficiently, consider using fast-drying paint. Fast-drying paint allows you to complete the job in less time, ensuring that you can enjoy your newly painted space sooner. Another option to speed up the process is hiring professional painters who are experienced in using airless sprayers. They have the expertise and equipment to quickly and effectively paint your house, saving you time and effort.
To further enhance your painting experience, use the following table as a guide:
| Tip | Description |
|---|---|
| 1. | Choose a fast-drying paint |
| 2. | Prepare the paint and sprayer |
| 3. | Apply the paint in even strokes |
| 4. | Allow proper drying time |
By incorporating these tips, you can achieve a fast and professional paint job. Now, let’s move on to the next section and learn how to clean and maintain your equipment for future projects.
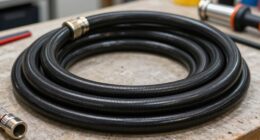
Clean and Maintain Your Equipment
To ensure the longevity of your equipment, it is crucial to regularly clean and maintain it. This includes proper storage and routine inspections.
Neglecting to clean your paint sprayer after each use can lead to clogs and decreased performance. This can ultimately cause delays and frustration during future painting projects.
Cleaning techniques for an airless sprayer involve flushing it with water or a cleaning solution. This helps remove any leftover paint or debris.
Additionally, it is important to inspect the sprayer for any worn or damaged parts. If any are found, they should be replaced as needed.
Proper equipment maintenance also includes lubricating moving parts and storing the sprayer in a clean and dry place.
Once you have cleaned and maintained your equipment, you can move on to the next step of allowing the paint to dry.
Allow the Paint to Dry
Once you’ve completed your painting project, it’s time to sit back and watch as the vibrant colors slowly transform into a beautiful, dried masterpiece. To speed up the drying process of your paint, here are a few tips:
- Ensure proper ventilation in the area where you painted. Open windows and use fans to increase airflow, helping the paint dry faster.
- Thin layers of paint dry faster than thick ones, so apply multiple thin coats instead of one thick coat.
- Avoid painting in humid conditions or when it’s raining, as moisture in the air slows down the drying process.
By following these tips, you can minimize drying time and prevent common mistakes such as smudging or touching the paint before it’s fully dried.
Now that the paint is drying nicely, let’s move on to the next step of inspecting and touching up as needed.
Inspect and Touch Up as Needed
After allowing the paint to dry, take a moment to inspect your masterpiece and make any necessary touch-ups.
Inspecting the paint quality is crucial to ensure a professional finish. Carefully examine the painted surfaces for any streaks, drips, or uneven coverage. Use a bright light to check for any missed spots or areas that require additional coats.
If you notice any imperfections, take your brush or roller and carefully touch up those areas. This step will ensure a seamless and flawless look for your painted house.
Once you are satisfied with the overall quality, move on to the next step and enjoy your newly painted home!
Enjoy Your Newly Painted Home!
Now that your home is freshly painted, it’s time to sit back, relax, and bask in the beauty of your newly transformed space! Here are some tips for enjoying your newly painted home:
-
Consider the mood you want to create: Think about the atmosphere you want to establish in each room. Choose colors that evoke the desired emotions, whether it’s a calming blue for the bedroom or a vibrant yellow for the kitchen.
-
Test before committing: Before painting the entire room, test a small area to see how the color looks in different lighting conditions. This will help you avoid any surprises once the whole room is painted.
-
Cleaning and maintenance: To keep your walls looking fresh, regularly dust them with a soft cloth or vacuum with a brush attachment. For tougher stains, use a mild detergent and a soft sponge. Avoid abrasive cleaners that can damage the paint.
Enjoy your newly painted home and the beautiful ambiance it creates for years to come!
Frequently Asked Questions
How do I choose the right type of paint for my house?
To choose the right paint for my house, I consider the color that matches my aesthetic preferences and the mood I want to create. I also choose paint finishes based on the room’s function and the desired level of durability and sheen.
Can I use an airless sprayer to paint the interior of my house?
Yes, you can use an airless sprayer on textured walls for interior painting. The pros include faster application and even coverage. However, the cons are overspray and the need for proper masking and ventilation.
Is it necessary to cover windows and doors before painting with an airless sprayer?
Absolutely! It’s crucial to cover windows and doors before painting with an airless sprayer. This prevents overspray and protects surfaces from unwanted paint. Trust me, it’s a lifesaver and prevents any unnecessary cleaning later on.
How long does it typically take for the paint to dry when using an airless sprayer?
When using an airless sprayer, the drying time of paint depends on various factors such as humidity, temperature, and the type of paint used. To prevent paint drips, maintain a consistent spraying speed and distance. After use, clean the sprayer thoroughly to ensure its proper functioning.
Are there any safety precautions I should take when using an airless sprayer to paint my house?
When using an airless sprayer to paint my house, I should take precautions to ensure safety. Important safety measures include wearing protective clothing, using goggles and a respirator, and keeping the work area well-ventilated.
Conclusion
In conclusion, painting a house with an airless sprayer can be a game-changer for anyone looking to complete the task quickly and efficiently.
With the right materials, proper technique, and a well-planned strategy, you can transform your home in no time.
Just like a skilled artist, you’ll be able to create a masterpiece on your walls with ease.
So don’t hesitate to grab that sprayer and start painting.
Soon enough, you’ll be relaxing in your beautifully painted home, admiring the work of your own hands.