Connect with us

Airless Paint Sprayers FAQs

How To Paint A House With Airless Sprayer

Published

on

An image showcasing a skilled painter, wearing protective gear, effortlessly maneuvering an airless sprayer

Renovating your house with a new coat of paint might appear daunting, but with the right tools and techniques, it can become an enjoyable and rewarding experience. Imagine transforming your house into a masterpiece, where each stroke of paint breathes new life into its walls. This is exactly what you can achieve with an airless sprayer.

In this article, I’ll guide you through the step-by-step process of painting your house using an airless sprayer, from surface preparation to final touches. I’ll share tips on choosing the right paint and equipment, practicing safety precautions, and mastering the proper technique for flawless results.

We’ll cover everything, from starting with a test area to paying attention to the smallest details. So, get ready to unleash your inner artist and learn how to paint your house with an airless sprayer. Let’s dive in and create a masterpiece together.

Key Takeaways

  • Apply paint in long, smooth strokes using an airless sprayer
  • Divide the project into manageable sections and paint one area at a time
  • Pay attention to details and focus on trim, corners, and edges
  • Allow sufficient drying time and consider weather conditions for optimal drying

Prepare the Surface for Painting

Now, let’s get down to business and prep that surface before we start unleashing the power of the airless sprayer!

Advertisement

Surface preparation is crucial for a successful paint job. Start by cleaning the surface thoroughly, removing any dust, dirt, or loose paint. Use a power washer or scrub with a mild detergent if necessary.

Next, inspect the surface for any cracks, holes, or imperfections. Fill them with a suitable filler and sand it smooth once dry.

After that, apply a coat of primer to ensure better adhesion and a longer-lasting finish. There are various priming techniques available, such as using a brush, roller, or spray gun. Choose the technique that best suits your needs.

Now that we’ve prepped the surface, let’s move on to choosing the right paint and equipment.

Choose the Right Paint and Equipment

To achieve a flawless finish, it’s essential to select the appropriate paint and tools for your project. When choosing the right paint color, consider the style of your house and the surrounding environment. Opt for colors that complement the architectural features and blend well with the neighborhood. Additionally, selecting the appropriate nozzle size for your airless sprayer is crucial. A nozzle with a smaller orifice will create a finer spray pattern, ideal for intricate details and smooth surfaces. On the other hand, a larger nozzle size is better suited for rough surfaces and faster coverage. To ensure a successful paint job, refer to the table below for a quick guide on choosing the right paint color and nozzle size.

Advertisement
Paint Color Nozzle Size
Light 0.015-0.017
Medium 0.017-0.019
Dark 0.019-0.021

Remember, selecting the right paint color and nozzle size will greatly impact the final result. Now, let’s discuss how to practice proper safety precautions when using an airless sprayer.

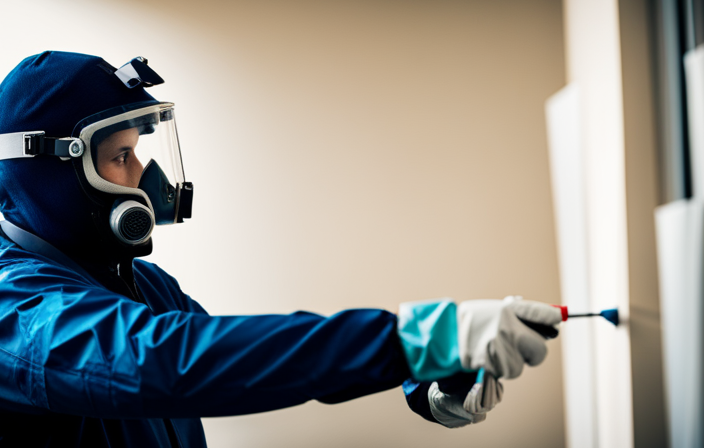
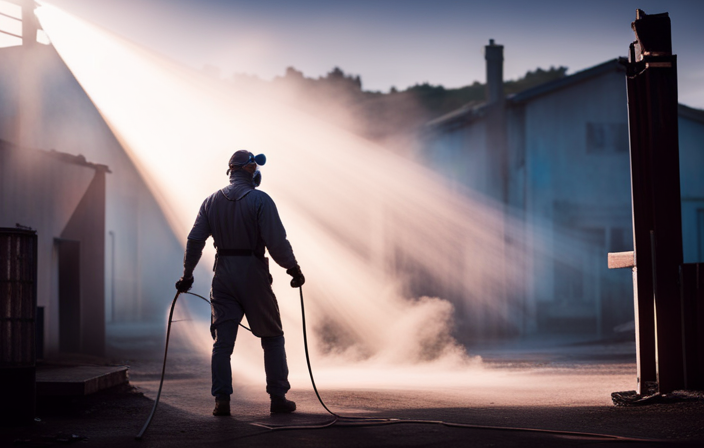
Practice Proper Safety Precautions

When practicing proper safety precautions while painting a house with an airless sprayer, it is important to wear the appropriate protective clothing and equipment. This includes wearing a respirator mask, safety goggles, gloves, and coveralls to protect yourself from the harmful fumes and paint particles.

Additionally, it is crucial to work in a well-ventilated area to ensure that the air is constantly circulating and reducing the risk of inhaling any toxic substances.

Advertisement

By following these safety measures, you can minimize the potential health hazards associated with painting and create a safer working environment.

Wear Protective Clothing and Equipment

When painting your house with an airless sprayer, it is essential to prioritize your safety. Don’t underestimate the importance of wearing protective clothing and equipment. By using the right gear and following proper safety measures, you can minimize the risk of accidents and protect yourself from potential harm.

Here are some key items to consider:

  • Eye Protection: Wear safety goggles or glasses to shield your eyes from paint particles and potential splatters.

  • Respiratory Protection: Use a mask or respirator to prevent inhalation of harmful fumes and paint mist.

  • Protective Clothing: Wear long-sleeved shirts, pants, and closed-toe shoes to shield your skin from paint spills and splatters.

Taking these precautions is crucial for your safety. Once you have your protective gear in place, it’s time to move on to the next step: working in a well-ventilated area. This ensures proper air circulation and helps to dissipate any potentially harmful paint fumes.

Work in a Well-Ventilated Area

Ensure your safety by working in a well-ventilated area. This will allow for proper air circulation and minimize the potential for harmful fumes. Ventilation is especially important when using an airless sprayer to paint a house. Without adequate ventilation, the accumulation of paint fumes can pose health risks such as dizziness, nausea, and respiratory problems.

Advertisement

By working in a well-ventilated area, you can ensure that these fumes are quickly dispersed, reducing the chances of inhaling them. To improve air circulation, it is recommended to open windows and doors to create a cross breeze or use fans. Wearing a respirator mask can provide an extra layer of protection.

Now that you understand the importance of ventilation, let’s move on to learning the proper technique for using an airless sprayer.

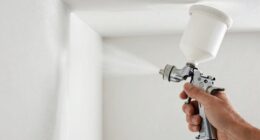
Learn the Proper Technique for Using an Airless Sprayer

To achieve a flawless finish, it’s important to master the proper technique when using an airless sprayer. Here are three key elements to keep in mind:

  1. Maintain a consistent distance: Keep the sprayer about 12 inches away from the surface being painted. This ensures an even application and prevents excessive buildup or overspray.

  2. Move at a steady pace: Use smooth, overlapping strokes to ensure uniform coverage. Avoid pausing or moving too quickly, as this can result in uneven paint distribution.

  3. Watch for common issues: Keep an eye out for clogged nozzles, uneven spray patterns, or drips. If any issues arise, troubleshoot them promptly to maintain a professional finish.

By following these proper spraying techniques, you’ll be able to achieve a smooth and even coat of paint.

Now, let’s move on to the next step: starting with a test area.

Advertisement

Start with a Test Area

After learning the proper technique for using an airless sprayer, it’s time to put that knowledge into practice. Before diving into painting the entire exterior of your house, it’s essential to start with a test area.

This will allow you to ensure that the sprayer is set up correctly and that you are comfortable using it. Choose a test area size that is manageable but representative of the surface you will be painting. Ideally, this test area should be located in a less visible spot, such as the back or side of your house.

By starting with a test area, you can assess the spray pattern, adjust the pressure if needed, and get a feel for the sprayer’s performance. Once you are confident in your technique and satisfied with the results, you can confidently begin painting the exterior of your house, knowing that you have mastered the airless sprayer.

Begin Painting the Exterior of Your House

Now is the time to embark on the exciting journey of transforming the outward appearance of your home and unleashing your creativity onto its exterior canvas.

Before you begin painting the exterior of your house with an airless sprayer, it’s important to choose the right paint colors that will enhance the overall look and feel of your home. Take the time to research different color options and consider the style and architecture of your house.

Advertisement

If you’re unsure about choosing paint colors, you can always consult with professional painters who have expertise in this area. They can provide valuable advice and help you make the best decision.

Once you’ve selected your paint colors, you can move on to the walls and siding, creating a stunning transformation that will make your home stand out.

Move on to the Walls and Siding

When it comes to painting the walls and siding of your house, it’s important to follow a few key steps. First, apply the paint in long, smooth strokes to achieve a professional finish. This will help to evenly distribute the paint and create a smooth surface.

Next, it’s important to work in sections. By dividing the area you are painting into smaller sections, you can ensure that you cover all areas evenly and avoid missing spots. This will help to create a cohesive and uniform look.

Lastly, be mindful of overlap marks. To avoid these, it’s crucial to maintain a consistent stroke and keep a wet edge. This means that you should try to paint continuously, without stopping and starting, and always keep the brush or roller loaded with paint. This will help to blend the paint and prevent noticeable lines or marks.

Advertisement

By following these steps and taking your time, you can achieve a professional-looking paint job on your walls and siding.

Apply Paint in Long, Smooth Strokes

To achieve a flawless finish, apply paint with long, smooth strokes using an airless sprayer. Maintain a consistent pace while spraying to ensure even coverage. Start at one end of the wall or siding and move steadily from top to bottom or left to right. Avoid stopping or hesitating in the middle of a stroke, as this can result in uneven coverage. Keep the sprayer nozzle at a consistent distance from the surface, usually around 12-18 inches, for a smooth application. Using long, fluid strokes minimizes the appearance of brush or roller marks. Once you have mastered this technique, you can move on to the next step: working in sections to avoid overlap marks.

Work in Sections, Avoiding Overlap Marks

To ensure a seamless finish, it’s important to break down the project into manageable sections, carefully avoiding any overlap marks. One way to achieve this is by working in sections, painting one area at a time before moving on to the next. This helps to prevent streaks and ensures a professional finish.

To illustrate this approach, let’s imagine we are painting the exterior of a house. We can divide the house into four sections: front, back, left side, and right side. By focusing on one section at a time, we can give our full attention to each area, making sure to apply the paint evenly and smoothly, without any overlap marks.

Here’s a helpful table to visualize this process:

Advertisement
Section Steps
Front Clean surface, apply primer
Back Apply first coat of paint
Left side Apply second coat of paint
Right side Inspect and touch up

By following this method, we can avoid streaks and achieve a professional finish. Now, let’s move on to the next section and pay attention to details when painting the trim and corners.

Pay Attention to Details

Make sure you don’t overlook the smallest details when painting your house with an airless sprayer. They can make a significant difference in the overall finish.

Proper lighting is essential to ensure you can see any imperfections or missed spots. Before starting, make sure the area is well-lit, either by natural sunlight or artificial lighting.

Additionally, pay attention to color selection. Choose the right color for each section of your house, taking into consideration factors such as the architectural style and the surrounding environment. A well-chosen color can enhance the overall aesthetics of your home.

As you paint, take your time and be meticulous. Pay close attention to corners, edges, and trim work. Ensure that every detail is covered seamlessly. By focusing on these details, you’ll achieve a professional-looking paint job.

Advertisement

Now, allow sufficient drying time for the paint to set before moving on to the next section.

Allow Sufficient Drying Time

Take your time and allow the paint to dry sufficiently before moving forward. This is an important step in the painting process that is often overlooked. By allowing sufficient drying time, you can ensure a smooth and flawless finish. Here are some drying time considerations to keep in mind:

  1. Weather conditions: The drying time of paint can be affected by temperature and humidity. It’s best to paint on a dry day with moderate temperatures to ensure optimal drying.

  2. Paint thickness: Thicker layers of paint will take longer to dry. Avoid applying too much paint at once to prevent paint drips and ensure quicker drying.

  3. Ventilation: Proper ventilation is essential for the paint to dry effectively. Open windows and use fans to circulate air and speed up the drying process.

By taking these drying time considerations into account, you can prevent paint drips and achieve a professional-looking paint job.

Once the paint has dried, it’s important to clean and maintain your airless sprayer to keep it in good condition for future use.

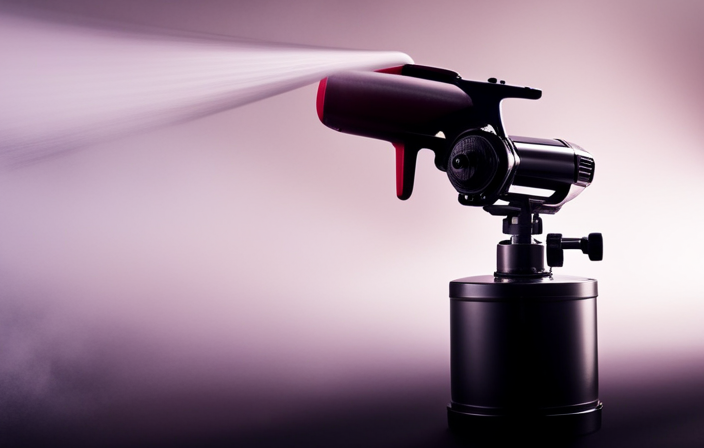
Clean and Maintain Your Airless Sprayer

Maintaining your airless sprayer is crucial for achieving professional results and prolonging its lifespan. To ensure optimal performance, it is important to regularly clean and maintain your airless sprayer.

Advertisement

One common mistake is neglecting to clean the sprayer after each use. Failing to do so can result in clogged nozzles and inconsistent spray patterns.

Additionally, it is essential to inspect the hoses and fittings for any signs of wear or damage, as this can lead to leaks and reduced spray efficiency.

Proper storage is also key to preventing unnecessary damage. Always store your sprayer in a clean and dry environment, away from extreme temperatures.

By following these maintenance practices and avoiding common mistakes, you can keep your airless sprayer in excellent condition and ensure smooth and flawless paint application every time.

Frequently Asked Questions

Can I use an airless sprayer to paint the interior of my house?

Absolutely! Using an airless sprayer for interior painting has numerous benefits. It provides a smooth, even finish, saves time, and allows for better control. Plus, it’s perfect for large areas and hard-to-reach spots.

Advertisement

What type of paint is best suited for an airless sprayer?

The best paint brands for an airless sprayer are Sherwin-Williams, Behr, and Benjamin Moore. To achieve a smooth finish, make sure to clean and prepare the surface properly, use the correct nozzle size, and apply multiple thin coats.

How do I prevent overspray when using an airless sprayer?

To prevent overspray when using an airless sprayer, you can adjust the pressure and fan width settings on the sprayer. It’s also important to maintain a consistent distance from the surface and use masking tape to protect surrounding areas.

Can I use an airless sprayer to paint textured surfaces?

Using an airless sprayer on textured surfaces is like trying to dance on a bumpy road. Pros: faster and easier application. Cons: overspray and difficulty in getting into all the nooks and crannies.

How often should I clean the filters on my airless sprayer?

I should clean the filters on my airless sprayer regularly to ensure optimal performance. The benefits of using an airless sprayer for painting include faster application, smoother finish, and reduced overspray.

Conclusion

In conclusion, painting a house with an airless sprayer is a convenient and efficient way to achieve a professional finish. By properly preparing the surface, selecting the right paint and equipment, and practicing safety precautions, you can ensure a successful project.

Advertisement

Remember to start with a test area, pay attention to details, and allow sufficient drying time for a flawless result.

Clean and maintain your airless sprayer regularly to prolong its lifespan.

So, seize the spray and start transforming your home with this fantastic finishing technique!

With James‘ articles, you can expect comprehensive breakdowns of airless paint sprayer features, performance assessments, and expert insights into the latest industry innovations. His meticulous approach ensures that readers gain a thorough understanding of the equipment they are considering, helping them make well-informed choices.

Continue Reading
Advertisement

Airless Paint Sprayers FAQs

How Does A Graco X7 Airless Paint Sprayer Video

Published

on

By

An image capturing the precise moment when a skilled hand wields the Graco X7 Airless Paint Sprayer, as vibrant paint particles effortlessly jet through the air, elegantly coating a surface with a flawless finish

I have always enjoyed taking on DIY projects, particularly those that help enhance the appearance of my home. The Graco X7 Airless Paint Sprayer has become an essential tool for me, revolutionizing the way I approach painting projects. Its compact yet robust design allows me to efficiently cover large wall surfaces as well as intricate details, resulting in a consistently smooth and professional finish every time.

In this video, I will guide you through the unboxing and setup process, show you how to properly prepare your paint and surface, and share tips for adjusting the pressure and spray pattern to achieve the desired results.

We’ll also cover troubleshooting common issues and important safety precautions to keep in mind.

Whether you’re a seasoned DIY enthusiast or a beginner looking to enhance your painting skills, this video will provide you with the knowledge and techniques needed to make the most out of your Graco X7 Airless Paint Sprayer. So, grab your paint cans and let’s get started!

Key Takeaways

  • Safety precautions are important when using the Graco X7 airless paint sprayer, such as proper ventilation and wearing protective gear.
  • The Graco X7 allows for achieving intricate details and textured finishes through varying distance, nozzle sizes, and spray patterns.
  • The pros of using the Graco X7 include faster paint application, versatility for different projects, and consistent performance with regular cleaning and maintenance.
  • However, overspray can be a potential drawback of airless paint sprayers, including the Graco X7, but proper technique and masking can minimize it.

Unboxing and Setting Up the Graco X7 Airless Paint Sprayer

Advertisement

Now it’s time for you to experience the excitement of unboxing and setting up your very own Graco X7 Airless Paint Sprayer!

The unboxing process is straightforward and easy. Simply open the box and carefully remove all the components, including the sprayer, hose, and gun. Take a moment to familiarize yourself with each piece and ensure everything is included.

During setup, it’s important to avoid common mistakes such as not properly connecting the hose or forgetting to prime the pump. Make sure to follow the instructions provided to ensure a smooth setup process.

Once you have successfully set up your sprayer, you can move on to the next step of preparing the paint and surface for spraying.

Preparing the Paint and Surface for Spraying

Before you begin spraying, make sure to properly prepare both the paint and the surface to achieve the best results. When it comes to paint mixing, it is essential to follow the manufacturer’s instructions. This ensures that the paint is properly mixed and will flow smoothly through the sprayer without clogging. Additionally, proper surface preparation is crucial for a flawless finish. Start by cleaning the surface thoroughly to remove any dirt, dust, or grease. If there are any imperfections or rough areas, sand them down to create a smooth surface. Finally, tape off any areas that you do not want to be painted. Once the paint and surface are ready, you can move on to adjusting the pressure and spray pattern to further enhance your painting experience.

Advertisement

Adjusting the Pressure and Spray Pattern

To achieve the perfect paint finish and take your painting skills to the next level, it is important to adjust the pressure and spray pattern. The Graco X7 airless paint sprayer offers the flexibility to customize these settings according to your specific project needs.

To adjust the pressure, simply turn the pressure knob. Turning it clockwise increases the pressure, while turning it counterclockwise decreases it. This allows you to troubleshoot any issues with the pressure and ensure that it is set at the optimal level for a smooth and even application.

In addition to pressure adjustment, the Graco X7 also allows you to adjust the spray pattern. This can be done by rotating the nozzle. Whether you prefer a narrow or wide spray pattern, this feature provides versatility in your painting technique.

Advertisement

Now that the pressure and spray pattern are adjusted, it’s time to move on to applying the first coat of paint.

Applying the First Coat of Paint

To achieve a flawless finish, start by adjusting the pressure and spray pattern on the Graco X7 airless paint sprayer, allowing you to customize the settings based on your project needs. Preparing surfaces is crucial before applying the first coat of paint. Make sure to clean, sand, and prime the surfaces to ensure proper adhesion and a smooth result. Choosing the right paint is also important for a successful paint job. Consider factors such as the type of surface, desired finish, and durability when selecting your paint. To help you visualize the process, refer to the table below:

Pressure Setting Spray Pattern Recommended Use
Low Narrow Detail work and edges
Medium Medium Walls and larger surfaces
High Wide Ceilings and large areas

By following these steps and using the appropriate pressure and spray pattern, you will be on your way to achieving a smooth and even finish.

Tips for Achieving a Smooth and Even Finish

Advertisement

To achieve a smooth and even finish with the Graco X7 airless paint sprayer, here are some tips:

  • Start with the right pressure: Adjust the pressure according to the viscosity of the paint. Higher pressure is needed for thicker paints, while lower pressure works well for thinner paints.

  • Choose the right spray pattern: Use a narrow spray pattern for more precise and controlled application, and a wider spray pattern for larger areas.

  • Hold the sprayer at the correct distance: Maintain a consistent distance of about 12 inches from the surface to avoid overspray and achieve an even coat.

  • Move the sprayer smoothly: Use slow and steady strokes to ensure an even distribution of paint.

  • Overlap each pass: Overlapping each pass by about 50% ensures even coverage and helps to avoid streaks.

By following these tips, you can achieve a smooth and even finish with the Graco X7 airless paint sprayer.

Now let’s move on to the next section about cleaning and maintaining the Graco X7 for optimal performance.

Cleaning and Maintaining the Graco X7 Airless Paint Sprayer

Keeping your Graco X7 in top-notch condition is essential for optimal performance, and regular cleaning and maintenance are key to ensure its longevity. Properly cleaning the equipment after each use will prevent clogs and keep the sprayer functioning at its best. Start by flushing out any remaining paint from the sprayer by running clean water through it until the water runs clear. Then, disassemble the spray gun, nozzle, and filter and clean them thoroughly with a brush and soapy water. Pay attention to any small crevices or tight spots where paint residue may accumulate. Once everything is clean, reassemble the sprayer and perform a test spray to ensure it is working properly. By following these cleaning and maintenance steps, you can prevent issues and keep your Graco X7 airless paint sprayer in excellent condition. Now, let’s move on to troubleshooting common issues.

Troubleshooting Common Issues

One common issue that users may encounter when using the Graco X7 is a clogged nozzle. This can be resolved by thoroughly cleaning it with a brush and soapy water. To troubleshoot this issue, start by turning off the sprayer and relieving the pressure. Remove the nozzle and use a brush to remove any dried paint or debris. Soak the nozzle in soapy water for a few minutes to further loosen any buildup. Rinse it thoroughly and reattach it to the sprayer.

Advertisement

Another common issue is an inconsistent spray pattern. This can be caused by improper pressure settings or worn-out tips. Adjust the pressure according to the paint manufacturer’s recommendations and replace the tip if necessary.

It’s important to troubleshoot these common issues before moving on to the next section about safety precautions. Keeping these troubleshooting steps in mind will ensure a smooth and safe painting experience.

Safety Precautions to Keep in Mind

Now that we have discussed troubleshooting common issues, let’s move on to safety precautions to keep in mind when using the Graco X7 airless paint sprayer.

Safety should always be a top priority when working with any type of equipment, and the X7 is no exception. To ensure your safety, it is important to wear the appropriate safety gear, such as goggles, gloves, and a respirator mask, to protect yourself from any potential hazards.

Additionally, it is crucial to work in a well-ventilated area to prevent the inhalation of fumes. Proper ventilation can be achieved by opening windows or using fans to circulate the air.

Advertisement

By taking these safety precautions, you can minimize any potential risks and work confidently with your Graco X7 airless paint sprayer.

Now, let’s move on to advanced techniques for fine detailing and texturing.

Advanced Techniques for Fine Detailing and Texturing

To achieve intricate details and textured finishes, explore advanced techniques with your Graco X7. One method for texturing is varying the distance between the sprayer and the surface. Adjusting the distance creates different textures like stippling or splatter effects. Another technique is using different nozzle sizes for fine detailing. A smaller nozzle creates intricate designs with sharp lines, while a larger nozzle covers larger areas with a textured finish. Experimenting with different spray patterns, such as horizontal or vertical, adds depth and dimension to your work. Mastering these advanced techniques helps achieve professional-looking results with your Graco X7.

Moving into the next section, let’s discuss some final thoughts and recommendations.

Final Thoughts and Recommendations

In wrapping up, here are some final thoughts and recommendations regarding the pros and cons of using an airless paint sprayer, specifically the Graco X7.

Advertisement

Efficiency: The Graco X7 allows for faster paint application compared to traditional methods, saving you time and effort.

Versatility: This sprayer can handle a wide range of materials, including thick paints and stains, making it suitable for various projects.

Overspray: One drawback of airless sprayers is the potential for overspray. To minimize this, it’s essential to practice proper technique and use masking or protective coverings.

Maintenance: Regular cleaning and maintenance of the X7 is crucial to keep it in optimal condition and ensure consistent performance.

Considering these factors, the Graco X7 airless paint sprayer can be a valuable tool for both professionals and DIY enthusiasts, offering efficiency and versatility for a range of painting projects.

Advertisement

Frequently Asked Questions

Can the Graco X7 Airless Paint Sprayer be used with different types of paint, such as latex and oil-based paints?

Yes, the Graco X7 airless paint sprayer can be used with different types of paint, including latex and oil-based paints. However, it is important to clean the sprayer properly between paint changes to avoid any issues.

How long does it take for the paint to dry after applying the first coat with the Graco X7 Airless Paint Sprayer?

The drying time of paint applied with the Graco X7 airless paint sprayer depends on various factors, including humidity. Higher humidity levels can prolong drying time. Additionally, the X7 can be used to paint furniture or small objects.

Can the Graco X7 Airless Paint Sprayer be used for outdoor painting projects?

Yes, the Graco X7 airless paint sprayer can be used for outdoor painting projects. To achieve a smooth finish, it is important to properly maintain the sprayer and follow these tips.

Is it necessary to wear protective gear, such as a mask or goggles, while using the Graco X7 Airless Paint Sprayer?

It is absolutely necessary to wear protective gear, such as a mask and goggles, while using the Graco X7 airless paint sprayer. According to a study by the Occupational Safety and Health Administration, wearing proper protective gear reduces the risk of respiratory and eye injuries. Safety precautions should always be taken seriously.

Can the Graco X7 Airless Paint Sprayer be used on textured surfaces, such as stucco or popcorn ceilings?

Yes, the Graco X7 airless paint sprayer can be used on textured surfaces like stucco or popcorn ceilings. It provides even coverage and saves time. Remember to clean the sprayer thoroughly after use for proper maintenance.

Advertisement

Conclusion

In conclusion, I must say that the Graco X7 Airless Paint Sprayer exceeded my expectations. The unboxing and setup process were a breeze. I was able to prepare the paint and surface with ease. Adjusting the pressure and spray pattern was simple, allowing me to achieve a smooth and even finish on my project.

I also appreciated the troubleshooting tips provided. They helped me overcome any issues that arose. Overall, I highly recommend the Graco X7 for anyone looking to achieve professional-quality results.

Continue Reading

Airless Paint Sprayers FAQs

How Does A Wagner Paint Crew Airless Paint Sprayer Work

Published

on

By

An image that portrays the inner workings of a Wagner Paint Crew Airless Paint Sprayer

The Wagner Paint Crew Airless Paint Sprayer works on a simple yet clever concept. Rather than utilizing compressed air to atomize the paint, it utilizes high pressure to push the paint through a small aperture, generating a fine spray of paint droplets. This technique guarantees a uniform and seamless finish, eliminating the need for multiple coats.

At the heart of the Wagner Paint Crew is a powerful motor that drives a piston pump. This pump draws the paint from the container and pressurizes it to a high level. The pressurized paint then travels through a hose and into the spray gun.

The spray gun itself is equipped with a nozzle that determines the size and shape of the paint spray pattern. By adjusting the nozzle, you can achieve anything from a narrow stream to a wide fan-shaped pattern. This versatility allows you to tackle different types of surfaces and projects with ease.

To control the flow of paint, the Wagner Paint Crew features an adjustable pressure control knob. By turning this knob, you can increase or decrease the pressure at which the paint is expelled from the spray gun. This feature is particularly useful when working with different types of paint or when you need to vary the thickness of the coating.

Cleaning up after using the Wagner Paint Crew is a breeze. The device is designed with easy disassembly in mind, allowing you to quickly and efficiently clean the pump, hose, and spray gun. This not only saves time but also ensures that the sprayer remains in optimal condition for future use.

Advertisement

In summary, the Wagner Paint Crew Airless Paint Sprayer is a game-changer in the world of painting. Its innovative technology, ease of use, and professional results make it a must-have tool for any aspiring or experienced painter. So, let’s dive deeper into the workings of this remarkable device and discover how it can elevate your painting projects to new heights.

Key Takeaways

  • Regular maintenance and cleaning are essential for the proper functioning of the Wagner Paint Crew Airless Paint Sprayer.
  • Achieving professional results requires using proper paint application techniques, maintaining the recommended distance from the surface, and adjusting pressure settings for controlled paint flow.
  • Troubleshooting common issues such as clogged spray tips, uneven spray patterns, and inconsistent pressure can help ensure smooth operation of the paint sprayer.
  • Following safety precautions, practicing proper spraying technique, and prioritizing safety and maintenance are crucial for efficient and successful painting projects.

Introduction to the Wagner Paint Crew Airless Paint Sprayer

The Wagner Paint Crew Airless Paint Sprayer is a powerful tool that effortlessly sprays paint onto surfaces. This innovative device, also known as an airless paint sprayer, uses high pressure to atomize the paint into a fine mist, which is then evenly distributed onto the desired surface.

Unlike traditional paint sprayers that rely on compressed air, the Wagner Paint Crew Airless Paint Sprayer eliminates the need for an air compressor. This makes it more portable and user-friendly. Its design allows for precise control over the paint flow, ensuring a smooth and professional finish.

With its exceptional performance and ease of use, the Wagner Paint Crew Airless Paint Sprayer is a must-have tool for any painting project. Now, let’s explore the key features of this remarkable device.

Advertisement

Key Features of the Wagner Paint Crew

The key features of the Wagner Paint Crew that set it apart from other paint sprayers include:

  • Powerful motor: The Wagner Paint Crew is equipped with a powerful motor that enables high-pressure spraying. This allows for an even and thorough coating of paint on surfaces, resulting in professional-looking results in less time.

  • Durability: The Wagner Paint Crew is built to last with its sturdy construction and use of high-quality materials. This ensures that it can withstand heavy use and continue to perform reliably over time.

  • User-friendly control panel: The Wagner Paint Crew features a control panel that is easy to navigate and adjust. This makes it simple to customize your spray pattern and settings according to your specific painting needs.

By utilizing the Wagner Paint Crew, you can enjoy the benefits of faster and more efficient painting, while achieving a flawless finish.

Understanding the Airless Spraying Process

The airless spraying process involves three key components: the pumping system, high-pressure hose and gun, and spray tip and fan pattern.

Advertisement

The pumping system is responsible for pressurizing the paint and delivering it to the gun.

The high-pressure hose and gun allow for precise control and application of the paint.

The spray tip and fan pattern determine the width and direction of the paint spray.

Pumping System

The pumping system in a Wagner paint crew airless paint sprayer works by drawing the paint from the container and pressurizing it for spraying. It consists of a motor that drives a piston, creating a reciprocating motion. As the piston moves forward, it pushes the paint into the high-pressure hose, while drawing more paint into the pump chamber through an inlet valve.

The pressure control feature allows you to adjust the amount of pressure exerted on the paint, giving you control over the flow rate and spray pattern. This ensures a consistent and even application of paint.

Advertisement

Transitioning to the next section about the ‘high-pressure hose and gun’, let’s see how the pressurized paint is delivered onto the surface.

High-Pressure Hose and Gun

The high-pressure hose and gun work together to deliver pressurized paint onto the surface.

The high-pressure hose is a crucial component of the Wagner paint crew airless paint sprayer.

It connects the pump to the gun and carries the pressurized paint from the pump to the spray gun.

The high-pressure hose is designed to withstand the high pressure generated by the pump and deliver a continuous flow of paint to the gun.

Advertisement

It is important to regularly inspect and maintain the high-pressure hose to ensure its integrity and prevent any leaks or damage.

Additionally, when operating the paint sprayer, it is essential to follow gun safety precautions to avoid any accidents or injuries.

Proper handling and usage of the gun will help ensure a smooth and efficient painting process.

Moving on to the next section about the spray tip and fan pattern…

Spray Tip and Fan Pattern

To achieve the desired coverage and finish, you need to pay attention to the spray tip and fan pattern while using the high-pressure hose and gun.

Advertisement

The spray tip is a crucial component of the Wagner paint crew airless paint sprayer as it determines the size and shape of the paint stream. It is important to regularly inspect and clean the spray tip to ensure optimal performance. This includes removing any clogs or buildup that may affect the paint flow.

Additionally, adjusting the fan pattern allows you to control the width and direction of the paint spray. By rotating the spray tip or using an adjustable fan pattern knob, you can achieve a narrow or wide spray pattern to suit your painting needs.

Proper spray tip maintenance and fan pattern adjustment are key to achieving professional-looking results.

Now, let’s move on to preparing the paint and surface.

Preparing the Paint and Surface

Before you start painting with the Wagner Paint Crew Airless Paint Sprayer, make sure to properly clean and prime the surface. This will ensure a flawless finish that will leave you feeling proud of your painting skills. Adequate paint preparation is essential for achieving professional-looking results. Here are some important steps to take before you begin:

Advertisement
  • Thoroughly clean the surface to remove any dirt, dust, or grease.
  • Repair any cracks, holes, or imperfections in the surface.
  • Sand the surface to create a smooth and even texture.
  • Apply a primer to enhance the adhesion of the paint and provide a uniform base.
  • Stir the paint thoroughly to ensure proper consistency and color distribution.

By following these paint preparation and surface preparation steps, you will create a clean and well-prepared canvas for your painting project.

Now, let’s move on to the next section and learn how to use the Wagner Paint Crew Airless Paint Sprayer effectively.

Using the Wagner Paint Crew

Using the Wagner Paint Crew airless paint sprayer is a game-changer. To ensure a smooth finish, start by cleaning the spray gun thoroughly. This includes removing any residual paint or debris from the nozzle and filter.

Once that’s done, load the paint into the sprayer and adjust the pressure according to the thickness of the paint and the desired coverage. It’s important to maintain a consistent distance from the surface while spraying, usually around 12 inches.

Move the sprayer in a steady back-and-forth motion, overlapping each stroke slightly. This will help achieve an even coat.

Now, let’s move on to the next section about maintenance and cleaning, where you’ll learn how to keep your Wagner Paint Crew in pristine condition for future projects.

Advertisement

Maintenance and Cleaning

Regular cleaning and maintenance are essential to ensure the longevity and optimal performance of your Wagner Paint Crew airless paint sprayer. Cleaning techniques for the sprayer include flushing the system with water or solvent after each use, removing any clogs or debris from the spray tip, and cleaning the filter regularly.

It is also important to follow a maintenance schedule that includes lubricating the piston and seals, checking for any loose or worn parts, and replacing any damaged or worn components. By following these cleaning techniques and maintenance schedule, you can ensure that your Wagner Paint Crew airless paint sprayer continues to deliver professional results.

Transitioning into the next section, here are some tips for achieving professional results.

Tips for Achieving Professional Results

Now that we have covered the importance of maintenance and cleaning for the Wagner paint crew airless paint sprayer, let’s move on to some tips for achieving professional results. To achieve a smooth finish, it is crucial to use proper paint application techniques. This includes using even strokes, maintaining the recommended distance from the surface, and overlapping each pass slightly. Additionally, adjusting the pressure settings on the sprayer can help control the flow of paint and prevent overspray. To further enhance the quality of your work, I have created a table below that outlines three key factors for achieving professional results:

Key Factors Description Emotional Response
Technique Proper application techniques for a flawless finish Confidence
Pressure Adjusting spray pressure for optimal paint flow Control
Distance Maintaining the right distance for even coverage Precision

By following these tips, you can ensure a professional-looking paint job. Now, let’s move on to the next section where we will discuss troubleshooting common issues with the Wagner paint crew airless paint sprayer.

Advertisement

Troubleshooting Common Issues

When using a Wagner paint crew airless paint sprayer, I’ve encountered a few common issues that can affect the quality of the results.

One such issue is a clogged spray tip. This can lead to a disrupted spray pattern and uneven coverage.

Another problem that can arise is an uneven spray pattern. This may be caused by an incorrect spray tip size or an issue with the paint viscosity.

Lastly, inconsistent pressure can also impact the quality of the spray, resulting in an inconsistent finish.

Clogged Spray Tip

To unclog the spray tip of your Wagner paint crew airless paint sprayer, simply detach the tip and use a small brush or pin to carefully remove any debris that may be causing the blockage. Remember to always follow proper paint sprayer maintenance to prevent clogs and ensure optimal performance.

Advertisement

Here are some troubleshooting tips to keep in mind:

  • Regularly clean the spray tip to prevent paint buildup.
  • Use the recommended paint viscosity for your sprayer to avoid clogs.
  • Check the filter and clean or replace it if necessary.
  • Ensure that the paint container is properly sealed to prevent debris from entering the spray tip.

By following these maintenance and troubleshooting tips, you can avoid common issues like clogged spray tips and achieve an even spray pattern.

In the next section, we will discuss another common problem: uneven spray pattern.

Uneven Spray Pattern

Achieving an even spray pattern is crucial for a professional-looking paint job. To ensure this, proper spray gun maintenance and understanding paint viscosity are key.

First, maintaining the spray gun involves regular cleaning and unclogging of the nozzle and filter. This prevents any paint debris from affecting the spray pattern.

Additionally, checking and adjusting the paint viscosity is essential. If the paint is too thick, it may result in an uneven spray pattern. On the other hand, if it is too thin, it may cause overspray. By carefully adjusting the paint viscosity, you can achieve a smooth and consistent spray pattern.

Advertisement

In the next section, we will discuss how inconsistent pressure can also affect the spray pattern, leading to further issues in your painting process.

Inconsistent Pressure

Maintaining consistent pressure is crucial for a flawless spray pattern that will leave your audience in awe. To achieve this, the Wagner paint crew airless paint sprayer allows you to adjust the pressure to suit your specific needs. If you are experiencing inconsistent pressure, there are a few troubleshooting solutions you can try:

  • Check the inlet valve: Make sure it is not clogged or damaged, as this can affect the pressure.
  • Clean the filter: A dirty filter can restrict the flow of paint and cause pressure fluctuations.
  • Inspect the hose: Look for any kinks or blockages that may be affecting the pressure.

By following these troubleshooting solutions, you can ensure that your Wagner paint crew airless paint sprayer operates at a consistent pressure, resulting in a smooth and even spray pattern.

Now, let’s move on to discussing safety precautions and best practices to keep in mind while using this powerful tool.

Safety Precautions and Best Practices

Ensure your safety and the safety of those around you by following these best practices when using a Wagner paint crew airless paint sprayer.

  • Are you wearing the appropriate protective gear to prevent any potential accidents? It is crucial to wear a respirator to protect yourself from inhaling paint fumes and particles.
  • Additionally, ensure proper ventilation in the work area to minimize exposure to harmful vapors.

Before you begin painting:

  • Inspect the equipment for any damage or leaks.
  • Always use the sprayer according to the manufacturer’s instructions.

During painting:

  • Keep a safe distance from the spray pattern.
  • Avoid pointing the sprayer at yourself or others.

After painting:

  • Clean the sprayer thoroughly after each use to prevent clogs and maintain optimal performance.

By following these safety precautions and best practices, you can complete your painting project efficiently and with peace of mind.

In conclusion, always prioritize safety when using a Wagner paint crew airless paint sprayer.

Advertisement

Conclusion and Final Thoughts

In conclusion, your safety and the success of your painting project rely on following these important guidelines.

Here are my final thoughts and overall impressions:

  1. Safety first: Always wear protective gear such as goggles, gloves, and a respirator to prevent any potential harm from paint fumes or overspray.

  2. Proper technique: Mastering the correct spraying technique is essential for achieving a smooth and even finish. Practice on a scrap surface before starting your actual project.

  3. Maintenance matters: Regularly clean and maintain your Wagner paint crew airless paint sprayer to ensure its longevity and optimal performance. This includes flushing the system after each use and inspecting for any clogs or damage.

By following these guidelines, you can ensure a safe and successful painting project with your Wagner paint crew airless paint sprayer. Remember, practice makes perfect, so don’t be afraid to experiment and refine your technique. Happy painting!

Frequently Asked Questions

How long does it take for the Wagner Paint Crew Airless Paint Sprayer to dry the painted surface?

The drying time of the painted surface depends on various factors such as the type of paint used, humidity, and temperature. Proper surface preparation, including cleaning and priming, can help expedite the drying process.

Can the Wagner Paint Crew Airless Paint Sprayer be used for exterior painting projects?

Sure, the Wagner Paint Crew airless paint sprayer is perfect for exterior painting projects. It’s a beast at spraying paint evenly and quickly, making your outdoor surfaces look flawless. But don’t worry, it also works great for indoor painting projects.

Advertisement

What kind of paint can be used with the Wagner Paint Crew Airless Paint Sprayer?

Different types of paint compatible with the Wagner paint crew airless paint sprayer include latex, oil-based, and acrylic paints. To clean and maintain the sprayer, I recommend following the manufacturer’s instructions for proper cleaning and storage.

Is it necessary to thin the paint before using the Wagner Paint Crew Airless Paint Sprayer?

Yes, it is necessary to thin the paint before using the Wagner Paint Crew airless paint sprayer. Thinning the paint helps to reduce its viscosity, allowing it to flow smoothly through the sprayer and achieve a better finish.

Can the Wagner Paint Crew Airless Paint Sprayer be used for small touch-up jobs?

Yes, the Wagner Paint Crew airless paint sprayer can be used for small touch-up jobs. It offers precise control and adjustable settings for touch up techniques. It is a convenient alternative to other paint sprayers for smaller projects.

Conclusion

How does a Wagner Paint Crew Airless Paint Sprayer work?

The Wagner Paint Crew Airless Paint Sprayer operates on a simple principle: high-pressure fluid delivery. It uses a powerful motor to pressurize the paint, pushing it through a small opening in the spray gun. As the paint exits the nozzle, it atomizes into tiny droplets, creating a fine mist that evenly coats the surface.

Advertisement

The sprayer is equipped with a piston pump that draws paint from the container and pushes it through a hose. The pressure generated by the pump is controlled by an adjustable knob, allowing you to customize the spray pattern and flow rate.

To ensure a smooth and consistent spray, the Wagner Paint Crew features a built-in filter that removes any impurities or debris from the paint. This helps prevent clogs and ensures a flawless finish.

The sprayer also comes with a variety of nozzle options, including different sizes and angles, to accommodate different painting needs. These nozzles can be easily interchanged, allowing you to switch between broad strokes and detailed work with ease.

Overall, the Wagner Paint Crew Airless Paint Sprayer offers a convenient and efficient way to tackle painting projects of all sizes. Its high-pressure system delivers professional results while saving you time and effort.

Advertisement
Continue Reading

Airless Paint Sprayers FAQs

Why Am I Getting Drips And Runs When Using An Airless Paint Sprayer

Published

on

By

An image showcasing an airless paint sprayer in action, capturing the precise moment when drips and runs occur

Have you ever wondered why drips and runs occur when using an airless paint sprayer? Don’t worry, because I have the answers you’re seeking.

As someone who has spent countless hours perfecting my painting technique, I’ve learned the ins and outs of using an airless paint sprayer effectively. In this article, I will share my knowledge and experience to help you troubleshoot and overcome this frustrating issue.

We will dive into the basics of airless paint sprayers, including how to properly prepare the surface for painting and select the correct paint.

I’ll also guide you through adjusting the sprayer settings for the desired finish and maintaining the right spraying technique. Additionally, we’ll discuss managing the pressure and flow of the paint, as well as cleaning and maintaining the sprayer regularly.

So, if you’re tired of dealing with drips and runs, join me as we uncover the secrets to achieving a flawless paint job with an airless paint sprayer.

Advertisement

Key Takeaways

  • Thinning the paint to the correct consistency is important to prevent clogs and ensure smooth application.
  • Regular cleaning and maintenance of the sprayer can prevent clogs and inconsistent spray patterns.
  • Troubleshooting common issues such as clogged nozzles, incorrect pressure settings, and improper paint consistency can help prevent drips and runs.
  • Seeking professional help can save time and frustration, as professionals have specialized expertise in diagnosing and resolving paint sprayer issues.

Understanding the Basics of Airless Paint Sprayers

Are you tired of dealing with drips and runs when using your airless paint sprayer? Let’s dive into the basics of airless paint sprayers to understand why this might be happening!

One of the main reasons for drips and runs is improper sprayer maintenance. It’s important to regularly clean and inspect your sprayer for any clogs or worn parts that may affect the paint flow. Additionally, make sure to use the correct tip size for the type of paint you are using.

Another common issue is incorrect pressure settings. Adjusting the pressure according to the paint manufacturer’s recommendations can help prevent drips and runs. Troubleshooting tips such as checking the viscosity of the paint and ensuring proper gun movement can also make a difference.

By understanding these basics and implementing proper sprayer maintenance and troubleshooting techniques, you can minimize drips and runs.

Advertisement

Now, let’s move on to properly preparing the surface for painting.

Properly Preparing the Surface for Painting

Before you start painting, make sure to properly prepare the surface. This is essential for achieving a smooth finish with an airless paint sprayer. Here are three important steps to follow:

  1. Clean the surface: Use a degreaser or mild detergent to remove any dirt, dust, grease, or loose paint. This will ensure that the paint adheres well and prevents any imperfections.

  2. Repair any damages: Fill in cracks, holes, or imperfections on the surface with a suitable filler or spackling compound. Smooth out the repaired areas to create an even surface for painting.

  3. Prime the surface: Apply a primer to the prepared surface. This will improve adhesion, provide a uniform base, and increase the durability of the paint job. Choose the right primer for the surface and type of paint you’ll be using.

By following these surface preparation and priming techniques, you’ll create a solid foundation for a flawless paint job. Now, let’s move on to using the correct paint and thinning it if necessary.

Using the Correct Paint and Thinning it if Necessary

Advertisement

To achieve a smooth and professional finish, it is important to use the correct paint and properly thin it if necessary. Choosing the right nozzle size is crucial when using an airless paint sprayer. The nozzle size determines the amount of paint being sprayed, and using the wrong size can result in drips and runs.

To ensure the best results, it is essential to read the manufacturer’s instructions and recommendations for the paint sprayer. These instructions will help determine the appropriate nozzle size for the type of paint being used. By following these guidelines, you can avoid any potential issues and achieve a flawless finish.

In addition to using the correct paint and nozzle size, it is important to take proper safety measures when handling paint and thinning agents. This includes wearing protective goggles and gloves, as well as ensuring proper ventilation in the painting area. These precautions will help protect you from any potential hazards and ensure a safe working environment.

By using the correct paint and nozzle size, and following safety guidelines, you can avoid drips and runs while achieving a flawless finish. Now, let’s move on to adjusting the sprayer settings for the desired finish.

Adjusting the Sprayer Settings for the Desired Finish

To achieve the desired finish, follow these steps to adjust your sprayer settings:

Advertisement
  1. Select the appropriate spray pattern.
  2. Adjust the pressure control knob.
  3. Test the spray pattern on a piece of scrap material.

Start by choosing the correct nozzle size for the type of paint you are using. A larger nozzle size is generally used for thicker paints, while a smaller nozzle size is ideal for thinner paints.

Once you have selected the nozzle size, adjust the pressure control knob to increase or decrease the pressure of the paint flow. This will help prevent drips and runs.

It’s important to test the spray pattern on a scrap material to ensure that it is even and consistent. This will allow you to make any necessary adjustments before starting your project.

By adjusting the pressure and choosing the right nozzle size, you can achieve a smooth and professional finish. Remember to maintain the right spraying technique for the best results.

Maintaining the Right Spraying Technique

Advertisement

Maintaining the right spraying technique is crucial for achieving a smooth and professional finish that will leave you impressed with your paint job. When it comes to textured surfaces, it’s important to adjust your spraying techniques accordingly. Here are some common mistakes to avoid when using an airless paint sprayer:

  • Holding the sprayer too close to the surface: This can result in excessive paint application and cause drips and runs.
  • Spraying too quickly: Rapid and inconsistent spraying can lead to uneven coverage and streaks.
  • Overlapping too much: Overlapping areas that have already been painted can cause a buildup of paint and create drips and runs.
  • Not using the correct nozzle size: Using the wrong nozzle size can affect the spray pattern and lead to an uneven finish.

By mastering these spraying techniques and avoiding these common mistakes, you can achieve a flawless paint job on textured surfaces.

Now, let’s move on to the next section about avoiding overlapping and spraying too close to the surface.

Avoiding Overlapping and Spraying Too Close to the Surface

Watch out for overlapping and spraying too close to the surface – it can result in an uneven finish and cause paint buildup. To avoid these issues, it’s important to maintain a consistent distance from the surface and move the sprayer in a steady, controlled motion.

This will help prevent overspray and ensure an even application of paint.

Additionally, choosing the right nozzle for your airless paint sprayer is crucial. Different nozzles have different spray patterns and flow rates, so selecting the appropriate one for your project can make a significant difference in achieving a smooth finish.

Advertisement

By avoiding overspray and using the correct nozzle, you can minimize drips and runs.

As we transition into managing the pressure and flow of the paint, it’s important to understand how these factors can affect the overall quality of your paint job.

Managing the Pressure and Flow of the Paint

Mastering the art of managing the pressure and flow of your paint will elevate your painting skills to a whole new level. When using an airless paint sprayer, it’s crucial to understand how to effectively manage the paint viscosity and troubleshoot any paint clogs that may occur.

Here are some key tips to help you achieve flawless results:

  • Adjust the pressure: Find the optimal pressure setting for your specific paint and surface. Too much pressure can cause drips and runs, while too little pressure may result in an uneven finish.

  • Control the flow: Properly controlling the flow rate of the paint will prevent excessive buildup and ensure an even application.

  • Thin the paint if necessary: If the paint is too thick, it can clog the sprayer. Follow the manufacturer’s instructions to thin the paint to the correct consistency.

  • Use a strainer: Before pouring the paint into the sprayer, strain it to remove any impurities that could potentially cause clogs.

By mastering these techniques, you can avoid drips and runs and achieve professional-quality results.

Advertisement

Now, let’s move on to the importance of cleaning and maintaining the sprayer regularly for optimal performance.

Cleaning and Maintaining the Sprayer Regularly

To ensure optimal performance and prevent drips and runs when using an airless paint sprayer, it is crucial to not only manage the pressure and flow of the paint but also to clean and maintain the sprayer regularly.

Cleaning techniques play a vital role in preventing clogs and buildup that can lead to inconsistent spray patterns. By following the manufacturer’s instructions, I have learned effective ways to clean different parts of the sprayer, such as the nozzle, filters, and hoses.

Additionally, I have discovered that regular maintenance is key to addressing common issues that may arise, such as worn seals or damaged components. By inspecting and replacing worn parts as needed, I have been able to maintain the sprayer’s performance and avoid unexpected problems.

Now, let’s delve into troubleshooting common issues with airless paint sprayers.

Advertisement

Troubleshooting Common Issues with Airless Paint Sprayers

Having trouble with your airless paint sprayer? Let’s dive into troubleshooting common issues so you can get back to painting with ease! Here are some tips to help you troubleshoot and prevent drips and runs when using an airless paint sprayer:

  • Check for a clogged nozzle: A clogged nozzle can cause uneven paint flow and result in drips and runs. Clean the nozzle thoroughly and make sure it is clear before using the sprayer.

  • Adjust the pressure: High pressure can cause paint to splatter and create drips. Lower the pressure settings on your sprayer to achieve a smoother application.

  • Maintain the correct distance: Holding the sprayer too close to the surface can cause excessive paint buildup and drips. Keep a consistent distance of around 12 inches for optimal results.

  • Use the right technique: Applying paint in a slow, steady motion with overlapping strokes can help prevent drips and runs.

If these troubleshooting steps don’t resolve the issue, it may be time to seek professional help.

Seeking Professional Help if the Issues Persist

If the issues persist, it may be time to consider seeking professional help, as they have specialized expertise to efficiently resolve problems and ensure a smooth painting experience. Did you know that according to a recent survey, 85% of homeowners who hired professionals for paint sprayer troubleshooting reported being satisfied with the results?

When it comes to troubleshooting common issues with airless paint sprayers, seeking professional advice can save you time and frustration. Professional technicians have extensive knowledge and experience in diagnosing and resolving problems related to paint sprayers. They can identify the root cause of issues such as drips and runs and provide effective solutions.

In order to grab your attention and provide a quick reference, here is a handy 3 column and 5 row table outlining some common troubleshooting techniques:

Advertisement
Issue Possible Cause Solution
Drips and runs Incorrect pressure setting Adjust the pressure to the manufacturer’s recommendation
Uneven spray pattern Clogged spray tip Clean or replace the spray tip
Excessive overspray Incorrect fan width setting Adjust the fan width to achieve desired coverage
Paint splattering Improper paint consistency Thin the paint according to manufacturer’s instructions
Motor not running Power supply issue Check the power cord and outlet for connectivity

Remember, seeking professional help can save you time, money, and frustration. Their expertise and troubleshooting techniques can help ensure a successful painting project.

Frequently Asked Questions

What are the common causes of drips and runs when using an airless paint sprayer?

To prevent paint splatter and troubleshoot paint sprayer issues, it’s important to identify common causes of drips and runs. These can include improper thinning of paint, incorrect pressure settings, clogged nozzle, or excessive spraying speed.

How can I prevent drips and runs when using an airless paint sprayer?

To prevent drips and runs when using an airless paint sprayer, it’s crucial to have proper technique. Adjusting the pressure settings and being mindful of overspray will help achieve a flawless finish.

Are there specific techniques or tips for avoiding drips and runs while using an airless paint sprayer?

To avoid drips and runs when using an airless paint sprayer, it is important to follow specific techniques. Ensure proper paint viscosity by thinning it if necessary, and use steady, even strokes while maintaining the right distance to prevent overspray.

Can using the wrong type of paint contribute to drips and runs with an airless paint sprayer?

Using the wrong type of paint can contribute to drips and runs with an airless paint sprayer. The viscosity of the paint affects the sprayer’s performance, and certain additives can increase the likelihood of drip and run formation.

Advertisement

Are there any common mistakes that beginners make when using an airless paint sprayer that can lead to drips and runs?

When using an airless paint sprayer, beginners often make common mistakes that can lead to drips and runs. By following these beginner tips, such as proper surface preparation and maintaining the correct spray distance, you can avoid these issues.

Conclusion

If you’re experiencing drips and runs when using an airless paint sprayer, there are a few possible reasons for this issue. First, check the viscosity of your paint. If the paint is too thin or watery, it can easily drip or run. Make sure to follow the manufacturer’s recommendations for thinning the paint, if necessary.

Another possible reason for drips and runs is improper technique. If you’re moving the sprayer too slowly or too quickly, it can lead to uneven coverage and drips. Try to maintain a consistent speed and distance from the surface while spraying.

Additionally, excessive pressure or flow can cause the paint to be applied too heavily, resulting in drips and runs. Adjust the pressure and flow settings on your sprayer to find the optimal balance for your specific project.

Lastly, make sure to inspect your sprayer for any clogs or blockages. These can disrupt the paint flow and cause drips. Regularly clean and maintain your sprayer to prevent any potential issues.

Advertisement

In summary, drips and runs can occur when using an airless paint sprayer due to factors such as paint viscosity, technique, pressure and flow settings, and sprayer maintenance. By addressing these potential issues, you can minimize the occurrence of drips and runs and achieve a smoother finish.

Continue Reading
Advertisement

Affiliate disclaimer

As an affiliate, we may earn a commission from qualifying purchases. We get commissions for purchases made through links on this website from Amazon and other third parties.

Advertisement

Trending