So, you’ve decided to give your room a makeover, correct? I have to admit, choosing an airless sprayer for painting your room will be a game-changer. Trust me, I’ve personally gone through it, and it changes everything.
In this article, I’m going to walk you through the step-by-step process of painting a room with an airless sprayer. From gathering your supplies to cleaning up afterwards, I’ve got you covered.
Not only will using an airless sprayer save you time and effort, but it will also give you a professional-looking finish. No more streaks or brush marks to worry about. Just smooth, even coats of paint that will make your room look brand new.
So, grab your overalls and let’s get started. It’s time to transform your room with the power of an airless sprayer.
Key Takeaways
- Regularly inspect and clean the airless sprayer to prevent clogs and worn parts
- Take effective breaks and perform equipment maintenance to ensure physical and mental well-being
- Apply multiple coats of paint for even coverage and to hide imperfections
- Consider the room’s purpose, desired mood, and existing furniture and decor when choosing paint colors and finishes

TICONN Anti-Fog Safety Glasses for Men and Women, ANSI Z87.1 Scratch Proof Eye Goggles with Adjustable Arms and UV Protection (Clear, 1PK)
- Durable Polycarbonate Construction: Impact-resistant and lightweight design
- Anti-Fog and UV Protection: Scratch-resistant, clear vision, blocks 99.9% UV
- Adjustable and Comfortable Fit: Rubber frame, nose pads, adjustable temples
As an affiliate, we earn on qualifying purchases.
Gather Your Supplies
Now, it’s time to roll up your sleeves and gather all the supplies you’ll need to transform that dull room into a vibrant masterpiece with an airless sprayer.
Choosing the right paint colors is crucial for achieving the desired ambiance. Consider the room’s purpose and the mood you want to create. Lighter shades can make a small room feel more spacious, while darker colors add depth and drama.
As for achieving a smooth finish, here are a few tips: make sure the paint is well-mixed, strain it to remove any clumps or debris, and use a high-quality roller cover or brush. Additionally, invest in good quality paint and tools to ensure a professional-looking result.
Now that you have your supplies ready, let’s move on to preparing the room for painting.
Prepare the Room
First things first, make sure you’ve got everything ready to transform your space into a masterpiece. Start by preparing the walls before you start painting. Remove any loose paint or wallpaper and fill in any cracks or holes with spackling compound.
Sand the walls to create a smooth surface for painting. Next, choose the right paint color that suits your style and preferences. Consider the lighting in the room and the mood you want to create. Don’t forget to test the color on a small area of the wall to see how it looks in different lighting conditions.
Once the walls are prepared and the paint color is chosen, you’re ready to move on to the next step of setting up the airless sprayer and getting started on your painting project.
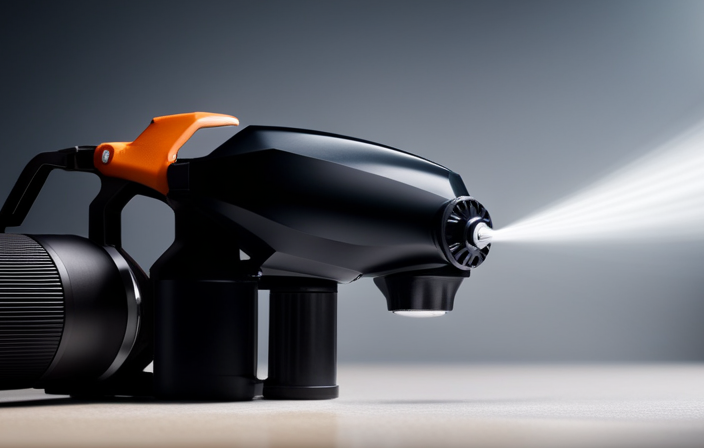
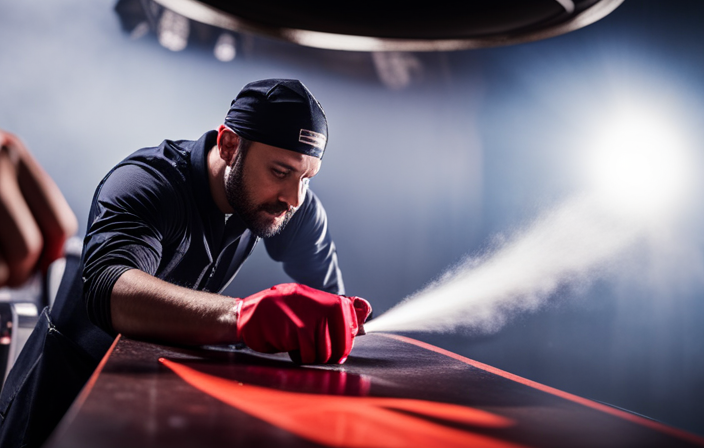
Set Up the Airless Sprayer
Get ready to unleash your creativity by setting up your magical painting wand, allowing colors to dance effortlessly onto the canvas of your space.
Before diving into the painting process, it’s crucial to ensure that your airless sprayer is in top-notch condition. Start by performing routine airless sprayer maintenance, such as cleaning the filters, inspecting the hoses for any damages, and checking the pressure settings. This will guarantee optimal performance and prevent any unwanted mishaps during the painting process.
Additionally, familiarize yourself with common airless sprayer issues like clogging or uneven spray patterns, and troubleshoot them accordingly. By taking these necessary steps, you’ll be equipped with a reliable and efficient tool for your painting project.
Now, let’s move on to the next section, where we’ll practice with the sprayer and perfect our technique.
Practice with the Sprayer
Take a moment to acquaint yourself with the sprayer by holding it in your hand, feeling its weight and balance as you imagine the smooth motion of your arm guiding it across the surface. To get comfortable with the sprayer, practice on a scrap piece of cardboard or wood. This will allow you to get a feel for the sprayer techniques and adjust the pressure and nozzle settings. Here are some troubleshooting tips to keep in mind:
- Keep the sprayer moving at a consistent speed to avoid excessive paint buildup.
- Hold the sprayer perpendicular to the surface for an even coat.
- Adjust the pressure and nozzle settings based on the thickness of the paint and desired coverage.
- Clean the sprayer thoroughly after each use to prevent clogs and maintain optimal performance.
- If you encounter any issues, refer to the sprayer’s manual for troubleshooting guidance.
With these sprayer techniques and troubleshooting tips in mind, you’re ready to start painting and bring your room to life.
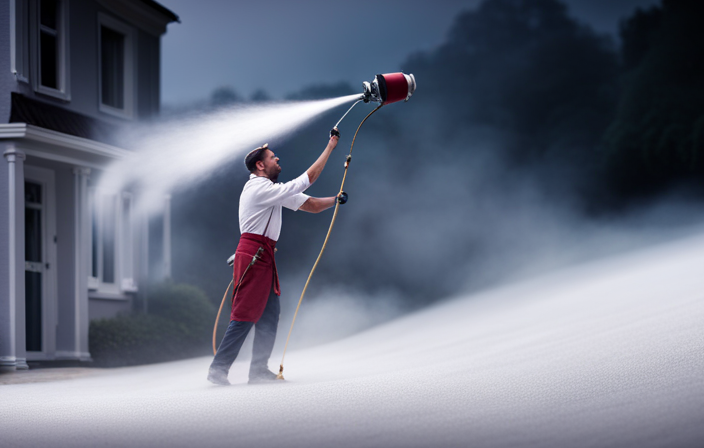
Start Painting
To start painting, I always begin with a primer coat to ensure a smooth and even surface. I apply the paint in even strokes, using a consistent motion to achieve a professional finish.
It’s important to overlap each stroke slightly to avoid any visible lines or unevenness in the final result.
Begin with a primer coat
Start by applying a primer coat to ensure a smooth and long-lasting finish. Here are some primer application tips to help you get started:
- Clean the surface thoroughly to remove any dirt or debris.
- Choose the right primer for your specific project, such as a stain-blocking primer for covering dark colors or a high-adhesion primer for slick surfaces.
Applying a primer has several benefits. It creates a uniform surface for the paint to adhere to, helps to hide any imperfections, and improves the durability of the paint job.
Once the primer coat is dry, you can move on to applying the paint in even strokes. This’ll ensure a professional-looking finish and help to avoid streaks or drips.
Apply paint in even strokes
Now that we have applied the primer coat, it’s time to move on to the next step in painting a room with an airless sprayer. To achieve a professional-looking finish, it is important to apply the paint in even strokes. This technique ensures that the color is spread evenly across the surface, resulting in a smooth and flawless appearance.
To help you visualize this process, take a look at the table below:
| Strokes | Technique | Result |
|---|---|---|
| Vertical | Overlapping | Smooth finish |
| Horizontal | Feathering | No streaks |
| Diagonal | Consistent speed | Even coverage |
| Circular | Controlled movement | Professional look |
| Crisscross | Slight overlap | Seamless blend |
By following these painting techniques, you can achieve a smooth finish that will make your room look professionally painted. In the next section, we will discuss the importance of overlapping each stroke slightly for optimal results.
Overlap each stroke slightly
Achieving a flawless and professional finish is as simple as overlapping each stroke slightly. By using overlap techniques, you ensure that every inch of the surface is evenly coated with paint. This not only eliminates any missed spots but also helps to achieve a smooth finish.
To effectively overlap each stroke, start by holding the sprayer at a consistent distance from the surface. As you move the sprayer in a steady and controlled motion, slightly overlap each new stroke with the previous one. This ensures that the paint is evenly distributed and eliminates any visible lines or streaks. Remember to maintain a consistent speed and pressure throughout the process.
By mastering these overlap techniques, you can achieve a flawless and professional finish.
Now, let’s move on to the next section about working in sections to further enhance the painting process.
Work in Sections
To effectively paint a room with an airless sprayer, begin by dividing the space into manageable sections, allowing you to maintain a consistent and professional finish throughout. Working in sections not only helps you to stay organized but also prevents paint drips and ensures an even application. By breaking down the room into smaller areas, you can focus on one section at a time, making sure to overlap each stroke slightly for a seamless finish. To emphasize the importance of working in sections, refer to the table below:
| Section | Steps | Benefits |
|---|---|---|
| 1 | Prep the area | Minimizes mess |
| 2 | Prime the walls | Enhances paint adhesion |
| 3 | Apply the paint | Achieves a smooth finish |
By following this method, you can avoid paint drips and maintain a professional look. Now, let’s move on to the next step of taking breaks and maintaining equipment.
Take Breaks and Maintain Equipment
Make sure you take breaks and keep your equipment in good condition to ensure a smooth and stress-free painting experience. Proper maintenance for airless sprayers is crucial to their longevity and performance.
Regularly inspect and clean the sprayer, checking for any clogs or worn parts that may impact the paint application. This will help prevent any interruptions or issues while painting. Additionally, taking effective breaks is important for both your physical and mental well-being. It allows you to rest and recharge, reducing the risk of fatigue and mistakes.
During breaks, clean your equipment and refill paint if necessary. Remember to stretch and hydrate to avoid muscle strain. Once you feel refreshed, you can confidently move on to applying additional coats, ensuring a professional finish.
Apply Additional Coats
Once you’ve given your equipment a thorough inspection and cleaned any clogs or worn parts, it’s time to apply an additional coat for a flawless finish.
Applying a second coat is crucial to ensure even coverage and hide any imperfections. Before starting, make sure the first coat is completely dry. The drying time between coats can vary depending on the type of paint and environmental conditions, so refer to the manufacturer’s instructions for guidance.
When applying the second coat, use the same technique as before, making sure to overlap each stroke slightly for consistent color and texture. Take your time and ensure proper coverage, but avoid over-spraying or applying too thick of a coat, as it can lead to drips or runs.
Once the second coat is complete, allow it to dry thoroughly before moving on to the clean-up stage, which we’ll discuss next.
Clean Up
After applying the second coat, it’s time to tidy up and put away your painting supplies. Cleaning up after using an airless sprayer is important to ensure its longevity and maintain its efficiency for future projects.
Start by removing any excess paint from the sprayer and pouring it back into the paint can. Then, disassemble the sprayer and clean each part thoroughly using warm soapy water. Pay special attention to the nozzle and filters, as these’re the most prone to clogging.
Once everything is clean, reassemble the sprayer and store it in a safe place. If you prefer an alternative method, there’re paint sprayer cleaning solutions available on the market.
With the cleaning done, you can now step back and enjoy your newly painted room!
Enjoy Your Newly Painted Room!
Now that you’ve completed the final touches, take a moment to step into your transformed space and bask in the vibrant colors that bring life and warmth to your surroundings. Painting a room with an airless sprayer can be a daunting task, but the end result is worth it. To ensure you choose the perfect paint color, consider these helpful tips:
-
Test the paint samples on the walls: Paint a small area with different colors to see how they look in different lighting conditions.
-
Consider the room’s purpose: Different colors evoke different moods, so think about how you want the room to feel.
-
Coordinate with existing elements: Take into account the furniture, flooring, and decor in the room to create a cohesive look.
When selecting the right paint finish, keep these tips in mind:
-
Consider the room’s function: High-traffic areas may benefit from a durable and washable finish, while a matte finish can create a more relaxed atmosphere.
-
Reflect on lighting: Glossy finishes can reflect light and make a space appear brighter, while flat finishes can absorb light and create a cozy ambiance.
Remember, the choice of color and finish can greatly impact the overall feel of your room, so take your time and enjoy the process of creating your ideal space.
Frequently Asked Questions
How do I choose the right type of paint for my room?
To choose the right paint for your room, consider factors like durability, color, and coverage. Research different paint brands and their quality. Additionally, select the appropriate paint finish, such as matte or satin, based on your desired aesthetic and room usage.
Can I use an airless sprayer to paint a textured wall?
Yes, an airless sprayer can be used to paint a textured wall. Proper technique is important – use a wider spray tip, hold the sprayer at a consistent distance, and apply multiple thin coats for even coverage. Remember, practice makes perfect!
Is it necessary to remove all furniture and cover all surfaces before painting with an airless sprayer?
It is not necessary to remove all furniture and cover all surfaces before painting with an airless sprayer. However, alternative methods for painting a room with an airless sprayer include protecting furniture with drop cloths or plastic covers. The pros of using an airless sprayer for painting furniture are its efficiency and ability to provide a smooth finish. The cons include overspray and the need for proper ventilation.
How long should I wait between applying multiple coats of paint with an airless sprayer?
I wait at least 2 hours between coats when painting with an airless sprayer. This allows the first coat to dry properly before applying another. When choosing paint colors, consider the room’s lighting and existing décor. After painting, clean the airless sprayer by flushing it with water and using a brush to remove any excess paint.
Are there any safety precautions I should take when using an airless sprayer to paint a room?
When using an airless sprayer, it’s important to take safety precautions. Wear protective clothing, goggles, and a respirator to avoid inhaling paint fumes. Keep the sprayer’s nozzle away from your body and never point it at anyone.
Conclusion
So there you have it – a step-by-step guide on how to paint a room with an airless sprayer. By following these instructions, you can achieve a professional-looking paint job in no time.
Remember to gather your supplies, prepare the room, set up the sprayer, practice, and then start painting. Take breaks and maintain your equipment to ensure smooth operation. Apply additional coats if needed and clean up afterwards.
Now, imagine stepping into your newly painted room – doesn’t it feel like a fresh start?