
Standing in the impressive foyer of my newly purchased Victorian home, adorned with intricate crown molding, I couldn’t help but feel amazed. The ornate embellishments added a touch of sophistication and class to the space, but they were in desperate need of a fresh coat of paint.
Determined to restore the crown molding to its former glory, I embarked on a mission to learn how to paint it using an airless sprayer. This powerful tool would allow me to achieve a smooth and professional finish, saving me time and effort.
Through extensive research and hands-on experimentation, I discovered the steps and techniques necessary to successfully tackle this project. In this article, I will share my newfound knowledge with you, guiding you through the process of preparing the molding, choosing the right paint and equipment, and mastering the art of spraying.
Get ready to transform your crown molding and elevate the ambiance of your home.
Key Takeaways
- Extensive testing and research is crucial for optimal paint application with an airless sprayer.
- Proper ventilation is important for faster drying and achieving a flawless finish.
- Inspecting and touching up crown molding ensures a flawless finish.
- Cleaning up and maintaining equipment, including the airless sprayer, is essential for longevity and excellent condition.

TICONN Anti-Fog Safety Glasses for Men and Women, ANSI Z87.1 Scratch Proof Eye Goggles with Adjustable Arms and UV Protection (Clear, 1PK)
- Durable Polycarbonate Construction: Impact-resistant and lightweight design
- Anti-Fog and UV Protection: Scratch-resistant, clear vision, blocks 99.9% UV
- Adjustable and Comfortable Fit: Rubber frame, nose pads, adjustable temples
As an affiliate, we earn on qualifying purchases.
Prepare the Crown Molding and the Area
Now that you’ve gathered all the necessary tools, it’s time to get the crown molding and the surrounding area ready for a flawless paint job.
To protect furniture during crown molding painting, start by moving any items away from the walls and covering them with drop cloths or plastic sheets. This will prevent any accidental paint splatters or drips from ruining your furniture.
Next, inspect the crown molding for any old paint that needs to be removed. Use a scraper or sandpaper to carefully strip away the old paint until the surface is smooth and clean. This step ensures that the new paint will adhere properly.
With the crown molding and area prepared, it’s now time to choose the right paint and equipment for the job.
Choose the Right Paint and Equipment
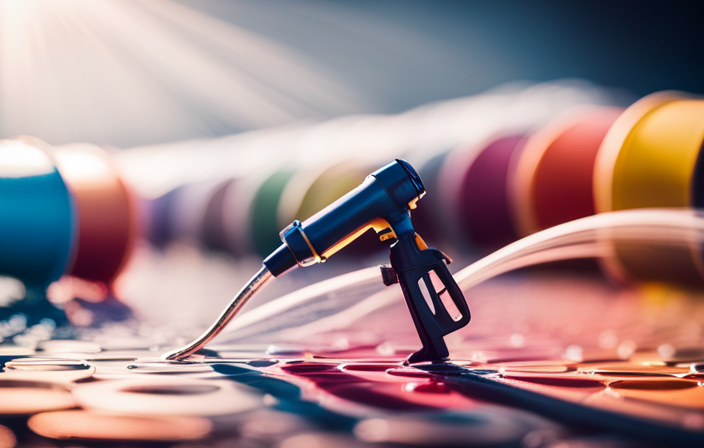
To achieve a flawless finish, you’ve got to find the perfect color and gear up with the right tools in your artistic arsenal.
When it comes to choosing the right paint color for crown molding, it’s important to consider the overall aesthetic of the room. Opt for a color that complements the walls and other elements in the space.
Additionally, take into account the type of paint that will work best with your airless sprayer. Latex paint is a popular choice due to its quick drying time and easy clean-up. However, if you’re working with stained or varnished wood, an oil-based paint may be more suitable.
Troubleshooting common painting problems, such as drips or streaks, can be prevented by using the correct paint viscosity and adjusting the sprayer settings accordingly.
With the right paint and equipment, you’ll be ready to prime the crown molding and create a flawless finish.
Prime the Crown Molding
To achieve a flawless finish, it is important to properly prime your crown molding. This step is crucial for ensuring good paint adhesion and long-lasting results. Before priming, thoroughly clean the crown molding to remove any dust or dirt. Use a high-quality primer that is specifically designed for the type of paint you will be using.
Apply the primer evenly using an airless sprayer, making sure to cover all surfaces of the molding. Allow the primer to dry completely before moving on to the next step.
Some practical tips for this process include wearing protective clothing and ensuring proper ventilation. Avoid common mistakes such as applying too thick of a coat, which can lead to drips and uneven coverage.
With the crown molding properly primed, you are now ready to mix and thin the paint for the airless sprayer.
Mix and Thin the Paint
Once you’ve got your primer on, it’s time to mix and thin the paint to achieve that perfect finish you’re after.
When it comes to mixing techniques, start by pouring the paint into a clean bucket. Use a stirring stick to gently mix the paint, being careful not to introduce any air bubbles.
To achieve the right paint consistency, add small amounts of water or paint thinner at a time, stirring continuously until you reach the desired thickness. Remember, a thinner paint will give you a smoother finish, while a thicker paint will provide more coverage.
Test the consistency by dipping the tip of your sprayer into the paint and spraying a small amount onto a test surface. Once you’re satisfied with the consistency, you can move on to practicing proper spraying techniques.
Practice Proper Spraying Techniques
Improve your painting skills by perfecting your spraying techniques.
When using an airless sprayer to paint crown molding, it is crucial to employ proper spraying techniques to achieve a smooth and even finish.
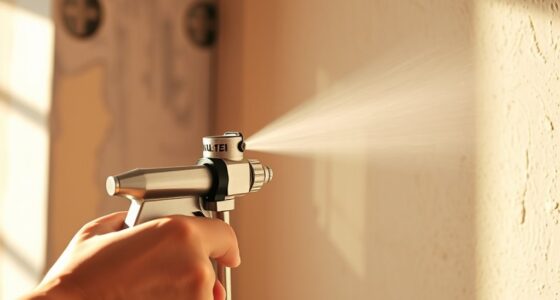
One of the most common mistakes to avoid is holding the sprayer too close to the molding, resulting in uneven coverage and drips. Instead, maintain a consistent distance of around 10-12 inches from the surface to ensure an even application.
Another important technique is to move the sprayer in a steady, controlled motion, overlapping each stroke slightly to prevent streaks and missed spots.
It is also essential to adjust the sprayer’s pressure settings according to the thickness of the paint and desired coverage.
By mastering these proper spraying techniques, you can ensure a professional-looking paint job.
Now, let’s move on to the next section and start painting the crown molding.
Start Painting the Crown Molding
To achieve a flawless finish, keep a consistent distance from the surface and smoothly move the sprayer along the intricate edges. When spray painting crown molding with an airless sprayer, it is important to use proper spraying techniques to ensure even coverage and avoid common issues. Here are some tips to help you get the best results:
-
Maintain a consistent distance: Keep the sprayer nozzle about 8-12 inches away from the crown molding to achieve optimal coverage.
-
Move in a steady motion: Start at one end of the molding and move the sprayer smoothly along the length, overlapping each pass by about 50% to avoid streaks or missed spots.
-
Angle the sprayer correctly: Hold the sprayer at a 45-degree angle to the molding for best results, allowing the paint to evenly coat the surface.
-
Troubleshoot common issues: If you encounter drips or uneven coverage, check the sprayer settings, paint viscosity, and nozzle condition to ensure everything is working properly.
By following these spray painting techniques, you can achieve a professional-looking finish on your crown molding. In the next section, we will discuss how to maintain a consistent speed and pressure for optimal results.
Maintain a Consistent Speed and Pressure
After starting to paint the crown molding, it’s important to maintain a consistent speed and pressure throughout the process. This ensures an even application and a smooth finish.
To achieve this, I keep a steady hand and move the sprayer at a constant pace, making sure not to slow down or speed up randomly. Maintaining a consistent spray pattern is essential for a professional-looking result.
If I encounter any spraying issues, such as uneven coverage or drips, I troubleshoot by adjusting the pressure or cleaning the nozzle. It’s crucial to address these issues promptly to avoid any imperfections in the final coat.
Once I have finished spraying, I transition into the subsequent section by allowing sufficient drying time between coats.
Allow Sufficient Drying Time Between Coats
When painting crown molding with an airless sprayer, it’s important to allow sufficient drying time between coats. To ensure optimal results, I always follow the paint manufacturer’s recommendations regarding drying time.
Additionally, it’s crucial to ensure proper ventilation in the area to facilitate faster drying and prevent any issues with the paint drying unevenly.
Follow the Paint Manufacturer’s Recommendations
By following the paint manufacturer’s recommendations, you can ensure that your crown molding is painted properly and will last for years to come. For example, a homeowner in need of repainting their crown molding could consult the paint can label for specific instructions on how to use an airless sprayer, including recommended thinning ratios and spray settings.
These recommendations are crucial because they are based on extensive testing and research conducted by the manufacturer. They know the best way to apply their paint for optimal results. Following their guidelines will not only ensure a smooth and even coat but also prevent any potential issues such as peeling or chipping.
It is important to adhere to these recommendations to achieve a professional and long-lasting finish.
To ensure proper ventilation for faster drying, the next step is to…
Ensure Proper Ventilation for Faster Drying
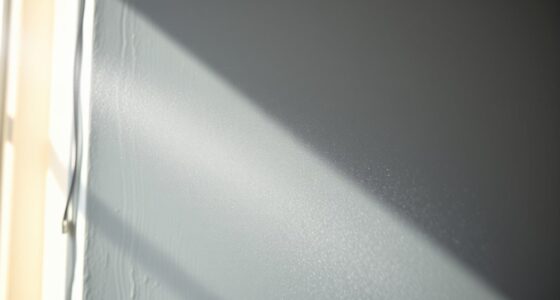
After following the paint manufacturer’s recommendations, it’s crucial to ensure proper ventilation for faster drying of the crown molding. This step is essential to achieve a flawless finish and prevent any potential issues such as drips or uneven drying.
Proper ventilation allows the paint to dry evenly and more quickly, ensuring a smooth and professional-looking result. To facilitate faster drying, open windows and doors to create a cross breeze or use fans to circulate the air. This will help remove any excess moisture and promote better airflow, expediting the drying process.
Once the paint has dried thoroughly, it’s time to inspect and touch up as necessary, ensuring a seamless and beautiful finish. By paying attention to these details, you’ll achieve a stunning result that will enhance the overall appearance of your crown molding.
Inspect and Touch Up as Necessary
To ensure a flawless finish, it’s essential to carefully inspect the crown molding and touch up any imperfections as needed. When using an airless sprayer, it’s important to be familiar with touch up techniques to achieve professional results.
One common mistake is overlooking small drips or runs that may occur during the spraying process. These can easily be fixed by lightly sanding the affected area and then reapplying a thin coat of paint.
Additionally, pay close attention to any missed spots or uneven coverage. These can be touched up by using a small brush or roller to blend in the paint seamlessly.
By taking the time to inspect and touch up the crown molding, you can ensure a smooth and even finish.
Now, let’s move on to the next section about cleaning up and maintaining your equipment.
Clean Up and Maintain Your Equipment
Now that we’ve finished painting the crown molding with the airless sprayer, it’s important to clean up and maintain our equipment properly.
To ensure the longevity of the sprayer, the first step is to flush and clean it thoroughly. This will remove any remaining paint and prevent clogging.
Next, it’s important to properly store the sprayer for future use. Follow the manufacturer’s guidelines and protect it from damage.
By taking these steps, we can ensure that our equipment stays in good working condition and is ready for the next project.
Flush and Clean the Airless Sprayer
Before you begin painting, make sure to flush and clean the airless sprayer to ensure a smooth and flawless application of paint. Proper airless sprayer maintenance is crucial to prevent clogs, uneven spraying, and other troubleshooting issues that can affect the quality of your work. Here are three important steps to follow:
-
First, remove the paint container and attach a clean water container to the sprayer. Turn on the sprayer and run water through it until the water comes out clear.
-
Next, detach the spray tip and filter. Clean them thoroughly with water or a specialized cleaning solution to remove any paint residue or debris.
-
Finally, reassemble the sprayer and run clean water through it again to ensure all traces of paint are gone.
By following these steps, you can maintain your airless sprayer and avoid future issues.
Now, let’s move on to how to store the sprayer properly for future use.
Store the Sprayer Properly for Future Use
Make sure you take the time to properly store your sprayer after use to keep it in good condition for your next painting project. Proper storage is essential for maintaining the longevity of your airless sprayer. Here are some maintenance tips for storing your sprayer:
| Proper Storage Tips | Maintenance Tips |
|---|---|
| Clean the sprayer thoroughly before storing it. | Remove any remaining paint and clean all the components of the sprayer, including the nozzle, filters, and hoses. |
| Store the sprayer in a dry and cool place. | Avoid exposing the sprayer to extreme temperatures or humid environments, as this can damage its internal components. |
| Protect the sprayer from dust and debris. | Use a cover or a storage case to prevent dust and debris from settling on the sprayer, which can clog the nozzle and affect its performance. |
| Regularly inspect the sprayer for any damage. | Check for any leaks, cracks, or worn-out parts, and replace them if necessary to ensure optimal performance. |
By following these proper storage and maintenance tips, you can ensure that your airless sprayer remains in excellent condition and ready for your next painting project.
Frequently Asked Questions
How do I remove existing paint from crown molding before painting with an airless sprayer?
To remove existing paint from crown molding, I recommend using a paint scraper or chemical paint stripper. These alternative painting methods effectively strip the paint, preparing the surface for painting with an airless sprayer.
Can I paint crown molding with an airless sprayer if it is already installed on the wall?
Yes, you can paint crown molding with an airless sprayer even if it is already installed on the wall. It is one of the alternative painting methods for crown molding and here are some tips for achieving a professional finish:
What safety precautions should I take when using an airless sprayer to paint crown molding?
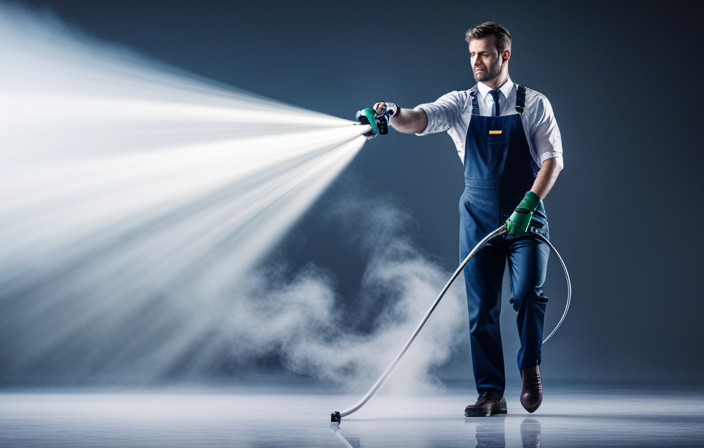
Safety is key when using an airless sprayer to paint crown molding. Take precautions like wearing protective goggles, gloves, and a mask. Follow proper technique by maintaining a safe distance, using even strokes, and ensuring proper ventilation.
How long does it typically take for the paint on crown molding to fully dry after using an airless sprayer?
The drying time for paint on crown molding after using an airless sprayer can vary depending on factors such as temperature and humidity. However, it typically takes around 6 to 8 hours for the paint to fully dry. It is important to follow best practices, such as ensuring proper ventilation and allowing sufficient drying time before handling or applying additional coats.
Are there any specific maintenance steps I should follow for my airless sprayer after painting crown molding?
To properly maintain an airless sprayer after painting crown molding, it is important to clean the sprayer thoroughly. This includes flushing the system with a cleaning solution and removing any remaining paint from the sprayer components.
Conclusion
In conclusion, painting crown molding with an airless sprayer is an efficient and effective way to achieve a professional finish. By following the proper steps and techniques, you can transform the look of your space with ease.
Did you know that using an airless sprayer can save you up to 70% of the time it would take to paint with a brush or roller? This statistic highlights the time-saving benefits of using this method, making it a popular choice among homeowners and professionals alike.
Remember to always clean and maintain your equipment for optimal performance. Happy painting!