I have always admired the clean and modern appearance that a fresh coat of paint on trim can bring to a home. It truly transforms the overall look of a house. If you decide to take on this project on your own, using an airless sprayer can greatly simplify the process, resulting in an easier job and superior results.
In this article, I’ll guide you through the steps of how to paint your house trim using an airless sprayer.
First, we’ll gather all the necessary tools and materials to ensure we’re well-prepared.
Then, we’ll focus on properly preparing the trim surface, making sure it’s clean and smooth.
Choosing the right paint and primer is crucial for achieving a long-lasting and professional finish.
Once we have everything ready, we’ll set up the airless sprayer and practice the proper spraying technique.
After allowing sufficient drying time, we’ll inspect the finished trim and make any necessary touch-ups.
Lastly, I’ll share tips on how to clean and maintain the airless sprayer to prolong its lifespan.
So, let’s get started and transform your home with beautifully painted trim!
Key Takeaways
- Start with light coats and gradually build up color and coverage
- Maintain a consistent distance and speed while spraying for a flawless finish
- Overlap each pass for even coverage and avoid streaks or uneven areas
- Allow sufficient drying time and inspect the finished trim for any imperfections before proceeding

HomeRight C800971 Super Finish Max, Includes 3 Brass Spray Tips, 3 Spray Patterns, Easy to Clean HVLP Paint Sprayer, Great for Furniture, Cabinets, Trim & More, Sprays Stains, Sealers & Latex Paints
- Versatile DIY Paint Sprayer: Ideal for furniture, cabinets, and more
- Multiple Spray Patterns: Horizontal, vertical, and round options
- Adjustable Material Flow: Control knob for output customization
As an affiliate, we earn on qualifying purchases.
As an affiliate, we earn on qualifying purchases.
Gather the Necessary Tools and Materials
To get started, you’ll need to gather all the tools and materials required for the job. First, choose your paint colors for the trim. Consider the style of your house and the overall aesthetic you want to achieve.
Next, make sure to protect the surrounding surfaces by covering them with drop cloths or plastic sheets. This will prevent any accidental overspray from damaging your floors, windows, or furniture.
Additionally, gather your airless sprayer, paintbrushes, masking tape, and a ladder. These tools will help you achieve a professional-looking finish.
Once you have everything ready, you can move on to preparing the trim surface for painting.
Prepare the Trim Surface
Before painting the house trim with an airless sprayer, it is crucial to properly prepare the trim surface.
First, clean the trim thoroughly to remove any dirt, dust, or grime that may affect the paint adhesion.
Next, carefully inspect the trim for any damage and sand or repair any imperfections to ensure a smooth and even finish.
Lastly, mask off adjacent surfaces such as windows, doors, and siding to protect them from overspray and achieve clean lines.
By following these key points, you can ensure a professional-looking paint job on the house trim.
Clean the Trim
To clean the trim, start by grabbing a bucket of soapy water and a scrub brush. The cleaning methods will vary depending on the type of material. For painted trim, gently scrub the surface with the soapy water solution to remove dirt and debris. Avoid scrubbing too hard to prevent paint damage. For unpainted trim, use a mild cleaner suitable for the material and follow the manufacturer’s instructions. Once the trim is clean, thoroughly dry it using a clean cloth or allowing it to air dry.
Now that the trim is clean and dry, it’s time to move on to the next step: sanding and repairing any damage.
Sand and Repair any Damage
Now, I can begin the process of sanding and repairing any damage to the trim, ensuring a flawless finish.
To start, I will carefully inspect the trim for any cracks, dents, or loose pieces.
For minor damage, I will use a putty knife to fill in the imperfections with wood filler or spackle. After allowing it to dry, I will use a fine-grit sandpaper to smooth out the repaired areas and feather the edges.
For larger repairs, such as rot or extensive damage, I may need to replace the affected sections of trim.
Once the repairs are complete, I will thoroughly sand the entire trim using a medium-grit sandpaper to create a smooth surface for painting. This repair technique and sanding process will ensure that the paint adheres properly and gives a professional-looking result.
Moving on, I will now mask off adjacent surfaces to protect them from overspray.
Mask off Adjacent Surfaces
To ensure a clean and precise painting job, take the time to carefully mask off the surrounding surfaces. This will protect them from any accidental splatters or overspray that could ruin the overall look of your beautiful trim.
Here are some protective measures and best masking techniques to follow:
1) Use painter’s tape: Apply painter’s tape along the edges of the trim where it meets the adjacent surfaces, such as walls or windows.
2) Cover larger areas: For larger surfaces, like walls or floors, use plastic drop cloths or old sheets to protect them from paint splatters.
3) Protect windows and fixtures: Use plastic or paper to cover any windows, light fixtures, or other objects near the trim that you don’t want to accidentally paint.
4) Seal gaps and cracks: Before masking off, make sure to seal any gaps or cracks in the trim with caulk to prevent paint from seeping through.
By following these protective measures and best masking techniques, you can ensure a clean and professional-looking paint job.
Now, let’s move on to the next step: choosing the right paint and primer.
Choose the Right Paint and Primer
When choosing paint and primer for my trim, I consider two key points: the type of trim and the proper finish.
The type of trim will determine the specific paint and primer needed for optimal adhesion and durability.
Additionally, selecting the proper finish is essential to achieve the desired aesthetic and level of protection for the trim.
By carefully considering these factors, I can ensure a successful and long-lasting paint job for my house trim.
Consider the Type of Trim
First things first, before you dive into painting, let’s take a moment to consider the type of trim you have. When it comes to painting house trim with an airless sprayer, it’s important to choose the right type of trim paint and primer. Here are three key factors to consider when it comes to the type of trim:
-
Types of trim paint: There are various types of trim paint available, such as latex, oil-based, or water-based paints. Each type has its own advantages and disadvantages, so it’s important to understand which one suits your trim material the best.
-
Pros and cons of different trim materials: Different trim materials, such as wood, PVC, or metal, require different types of paint and preparation. Knowing the pros and cons of each material will help you make an informed decision and achieve the best results.
-
Compatibility with airless sprayer: Not all trim paints are suitable for airless sprayers. Make sure the paint you choose is compatible with this painting method to ensure smooth and efficient application.
Considering these factors will help you select the proper finish for your trim. Now, let’s move on to the next step and discuss how to select the proper finish for your trim.
Select the Proper Finish
Now that we’ve considered the type of trim, let’s talk about choosing the perfect finish.
When it comes to painting house trim with an airless sprayer, selecting the appropriate paint color and understanding different types of paint finishes are crucial.
The right paint color can enhance the overall look of your home, so take your time to find the shade that complements the exterior.
Additionally, different paint finishes offer various benefits. For example, glossy finishes are durable and easy to clean, while matte finishes hide imperfections.
Consider the style of your home and the level of maintenance you prefer when deciding on the finish.
Now, let’s move on to setting up the airless sprayer for the painting process.
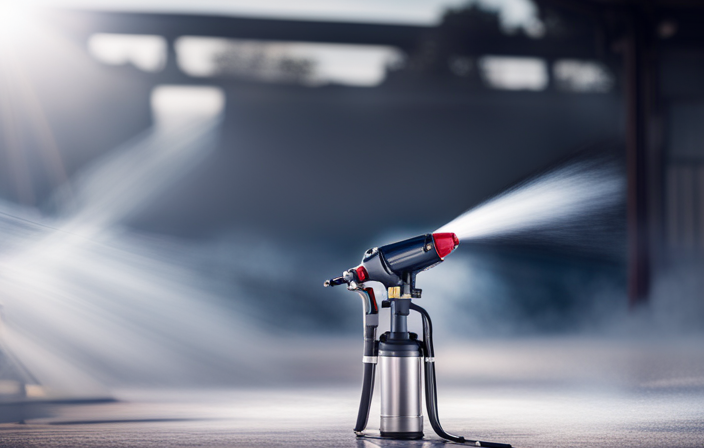
Set Up the Airless Sprayer
To get started, you’ll need to make sure the airless sprayer is properly set up. Before using the sprayer, it’s important to perform airless sprayer maintenance to ensure optimal performance. This includes:
- Checking for any clogs or blockages in the spray tip
- Cleaning the filter
- Inspecting the hoses for any leaks or damage
If you encounter any troubleshooting airless sprayer problems, such as uneven spray patterns or excessive overspray, refer to the user manual or seek professional assistance.
Once the sprayer is set up and ready to go, you can begin practicing proper spraying technique. This involves:
- Maintaining a consistent distance from the surface
- Using smooth and even strokes
- Overlapping each pass for even coverage.
Practice Proper Spraying Technique
When practicing proper spraying technique with an airless sprayer, it’s important to start with light coats to achieve an even coverage.
Maintaining a consistent distance and speed is also crucial in order to avoid uneven application and drips.
Additionally, overlapping each pass ensures that the paint is evenly distributed and provides a professional finish.
Start with Light Coats
When painting house trim, it is important to start with light coats of paint. This may seem counterintuitive, but it can actually result in a more even and professional-looking finish. Here are some tips to help you achieve the best results:
- Start by applying a thin layer of paint, making sure to cover the surface evenly.
- Allow each coat to dry completely before applying the next one. This will prevent drips and ensure a smooth finish.
- Apply additional coats as needed, gradually building up the color and coverage.
Remember to keep a consistent distance and speed while spraying to avoid uneven application.
By following these steps, you can achieve a flawless finish on your house trim. Maintaining a consistent distance and speed will be discussed in the next section to further enhance your painting technique.
Maintain a Consistent Distance and Speed
Mastering the art of maintaining a steady hand and a consistent distance and speed will elevate your painting skills to a professional level.
When using an airless sprayer to paint house trim, it is crucial to maintain a consistent distance from the surface being painted. This ensures an even spray pattern and prevents over-spray or uneven coverage.
Additionally, adjusting the spray pressure is essential for achieving the desired results. Too high of a pressure can lead to excessive paint application, while too low of a pressure may result in a patchy finish.
By maintaining a consistent distance and speed and adjusting the spray pressure accordingly, you can achieve a smooth and professional-looking paint job.
Now, let’s move on to the next step: overlapping each pass for even coverage.
Overlap Each Pass for Even Coverage
To achieve a flawless and professional finish, be sure to overlap each stroke as you paint, allowing for even coverage and a truly impressive end result.
To achieve this, maintain even pressure on the sprayer and move in smooth strokes along the trim. This will ensure that the paint is distributed evenly and there are no streaks or uneven areas. Remember to keep a consistent distance from the trim and maintain a steady speed.
Overlapping each pass will help to blend the paint and create a seamless look. Once you have mastered this technique, you can move on to the next step of applying the paint to the trim, ensuring a smooth and beautiful finish.
Apply the Paint to the Trim
Once you’ve got the airless sprayer ready to go, it’s time to dive into applying the paint to the trim. Here’s a step-by-step guide to help you get the best results:
-
Start by testing the sprayer on a scrap piece of trim to ensure the spray pattern and pressure are correct. This will help you avoid any issues later on.
-
Hold the sprayer about 12 inches away from the trim and move it in a smooth, continuous motion. Be sure to overlap each pass for even coverage.
-
Keep the sprayer at a consistent distance from the trim to prevent uneven application.
-
If you encounter any common spraying issues, such as drips or clogs, troubleshoot them immediately to prevent further problems.
Now that you’ve applied the paint to the trim, it’s important to allow sufficient drying time before moving on to the next step.
Allow Sufficient Drying Time
After applying the paint to the trim, it’s crucial to give it enough time to dry thoroughly before proceeding. Sufficient drying time is important because it allows the paint to cure properly and ensures a smooth and long-lasting finish. Depending on the type of paint and the weather conditions, drying time can vary.
It’s essential to follow the manufacturer’s instructions for drying time. Additionally, proper ventilation is important during the drying process to aid in the evaporation of solvents and prevent the buildup of fumes. Open windows and use fans to promote airflow.
Once the trim is completely dry, it’s time to inspect the finished result to ensure it meets your expectations and make any necessary touch-ups.
Inspect the Finished Trim
Take a moment to marvel at the flawless beauty of your newly transformed trim. It’s like a masterpiece that’s come to life!
Now that the painting is complete, it’s time to inspect the final results and determine if any touch-ups are needed. Carefully examine the trim from different angles and distances to ensure an even and smooth finish.
Look for any missed spots, drips, or uneven coverage. If you notice any imperfections, mark them for touch-up later. It’s important to address these issues before moving on to the next step.
Once you are satisfied with the results, you can proceed to clean and maintain the airless sprayer.
Clean and Maintain the Airless Sprayer
When it comes to cleaning and maintaining the airless sprayer, there are two important key points to focus on:
-
Flushing the system with a cleaning solution: It is essential to flush the system with a cleaning solution to remove any built-up paint or debris. This will help ensure that the sprayer operates smoothly and efficiently.
-
Removing and cleaning the spray tip: Regularly removing and cleaning the spray tip is crucial for maintaining a consistent spray pattern and preventing clogs.
By following these steps, you can keep your airless sprayer in optimal condition and prolong its lifespan.
Flush the System with Cleaning Solution
To get started, you’ll want to thoroughly flush the system with a cleaning solution, ensuring that your house trim is prepped and ready for a flawless paint job. Here are some benefits of using a cleaning solution:
-
Removes dirt and debris: The cleaning solution effectively removes any dirt or debris that may be on the surface of the trim, ensuring a clean and smooth paint application.
-
Prevents clogs: By flushing the system with a cleaning solution, you can prevent clogs in the sprayer, which can lead to uneven paint distribution.
-
Extends sprayer lifespan: Regularly cleaning the system with a cleaning solution helps to extend the lifespan of your airless sprayer, ensuring that it continues to work effectively for future paint jobs.
-
Environmentally friendly: Some cleaning solutions are biodegradable and environmentally friendly, making them a great option for those who are conscious of their ecological impact.
-
Cleaning solution alternatives: If you don’t have a specific cleaning solution, you can use warm soapy water or a mixture of vinegar and water as alternatives.
Now, let’s move on to the next step, which is to remove and clean the spray tip.
Remove and Clean the Spray Tip
To remove and clean the spray tip, follow these steps:
-
Unscrew the nozzle from the sprayer head. Take care to remove it gently to maintain a smooth and precise paint application.
-
Inspect the spray tip for any clogs or debris. If you notice any blockages, use a small brush or toothpick to gently remove the buildup.
-
If the clog persists, soak the spray tip in a cleaning solution for a few minutes. You can use vinegar and water or a commercial paint thinner as a cleaning solution.
-
After soaking, rinse the spray tip with clean water.
-
Reattach the spray tip to the sprayer head.
Remember to regularly clean and maintain the spray tip to prevent clogs and ensure consistent paint flow. With a clean and functional spray tip, you can now enjoy your newly painted trim!
Enjoy Your Newly Painted Trim!
Now that your trim is freshly painted, take a step back and admire the beautiful transformation! Painting your house trim with an airless sprayer can give it a smooth and professional finish.
To ensure a successful outcome, it’s important to choose the right paint color for your trim. Consider the style and color scheme of your home, and test different shades to find the perfect match.
Additionally, proper cleaning and maintenance of your paint brushes is crucial for achieving a flawless paint job. After each use, thoroughly clean your brushes with warm soapy water, removing any excess paint and allowing them to dry completely. This will help prolong the lifespan of your brushes and ensure consistent results every time you paint your trim.
Enjoy the fresh look of your newly painted trim!
Frequently Asked Questions
How do I clean and maintain my airless sprayer after painting the trim?
To clean and maintain my airless sprayer after painting the trim, I follow a thorough cleaning process. I flush out the paint with water, disassemble the sprayer for a deep clean, and lubricate the moving parts. These maintenance tips ensure optimal performance and longevity.
What should I do if the paint on the trim surface starts to drip or run?
If the paint on the trim surface starts to drip or run, there are a few things I can do to prevent it. First, I can make sure to apply thin coats of paint. Second, I can use a high-quality brush to smooth out any drips. Lastly, I can check the weather conditions to avoid painting in high humidity or extreme temperatures. These tips will help me avoid common mistakes when painting trim.
Can I use an airless sprayer to paint both interior and exterior trim?
Using an airless sprayer, I can paint both interior and exterior trim. It’s a versatile tool that allows for efficient and even coverage. No need to worry about separate tools for different areas.
How long should I wait before applying a second coat of paint to the trim?
I typically wait around 4-6 hours before applying a second coat of paint to trim. This allows enough time for the first coat to dry properly. Some tips for applying the second coat include using smooth, even strokes and maintaining a consistent thickness of paint.
Will using an airless sprayer for painting trim create a lot of overspray?
Using an airless sprayer on trim can create overspray, but with some tips, you can minimize it. To avoid a messy situation, adjust the sprayer’s pressure, use a shield, and practice proper technique.
Conclusion
As I stood back and admired my newly painted house trim, a sense of satisfaction washed over me. The crisp lines and smooth finish created a visual masterpiece against the backdrop of my home.
The suspenseful anticipation of the final result had been worth it. With the right tools, preparation, and technique, using an airless sprayer had transformed the trim into a work of art.
Now, every time I approached my house, I couldn’t help but marvel at the stunning transformation.