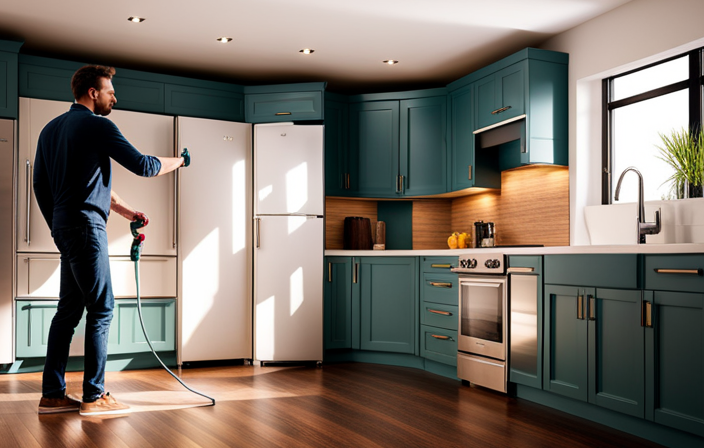
Did you know that giving your laminate kitchen cabinets a fresh coat of paint with an airless sprayer can totally transform their look? It’s true! In this article, I will guide you through the step-by-step process to turn your outdated cabinets into a modern and stylish focal point in your kitchen.
First, we will discuss how to properly prepare your cabinets for painting. Then, I will provide you with a list of the necessary tools and materials you will need to complete the project. Next, I will explain how to remove cabinet hardware and cover surrounding areas to protect them from paint splatter.
Once the cabinets are prepped, we will dive into the exciting part – applying the first coat of paint using an airless sprayer. I will also walk you through the crucial steps of sanding and cleaning between coats to achieve a smooth and professional finish.
By the end of this article, you will have all the knowledge and confidence to successfully paint your laminate kitchen cabinets with an airless sprayer. Get ready to enjoy your newly transformed kitchen!
Key Takeaways
- Prime cabinets for a smooth surface before painting
- Use high-quality paint specifically designed for laminate surfaces
- Apply paint in thin and even coats with an airless sprayer
- Allow each coat to dry completely before applying the next one and sand between coats for a smoother finish
Prepare the Cabinets for Painting
Now that you’ve gathered all your supplies, it’s time to roll up your sleeves and start prepping those laminate kitchen cabinets for a flawless paint job.
Preparing surfaces is crucial to ensure that the paint adheres properly. Begin by thoroughly cleaning the cabinets with a mild detergent and warm water to remove any grease or grime. Next, lightly sand the surfaces using fine-grit sandpaper to create a rough texture that allows the paint to adhere better. After sanding, wipe down the cabinets to remove any dust or debris.
Choosing the right paint is equally important. Opt for a high-quality paint that’s specifically formulated for laminate surfaces. Look for a paint with a built-in primer to save time and effort. Additionally, consider using a paint with a semi-gloss or satin finish, as it provides durability and is easier to clean.
Now that the surfaces are prepped and the paint is ready, it’s time to gather the necessary tools and materials for the painting process.
Gather the Necessary Tools and Materials
First, make sure you have all the tools and materials required to transform your kitchen cabinets into a stunning masterpiece. Choosing the right paint color is essential in achieving the desired look for your cabinets. Consider the overall theme and style of your kitchen to select a color that complements the space. Additionally, gathering the necessary tools such as an airless sprayer, paint brushes, sandpaper, and a drop cloth will ensure a smooth painting process. To achieve a smooth finish, here are a few tips: sand the cabinets thoroughly to create a clean and even surface, apply a primer to help the paint adhere better, and use long, even strokes when applying the paint with the airless sprayer. By following these steps, you’ll be on your way to transforming your laminate kitchen cabinets. Next, remove cabinet hardware and cover surrounding areas to protect them from paint splatters.
Remove Cabinet Hardware and Cover Surrounding Areas
Begin by carefully removing the hardware from your cabinets and taking the time to cover the surrounding areas to protect them from any accidental splatters.
Discussion Ideas:
- Importance of proper surface preparation: Before painting laminate cabinets, it’s crucial to properly prepare the surface. This includes cleaning the cabinets thoroughly to remove any grease or grime, and lightly sanding them to create a rougher surface for better paint adhesion.
- Tips for choosing the right type of paint for laminate cabinets: It’s important to select a paint specifically designed for laminate surfaces. Look for paints that are labeled as ‘cabinet and trim’ or ‘high adhesion’ to ensure a long-lasting finish. Additionally, consider using a primer designed for laminate surfaces to further enhance paint adhesion.
With the hardware removed and the surrounding areas protected, we can now move on to applying the first coat of paint to the laminate kitchen cabinets.
Apply the First Coat of Paint
I start applying the first coat of paint on my laminate kitchen cabinets by ensuring that I’m using a thin and even coat. This helps to prevent drips and creates a smooth and professional finish. I use smooth, overlapping strokes to ensure that the entire surface is covered evenly.
After applying the first coat, I allow sufficient drying time before moving on to the next coat. This ensures that the paint adheres properly and provides a durable finish.
Start with a Thin and Even Coat
To achieve a flawless finish, it’s crucial to apply a thin and even coat of paint when using an airless sprayer on laminate kitchen cabinets. Here are some tips for achieving a smooth finish:
-
Start by choosing the right paint color that complements your kitchen decor. Consider lighter shades to make the space feel larger and brighter.
-
Before you begin painting, make sure to clean and prime the cabinets properly. This will ensure better adhesion and a long-lasting finish.
-
When applying the first coat of paint, hold the sprayer approximately 12-18 inches away from the surface. Move the sprayer in smooth, overlapping strokes to ensure even coverage.
-
Be mindful of the paint thickness. If the coat appears too thick or uneven, adjust the sprayer settings or dilute the paint accordingly.
-
Remember to maintain a consistent speed and distance while spraying to avoid drips or runs.
By following these tips, you’ll be well on your way to achieving a professional-looking finish on your laminate kitchen cabinets. Now let’s move on to the next step: using smooth, overlapping strokes for a seamless result.
Use Smooth, Overlapping Strokes
Achieving a flawless finish on your laminate kitchen cabinets requires using smooth, overlapping strokes with the airless sprayer. This technique ensures that the paint is applied evenly and creates a seamless result.
Start by holding the sprayer about 12 inches away from the cabinet surface and move your hand in a smooth motion, keeping a consistent distance. As you spray, make sure to overlap each stroke slightly to avoid any visible lines or streaks.
Take your time and work in small sections, paying attention to any missed spots or uneven coverage. By using smooth strokes and taking care to overlap, you can achieve a professional-looking finish on your laminate cabinets.
Once you have completed painting, allow sufficient drying time for the paint to set before moving on to the next step of the process.
Allow Sufficient Drying Time
Make sure you give your cabinets enough time to dry before moving forward with the next step of the process. Proper drying techniques are crucial for achieving a smooth and professional finish on your laminate kitchen cabinets.
Patience is key when it comes to allowing sufficient drying time. Rushing this step can result in a subpar outcome with potential issues like streaks, smudges, or even damage to the paint.
Depending on the type of paint and environmental conditions, it’s recommended to wait at least 24-48 hours for the first coat to dry completely before applying additional coats. This allows the paint to cure properly and ensures a durable finish.
Once the cabinets are thoroughly dry, you can proceed with the next section about sanding and cleaning between coats, which’ll help to achieve an even smoother and more polished result.
Sand and Clean Between Coats
After each coat of paint, it’s important to sand and clean between coats to ensure a smooth and flawless finish on your laminate kitchen cabinets. Using an airless sprayer for painting laminate cabinets offers several benefits. It allows for an even application of paint, reduces the chances of brush marks or streaks, and saves time compared to using a brush or roller.
To achieve a smooth finish when using an airless sprayer, make sure to sand the cabinets lightly between coats to remove any imperfections or roughness. This will create a smooth surface for the next coat of paint to adhere to. After sanding, clean the cabinets thoroughly to remove any dust or debris. This will prevent any particles from getting trapped in the paint and creating a bumpy texture.
Once the cabinets are sanded and cleaned, you can apply additional coats for full coverage.
Apply Additional Coats for Full Coverage
To achieve a flawless and professional look, it’s essential to build up layers of paint for full coverage on your laminate kitchen cabinets. Before applying additional coats, make sure to prime the cabinets. Priming creates a smooth and even surface for the paint to adhere to, ensuring a long-lasting finish. It also helps to prevent the laminate from peeling or chipping.
To achieve a smooth and professional finish, there are a few tips to keep in mind. First, use a high-quality paint specifically designed for laminate surfaces. This will help the paint adhere better and resist chipping or peeling. Second, apply the paint in thin and even coats using an airless sprayer. This will prevent drips and streaks, resulting in a smooth and seamless finish. Lastly, allow each coat to dry completely before applying the next one.
With the additional coats applied and fully dried, it’s time to move on to reattaching the cabinet hardware.
Reattach Cabinet Hardware
Now it’s time to bring back the finishing touch to your revamped kitchen cabinets – reattach the sleek and stylish cabinet hardware, adding a touch of elegance and functionality to your newly painted masterpiece. Reattaching cabinet handles is a simple process that can be done using basic tools such as a screwdriver. Make sure to align the handles properly and tighten the screws securely to ensure they are firmly in place. Additionally, choosing the right paint color for your cabinets is crucial in achieving the desired aesthetic. Consider the overall color scheme of your kitchen and select a paint color that complements it well. Once the cabinet hardware is reattached and the paint is dry, allow it to fully cure before moving on to the next step of your kitchen renovation journey. This will ensure a durable and long-lasting finish.
Allow the Paint to Fully Cure
Be patient and give your newly painted cabinets some time to fully cure before moving on to the next step of your kitchen renovation journey. Proper ventilation is crucial during the curing process to ensure a smooth and even finish. Make sure to open windows or use fans to circulate air in the room, allowing the paint to dry properly.
Additionally, it’s important to prevent smudging or damage to the freshly painted cabinets while they cure. Avoid touching or leaning objects against the cabinets, and be cautious when using the kitchen during this time. To further protect the paint, consider using temporary covers or barriers to prevent any accidental bumps or scratches.
Once the paint has fully cured, you can confidently move on to applying a protective topcoat for added durability and longevity.
Apply a Protective Topcoat
After allowing the paint to fully cure, it’s time to give your newly transformed cabinets an extra layer of protection with a durable topcoat.
A protective topcoat not only adds a glossy finish to your laminate cabinets but also provides added durability and resistance against scratches and moisture. Here are three types of topcoats you can consider:
-
Polyurethane: This type of topcoat offers excellent protection and durability, but it can yellow over time.
-
Acrylic: Acrylic topcoats are water-based, quick-drying, and provide good protection. However, they may not be as durable as polyurethane.
-
Lacquer: Lacquer topcoats are known for their high-gloss finish and fast-drying properties. They provide good protection, but they may require more maintenance.
To achieve a smooth and flawless finish with your protective topcoat, make sure to apply it evenly using long, even strokes. Sanding between coats can also help achieve a smoother result.
Once you’ve applied the topcoat, allow it to dry completely before reassembling your cabinets.
With your cabinets now protected and looking fresh, you can enjoy your newly painted laminate kitchen cabinets!
Enjoy Your Newly Painted Laminate Kitchen Cabinets!
Sit back and admire the fresh and vibrant look of your newly transformed laminate kitchen cabinets! You’ve put in the hard work of painting them with an airless sprayer, and now it’s time to enjoy the results. But how do you maintain the beauty of your painted laminate cabinets? First, avoid harsh cleaning chemicals that can damage the paint. Instead, use a mild soap and water solution to clean them. Additionally, be mindful of any scratches or chips that may occur over time. Touching up these areas with a small brush and matching paint will keep your cabinets looking flawless.
Now, let’s talk about choosing the right paint color for your laminate cabinets. Consider the overall aesthetic of your kitchen. Do you want a modern, sleek look or a more traditional feel? Take into account the color of your countertops, backsplash, and flooring. A neutral color like white or gray can create a timeless appeal, while a bold color can add a pop of personality. Don’t forget to test a small area before committing to a color, as laminate may react differently to paint than other surfaces. With these tips in mind, you’ll be able to maintain and enjoy your newly painted laminate kitchen cabinets for years to come.
| Column 1 | Column 2 | Column 3 | Column 4 | Column 5 |
|---|---|---|---|---|
| Maintain the beauty | Avoid harsh cleaning chemicals | Use mild soap and water solution | Touch up scratches or chips | Matching paint and small brush |
| Choose the right paint color | Consider overall kitchen aesthetic | Neutral colors for timeless appeal | Bold colors for a pop of personality | Test a small area before committing |
Frequently Asked Questions
Can I use a brush or roller instead of an airless sprayer to paint laminate kitchen cabinets?
Using a brush or roller for painting laminate cabinets is possible, but it may not provide a smooth, professional finish. Pros of using an airless sprayer include faster application and an even coat, while cons include overspray and the need for proper ventilation.
How long should I wait for the paint to dry between coats?
I need to wait for the paint to dry between coats in order to achieve a smooth finish. Applying multiple coats without waiting can cause the paint to become uneven and result in a poor outcome.
Is it necessary to sand the cabinets before painting?
Sanding is not necessary for painting laminate cabinets. However, it is important to properly prep the cabinets by cleaning them thoroughly and using a primer specifically designed for laminate surfaces.
Can I use regular latex paint for painting laminate cabinets, or do I need a specific type of paint?
Regular latex paint can be used for painting laminate cabinets, but it is important to choose a high-quality paint that is specifically designed for laminate surfaces. Using an airless sprayer has pros like achieving a smooth, professional finish, but cons like overspray and difficulty in controlling the application.
Can I paint laminate cabinets that have already been painted?
Yes, you can paint laminate cabinets that have already been painted without sanding. To ensure good adhesion, use a high-quality primer specifically designed for painting laminate cabinets.
Conclusion
In conclusion, painting laminate kitchen cabinets with an airless sprayer is a straightforward and efficient way to achieve a fresh, updated look. By properly preparing the cabinets, using the right tools and materials, and following the necessary steps, you can transform your cabinets with ease.
Remember to sand and clean between coats for a smooth finish, and don’t forget to apply a protective topcoat for added durability. With patience and a little elbow grease, you’ll be able to enjoy your beautifully painted laminate kitchen cabinets for years to come.
