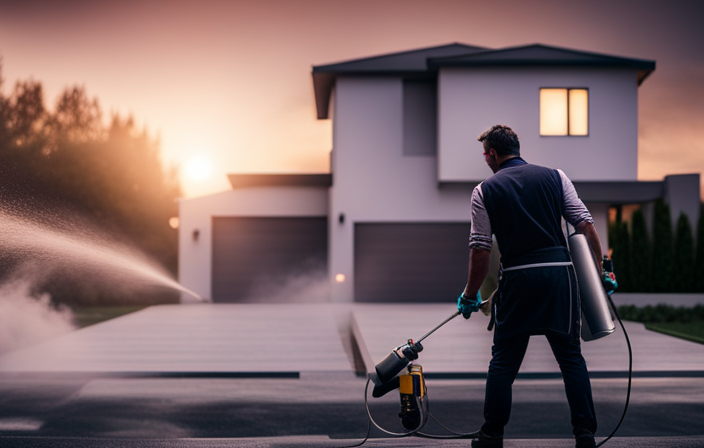
I have always enjoyed painting my home, even though it can be messy and time-consuming. That is why I was thrilled to discover the Harbor Freight airless paint sprayer. This handy tool has made painting much easier, and I am excited to share my step-by-step instructions on how to use it effectively.
In this article, I’ll walk you through everything you need to know, from familiarizing yourself with the sprayer’s components to troubleshooting common issues.
We’ll cover topics like:
- Preparing your painting area
- Choosing the right paint and dilution ratio
- Practicing proper technique and spray patterns
Plus, I’ll share some tips on how to maintain the sprayer for optimal performance.
So, if you’re ready to tackle your next painting project with ease, let’s dive in and learn how to use the Harbor Freight airless paint sprayer like a pro.
Key Takeaways
- Preparing the surface before painting is important for better adhesion and a smoother finish.
- Regularly clean and maintain the sprayer to ensure optimal performance and longevity.
- Troubleshoot common issues such as clogs, leaks, and uneven spray patterns for optimal results.
- Complete the painting project by gathering necessary supplies, protecting surrounding areas, applying a thin coat of primer, and using even strokes in small sections.

14 Pieces Airless Paint Sprayer Tips Set, Anglecai 6 Reversible Spray Nozzles, 6 Airless Paint Spray Gun Filters, 2 Nozzle Tip Guards for Guns House Painting
- Compatible Nozzle Sizes: Six models with various diameters
- Durable Material: Made of sturdy plastic and metal
- Leak-Proof Design: Stable and wear-resistant construction
As an affiliate, we earn on qualifying purchases.
As an affiliate, we earn on qualifying purchases.
Familiarize Yourself with the Sprayer’s Components
Take a look at the sprayer’s components, like the nozzle, paint container, and power cord. This will help you easily identify and understand how they all work together.
The nozzle is where the paint comes out and can be adjusted for different spray patterns.
The paint container holds the paint. It’s important to clean it thoroughly after each use to prevent clogs.
The power cord supplies electricity to the sprayer. Make sure it’s in good condition and plugged into a grounded outlet.
Sprayer maintenance is crucial for optimal performance. Regularly check for any loose or damaged parts and clean the nozzle to remove any dried paint.
Troubleshooting tips include checking for proper paint viscosity and ensuring all connections are secure.
Now that you’re familiar with the sprayer’s components, let’s move on to preparing your painting area.
Prepare Your Painting Area
Clear the space around your project, making sure there are no obstacles or debris that could interfere with your painting process. Before setting up the Harbor Freight airless paint sprayer, it’s important to organize your painting area for optimal results. Here are some steps to prepare your painting area:
- Set up a drop cloth or plastic sheet to protect the floor or any surrounding surfaces from paint overspray.
- Remove any furniture or items that you don’t want to get paint on.
- Cover nearby objects, such as light fixtures or outlets, with masking tape or plastic bags to prevent accidental paint splatters.
By following these steps, you can ensure a clean and organized painting area that will make your painting process smoother. Now, let’s move on to the next step: choosing the right paint and dilution ratio for your project.
Choose the Right Paint and Dilution Ratio
Get ready to achieve the perfect finish by selecting the ideal paint and dilution ratio for your project.
When it comes to paint selection, consider the type of surface you’ll be painting and the desired finish. For example, latex paint is great for interior walls, while oil-based paint is better suited for outdoor surfaces.
Additionally, check the manufacturer’s instructions to see if they recommend a specific type of paint for your airless paint sprayer.
Once you’ve chosen the paint, it’s important to dilute it properly. Dilution guidelines can usually be found on the paint can or in the manufacturer’s instructions. Follow these guidelines carefully to ensure the paint flows smoothly through the sprayer without clogging.
With the right paint and dilution ratio, you’ll be ready to move on to the next step of practicing proper technique and spray patterns.
Practice Proper Technique and Spray Patterns
Mastering proper technique and creating flawless spray patterns is crucial for achieving a professional finish. Regularly maintaining the sprayer is essential for optimal performance. Here are three sprayer maintenance tips to keep in mind:
-
Clean the sprayer thoroughly after each use to prevent clogs and buildup. This includes unclogging the nozzle, removing excess paint, and flushing the system with water or a cleaning solution.
-
Regularly inspect and replace worn or damaged parts to prevent leaks and ensure consistent spray patterns. Check the filters, gaskets, and seals for signs of wear and tear.
-
Familiarize yourself with troubleshooting techniques to address issues that may arise during the painting process. Adjust pressure settings, check for blockages, or troubleshoot electrical components.
By practicing proper maintenance and troubleshooting techniques, you can ensure optimal performance and achieve flawless spray patterns. Now, let’s move on to the next section and start with a test spray.
Start with a Test Spray
Before diving into a big paint project, it’s always a good idea to start with a test spray. Adjusting the pressure and spray pattern is crucial to achieving a smooth and even coat. Fine-tuning your technique will ensure that you have full control over the sprayer and can achieve the desired finish.
To begin, set the pressure according to the manufacturer’s instructions and test the spray on a scrap piece of material to make any necessary adjustments.
Next, adjust the spray pattern by turning the nozzle until you achieve the desired width and shape.
Finally, practice your technique by moving the sprayer in a steady back-and-forth motion, keeping the nozzle at a consistent distance from the surface.
By starting with a test spray and focusing on adjusting the pressure, spray pattern, and technique, you’ll be well-prepared for a successful paint job.
Adjust Pressure and Spray Pattern
To achieve optimal results with the Harbor Freight airless paint sprayer, it’s crucial to fine-tune the pressure and adjust the spray pattern to suit your specific painting requirements. Here’s how to do it:
-
Adjust Pressure:
- Start by setting the pressure to the recommended PSI for your paint type.
- Test spray on a scrap surface to ensure the pressure is not too high or low.
- Increase or decrease the pressure as needed to achieve a smooth and even spray.
-
Clean Nozzle:
- Ensure the nozzle is clean by removing any clogs or debris.
- Use a small brush or needle to clean out any paint buildup.
- A clean nozzle will ensure a consistent spray pattern.
Once you have adjusted the pressure and cleaned the nozzle, you can move on to fine-tuning your technique for a flawless finish.
Transitioning to the next section, let’s explore how to perfect your painting skills with the Harbor Freight airless paint sprayer.
Fine-tune Your Technique
Once you’ve adjusted the pressure and cleaned the nozzle, you’ll want to ensure you have a steady hand and maintain a consistent distance from the surface to achieve a professional finish with the Harbor Freight airless paint sprayer, even if you’re new to using this type of equipment. Improving control and achieving even coverage is crucial for a flawless paint job. Here are some techniques to help you fine-tune your technique:
| Technique | Description |
|---|---|
| Overlap | Make sure to overlap each pass by 50% to avoid any missed spots. This will ensure even coverage. |
| Speed | Move the sprayer at a consistent speed to achieve a uniform coat. Too fast may result in thin spots, while too slow can cause drips. |
| Wrist Action | Use your wrist to control the direction of the spray, keeping it perpendicular to the surface for an even application. |
| Testing | Before painting the entire surface, test your technique on a small area to ensure the settings and spray pattern are adjusted correctly. |
Once you’ve fine-tuned your technique, you’ll be ready to begin painting and achieve professional results.
Begin Painting
Now that you’ve got everything set up, it’s time to dive into the fun part – painting with your Harbor Freight airless paint sprayer! Here are some painting tips to help you get started:
-
Selecting colors: Choose colors that complement your space and create the desired atmosphere. Consider the lighting and the mood you want to achieve.
-
Prepare the surface: Clean and prime the surface before painting to ensure better adhesion and a smoother finish.
-
Test spray: Before painting the entire area, do a test spray on a small inconspicuous area to ensure the paint consistency and adjust the settings if needed.
-
Maintain consistent speed and distance: Move the sprayer in smooth, even strokes while maintaining a consistent speed and distance from the surface for an even coat.
-
Overlap strokes: Overlap each stroke by about 50% to avoid streaks and ensure full coverage.
Now that you know how to begin painting, let’s move on to the next step – maintaining the sprayer for optimal performance.
Maintain the Sprayer for Optimal Performance
To maintain the sprayer for optimal performance, follow these sprayer maintenance tips:
-
Thoroughly clean the sprayer after each use by flushing it with water or the recommended cleaning solution. This will remove any leftover paint or debris that could clog the sprayer or affect its performance.
-
Regularly inspect the sprayer for signs of wear or damage, such as worn seals or clogged nozzles. Replace any damaged parts immediately to prevent further issues.
-
Lubricate any moving parts as recommended by the manufacturer to keep them operating smoothly.
-
Store the sprayer in a clean and dry place to prevent rust and ensure its longevity.
By following these maintenance tips, you can ensure your sprayer performs optimally.
Now, let’s move on to troubleshooting common issues with the sprayer.
Troubleshoot Common Issues
When troubleshooting common issues with your sprayer, it’s important to address any clogs, leaks, or uneven spray patterns that may arise. Here are some tips for cleaning and resolving these problems:
-
Clearing clogs: Start by disconnecting the sprayer from the power source and removing the spray tip. Use a small brush or toothpick to dislodge any paint or debris that may be causing the clog. Rinse the tip and reattach it to the sprayer.
-
Fixing leaks: Check all the connections and fittings for any loose or damaged parts. Tighten or replace them as necessary. If the leak persists, it may be a sign of a worn-out seal or gasket, which should be replaced.
-
Correcting uneven spray patterns: Ensure that the sprayer is properly aligned and that the nozzle is clean. Adjust the pressure settings to achieve a more even spray pattern.
By troubleshooting and resolving these common issues, you can ensure optimal performance of your sprayer and complete the painting project efficiently.
Complete the Painting Project
To finish your painting project, simply follow these steps and achieve a flawless result.
First, make sure you have all the necessary supplies and materials, including primer, paint, and a clean paint sprayer.
Before starting, protect surrounding areas with drop cloths or plastic sheets.
Begin by applying a thin coat of primer to ensure proper adhesion.
Once the primer is dry, it’s time to start painting. Hold the sprayer about 12 inches away from the surface and move it in smooth, even strokes. Avoid overspray and drips by maintaining a consistent distance and speed.
Work in small sections, overlapping each pass slightly.
Allow the paint to dry between coats and apply multiple thin coats for a professional finish.
Remember to clean the sprayer thoroughly after each use to prevent clogs and maintain its longevity.
In the next section, we will discuss the important steps for clean up and maintenance.
Clean Up and Maintenance
Completing the painting project is just the beginning; now it’s time to roll up your sleeves and ensure the clean up and maintenance are a breeze, so your sprayer stays as good as gold. Here are some cleaning tips and storage guidelines to help you out:
-
Start by disconnecting the sprayer from the power source and relieving any pressure in the system.
-
Rinse the paint container and spray gun thoroughly with water to remove any remaining paint.
-
Use a brush or a cloth to clean the nozzle, ensuring there is no dried paint left behind.
-
Store the sprayer in a clean and dry place, away from extreme temperatures, to prevent damage.
By following these steps, you can keep your Harbor Freight airless paint sprayer in great condition and ready for your next painting project.
Frequently Asked Questions
How long does it take for the paint to dry after using the Harbor Freight airless paint sprayer?
After using the Harbor Freight airless paint sprayer, the drying time can vary depending on factors like humidity and paint type. To speed up drying, ensure proper ventilation, use a fan, and consider using a paint drying accelerator. Troubleshoot common drying issues by adjusting the paint thickness or applying thinner coats.
Can I use the Harbor Freight airless paint sprayer for both indoor and outdoor projects?
Using the harbor freight airless paint sprayer for both indoor and outdoor projects is like having a versatile tool in my hand. It saves time and delivers a smooth, professional finish, making it ideal for any painting job.
Is it necessary to wear protective gear while using the Harbor Freight airless paint sprayer?
When using the harbor freight airless paint sprayer, it is necessary to wear protective gear to ensure safety. Pros of using the sprayer include efficient paint application, while cons include potential overspray. Tips for achieving a smooth finish include practicing on a scrap surface and maintaining a consistent distance from the surface being painted.
Can I use the Harbor Freight airless paint sprayer for textured surfaces?
To use the Harbor Freight airless paint sprayer on textured surfaces, make sure to choose the appropriate nozzle size for the texture. Before starting, ensure that the paint sprayer is clean and in good condition.
How often should I clean the Harbor Freight airless paint sprayer to maintain its performance?
I clean the harbor freight airless paint sprayer after every use to maintain its performance. Cleaning frequency is crucial to prevent clogs and ensure smooth operation. Here are some maintenance tips to follow for optimal results.
Conclusion
Using the Harbor Freight airless paint sprayer has been a game-changer for me. This little tool has made painting projects so much easier and faster. I couldn’t believe how smooth and even the paint looked on my walls. It was like magic!
The best part is, the sprayer is super easy to use and maintain. With a little practice and following the step-by-step guide, anyone can achieve professional-looking results.
So go ahead, grab your Harbor Freight sprayer and unleash your inner artist!