You may think that utilizing an airless paint sprayer seems complicated and intimidating. But rest assured, it’s not as daunting as it may seem at first. Once you understand how an airless sprayer works and learn the proper techniques, it can greatly enhance your painting capabilities.
In this article, I will walk you through everything you need to know about painting with an airless sprayer. From preparing your workspace and materials to adjusting the sprayer settings and dealing with common issues, I’ve got you covered.
I’ll also share safety precautions and tips for choosing the right paint for airless spraying.
Whether you’re a seasoned DIY enthusiast or a beginner looking to enhance your painting skills, this guide will provide you with all the information you need to confidently paint with an airless sprayer.
So, let’s dive in and unleash your inner Picasso!
Key Takeaways
- Proper storage and maintenance of the airless sprayer is essential for prolonging its lifespan and ensuring readiness for use.
- Wearing proper safety gear, such as a respirator and safety goggles, is crucial when using an airless sprayer to protect against harmful fumes and particles.
- Choosing the right paint type based on the surface and desired finish is important, with water-based paints recommended for quick drying and easy cleanup, and oil-based paints providing a durable and smooth finish.
- When using an airless sprayer, it is important to properly prepare the surface, start spraying from the top in even, overlapping strokes, and consider factors such as the size and lighting of the space when selecting paint colors.
Understanding How an Airless Sprayer Works
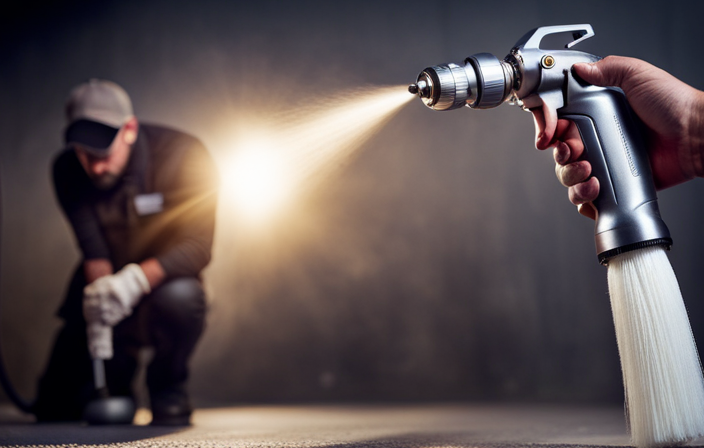
Now, let me show you how an airless sprayer works so you can understand its amazing capabilities. An airless sprayer is a powerful tool used for painting that operates by pumping paint under high pressure through a small nozzle, creating a fine mist of paint particles.
This method allows for a smooth and even application of paint on various surfaces, including walls, ceilings, and furniture. To ensure the airless sprayer works efficiently, regular maintenance is crucial. This includes cleaning the sprayer thoroughly after each use and checking for any clogs or damaged parts.
Troubleshooting airless sprayer problems, such as uneven spray pattern or clogging, can be easily resolved by following the manufacturer’s instructions.
Now, let’s move on to preparing your workspace and materials for a successful painting project.
Preparing Your Workspace and Materials
Before diving into the painting process, it’s crucial to ensure that your workspace and materials are properly prepared.
First, organize your workspace by removing any unnecessary items and covering furniture or surfaces that you want to protect from paint. This will help you work efficiently and avoid any accidental spills or damage.
Next, prepare your materials by gathering the necessary paint, primer, and other supplies. Make sure your paint is properly mixed and strained to remove any lumps or debris that could clog the sprayer.
Additionally, check that your sprayer is clean and in good working condition. Once your workspace and materials are ready, you can move on to adjusting the sprayer settings and getting started on your painting project.
Adjusting the Sprayer Settings
Get ready to unleash a tornado of color as you fine-tune the settings on your powerful paint-spewing machine. Adjusting the pressure on your airless sprayer is crucial for achieving the desired paint coverage. Start by testing the pressure on a scrap piece of material and gradually increase or decrease it until you reach the optimal setting.
Additionally, selecting the right nozzle size is important for achieving the desired spray pattern. Different nozzle sizes create different widths and fan patterns, so choose the one that best suits your project.
Once you’ve adjusted the pressure and selected the appropriate nozzle, you’re ready to move on to the next section about the proper technique for spraying, ensuring smooth and even coverage.
Proper Technique for Spraying
Mastering the art of spraying requires a smooth, sweeping motion with your arm, as if you’re gracefully conducting an orchestra.
When using an airless sprayer, it’s important to maintain a consistent distance from the surface you’re painting. Start by holding the sprayer about 12 inches away and adjust as needed for optimal coverage.
Move your arm in a steady, side-to-side motion, overlapping each pass by about 50%. This ensures an even application and prevents streaks or lines.
As you spray, keep your wrist relaxed and your grip firm but not too tight. This’ll help you maintain control and achieve a smooth finish.
Remember to always follow the manufacturer’s instructions for your specific sprayer model and practice on a test surface beforehand to get a feel for the spraying techniques.
Transitioning into dealing with common issues, it’s important to be aware of potential clogs or uneven coverage during the painting process.
Dealing with Common Issues
To tackle any hiccups along the way, you’ll need to be prepared for some common issues that may arise while perfecting your spraying technique. Here are a few troubleshooting tips and best practices to help you overcome these challenges.
First, if you notice uneven coverage or streaks, try adjusting the nozzle pressure or the spray pattern. Additionally, make sure to always keep the sprayer at the correct distance from the surface being painted, usually around 12-18 inches.
Another common issue is clogging, which can be resolved by regularly cleaning the sprayer’s filters and ensuring the paint is properly strained.
Finally, if you experience any leaks or drips, double-check that all connections are secure and tighten them if needed.
By following these troubleshooting tips and best practices, you can achieve a smooth and professional finish.
Now, let’s move on to cleaning and maintaining the sprayer.
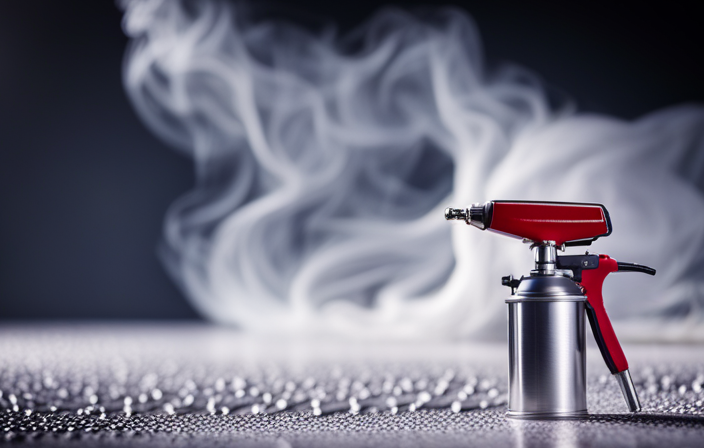
Cleaning and Maintaining the Sprayer
When it comes to cleaning and maintaining my airless sprayer, there are three key points that I always follow.
First, after each use, I make sure to flush the system thoroughly to remove any paint residue. This helps prevent clogs and ensures that the sprayer is ready for the next job.
Second, I disassemble and clean all the parts, including the spray tip, filter, and hose, to remove any dried paint or debris.
Lastly, I store the sprayer properly by following the manufacturer’s instructions, which usually involve draining any remaining paint and storing it in a clean, dry place.
By following these steps, I can ensure that my sprayer stays in good condition and continues to perform at its best.
Flushing the System After Use
After you’re finished painting, it’s crucial to flush the system of an airless sprayer for its longevity. To begin, disconnect the sprayer from the power source and release the pressure by triggering the gun.
Next, remove the spray tip and guard, and then attach a bucket of clean water to the sprayer. Turn on the sprayer and let the water run through the system until it comes out clear. This cleaning technique helps remove any remaining paint or debris, preventing clogs and ensuring the sprayer’s proper functioning.
Once the system is flushed, it’s time to move on to disassembling and cleaning the parts. This step will help you thoroughly clean the individual components of the sprayer, ensuring their longevity and optimal performance.
Disassembling and Cleaning the Parts
After flushing the system, it’s time to disassemble and clean the parts of your airless sprayer. This is an essential step to ensure the longevity and optimal performance of your equipment. Here’s a quick disassembling technique to follow:
-
Start by removing the spray tip and guard, as well as the filter housing.
-
Carefully detach the pump housing and piston rod assembly, taking note of their positions for easy reassembly.
-
Next, clean each part thoroughly using warm soapy water or a specialized cleaning solution. Pay extra attention to any clogs or buildup.
Cleaning your airless sprayer equipment regularly will prevent paint residue from hardening and causing future issues. Once the parts are clean and dry, you can move on to the next step: storing the sprayer properly. This ensures that your equipment will be ready for your next painting project.
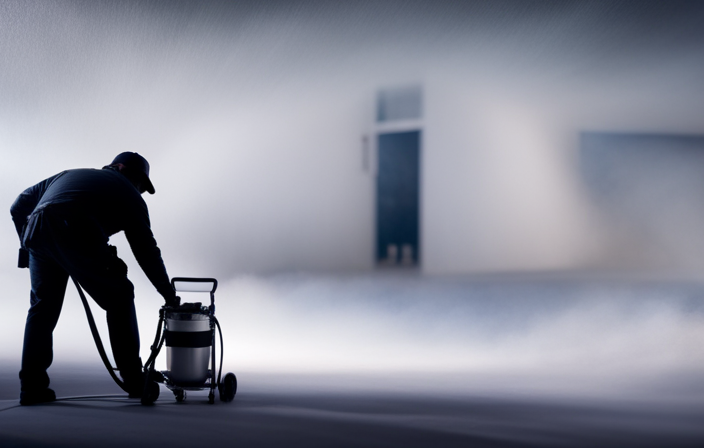
Storing the Sprayer Properly
To ensure your equipment stays in top condition, it’s crucial to store your sprayer properly after cleaning and disassembling its parts. Proper storage is essential for preventing clogs and maintaining the functionality of your airless sprayer.
After cleaning, make sure to remove any excess paint from the sprayer and its accessories. Store the sprayer in a clean, dry place, away from extreme temperatures and direct sunlight. It’s also important to keep the sprayer upright to prevent any leaks or damage. Additionally, consider using a sprayer cover or bag to protect it from dust and debris.
By following these proper storage practices, you can prolong the lifespan of your sprayer and ensure it’s ready for use when needed.
Now, let’s move on to discussing safety precautions and the importance of wearing protective gear.
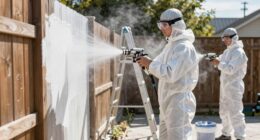
Safety Precautions and Protective Gear
Wearing the proper safety gear is crucial when using an airless sprayer to protect yourself from potential hazards. It’s important to wear a respirator to prevent inhaling harmful fumes and particles. Additionally, safety goggles should be worn to shield your eyes from paint overspray and debris. These precautions are essential in maintaining your health and safety while using an airless sprayer.
Before starting any painting project, make sure you have these protective gear items readily available. Once you’ve taken the necessary safety measures, you can proceed to the next step, which is choosing the right paint for airless spraying.
Choosing the Right Paint for Airless Spraying
When it comes to selecting the perfect paint for your project, you’ll want to consider the type of surface you’re working with and the desired finish you’re aiming for. Choosing the right paint type is crucial for achieving the best results with an airless sprayer.
Water-based paints are generally recommended as they dry quickly and clean up easily. They’re also less likely to clog the sprayer’s nozzle.
Oil-based paints, on the other hand, provide a durable and smooth finish but require more time to dry and clean up.
As for the best paint brands, some popular choices include Sherwin-Williams, Benjamin Moore, and Behr. These brands offer a wide range of colors and finishes to suit any project.
Now, let’s move on to some tips for painting different surfaces.
Tips for Painting Different Surfaces
When it comes to painting different surfaces, there are a few key tips to keep in mind.
First, when painting walls and ceilings, it’s important to properly prepare the surface by cleaning and priming it before applying the paint.
Second, when painting furniture and cabinets, be sure to sand and prime the surface for better adhesion and durability.
Lastly, when painting exterior surfaces and siding, choose a paint that is specifically formulated for outdoor use and consider factors such as weather resistance and UV protection.
Walls and Ceilings
To achieve a smooth and even finish on your walls and ceilings, it’s important to apply the paint with an airless sprayer. An airless sprayer can cover up to 10 times more area than traditional painting methods. Here are some painting techniques and color choices to consider when using an airless sprayer for walls and ceilings:
-
Prep the surface: Ensure that the walls and ceilings are clean and free of any dirt or debris. Sand down any rough patches and fill in any holes or cracks.
-
Use the right technique: Start by spraying from the top of the wall or ceiling and work your way down in even, overlapping strokes. Keep the sprayer nozzle about 12 inches away from the surface for best results.
-
Choose the right color: Consider the size and lighting of the space when selecting paint colors. Lighter colors can make a room feel more open and spacious, while darker colors can create a cozy atmosphere.
-
Practice and test: Before starting on the walls and ceilings, practice using the airless sprayer on a piece of cardboard or scrap wood to get comfortable with the technique and adjust the spray pattern if needed.
Now, let’s move on to the next section about painting furniture and cabinets.
Furniture and Cabinets
Now onto giving your furniture and cabinets a fresh new look! When it comes to painting furniture and cabinets with an airless sprayer, there are a few key things to keep in mind.
First, make sure to properly prepare the surfaces by sanding and cleaning them. This will ensure that the paint adheres well and gives a smooth finish.
Next, choose the right painting technique for the job. For furniture, it’s best to start with a primer and then apply multiple thin coats of paint, allowing each coat to dry completely before applying the next.
For cabinets, consider using a sprayer with a fine finish tip to achieve a professional result.
Finally, don’t forget about color selection. Choose a paint color that complements your overall design scheme and enhances the look of your furniture and cabinets.
Now, let’s move on to the next section about painting exterior surfaces and siding.
Exterior Surfaces and Siding
Additionally, achieving a flawless finish on exterior surfaces and siding requires careful preparation and the right tools.
When painting exterior wood, brick, and stucco, it’s important to clean the surfaces thoroughly to remove any dirt, debris, or loose paint. If there are any cracks or holes, they should be filled and sanded before painting.
Using an airless sprayer, I found it helpful to start spraying in a vertical motion, overlapping each pass slightly to ensure even coverage. For wood surfaces, it’s recommended to use a primer before applying the paint.
When painting brick or stucco, a high-quality masonry paint works best. It’s important to follow the manufacturer’s instructions for drying time and any additional coats.
Transitioning into the next section about practice and experimentation, it’s essential to remember that achieving the perfect finish may require some trial and error.
Practice and Experimentation
First, start by practicing with your airless sprayer to get a feel for its power and coverage. Remember that practice makes perfect. The key to becoming proficient with an airless sprayer is trial and error. It may take some time to find the right technique and pressure settings that work best for you. Don’t be discouraged if you make mistakes along the way, as there’s a learning curve to mastering this tool.
To help you in your practice and experimentation, here are three important tips to keep in mind:
- Start with a small, inconspicuous area to test different spraying techniques and adjust the pressure settings.
- Experiment with different paint consistencies to find the optimal viscosity for your sprayer.
- Practice controlling the sprayer’s speed and distance from the surface to achieve even coverage.
By embracing the process of trial and error and continually learning from your experiences, you’ll become more confident and efficient in painting with an airless sprayer.
Frequently Asked Questions
Can I use an airless sprayer for detailed or intricate painting projects?
Yes, an airless sprayer is not the best tool for detailed or intricate painting projects. Instead, consider using brushes, small rollers, or even a paint pen for more precise and controlled painting.
What type of paint is best suited for airless spraying?
The best paint for airless spraying is typically latex or water-based paint. These types of paint are easier to clean up and provide a smooth finish when used with an airless sprayer.
How do I prevent overspray and achieve a smooth finish with an airless sprayer?
To prevent overspray and achieve a smooth finish with an airless sprayer, I adjust the nozzle pressure and distance from the surface. I also use masking tape to protect surrounding areas and apply multiple thin coats for even coverage.
What are the potential risks or dangers associated with using an airless sprayer?
One potential hazard of using an airless sprayer is the risk of high-pressure fluid injection injuries, which can cause severe tissue damage. To prevent this, it’s crucial to wear proper protective gear and follow all safety precautions.
Can I use an airless sprayer for outdoor painting projects?
Yes, you can use an airless sprayer for outdoor painting projects. The pros include faster application, even coverage, and the ability to spray a variety of coatings. However, cons include overspray and the need for proper safety precautions.
Conclusion
In conclusion, painting with an airless sprayer can be a rewarding and efficient way to transform your space. By understanding how the sprayer works and properly preparing your materials and workspace, you can achieve professional-looking results.
Remember the adage "practice makes perfect" and don’t be afraid to experiment with different techniques and surfaces. Just be sure to prioritize safety by wearing protective gear and following the necessary precautions.
With the right paint and a little practice, you’ll be well on your way to becoming a painting pro.