Hey there! I know painting the outside of your wooden house can feel like a big job, but don’t stress! I’m here to guide you through using an airless sprayer every step of the way. This handy tool will help you achieve a professional-looking finish in no time.
First things first, we need to prepare the surface for painting. This involves cleaning, sanding, and repairing any damaged areas. Once that’s done, we’ll move on to choosing the right paint and primer for your project.
Next, it’s time to set up and test your airless sprayer. Don’t worry, I’ll walk you through the process, making sure you’re confident and ready to go. Then, we’ll dive into practicing proper spraying techniques to ensure smooth and even coverage.
Once we’ve got the hang of it, it’s time to start painting! We’ll go over the best approach, making sure to apply multiple coats if needed, and paying close attention to all the details.
Finally, we’ll evaluate the finished result and wrap things up with some clean-up tips. So, grab your airless sprayer and let’s transform your wood exterior into a stunning masterpiece!
Key Takeaways
- Clean and maintain the airless sprayer and hoses after each use to avoid potential issues during painting.
- Assess the coverage after the first coat to identify thin or uneven areas requiring additional coats.
- Apply additional paint to corners, edges, and hard-to-reach spots, and promptly address areas needing touch-ups.
- Allow sufficient drying time between coats to ensure optimal adhesion and a long-lasting finish.
Prepare the Surface for Painting
To ensure a smooth and long-lasting paint job, you’ll need to properly prepare the surface before using an airless sprayer. Here’s how:
-
Thoroughly clean the wood exterior using a pressure washer or a mixture of water and detergent. This will remove any dirt, grime, or loose paint.
-
Once the surface is clean and dry, inspect it for any cracks or imperfections. Use a putty knife to fill cracks with a wood filler and let it dry completely.
-
Next, sand the entire surface using a medium-grit sandpaper to create a smooth and even texture. Pay extra attention to areas with peeling paint or rough spots.
-
Finally, wipe away any dust or debris with a damp cloth.
With the surface properly prepared, you can now move on to choosing the right paint and primer for your project.
Choose the Right Paint and Primer
When choosing the right paint color for your exterior wood, consider the overall aesthetic of your neighborhood and your personal style preferences. It’s important to select a paint color that complements the architectural style of your home and blends well with the surroundings.
Additionally, prepping the surface properly is crucial before applying the primer and paint. This involves cleaning the wood, removing any loose or peeling paint, and sanding the surface to ensure a smooth finish. Proper surface preparation will help the primer and paint adhere better and result in a longer-lasting finish.
Now that you have chosen the perfect paint and primer, let’s move on to the next step of setting up and testing your airless sprayer.
Set Up and Test Your Airless Sprayer
Before you can start painting with an airless sprayer, there are a few important steps to take.
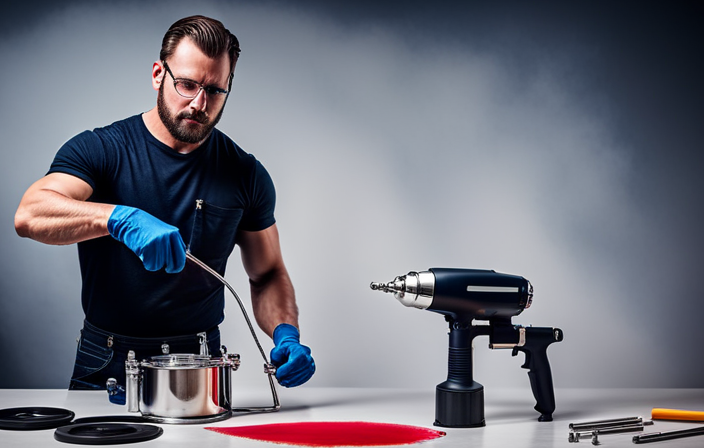
First, gather all the necessary equipment such as the sprayer, paint, and a mixing stick.
Next, check if the paint needs to be diluted and follow the manufacturer’s instructions if necessary.
Finally, test the sprayer on a test surface to ensure it is working properly and adjust the settings if needed.
Gather the Necessary Equipment
First, make sure you have all the essential equipment ready for painting the exterior of your wood house with an airless sprayer. To successfully complete the task, you will need the following items:
- Airless sprayer: Choose a high-quality sprayer that can handle the job efficiently.
- Paint: Select a suitable paint color for your house, considering factors such as the architecture and surrounding environment.
- Protective gear: Wear safety goggles, a respirator mask, and gloves to protect yourself from paint fumes and chemicals.
- Weather monitoring tools: Check the weather forecast to ensure optimal painting conditions. Consider temperature, humidity, and wind speed.
When painting in different weather conditions, keep in mind that hot weather can cause the paint to dry too quickly, while cold weather can affect its drying time.
Once you have gathered all the necessary equipment, you can proceed to the next section about diluting the paint if necessary.
Dilute the Paint if Necessary
If necessary, you can thin out the paint to achieve the desired consistency for a smooth and even application. This will allow the color to effortlessly glide onto the surface of your home.
Before diluting the paint, check the manufacturer’s instructions for recommended dilution ratios. Some paints may require a certain amount of water or thinning agent to be added for optimal results.
To dilute the paint, pour a small amount into a separate container and gradually add the appropriate thinner while stirring continuously. The goal is to reach a consistency that allows the paint to flow easily through the airless sprayer without clogging or spattering.
If you don’t want to thin the paint, there are alternative paint application methods, such as using a brush or roller.
Once the paint is properly diluted, you can proceed to the next step of testing the sprayer on a test surface.
Test the Sprayer on a Test Surface
Now it’s time to put my skills to the test and see how the sprayer performs on a trial surface.
Testing the sprayer on a test surface is crucial to ensure that it is working properly and to familiarize myself with its capabilities.
To begin, I will select a small area on the test surface and apply the paint using the sprayer. I will pay close attention to the spray pattern, coverage, and any potential issues such as clogging or uneven application.
By testing the sprayer, I can determine if any adjustments need to be made before moving on to the actual project. If there are any troubleshooting tips or techniques that I need to employ, this is the perfect opportunity to identify and address them.
Once I am satisfied with the performance of the sprayer, I can confidently move on to the next section about practicing proper spraying techniques.
Practice Proper Spraying Techniques
To achieve a flawless finish on your wood exterior, you’ll want to master the art of proper spraying techniques with an airless sprayer. These techniques not only improve efficiency but also help troubleshoot common issues that may arise during the painting process.
Firstly, it’s important to maintain a consistent distance from the surface, typically around 12 inches, to ensure an even coat of paint. Additionally, always keep the sprayer moving in a smooth and steady motion to avoid drips or uneven coverage.
It’s also crucial to overlap each pass by about 50% to achieve a seamless finish. Lastly, make sure to adjust the spray pattern and pressure settings according to the surface and paint being used.
With these proper spraying techniques, you’ll be well-prepared to start painting and achieve professional results.
Start Painting
Let’s dive right into applying a fresh coat of color to your outdoor space and bring it to life! When it comes to painting with an airless sprayer, there are a few tips to keep in mind for achieving a smooth finish.
First, make sure to maintain a consistent distance from the surface, usually around 12 inches. This will help prevent uneven coverage. Additionally, keep your hand steady and move in a smooth, sweeping motion to avoid any streaks or drips. Another important tip is to overlap each pass by about 50% to ensure even distribution of paint.
Now, let’s talk about some common mistakes to avoid. One of the biggest mistakes is spraying too quickly or too slowly. This can result in an uneven finish or excessive build-up. It’s also important to avoid spraying in direct sunlight or on windy days, as this can cause the paint to dry too quickly or be blown off course.
Lastly, take breaks and clean the sprayer regularly to prevent clogs and maintain optimal performance.
Now that we have covered the application process, let’s move on to the next section about taking breaks and cleaning the sprayer.
Take Breaks and Clean the Sprayer
To optimize performance and achieve a flawless paint job, it is crucial to take breaks and keep the sprayer clean. Taking breaks prevents fatigue and helps maintain focus during the painting process.
Regular cleaning of the sprayer is essential for proper functioning. It is recommended to create a cleaning schedule, which includes cleaning the filters, nozzles, and hoses after each use. Additionally, performing regular maintenance on the sprayer by checking for clogs or damage and addressing them promptly is important.
By keeping the sprayer clean and well-maintained, potential issues that may arise during painting can be avoided. Now, let’s move on to the next section about applying multiple coats if needed.
Apply Multiple Coats if Needed
After applying the first coat of paint, I always take the time to assess the coverage to ensure that it is even and thorough. If there are any areas that appear thin or uneven, I know that I will need to apply additional coats for a solid finish.
It is important to allow sufficient drying time between coats to prevent smudging or smearing of the paint.
Assess the Coverage After the First Coat
After applying the first coat, it is important to assess the coverage of the paint on the wood. This step is crucial to ensure a smooth and professional finish. Take a step back and check if the paint has evenly covered the wood. Look for any areas where the paint may be thin or inconsistent. If you notice any issues, troubleshoot them by applying additional paint to those areas using your airless sprayer. Pay close attention to corners, edges, and hard-to-reach spots, as they are often missed during the initial application. Promptly address any areas that need touch-ups to avoid potential problems later on. Once you are satisfied with the coverage and have made any necessary touch-ups, you can proceed to apply additional coats for a solid finish.
Apply Additional Coats for a Solid Finish
To achieve a flawless and professional result, it’s important to apply additional coats for a solid finish. Adding extra coats not only enhances the durability of the paint but also helps to cover any missed spots or unevenness from the previous coat.
It is recommended to wait for the first coat to dry completely before applying the next one. This will allow you to assess the coverage and identify any areas that need more attention.
If you desire a different color or want to experiment with alternative painting methods, additional coats provide an opportunity to make those changes. Remember to allow sufficient drying time between coats to ensure optimal adhesion and a long-lasting finish.
Allow Sufficient Drying Time Between Coats
Make sure you give each coat enough time to dry properly in order to achieve a smooth and seamless finish. Allowing sufficient drying time between coats is crucial for the success of your paint job.
The drying time is important because it ensures that the previous coat is fully dry before applying the next one. This prevents the paint from peeling or cracking later on.
Here are three reasons why drying time is so important:
- Proper drying time allows the paint to cure fully, ensuring a durable and long-lasting finish.
- It allows any moisture trapped beneath the paint to evaporate, preventing future issues.
- Giving each coat enough time to dry allows for better adhesion between coats, resulting in a more even and professional-looking finish.
By allowing sufficient drying time, you can prevent paint peeling and ensure a beautiful and lasting exterior paint job.
Now, let’s move on to the next section and pay attention to details for an even better result.
Pay Attention to Details
Attention to details is crucial when painting your wood exterior house with an airless sprayer. You’ll be amazed at how a single missed spot can stand out like a glaring flaw in a masterpiece.
When using an airless sprayer, it’s important to pay close attention to color consistency throughout the entire painting process. Make sure to mix the paint thoroughly and periodically check that the color remains consistent as you work your way around the house.
Additionally, paying attention to weather conditions is essential for a successful paint job. Avoid painting on windy or rainy days, as it can negatively affect the application and drying process.
By paying attention to these details, you’ll ensure a smooth and even coat of paint on your wood exterior. Evaluating the finished result will be the next step in achieving a flawless finish.
Evaluate the Finished Result
Take a step back and marvel at the flawless finish you’ve achieved on your stunning wooden home with the airless sprayer. Evaluating the finished result is crucial to ensure the color choice and durability meet your expectations. Here is a detailed assessment table to help you evaluate the outcome:
| Aspect | Color Choice | Durability |
|---|---|---|
| Evaluation | [ ] Satisfactory | [ ] Satisfactory |
| Comments |
When evaluating the color choice, consider if it complements your home’s architecture and surroundings. Assess the durability by checking for any signs of peeling, cracking, or fading. Remember, a high-quality paint job should withstand the test of time and weather conditions.
Now that you have assessed the finished result, it’s time to clean up and enjoy your newly painted exterior.
Clean Up and Enjoy Your Newly Painted Exterior
After evaluating the finished result of my freshly painted exterior, I am thrilled with the transformation. Now it’s time to clean up and enjoy the fruits of my labor.
Cleaning up is essential to maintain the longevity of the paint job. I start by carefully removing any paint overspray or drips using a scraper or a cloth dampened with paint thinner.
Next, I clean my airless sprayer thoroughly to prevent any clogs or build-up for future use.
To ensure the longevity of the paint, I follow some tips for maintaining the painted exterior. This includes regular cleaning with a mild detergent and water, avoiding harsh chemicals or abrasive cleaners.
Additionally, I make sure to choose the right weather conditions for painting, aiming for a dry day with moderate temperatures to achieve the best results.
Frequently Asked Questions
How long does it typically take to prepare the surface for painting a wood exterior house?
It typically takes me a few days to prepare the surface for painting a wood exterior house. This includes cleaning, scraping off loose paint, sanding, and priming any bare areas for optimal surface readiness.
Should I use a specific type of paint and primer for painting a wood exterior house with an airless sprayer?
For painting a wood exterior house with an airless sprayer, it is important to use specific paint types and the best primers. By choosing the right products, you can ensure a durable and long-lasting finish.
How do I properly set up and test my airless sprayer before starting the painting process?
To properly set up and test my airless sprayer, I start by assembling all the necessary parts and ensuring they are clean. Then, I check the pressure settings, inspect the spray tip, and run a test spray to ensure proper functioning. Here are some tips for using an airless sprayer for wood painting.
Are there any specific spraying techniques I should practice when using an airless sprayer to paint a wood exterior house?
When using an airless sprayer, it’s important to practice specific spraying techniques. Start by maintaining a consistent distance from the wood surface, using a sweeping motion, and overlapping each pass for even coverage.
How long should I wait between coats when applying multiple coats of paint to a wood exterior house using an airless sprayer?
When applying multiple coats of paint with an airless sprayer, I wait for the previous coat to dry completely, usually around 24 hours. To prevent overspray, I use masking tape and plastic sheets. To achieve a smooth finish, I maintain a consistent spraying distance and move the sprayer in even strokes.
Conclusion
In conclusion, painting the exterior of your house with an airless sprayer is a detailed and precise process that requires careful preparation and proper technique. By choosing the right paint and primer and setting up and testing your sprayer, you can achieve a professional-looking finish.
Practicing good spraying techniques is also essential. Remember to apply multiple coats if needed and pay attention to the little details. Evaluating the finished result and cleaning up properly are important steps to ensure a beautifully painted exterior.
With a little patience and effort, your home will look stunningly refreshed. So go ahead, grab that sprayer, and give your house the makeover it deserves!
