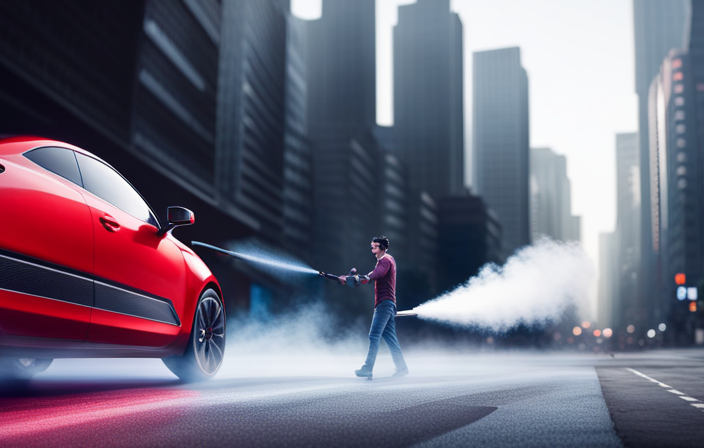

Standing in front of my car, it felt like a blank canvas ready to transform into a work of art. The electric sprayer in my hand filled me with excitement, suggesting countless creative possibilities. The idea of painting my vehicle had been on my mind for a long time. With high-quality equipment and know-how, I was prepared to bring that dream to life.
In this article, I will guide you through the step-by-step process of painting your car with an electric airless sprayer, using the power of YouTube tutorials as our source of inspiration. From gathering the necessary materials and preparing the car’s surface, to applying the base coat and clear coat for a flawless finish, we will cover it all.
I will also provide tips on buffing and polishing the painted surface, as well as cleaning and maintaining your sprayer for long-lasting results.
So, let’s dive in and turn our cars into works of art with the help of an electric airless sprayer and the invaluable guidance of YouTube tutorials.
Key Takeaways
- Achieve desired finish on surfaces
- Clean and maintain electric airless sprayer for optimal performance
- Practice on a test panel before painting car
- Adjust sprayer’s pressure and fan width to match paint and desired effect
Gathering the necessary materials and tools
In order to efficiently paint your car using an electric airless sprayer, it’s crucial to gather all the necessary materials and tools.
First and foremost, you need to choose the right paint color that suits your car and personal preferences. Consider factors such as the car’s model, style, and your desired aesthetic.
Next, make sure you have a high-quality electric airless sprayer that provides a smooth and even application.
Additionally, you’ll need masking tape, plastic sheets, and drop cloths to protect the surrounding areas from overspray.
To achieve a smooth finish, proper preparation is essential. This includes thoroughly cleaning the car’s surface, removing any rust or old paint, and sanding down imperfections.
By gathering the right materials and tools and following these tips for achieving a smooth finish, you’ll be well-prepared to move on to the next step of preparing the car’s surface for painting.
Preparing the car’s surface for painting
To get started, make sure you’ve properly cleaned and sanded the surface. Does the car’s surface feel smooth to the touch? Sanding techniques are crucial for achieving a flawless finish.
Begin by using coarse-grit sandpaper to remove any existing paint or imperfections. Then, switch to a finer grit to smooth out the surface. This will provide a better adhesion for the paint.
Once the sanding is complete, it’s important to choose the right primer. A high-quality automotive primer will ensure that the paint adheres well and provides a durable finish. Look for a primer that’s compatible with the type of paint you plan to use.
Applying the primer will create a smooth and even surface for the paint to adhere to.
With the surface properly prepped and primed, it’s time to move on to the next step of masking off areas that you don’t want to paint.
Masking off areas that you don’t want to paint
First things first, take a moment to visualize the areas you want to protect from any paint mishaps. To ensure a clean and professional finish, it’s crucial to mask off these surfaces properly. Here are three key steps to follow:
-
Clean the areas to be masked thoroughly, removing any dirt, grease, or wax. This’ll ensure that the masking tape adheres properly.
-
Choose the right masking tape for the job. Look for a tape specifically designed for automotive painting, as it’ll provide clean lines and won’t leave residue behind.
-
Apply the masking tape carefully, making sure it’s firmly pressed down to prevent any paint from seeping underneath.
Protecting surfaces and choosing the right masking tape are essential steps in achieving a flawless paint job. Once you’ve completed these tasks, you can move on to the next section and learn about mixing the paint and priming the sprayer.
Mixing the paint and priming the sprayer
Before diving into the exciting process of mixing paint and priming the sprayer, let’s explore how these crucial steps can elevate your painting game to a whole new level. Mixing paint ratios is essential for achieving the desired color and consistency. To ensure a smooth and even application, it is important to follow the manufacturer’s instructions and use the correct ratio of paint to thinner. Troubleshooting common issues, such as clogging or inconsistent spray, can be resolved by adjusting the paint mixture or cleaning the sprayer thoroughly. By mastering the art of mixing paint and priming the sprayer, you will set the foundation for a flawless paint job. In the next section, we will delve into the process of applying the base coat, building upon the foundation we have established.
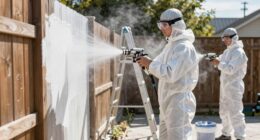
Applying the base coat
Now that we’ve mastered the art of mixing paint and priming the sprayer, it’s time to dive into the exciting process of applying the base coat.
Achieving a smooth base coat finish is crucial for a professional-looking paint job. To start, make sure the sprayer is properly cleaned and free of any debris or leftover paint.
Begin by applying a light, even coat of base coat to the car’s surface, working in small sections at a time. Keep the sprayer parallel to the surface and maintain a consistent distance of about 6-8 inches. This will help prevent any drips or uneven coverage.
If you encounter any issues such as orange peel texture or runs, adjust the sprayer settings or thin the paint slightly.
Once the base coat is applied, allow it to dry completely before moving on to the next step of sanding any imperfections.
Allowing the base coat to dry and sanding any imperfections
Once the base coat is dry, I can begin sanding out any imperfections, smoothing the surface to perfection.
Sanding is a crucial step in achieving a flawless paint job. To start, I use a sanding block or sandpaper with a fine grit, such as 400 or 600. I gently sand the entire surface, focusing on areas where there are noticeable imperfections like drips, runs, or orange peel texture.
It’s important to maintain an even pressure and use long, smooth strokes to avoid creating new scratches. If I encounter any stubborn imperfections, I can switch to a coarser grit sandpaper and gradually work my way back to a finer grit.
After sanding, I wipe away any dust with a clean cloth before moving on to applying the clear coat for a glossy finish.
Applying the clear coat for a glossy finish
To achieve a showroom-worthy shine, it’s time to seal the flawless surface with a coat of clear gloss. Before applying the clear coat, it’s essential to ensure the base coat is completely dry and free from any imperfections.
This can be achieved by using wet sanding techniques to smooth out any rough spots or unevenness. Wet sanding involves using a fine-grit sandpaper and water to gently sand the surface in a circular motion.
Once the base coat is smooth, it’s time to choose the right clear coat brand. Look for a high-quality clear coat that’s compatible with your paint system and provides a glossy finish.
Applying the clear coat should be done in thin, even layers to avoid drips or orange peel texture. After applying the clear coat, allow it to dry completely before moving on to the next step of buffing and polishing the painted surface, which will further enhance the shine and depth of the finish.
Buffing and polishing the painted surface
With a little elbow grease and some polishing compound, you can transform your vehicle’s paint job into a mirror-like finish. Achieving a flawless and glossy surface requires the right buffing and polishing products. Here are some tips to help you get the best results:
- Start by choosing the right buffing pad for your specific paint type.
- Apply a small amount of polishing compound onto the pad and spread it evenly on the painted surface.
- Using a low-speed buffer, work the compound into the paint in circular motions.
- Gradually increase the speed and pressure as you buff the surface to remove any imperfections.
During the buffing process, it’s important to avoid common mistakes such as applying too much pressure or buffing for too long in one spot. These can lead to swirl marks and uneven surfaces.
Once you have achieved the desired finish, you can move on to the next step of cleaning and maintaining your electric airless sprayer.
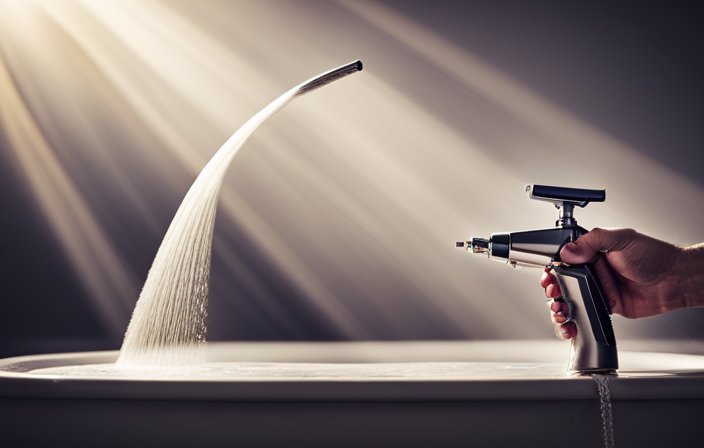
Cleaning and maintaining your electric airless sprayer
Imagine your electric airless sprayer as a trusty steed that needs regular grooming and maintenance to perform at its best. Properly cleaning and maintaining your sprayer is crucial for achieving a flawless paint job. Here are some effective cleaning techniques and troubleshooting tips to keep your sprayer in top shape:
| Cleaning Techniques | Troubleshooting Common Issues | Maintenance Tips |
|---|---|---|
| Flush out residual paint with water after each use. | Clogged spray tip? Remove and clean it thoroughly. | Regularly inspect hoses and connections for leaks. |
| Clean filters regularly to prevent clogs. | Uneven spray pattern? Check for worn or damaged seals. | Keep the sprayer in a clean and dry storage area. |
| Avoid using harsh chemicals that can damage the sprayer. | Spray gun not working? Check for loose or damaged wires. | Follow the manufacturer’s instructions for maintenance schedules. |
By following these cleaning techniques and troubleshooting common issues, you can ensure the longevity and optimal performance of your electric airless sprayer. For a step-by-step guidance, watch the YouTube tutorial on how to paint your car with an electric airless sprayer.
Watching the YouTube tutorial for step-by-step guidance
After cleaning and maintaining your electric airless sprayer, the next step is to gain a thorough understanding of how to use it effectively. Watching a YouTube tutorial can provide step-by-step guidance and help you achieve a professional finish when painting your car.
Using an electric airless sprayer for car painting has its pros and cons. On the positive side, it offers faster application, even coverage, and reduced overspray compared to traditional methods. However, it can be more expensive and requires proper technique to avoid drips or uneven paint distribution.
To achieve a professional finish, it’s essential to follow a few tips. Firstly, practice on a test panel before tackling your car. Secondly, adjust the sprayer’s pressure and fan width to match the paint and desired effect. Lastly, make sure to move the sprayer smoothly and evenly, maintaining a consistent distance from the surface.
Frequently Asked Questions
How long does it typically take for the base coat to dry before sanding any imperfections?
The drying time for the base coat before sanding any imperfections can vary depending on factors such as temperature and humidity. It is recommended to wait at least 24 hours for the base coat to fully dry before starting the sanding process.
Can I use any type of paint with an electric airless sprayer, or are there specific types that work best?
For the best results, it is important to use specific types of paint with an electric airless sprayer. These paint types are designed to work well with the spraying technique and ensure a smooth and even finish on your car.
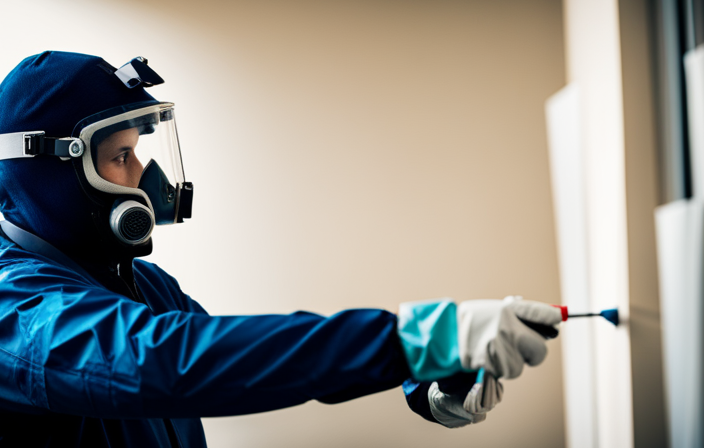
Are there any specific safety precautions I should take while using an electric airless sprayer?
Safety tips for using an electric airless sprayer include wearing protective gear, such as goggles and a respirator. Regular equipment maintenance is crucial, including cleaning the sprayer after each use and checking for any damaged parts.
How often should I clean and maintain my electric airless sprayer to ensure it continues to work properly?
To ensure my electric airless sprayer works properly, I clean and maintain it regularly. I recommend cleaning the filters, flushing the system with water, and inspecting the nozzle for blockages. These tips prevent clogs and ensure optimal performance.
Are there any alternative methods to buffing and polishing the painted surface if I don’t have the necessary tools?
If I lack the necessary tools for buffing and polishing the painted surface, alternative methods can be used. These include hand rubbing with a microfiber cloth, using a polishing compound, or applying a spray wax for a glossy finish.
Conclusion
In conclusion, painting your car with an electric airless sprayer can be a highly efficient and effective method. By following the steps outlined in the article and watching the YouTube tutorial, you can achieve professional-looking results.
For example, I recently used an electric airless sprayer to paint my own car and I was amazed at how smooth and even the finish turned out. The sprayer allowed for precise application and the clear coat gave my car a glossy showroom appearance.
With proper maintenance, your electric airless sprayer can provide you with years of use and help you achieve professional-quality paint jobs.