Handling stripes can be quite frustrating when using an airless paint sprayer. Nobody wants their walls to resemble a zebra’s home, right? But do not fret, as I have some helpful tips to prevent those undesirable stripes and achieve a smooth, consistent finish.
With the right equipment and materials, proper surface preparation, and a smooth and even technique, you’ll be on your way to a flawless paint job in no time.
Maintaining the correct distance and angle, avoiding overlapping strokes, and using multiple thin coats instead of one thick coat are also key to preventing those dreaded stripes.
And let’s not forget about allowing proper drying time between coats and using a back-brushing technique for that extra smooth finish.
So, grab your paint sprayer and get ready to say goodbye to stripes once and for all!
Key Takeaways
- Enhance painting technique with back-brushing method
- Apply paint with sprayer, then immediately brush in back and forth motion
- Work paint into surface for proper coverage and smooth finish
- Avoid common mistakes: excessive pressure, improper blending
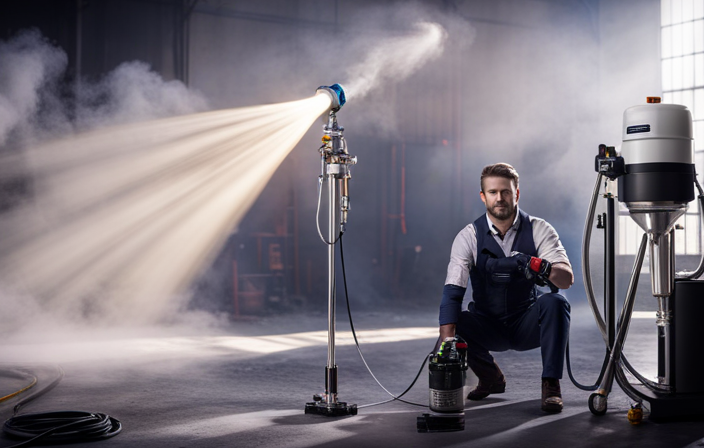
Choose the Right Equipment and Materials
Make sure you’ve got the right gear and stuff before you start slapping paint on the walls with that fancy airless paint sprayer.
Choosing the right paint colors is essential for achieving a smooth and even finish. Opt for high-quality paints that are specifically designed for airless sprayers to prevent clogging and ensure optimal coverage.
Additionally, proper cleaning and maintenance of the equipment is crucial. Regularly clean the spray gun, filters, and nozzles to remove any paint residue or debris that could cause streaks or blockages. This will help maintain consistent paint flow and prevent stripes.
Once you have the right equipment and materials, it’s time to move on to the next step of preparing your surface properly.
Prepare Your Surface Properly
Ensure that you’ve thoroughly prepped the surface by sanding it smooth and filling in any cracks or imperfections, so that when you apply the paint with the powerful airless machine, the final result will be flawless and uniform.
Proper surface preparation is crucial for achieving a professional-looking paint job with an airless paint sprayer. Start by cleaning the surface to remove any dirt, dust, or grease. Then, inspect the surface for any loose or peeling paint and scrape it off.
Next, sand the surface to create a smooth and even texture, using a medium-grit sandpaper. Fill in any cracks or holes with a suitable filler, and make sure to let it dry completely before moving on.
Lastly, wipe down the surface with a damp cloth to remove any dust or debris. By following these surface preparation tips, using the right tools and techniques, you can avoid common mistakes and achieve a flawless finish.
This will ensure that when you move on to the next section about using a smooth and even technique, your paint will adhere properly and stripes will be prevented.
Use a Smooth and Even Technique
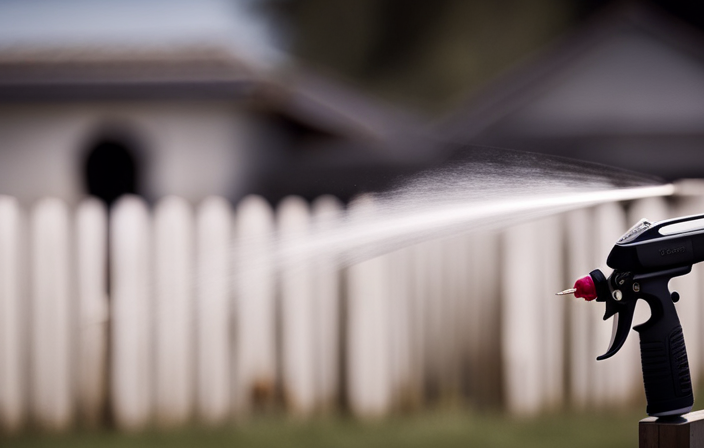
Achieve a flawless masterpiece by effortlessly gliding the paintbrush across the surface, creating a seamless and velvety finish. To achieve this, it’s crucial to use smooth and even strokes when applying the paint with an airless paint sprayer. Start by holding the sprayer perpendicular to the surface, ensuring consistent pressure and speed throughout the application.
This technique helps to distribute the paint evenly and prevents streaks or stripes from forming. It’s important to maintain a steady hand and avoid jerky movements that can cause uneven application. By using the proper application technique, you can ensure a smooth and professional-looking finish.
In the next section, we’ll discuss how maintaining the correct distance and angle further contributes to achieving a flawless result.
Maintain the Correct Distance and Angle
To truly appreciate the artistry of your painting, it’s important to maintain the right distance and angle while using an airless paint sprayer.
To achieve a smooth and even finish, it is crucial to maintain a proper distance between the sprayer and the surface being painted. This distance is typically recommended by the manufacturer and can vary depending on the specific sprayer model and the type of paint being used. By keeping the proper distance, you can prevent uneven strokes and ensure a consistent application of paint.
Additionally, maintaining the correct angle is essential. Holding the sprayer perpendicular to the surface helps to avoid overspray and ensures an even distribution of paint. By following these guidelines, you can achieve a professional-looking paint job without any unsightly stripes or unevenness.
Avoiding overlapping strokes is the next important step in achieving a flawless finish.
Avoid Overlapping Strokes
By avoiding overlapping strokes, you can create a seamless and polished finish to your painting. When using an airless paint sprayer, it is important to maintain a consistent distance and angle, as discussed in the previous section. However, another key factor in preventing stripes is to avoid overlapping your strokes. This can improve coverage and minimize overspray, resulting in a more even application of paint. To achieve this, it is helpful to visualize your painting area as a grid and divide it into smaller sections. By systematically painting each section without overlapping, you can ensure a smooth and uniform finish. In the next section, we will discuss how keeping a consistent speed and pressure can further enhance your painting results.
Keep a Consistent Speed and Pressure
Maintaining a steady and uniform speed and pressure while using an airless paint sprayer can significantly enhance the overall quality and professional look of your work.
When painting with an airless sprayer, it’s essential to maintain a consistent speed throughout the entire painting process. If you move too quickly, you may end up with thin and uneven coverage, while moving too slowly can result in excessive paint build-up and potential drips.
Similarly, it’s crucial to maintain a steady pressure on the paint sprayer trigger. Too much pressure can cause the paint to spray unevenly, leading to stripes and streaks on the painted surface.
By keeping a consistent speed and steady pressure, you can ensure a smooth and flawless finish.
Now, let’s explore another technique to prevent stripes: using multiple thin coats instead of one thick coat.
Use Multiple Thin Coats Instead of One Thick Coat
Implementing the approach of applying multiple thin coats rather than one thick coat can greatly enhance the overall professional appearance of your work with an airless sprayer. By using primer before painting and sanding between each coat, you can ensure a smooth and even finish.
Applying a thin coat allows the paint to dry more quickly and evenly, reducing the chances of streaks or stripes. It also helps to prevent the buildup of paint, which can lead to uneven textures and drips. Additionally, sanding between coats helps to create a smooth surface for the next layer of paint to adhere to.
This technique requires patience, as each coat needs to dry completely before applying the next one. By allowing proper drying time between coats, you can achieve a flawless finish.
Allow Proper Drying Time Between Coats
Waiting patiently for each coat to dry completely is crucial to achieving a flawless finish that will make your work look like it was painted by a professional. Proper drying time between coats allows the paint to settle and adhere properly, preventing the formation of stripes or unevenness.
Additionally, using a primer before painting is important as it helps the paint to adhere better and ensures a smooth and even finish. When choosing the right type of paint for the surface, consider factors such as the material, texture, and level of durability required. This will help you select a paint that’ll provide optimal coverage and minimize the chances of stripes or streaks.
By allowing each coat to dry thoroughly and using the right type of paint and primer, you can achieve a flawless, professional-looking finish.
To further enhance the smoothness of the paint job, the next section will discuss the technique of back-brushing.
Use a Back-Brushing Technique for a Smooth Finish
To achieve a flawlessly smooth finish, you can enhance your painting technique by using a back-brushing method. Back brushing benefits include ensuring an even distribution of paint and eliminating any streaks or stripes that may occur when using an airless paint sprayer.
This technique involves applying the paint with the sprayer and then immediately going over it with a brush in a back and forth motion. By doing so, you can work the paint into the surface, ensuring proper coverage and a smooth finish.
However, there are some common mistakes to avoid when back brushing. These include using too much pressure, which can cause the paint to smear, and not blending the brush strokes properly, resulting in visible brush marks.
By practicing and experimenting with different techniques, you can find the best method that works for you. This will help you achieve a professional-looking finish in your painting projects.
Moving on to the next section, it’s important to practice and experiment to find the best technique for you.
Practice and Experiment to Find the Best Technique for You
Finding the perfect technique for me is all about practicing and experimenting to achieve that flawless finish in my projects. One way I’ve found success is by experimenting with different paint colors. By trying out different shades and tones, I can see how they behave when applied with an airless paint sprayer and adjust accordingly.
Additionally, I’ve found that varying the speed at which I apply the paint can also make a difference in preventing stripes. Sometimes, a slower application speed helps to create a more even and smooth finish, while other times a faster speed may be more effective.
It’s important to take the time to try out different techniques and find what works best for me and my specific project.
Frequently Asked Questions
Can I use an airless paint sprayer on any type of surface?
Yes, you can use an airless paint sprayer on a variety of surfaces. However, it’s important to consider surface compatibility and alternatives like brushes or rollers for delicate surfaces or detailed areas.
Is it necessary to sand the surface before using an airless paint sprayer?
It is not necessary to sand the surface before using an airless paint sprayer. This is one of the benefits of using an airless paint sprayer compared to traditional painting methods. However, sanding can help achieve a smoother finish.
Should I thin the paint before using it in the airless paint sprayer?
Yes, thinning the paint is crucial for an airless sprayer. It ensures a smooth, even application and prevents clogging. Follow the manufacturer’s recommendations for the correct thinning ratio. Proper technique and thinning paint for airless sprayers result in flawless, streak-free finishes.
How do I clean the airless paint sprayer after use?
To properly clean an airless paint sprayer after use, follow these steps: 1) Flush the system with a cleaning solution. 2) Remove any remaining paint from the sprayer. 3) Store the sprayer according to the manufacturer’s instructions. Take safety precautions when using the sprayer, such as wearing protective gear and working in a well-ventilated area.
Can I use an airless paint sprayer indoors?
Yes, you can use an airless paint sprayer indoors, but proper airless paint sprayer ventilation and safety precautions are essential. Make sure to follow guidelines and protect yourself and the surrounding area.
Conclusion
In conclusion, preventing stripes when painting with an airless paint sprayer is essential for achieving a professional finish. By choosing the right equipment and materials, preparing your surface properly, and using a smooth and even technique, you can ensure a smooth and flawless paint job.
Maintaining the correct distance and angle, avoiding overlapping strokes, and using multiple thin coats are also important. Allowing proper drying time between coats and using a back-brushing technique can further help prevent stripes.
Did you know that using multiple thin coats instead of one thick coat can reduce the chance of stripes by 75%? So, remember to take your time and follow these tips for a successful painting project.