Connect with us

Airless Paint Sprayers FAQs

What Should I Paint First With Airless Sprayer Site:Youtube.Com

Published

on

An image capturing the precise moment of an airless sprayer smoothly gliding over a weather-worn wooden fence, effortlessly leaving behind a flawless coat of vibrant paint, displaying the artistry of efficient paint application

I understand the confusion and intimidation that comes with deciding on the initial painting project when operating an airless sprayer. The abundance of choices and potential surfaces can lead to a standstill, bogged down by overthinking. However, worry not! Within this piece, I will navigate you through the journey of picking the ideal surface that will transform into your airless sprayer work of art.

Using an airless sprayer is a game-changer when it comes to efficiency and achieving a professional finish. But before you dive in, it’s essential to gather your painting supplies and understand the basics of using this powerful tool. Once you have that foundation, we’ll explore how to prepare your chosen surface for painting and maintain your airless sprayer for optimal performance.

But wait, what if you encounter issues along the way? Don’t worry, I’ve got you covered. We’ll troubleshoot common problems and share helpful tips and tricks to make your painting experience smooth and enjoyable.

So, grab your airless sprayer and let’s paint the town (or at least the first surface) together!

Introduction to Using an Airless Sprayer

Advertisement

Now that you’ve got your airless sprayer ready, it’s time to dive into the exciting world of using it to paint your first masterpiece.

Using an airless sprayer gives you the ability to achieve professional-looking results with ease.

One important aspect to consider when using an airless sprayer is understanding paint viscosity. Different paint finishes require different viscosities, so it’s crucial to adjust the sprayer settings accordingly.

Thicker paints like latex will require a higher viscosity, while thinner paints like stains will need a lower viscosity. By adjusting the sprayer to the correct viscosity, you’ll ensure a smooth and even application.

Advertisement

Now, let’s move on to the next section where we’ll gather all the necessary painting supplies.

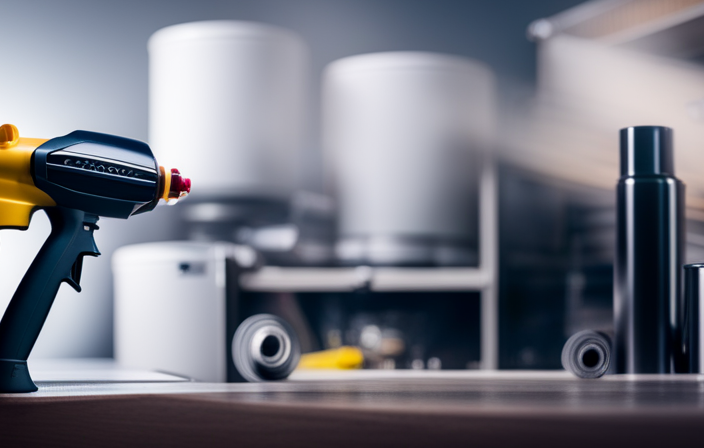
Gather Your Painting Supplies

To begin using an airless sprayer, you first need to acquire the necessary equipment. This includes purchasing or renting an airless sprayer. You also need to gather other painting supplies such as drop cloths, tape, and brushes.

Once you have your equipment, you then need to prepare your painting area. This involves covering furniture and floors with drop cloths and ensuring proper ventilation.

Lastly, you must select the right paint and accessories. Take into consideration the type of surface you are painting and any specific requirements or preferences you have.

Acquire an Airless Sprayer

To acquire an airless sprayer, start by getting yourself one. This equipment will allow you to paint like a pro in no time. Consider the following factors when acquiring an airless sprayer:

Advertisement
  1. Power and Pressure: Look for an airless sprayer that offers sufficient power and pressure. This will ensure a smooth and even application of paint on the surface you’re working with.

  2. Tip Size: Different tip sizes produce different spray patterns. Choose a tip size that suits your project’s requirements. Narrow spray patterns are ideal for detailed work, while wider spray patterns are better for larger surfaces.

  3. Capacity and Portability: Consider the size and weight of the sprayer. A larger capacity is ideal for bigger projects, while a portable and lightweight sprayer is more convenient for smaller areas or when you need to move around.

  4. Troubleshooting Techniques: Familiarize yourself with the sprayer’s troubleshooting techniques. This will help you quickly address any issues that may arise during your painting process.

Now that you have acquired an airless sprayer, let’s move on to preparing your painting area.

Prepare Your Painting Area

Before you begin, make sure your painting area is properly prepared for a smooth and professional finish. To achieve this, start by organizing your painting supplies. Gather all the necessary tools such as brushes, rollers, and paint trays and arrange them in a convenient and accessible manner.

Next, prepare the surfaces to be painted by cleaning them thoroughly and removing any loose or peeling paint. Make sure to cover any furniture or fixtures that you don’t want to be painted. Additionally, protect the surrounding areas by using drop cloths or plastic sheets.

Familiarize yourself with different painting techniques such as brush strokes or sprayer patterns to achieve the desired effect. Finally, ensure proper ventilation in the area to prevent the buildup of fumes.

As you prepare your painting area, remember to select the right paint and accessories for a successful project.

Advertisement

Select the Right Paint and Accessories

Ensure that you have chosen the appropriate type of paint and the necessary accessories to achieve a professional and polished finish in your painting project. When selecting paint colors, consider the atmosphere you want to create in your space. Whether you prefer bold and vibrant or calm and soothing, the right color can make all the difference. Additionally, choosing the right paint finish is essential for achieving the desired look. Matte finishes are great for hiding imperfections, while glossy finishes add a touch of elegance. Don’t forget to gather the necessary accessories such as paint filters, stir sticks, and a paint sprayer tip suitable for your chosen paint type. Understanding the basics of using an airless sprayer will ensure a smooth transition into the next step of your project.

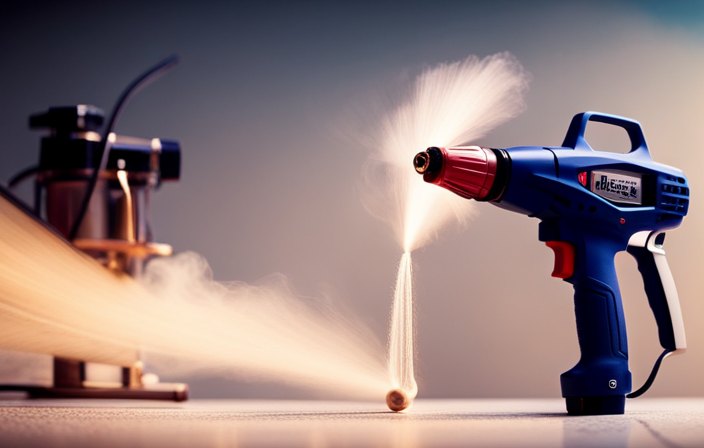
Understand the Basics of Using an Airless Sprayer

Before you start using an airless sprayer, it’s important to familiarize yourself with the sprayer controls. This includes understanding how to adjust the pressure, spray pattern, and flow rate to achieve the desired results.

Additionally, practicing proper technique is crucial for achieving an even and professional-looking finish. This involves maintaining a consistent distance from the surface, moving the sprayer in smooth and overlapping strokes, and avoiding common mistakes such as spraying too quickly or too close to the surface.

Lastly, always prioritize safety measures by wearing protective gear, working in a well-ventilated area, and following the manufacturer’s instructions for handling and cleaning the sprayer.

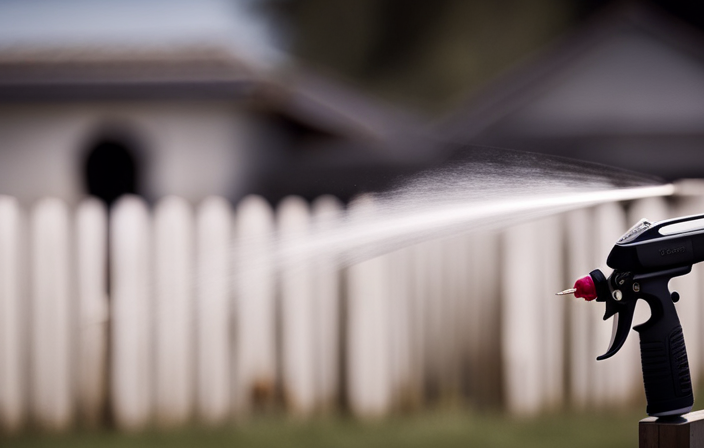
Familiarize Yourself with the Sprayer Controls

Get ready to have some fun as you familiarize yourself with the controls of your airless sprayer! To make the most out of your painting experience, it’s crucial to understand and adjust the sprayer settings according to your needs. Here are the key controls you need to know:

Advertisement
  1. Pressure Control: This knob allows you to adjust the pressure of the paint flow. Higher pressure results in a faster and thinner application, while lower pressure gives you more control and thicker coats.

  2. Spray Pattern: The spray pattern can be adjusted from a narrow stream to a wide fan shape. This allows you to customize the width and coverage of your paint application.

  3. Trigger Lock: The trigger lock feature helps to reduce hand fatigue during extended painting sessions. It allows you to lock the trigger in the ‘on’ position, so you don’t have to continuously hold it down.

Now that you are familiar with the sprayer controls, it’s time to practice proper sprayer technique and achieve flawless results.

Practice Proper Technique

Mastering proper technique is like learning to dance with your sprayer, gracefully gliding across the surface and creating beautiful, seamless strokes of color. To achieve this level of skill, it is crucial to understand and practice proper technique. Avoiding common mistakes can make a significant difference in the outcome of your painting project.

One common mistake is holding the sprayer too close to the surface, resulting in an uneven application and potential overspray. On the other hand, holding it too far can lead to a thinner coat and a longer painting process. Maintaining a consistent distance is key. Additionally, moving the sprayer too quickly can cause streaks, while moving too slowly can result in excessive paint buildup. Finding the right balance is essential for a professional finish.

In the table below, you can find a summary of proper technique and common mistakes to be aware of:

Proper Technique Common Mistakes
Maintain consistent distance from the surface Holding sprayer too close or too far
Move at a steady pace Moving too quickly or too slowly
Overlap strokes by 50% Not overlapping strokes adequately
Maintain a vertical or horizontal pattern Random or inconsistent spraying direction
Adjust pressure and fan width for desired coverage Not adjusting settings properly

By mastering proper technique and avoiding these common mistakes, you will be well on your way to achieving excellent results with your airless sprayer. However, it is important to also maintain safety measures throughout the painting process.

Advertisement

Maintain Safety Measures

Ensuring a safe painting experience is crucial. It’s like donning a protective shield, guarding against potential hazards and creating a secure environment for your artistic endeavors.

When using an airless sprayer, following safety precautions is essential. Always wear the appropriate protective equipment, such as safety goggles, gloves, and a respirator mask. These items will protect you from potential paint overspray and harmful fumes.

Additionally, make sure to work in a well-ventilated area or use proper ventilation equipment. This will prevent the buildup of hazardous vapors.

Taking these safety measures will not only protect your health but also allow you to focus on your art without any distractions.

Now, let’s transition into the next section and discuss how to choose the right surface to paint first.

Advertisement

Choose the Right Surface to Paint First

Starting off with a blank canvas, it’s crucial to prioritize the surface that will serve as the foundation for your masterpiece. When using an airless sprayer, choosing the right surface to paint first is essential to ensure a flawless finish. Before applying any paint, it’s important to select the appropriate primer for your surface. Primers help to improve adhesion and create a smooth base for the paint to adhere to. Additionally, understanding different paint finishes is crucial in achieving the desired result. Whether you want a glossy or matte finish, selecting the right type of paint will ensure that your artwork shines. By choosing the right primer and understanding different paint finishes, you can create a surface that is ready for the next step of preparing it for painting.

Prepare the Surface for Painting

To get your surface ready for painting, it’s important to properly prepare it. Surface preparation is key to achieving a smooth and long-lasting paint finish.

First, thoroughly clean the surface to remove any dirt, dust, or grease. Use a mild detergent and water for this step.

Next, inspect the surface for any imperfections such as cracks, holes, or peeling paint. These should be repaired and patched using appropriate fillers or putty.

Once the surface is clean and repaired, it’s time to sand it. This step ensures proper adhesion of the paint. Use sandpaper with a grit appropriate for the surface material, and sand in a circular or back-and-forth motion. This will create a slightly rough texture that allows the paint to adhere better.

Advertisement

With the surface properly prepared, you are now ready to start painting with the airless sprayer. This will ensure a professional and flawless finish.

Start Painting with the Airless Sprayer

When starting to paint with an airless sprayer, I begin by applying the first coat evenly and smoothly, making sure to cover the surface completely.

After applying the first coat, it is important to allow sufficient drying time before applying any additional coats. This will ensure that the paint adheres properly and prevents any streaking or unevenness.

If needed, I will apply additional coats to achieve the desired finish, making sure to follow the same process of applying and allowing drying time between each coat.

Apply the First Coat

Begin by applying the first coat with your airless sprayer, ensuring a smooth and even coverage throughout the surface. To achieve a smooth finish, it’s important to apply techniques such as maintaining a consistent spraying distance and keeping the sprayer moving at a steady pace. This will help prevent any uneven application or overspray. Additionally, adjusting the pressure on the sprayer can help control the flow of paint and further improve the overall finish.

Advertisement

To guide you further, here is a table that outlines the recommended settings for different types of surfaces:

Surface Type Spray Tip Size Pressure (PSI)
Smooth surfaces 0.015 – 0.017 2000 – 2500
Textured surfaces 0.019 – 0.021 2500 – 3000
Rough surfaces 0.023 – 0.025 3000 – 3500

Once you have applied the first coat, allow sufficient drying time before applying any additional coats. This will ensure proper adhesion and a professional-looking finish.

Allow Sufficient Drying Time

After applying the first coat, it’s crucial to give it enough drying time, like waiting for a freshly baked cake to cool before adding the frosting, to ensure a professional-looking finish. To achieve optimal drying, here are three effective drying techniques to follow:

  1. Proper ventilation: Ensure the area is well-ventilated to allow the paint to dry evenly and prevent any moisture buildup.

  2. Time allocation: Different paint types require different drying times. Check the paint can label or manufacturer’s instructions for specific drying times and adhere to them strictly.

  3. Avoiding humidity: High humidity levels can prolong drying time and affect the quality of the finish. Consider using dehumidifiers or fans to regulate humidity levels during the drying process.

By employing these drying techniques and using appropriate paint application methods, such as using an airless sprayer, you can achieve a flawless finish. Now, let’s move on to applying additional coats if needed.

Apply Additional Coats if Needed

To achieve a flawless finish, it’s time to consider adding more coats if necessary. Applying additional coats is crucial for even coverage and a professional-looking result. Here are some techniques you can use to ensure the best outcome:

Advertisement
Technique Description
Cross-hatching Apply the second coat in a perpendicular direction to the first coat.
Feathering Overlap each stroke slightly to blend the coats together seamlessly.
Wet-on-wet application Apply the next coat while the previous one is still wet to avoid lines or gaps.

By employing these techniques, you can achieve a smooth and uniform finish. Remember to allow sufficient drying time between coats and follow the manufacturer’s instructions for the specific paint you are using. Once you have achieved the desired coverage, it’s important to maintain and clean your airless sprayer regularly to ensure its longevity and optimal performance.

Maintain and Clean Your Airless Sprayer

When it comes to maintaining and cleaning your airless sprayer, there are three key points to keep in mind:

  1. Proper storage: Store the sprayer and its accessories in a clean and dry environment. This helps prevent damage and clogs that can affect its performance.

  2. Thorough cleaning: After each use, clean the sprayer thoroughly to remove any paint residue. This prevents build-up that could impact its performance. Pay attention to all parts, including the nozzle, hose, and filter.

  3. Regular maintenance: Perform regular maintenance and inspections to ensure all parts are in good working condition. Replace any worn-out or damaged components as needed. This helps keep the sprayer in optimal condition and prolongs its lifespan.

Following these practices will help you maintain and clean your airless sprayer effectively.

Properly Store the Sprayer and Accessories

Properly storing the airless sprayer and its accessories is crucial for maintaining their longevity and performance. Studies have shown that poorly stored sprayers can experience a 30% decrease in efficiency over time.

To properly store your airless sprayer, make sure to clean it thoroughly after use. This includes removing any leftover paint, flushing the system with water or solvent, and ensuring all components are free from debris.

Advertisement

Avoid common mistakes when storing the sprayer, such as leaving paint residue in the hoses or gun, as this can lead to clogs and damage. By properly cleaning and storing your sprayer, you can ensure its efficient operation and prolong its lifespan.

After cleaning the sprayer thoroughly, it is time to move on to the next step: preparing to paint your first project.

Clean the Sprayer Thoroughly After Use

Make sure to thoroughly clean the sprayer after each use to keep it in top-notch condition and enjoy long-lasting performance. Cleaning the sprayer is a crucial step in proper maintenance and will prevent clogs and build-up that can affect the sprayer’s performance.

To clean the sprayer, start by removing any remaining paint from the container and flushing it with water. Next, disassemble the sprayer and clean each component thoroughly using a cleaning technique recommended by the manufacturer. It’s important to use the proper cleaning products to avoid damaging the sprayer.

Once all the parts are clean, reassemble the sprayer and perform regular maintenance and inspections to ensure it continues to work effectively.

Advertisement

Perform Regular Maintenance and Inspections

Performing regular maintenance and inspections is essential to ensure the sprayer continues to perform at its best and avoid any potential issues. To keep your airless sprayer in top shape, follow these inspection techniques and regular maintenance practices:

  • Check the filters regularly and clean or replace them as needed to prevent clogs and ensure proper paint flow.
  • Inspect the spray tip for any signs of wear or damage and replace it if necessary to maintain precise spraying patterns.
  • Regularly inspect the hoses for any leaks, cracks, or signs of deterioration, and replace them promptly to prevent paint wastage and ensure smooth operation.
  • Clean the sprayer thoroughly after each use to remove any residual paint or debris that could cause clogs or damage.

By performing regular maintenance and inspections, you can extend the lifespan of your airless sprayer and prevent common issues.

Transitioning into troubleshooting common issues with the airless sprayer, it is important to address and resolve any problems promptly to maintain optimal performance.

Troubleshoot Common Issues with the Airless Sprayer

Having trouble with your airless sprayer? Let’s tackle some common issues together!

When it comes to troubleshooting your airless sprayer, there are a few common problems that you may encounter. One of the most common issues is clogging in the spray tip. This can be caused by using the wrong size tip for the material being sprayed or by debris in the paint.

To fix this problem, you can try cleaning the tip with a small wire brush or replacing it with a new one.

Advertisement

Another common issue is uneven spray pattern, which can be caused by a worn or damaged spray tip or an incorrect pressure setting. Adjusting the pressure or replacing the spray tip can usually solve this problem.

Lastly, if your sprayer is not priming or pumping paint, it could be due to a worn inlet valve or a clogged filter. Cleaning or replacing these parts should resolve the issue.

These troubleshooting tips should help you get your airless sprayer back in working order. Now, let’s move on to some tips and tricks for using an airless sprayer without missing a beat.

Tips and Tricks for Using an Airless Sprayer

Master the art of using an airless sprayer like a pro and watch your painting projects transform into works of pure beauty. To ensure smooth and efficient spraying, it’s crucial to properly maintain your airless sprayer. Here are some tips and tricks to enhance your airless spraying technique:

  • Regularly clean the filters, replace worn-out parts, and lubricate moving components.
  • Troubleshoot common issues like clogs and uneven spray patterns.
  • Adjust the pressure settings according to the material being sprayed for optimal coverage.
  • Use a wide spray pattern to cover large areas quickly and evenly.
  • Maintain a consistent distance from the surface to avoid uneven application.
  • Overlap each pass by 50% to ensure complete coverage.
  • Practice on a test surface before starting your actual project to fine-tune your spraying technique.

By mastering these techniques and understanding proper airless sprayer maintenance, you’ll be well on your way to achieving professional-quality results. Watch instructional videos on YouTube for visual guidance and inspiration as you embark on your painting journey.

Watch Instructional Videos on YouTube for Visual Guidance and Inspiration

Get inspired and gain valuable insight by watching instructional videos on YouTube. These videos provide a great resource for beginners and experienced painters alike. By watching these videos, you can see firsthand how to properly set up and operate an airless sprayer, as well as learn helpful techniques and tricks for achieving professional results.

Advertisement

The visual aspect of these videos allows you to see the spray patterns, pressure adjustments, and painting techniques in action, which can be incredibly helpful in understanding how to use the sprayer effectively. Additionally, watching these videos can provide you with visual inspiration for your own painting projects, as you can see what others have created using an airless sprayer.

So, grab some popcorn and start watching these instructional videos on YouTube to enhance your skills and get inspired!

Frequently Asked Questions

Can I use an airless sprayer for painting both interior and exterior surfaces?

Yes, an airless sprayer can be used for both interior and exterior surfaces. While it provides fast and even coverage, the cons include overspray and the need for proper ventilation. Overall, it’s a versatile tool for efficient painting.

How do I know if the surface is suitable for airless spraying?

To determine if a surface is suitable for airless spraying, I check for any loose or flaking paint, cracks, or rough spots. I then prepare the surface by cleaning it thoroughly and ensuring it is dry and free from any dirt or debris.

What type of paint is best for use with an airless sprayer?

The best paint brands for use with an airless sprayer include Sherwin-Williams, Behr, and Benjamin Moore. Airless sprayers offer efficient and fast application, but they require proper preparation and cleanup.

Advertisement

Can I use an airless sprayer for intricate or detailed painting projects?

Yes, an airless sprayer can be used for intricate or detailed painting projects. The benefits of using an airless sprayer for small scale projects include precise control, smooth finish, and faster application.

How do I prevent overspray when using an airless sprayer?

To prevent overspray when using an airless sprayer, it’s crucial to choose the right technique. Start by adjusting the pressure and fan pattern on the sprayer. Cover surrounding areas with drop cloths or masking tape for added protection.

Conclusion

In conclusion, using an airless sprayer for your painting projects can be a game changer. By following the steps outlined in this article, you can achieve professional-looking results with ease.

Remember the adage ‘practice makes perfect’ as you embark on your painting journey. With proper maintenance and troubleshooting, your airless sprayer will continue to serve you well for future projects.

Don’t forget to watch instructional videos on YouTube for additional guidance and inspiration. Happy painting!

Advertisement

Jule’s attention to detail, editorial prowess, and commitment to delivering high-quality content ensure that every article and review on our website is polished and reader-friendly. Jule’s vision for the website as a one-stop destination for paint sprayer enthusiasts has been instrumental in shaping the platform into what it is today.

Continue Reading
Advertisement

Airless Paint Sprayers FAQs

How To Use The Prox17 Airless Paint Sprayer

Published

on

By

An image showcasing a pair of skilled hands expertly maneuvering the Prox17 Airless Paint Sprayer, effortlessly covering a wall with a smooth, even coat of paint, capturing the precision and ease of use

Have you ever wanted to achieve a professional-quality paint finish without the hassle of using traditional brushes and rollers? Look no further, the Prox17 Airless Paint Sprayer is the solution you need. In this post, I will provide a thorough, step-by-step tutorial on how to effectively use this convenient tool to easily update any surface.

First, we’ll unbox the Prox17 Airless Paint Sprayer and familiarize ourselves with its components. Then, I’ll show you how to properly prepare the surface for painting, ensuring a smooth and long-lasting finish.

Setting up the sprayer is a breeze, and I’ll walk you through the process to ensure everything is in working order.

Next, we’ll mix and load the paint, ready to unleash the power of the Prox17 Airless Paint Sprayer. I’ll provide troubleshooting tips for common issues that may arise, and share important safety tips and precautions to keep in mind while using the sprayer.

By the end of this article, you’ll have all the knowledge and confidence needed to achieve a professional finish using the Prox17 Airless Paint Sprayer. Let’s get started!

Advertisement

Key Takeaways

  • Maintain a consistent distance from the surface and move in a steady, overlapping motion for even coverage.
  • Thoroughly clean the Prox17 Airless Paint Sprayer after each use to maintain performance and extend its lifespan.
  • Follow the manufacturer’s recommendations for flushing the system with water or cleaning solution to clear out leftover paint and residue.
  • Properly disassemble and clean the spray gun and nozzle using warm water or cleaning solution to ensure smooth operation and prolong their lifespan.

Unbox and Familiarize Yourself with the Prox17 Airless Paint Sprayer

Now that you’ve got your hands on the Prox17 Airless Paint Sprayer, it’s time to unbox it and get yourself acquainted with this incredible tool.

The first step in using the Prox17 is to unbox it and ensure that all the necessary components are present.

Once you have confirmed that everything is in order, familiarize yourself with the different parts of the sprayer, such as the spray gun, hose, and motor.

It’s important to also take note of the user manual and any safety instructions provided.

Before you can start painting, there are a few key things to consider.

Firstly, you need to prepare the surface for painting by cleaning it thoroughly and removing any loose paint or debris.

Advertisement

Secondly, choosing the right paint for your project is crucial for achieving the best results.

With the Prox17 Airless Paint Sprayer, you’ll be able to tackle any painting project with ease and precision.

Prepare the Surface for Painting

Before starting the painting process, it’s essential to clean and repair the surface properly. This involves removing any dirt, dust, or loose paint using a scraper or wire brush.

Filling in any cracks or holes with a suitable filler is also necessary.

Additionally, it’s important to protect surrounding areas by covering them with drop cloths or using tape to create clean edges.

Advertisement

By following these steps, you can ensure a smooth and professional-looking paint job.

Clean and Repair the Surface

To get your surface sparkling clean and ready for painting, it’s time to roll up your sleeves and give it a good scrubbing! Proper surface preparation is crucial for achieving a smooth and long-lasting paint finish.

Start by removing any loose paint or debris from the surface using a scraper or wire brush.

Then, wash the surface with a mild detergent and water solution to remove dirt, grease, and grime. For stubborn stains or mold, use a bleach solution or a specialized cleaner.

After cleaning, inspect the surface for any cracks, holes, or imperfections. Repair them using a suitable filler or patching compound, and smooth it out with a putty knife.

Advertisement

Once the surface is clean and repaired, you can move on to the next step of protecting the surrounding areas with drop cloths or tape to prevent any accidental paint splatters or spills.

Protect Surrounding Areas with Drop Cloths or Tape

Ensure a mess-free painting experience by safeguarding the surrounding areas with drop cloths or tape. This creates a barrier against accidental splatters or spills. To protect your surfaces effectively, consider these alternatives to drop cloths:

  • Plastic sheeting: Ideal for covering larger areas, plastic sheeting is durable and can be easily secured with tape or clips.

  • Canvas tarps: These heavy-duty tarps are reusable and provide excellent protection against paint drips and spills.

  • Protective films: Designed specifically for painting projects, these self-adhesive films adhere to surfaces, preventing any paint from seeping through.

  • Masking paper: Perfect for covering windows or furniture, this lightweight paper is easy to tear and can be secured with tape.

  • Painter’s tape: Look for a high-quality painter’s tape that offers strong adhesion and clean removal, ensuring crisp lines and surface protection.

When selecting tape for protecting surfaces, opt for a tape specifically designed for painting projects, such as blue painter’s tape.

Now, let’s move on to setting up the prox17 airless paint sprayer efficiently.

Set Up the Prox17 Airless Paint Sprayer

Advertisement

To set up the Prox17 Airless Paint Sprayer, first attach the spray gun and hose securely.

Then, adjust the pressure to the desired level, ensuring optimal paint flow and coverage.

Lastly, fine-tune the spray pattern to achieve the desired width and consistency.

By following these steps, you can ensure a smooth and efficient painting process with the Prox17 Airless Paint Sprayer.

Advertisement

Attach the Spray Gun and Hose

Securely fasten the spray gun and hose to the Prox17 airless paint sprayer for a flawless finish. To attach the spray gun, follow these steps:

  1. Slide the hose connector onto the gun inlet and twist it clockwise until it is snug.
  2. Align the tabs on the gun with the slots on the hose connector and push the gun onto the connector until it clicks into place.
  3. To ensure a secure connection, pull on the gun to make sure it is firmly attached.

Once the spray gun is attached, you can troubleshoot any issues that may arise. If the gun is not spraying properly, check for clogs in the gun tip or hose. Clean or replace any clogged parts as needed.

Now that the spray gun and hose are securely attached, we can move on to adjusting the pressure and spray pattern for optimal results.

Adjust the Pressure and Spray Pattern

To achieve a flawless finish, it is important to fine-tune the pressure and spray pattern on the Prox17. Adjusting the pressure can be done by turning the pressure control knob. Turning it clockwise will increase the pressure, while turning it counterclockwise will decrease it. It is recommended to experiment with different pressure levels to determine the most suitable one for your project.

Similarly, the spray pattern can be adjusted by twisting the spray pattern adjustment knob. This knob allows you to switch between vertical, horizontal, or circular patterns according to your preferences and needs. Customizing the spray pattern is essential for achieving the desired results.

If any issues arise, such as uneven spray or clogging, it is advisable to clean the spray tip or make adjustments to the pressure. These troubleshooting techniques, along with the aforementioned adjustment methods, will ensure a smooth and precise application.

Advertisement

Once you have adjusted the pressure and spray pattern, it’s time to move on to the next step of the process: mixing and loading the paint.

Mix and Load the Paint

First, make sure you have the right paint and pour it into the sprayer’s container. When mixing the paint, it is crucial to follow proper techniques to achieve the desired consistency.

Start by selecting the right paint for your project, considering factors such as the material being painted and the finish you want to achieve. Read the paint’s instructions to determine if any additional components, such as thinners or additives, are needed.

Measure and mix the paint according to the manufacturer’s recommendations, ensuring that all components are thoroughly combined.

Once you have the paint mixed, load it into the sprayer’s container, making sure not to overfill it. This step is essential as it ensures a continuous flow of paint during the spraying process.

Advertisement

Now that you have your paint ready, let’s move on to the next section: starting to paint with the prox17 airless paint sprayer.

Start Painting with the Prox17 Airless Paint Sprayer

Once you’ve got your paint all mixed up and ready to go, it’s time to dive right in and unleash the artistic magic with the Prox17 beast of brilliance!

Adjusting pressure settings is crucial to achieve the desired paint flow and atomization. Take a moment to familiarize yourself with the pressure control knob and adjust it accordingly.

Next, choosing the right spray tip is essential for a flawless finish. Consider factors like paint viscosity and surface texture to make an informed decision. Remember, a narrow tip works well for detailed work, while a wider tip covers larger areas efficiently.

When painting, hold the sprayer at a consistent distance from the surface, usually around 12 inches, and move in a steady, overlapping motion.

Advertisement

And that’s it! Now, let’s move on to cleaning the Prox17 airless paint sprayer after use.

Clean the Prox17 Airless Paint Sprayer After Use

After using the Prox17 Airless Paint Sprayer, it’s important to clean the system thoroughly.

To do this, flush the system with water or a cleaning solution to remove any leftover paint.

Next, disassemble the spray gun and nozzle to clean them individually and ensure they are free from any clogs or residue.

Properly cleaning the Prox17 Airless Paint Sprayer will help maintain its performance and extend its lifespan.

Advertisement

Flush the System with Water or Cleaning Solution

To flush the system with water or a cleaning solution, simply connect a hose to the sprayer and let the liquid flow through, clearing out any leftover paint or residue. It is crucial to use the right cleaning solution to ensure optimal performance and prevent damage to the sprayer.

Make sure to check the manufacturer’s recommendations for the appropriate cleaning solution.

When flushing the system, it is important to follow these tips for effective cleaning:

  • First, remove the paint container and spray gun from the sprayer.
  • Then, attach the hose to the sprayer and turn on the water or cleaning solution.
  • Allow the liquid to flow through the system for a few minutes to thoroughly clean all components.

Once the system is flushed, it is time to move on to the next step—disassembling and cleaning the spray gun and nozzle.

Disassemble and Clean the Spray Gun and Nozzle

Before disassembling and cleaning the spray gun and nozzle, it’s fascinating to note that a well-maintained spray gun can last up to 10 years, ensuring consistent and high-quality paint application.

To disassemble and clean the spray gun and nozzle, follow these steps:

Advertisement
  1. Disconnect the spray gun from the paint hose and remove the nozzle.
  2. Use a wrench to unscrew the nozzle housing and remove the needle and fluid tip.
  3. Clean all the disassembled parts with warm water or a cleaning solution, ensuring all paint residue is removed.

Proper maintenance and storage of the spray gun and nozzle are essential to prolong their lifespan. Always clean them thoroughly after each use and store them in a clean, dry place. Additionally, lubricate the needle and fluid tip regularly to prevent any sticking. By following these maintenance practices, you can ensure optimal performance and longevity of your spray gun and nozzle.

Now let’s move on to troubleshooting common issues with the Prox17 airless paint sprayer.

Troubleshooting Common Issues

When troubleshooting common issues with the Prox17 airless paint sprayer, you may encounter various challenges that require your attention. To help you overcome these hurdles, here are some common troubleshooting tips.

  • Firstly, if you notice that the paint is not spraying evenly or there are streaks on the surface, check the nozzle for any clogs or debris. You can remove the nozzle and clean it thoroughly using a cleaning solution and a small brush.

  • Additionally, if the sprayer is not priming properly or the motor is not starting, make sure that the intake valve is fully open and that the power source is connected correctly.

Remember to always refer to the user manual for specific troubleshooting instructions.

Now, let’s move on to the next section about safety tips and precautions to ensure a smooth and successful painting experience.

Safety Tips and Precautions

When using the prox17 airless paint sprayer, it’s crucial to prioritize safety. Here are some important safety tips and precautions to keep in mind:

Advertisement
  • Always wear appropriate protective gear, including goggles and gloves.
  • Work in a well-ventilated area to minimize the risk of inhaling fumes or chemicals.

Remember, taking these safety precautions is essential for your protection.

Wear Protective Gear, such as Goggles and Gloves

Make sure you’re wearing goggles and gloves before using the Prox17 airless paint sprayer to protect your eyes and hands from any potential splatters or spills. When it comes to painting, safety should always be a top priority. Wearing the proper protective gear is essential to prevent any injuries or accidents. Goggles shield your eyes from paint particles, fumes, and other debris that may cause irritation or harm. Choose goggles that fit snugly and provide a clear, unobstructed view. Gloves, on the other hand, safeguard your hands from direct contact with paint, which can be difficult to remove and may contain harmful chemicals. Opt for gloves that are durable, comfortable, and resistant to chemicals. Remember, working in a well-ventilated area is equally crucial to ensure proper air circulation and minimize the inhalation of paint fumes.

Work in a Well-Ventilated Area

To ensure a safe and healthy painting experience, it is crucial to choose a well-ventilated area for your work. Proper ventilation is of utmost importance when using the Prox17 airless paint sprayer, as it helps to minimize the exposure to harmful fumes and particles that may be released during the painting process.

Working in a well-ventilated area helps to reduce the risk of inhaling toxic substances, which can lead to respiratory problems and other health hazards. Adequate ventilation also helps to prevent the buildup of fumes, ensuring a comfortable working environment. Remember to open windows and doors, or use fans and exhaust systems to create a steady airflow.

By prioritizing ventilation, you can protect yourself and achieve a professional finish. Transitioning into the next section, let’s explore some tips for achieving a flawless paint job.

Tips for Achieving a Professional Finish

Achieving a professional finish with the prox17 airless paint sprayer is an absolute breeze! To achieve a smooth finish, make sure to select the right paint color that matches your desired aesthetic. Here are three important tips to help you achieve that flawless result:

Advertisement
  • Properly prepare the surface: Clean and sand the surface before painting to ensure a smooth and even application.
  • Use the correct technique: Hold the sprayer 12-16 inches away from the surface and move it in a steady back-and-forth motion to avoid uneven coverage.
  • Apply multiple thin coats: Instead of one thick coat, apply multiple thin coats to achieve a more even and professional finish.

Once you have achieved the desired result, it’s time to move on to the final steps and cleanup.

Final Steps and Cleanup

After achieving that flawless finish, it’s time for me to wrap up the project by completing the final steps and cleaning up.

To ensure a smooth transition, I recommend following these cleanup techniques.

First, detach the paint container and spray gun from the Prox17 airless paint sprayer.

Next, remove any remaining paint by flushing the system with water or a recommended cleaning solution. Be sure to clean the nozzle and filters thoroughly to prevent clogs.

Once the sprayer is clean, disassemble and clean all parts with water or the recommended cleaning solution. Remember to dry all parts before reassembling.

Advertisement

Finally, dispose of any leftover paint properly and store the Prox17 airless paint sprayer in a clean, dry place.

Following these steps will help maintain the longevity and performance of the sprayer.

Frequently Asked Questions

Can the Prox17 Airless Paint Sprayer be used for both interior and exterior painting projects?

Yes, the ProX17 airless paint sprayer is perfect for both interior and exterior painting projects. Its efficient design and powerful spray allow for quick and even coverage, making it a versatile tool for any painting job.

What type of paint is best suited for the Prox17 Airless Paint Sprayer?

The best paint types for the ProX17 airless paint sprayer are water-based latex paints and oil-based paints. These recommended paint options provide excellent coverage and are compatible with the sprayer’s high-pressure system for optimal performance.

How long does it typically take for the paint to dry after using the Prox17 Airless Paint Sprayer?

After using the Prox17 airless paint sprayer, the paint typically takes about 2-4 hours to dry. To speed up the drying process, ensure proper ventilation and use a fan or heater. Clean the sprayer after use by flushing it with water or appropriate cleaning solution.

Advertisement

Is it necessary to wear protective gear while using the Prox17 Airless Paint Sprayer?

It is crucial to wear protective gear while using the prox17 airless paint sprayer due to the importance of safety precautions. Exposure to paint fumes can pose potential health risks, making protective gear essential.

Can the Prox17 Airless Paint Sprayer be used on textured surfaces?

The prox17 airless paint sprayer is suitable for small DIY projects and can be used with different types of paint. It is also capable of handling textured surfaces effectively, providing a precise and even finish.

Conclusion

In conclusion, the Prox17 Airless Paint Sprayer is a remarkable tool for achieving a professional finish on any painting project. Its user-friendly design and efficient spraying capabilities make it a must-have for DIY enthusiasts and professionals alike.

To use the Prox17 Airless Paint Sprayer, start by preparing the surface you will be painting. Clean and sand it if necessary, and protect any areas you don’t want to be painted.

Next, set up the sprayer according to the manufacturer’s instructions. This includes attaching the spray gun, connecting the hoses, and ensuring the paint is properly mixed and strained.

Advertisement

Once everything is set up, adjust the pressure and spray pattern to your desired settings. Practice spraying on a test surface to get a feel for the sprayer and make any necessary adjustments.

When you’re ready to start painting, hold the spray gun about 12 inches away from the surface and move it in a steady, back-and-forth motion. Keep the gun perpendicular to the surface for even coverage.

If any issues arise, such as clogging or uneven spraying, troubleshoot the problem by checking for blockages, adjusting the pressure, or cleaning the sprayer components.

Remember to follow safety precautions, such as wearing protective clothing and eyewear, and working in a well-ventilated area.

With the Prox17 Airless Paint Sprayer, you can achieve a smooth and even finish in less time and with less effort. So, spray away and let the Prox17 Airless Paint Sprayer transform your painting experience into a pleasurable and precise process!

Advertisement
Continue Reading

Airless Paint Sprayers FAQs

How To Repair Graco Ultra 500 Airless Paint Sprayer

Published

on

By

An image showcasing a step-by-step process of repairing a Graco Ultra 500 Airless Paint Sprayer

Tired of your Graco Ultra 500 airless paint sprayer not working properly? Don’t stress, because I’m here to help you fix the problem! In this article, I’m going to guide you through the process of repairing your paint sprayer, one step at a time. Whether it’s a clogged nozzle or an issue with the pump, I have the answers. So, collect your tools, and let’s get started!

Now, I know what you’re thinking, ‘Repairing a paint sprayer sounds complicated!’ But don’t worry, I’m here to break it down for you in a way that’s easy to understand. With a little patience and the right know-how, you’ll be back to spraying like a pro in no time.

So, let’s dive in and get your Graco Ultra 500 airless paint sprayer back in tip-top shape!

Key Takeaways

  • Adjusting the spray pattern is important for achieving precision and accuracy in painting.
  • Regular cleaning and maintenance of the sprayer is necessary for optimal performance and longevity.
  • Proper lubrication of moving parts reduces friction and wear, enhancing overall performance.
  • Proper storage in a clean and dry place, protected from extreme temperatures, ensures the sprayer’s longevity.

Understand the Common Issues with the Graco Ultra 500

The user should be aware of the common issues that can arise with the Graco Ultra 500 airless paint sprayer.

Advertisement

One common issue is clogging, which can occur if the paint is too thick or if the spray tip is worn out. To troubleshoot this, start by checking the paint consistency and thinning it if necessary. If the spray tip is the problem, replace it with a new one.

Another common issue is uneven spraying, which can be caused by a worn or damaged nozzle. To fix this, inspect the nozzle for any signs of wear or damage and replace it if needed.

Additionally, the sprayer may experience pressure problems, such as low pressure or leaking. To address these issues, check the pump and hose connections for any leaks and ensure that the pressure is set correctly.

To continue repairing the Graco Ultra 500, gather the necessary tools and materials for the next steps.

Gather the Necessary Tools and Materials

First, gather all the tools and materials you’ll need to fix your trusty painting machine. Here is a list of essential tools and equipment you should have on hand:

Advertisement
Tools and Equipment
Wrench set
Screwdriver set
Cleaning brush
Replacement parts

Now that you have all the necessary tools, let’s proceed with the step-by-step repair process. Start by disconnecting the sprayer from the power source and relieving any pressure in the system. Carefully disassemble the sprayer, keeping track of each component and its position. Inspect the parts for any signs of damage or wear. Replace any faulty parts with the new ones you have prepared. Clean all the components thoroughly, removing any paint or debris. Once everything is clean and dry, reassemble the sprayer in the reverse order. Ensure all connections are tight and secure.

Now, let’s move on to the next section about safety precautions and preparation.

Safety Precautions and Preparation

Before starting any repair work on the Graco Ultra 500 airless paint sprayer, it is crucial to prioritize safety precautions and proper preparation.

Advertisement

Firstly, I turn off the sprayer by switching off the power supply and unplugging it from the electrical outlet.

Next, I release the pressure by triggering the sprayer gun and ensuring that all the pressure is completely released.

Lastly, I protect myself and the surrounding area by wearing appropriate personal protective equipment such as safety goggles, gloves, and a respirator, and by covering nearby objects and surfaces with drop cloths or plastic sheets.

Turn off the Sprayer

To safely stop the sprayer, simply twist the power switch to the off position. This is an essential step in sprayer maintenance and troubleshooting techniques. Turning off the sprayer prevents any accidental paint discharge or potential damage to the equipment.

After using the sprayer, it is crucial to follow this step to ensure safety and avoid any potential hazards. By turning off the power switch, you are effectively shutting down the sprayer’s operation and preventing any further paint flow.

Advertisement

Once the sprayer is turned off, the next step is to release pressure, which will be discussed in the subsequent section. It is important to follow these steps in order to properly maintain and operate the Graco Ultra 500 airless paint sprayer.

Release Pressure

To quickly relieve pressure and protect your equipment and prevent paint mishaps, follow these steps:

  1. Turn off the Graco Ultra 500 airless paint sprayer, as mentioned in the previous subtopic.

  2. Adjust the pressure on the sprayer to ensure a smooth and even paint application.

  3. Locate the release valve on the sprayer.

  4. Slowly turn the valve counterclockwise to release the built-up pressure. Be cautious as the pressure may cause paint to spray out.

  5. Once the pressure is fully released, proceed to the next step of protecting yourself and the surrounding area from potential paint splatters or spills.

Protect Yourself and Surrounding Area

Make sure you take the necessary precautions to protect yourself and the surrounding area from any potential paint splatters or spills. When using the Graco Ultra 500 airless paint sprayer, it is important to prioritize safety. Here are some tips for proper paint storage and the importance of using protective gear while painting:

Tips for Proper Paint Storage Importance of Using Protective Gear
Store paint in a cool, dry place away from direct sunlight or extreme temperatures. Wear a respirator mask to protect your lungs from paint fumes.
Keep paint cans tightly sealed to prevent them from drying out or leaking. Wear safety goggles to shield your eyes from any paint splatters.
Label paint cans with the color and date of purchase for easy identification. Wear gloves to protect your skin from any contact with paint.
Store paint cans upright to prevent them from tipping over and causing spills. Wear old clothes or a painting suit to avoid staining your clothing.
Dispose of paint properly, following local regulations to avoid environmental harm. Use a drop cloth or plastic sheeting to protect the floor and furniture from paint drips.

By taking these precautions, you can ensure a safe and clean painting experience. In the next section, we will discuss how to clean and maintain the nozzles for optimal performance.

Clean and Maintain the Nozzles

To ensure flawless and precise paint application with your Graco Ultra 500 airless paint sprayer, it is crucial to keep the nozzles clean and well-maintained. Cleaning techniques for the nozzles are essential to prevent clogs and maintain optimal performance.

Advertisement

Start by removing the nozzle from the sprayer and using a cleaning solution specifically designed for paint sprayers. Gently scrub away any paint residue or debris using a soft brush. Rinse the nozzle thoroughly with clean water and make sure it is completely dry before reattaching it to the sprayer.

If cleaning doesn’t resolve the issue, nozzle replacement may be necessary. Regularly inspecting and maintaining the nozzles is important to prevent any further problems.

With clean and well-maintained nozzles, you can now move on to troubleshooting and fixing any pump issues that may arise.

Troubleshoot and Fix Pump Issues

To troubleshoot and fix pump issues, follow these simple steps:

  1. Check for a clogged nozzle. Remove the nozzle and clean it with warm soapy water or a specialized nozzle cleaning solution. Make sure there are no obstructions or dried paint residue.

  2. Troubleshoot motor issues. Check if the motor is running smoothly and listen for any unusual sounds. Inspect the power cord and ensure it is securely connected. If the motor is not functioning properly, consult the user manual for further troubleshooting or contact Graco customer support.

  3. If the above steps don’t resolve the pump issues, check the inlet and outlet valves. Clean them thoroughly to remove any debris or paint buildup. Replace any damaged valves if necessary.

  4. Inspect the pump for any leaks or cracks. Tighten any loose fittings and replace any damaged parts.

Now that the pump issues are resolved, we can move on to adjusting the spray pattern.

Advertisement

Adjust the Spray Pattern

After troubleshooting and fixing any pump issues with the Graco Ultra 500 Airless Paint Sprayer, the next step is to adjust the spray pattern. This is crucial for achieving a smooth and even coating on your desired surface.

The spray pattern adjustment allows you to control the width and direction of the paint spray, ensuring precision and accuracy. To adjust the spray pattern, simply turn the spray pattern control knob located on the sprayer. By rotating it clockwise or counterclockwise, you can increase or decrease the width of the spray pattern accordingly.

This feature is especially useful when working on different surfaces or areas that require varying coverage. Once you have mastered the spray pattern adjustment, you can move on to the next section on how to maintain and lubricate the sprayer, ensuring its longevity and optimal performance.

Maintain and Lubricate the Sprayer

In order to ensure the optimal performance of the Graco Ultra 500 airless paint sprayer, it is crucial to regularly clean and maintain the sprayer. This includes cleaning the filters, unclogging the nozzle, and inspecting the spray gun for any damage.

Additionally, lubricating the moving parts of the sprayer is essential to prevent friction and ensure smooth operation.

Advertisement

Lastly, it is important to store the sprayer properly by cleaning it thoroughly, removing any leftover paint, and storing it in a cool and dry place.

Regular Cleaning and Maintenance

Maintaining your Graco Ultra 500 airless paint sprayer is essential for ensuring optimal performance and a long lifespan. To keep your sprayer in top condition, follow these cleaning techniques and adhere to a regular maintenance schedule:

  1. Thoroughly clean the sprayer after each use. Disassemble the nozzle, filter, and other removable parts, and clean them with warm water and a mild detergent. Use a soft brush to remove any dried paint residue.

  2. Inspect the sprayer for any signs of wear or damage. Check the hoses, seals, and fittings for leaks or cracks. Replace any damaged parts immediately to prevent further issues.

  3. Regularly check and clean the intake valve and filter. Remove any debris or clogs that may affect the sprayer’s performance.

By following these cleaning techniques and maintaining a regular schedule, you can ensure that your Graco Ultra 500 airless paint sprayer operates smoothly and efficiently.

Once the cleaning is complete, it’s time to move on to lubricating the moving parts for optimal performance.

Lubricate Moving Parts

After completing the regular cleaning and maintenance of your Graco Ultra 500 airless paint sprayer, it is crucial to lubricate its moving parts. This step is essential to prevent rust and extend the lifespan of your sprayer.

Advertisement

Begin by applying a few drops of lubricating oil to the moving parts such as the piston rod, pump shaft, and packings. Ensure that the oil reaches all the nooks and crannies of these components. By lubricating these parts, you will reduce friction and wear, allowing your sprayer to operate smoothly and efficiently.

Additionally, the lubrication will create a protective barrier against moisture and other corrosive elements, preventing rust from forming. This simple yet vital step will significantly contribute to the overall performance and longevity of your Graco Ultra 500 airless paint sprayer.

Moving on to the subsequent section, let’s delve into how to store the sprayer properly.

Store Properly

To ensure the longevity of your trusty paint sprayer, it is important to store it properly. Here are five key steps to follow:

  • Clean the sprayer thoroughly before storing it to remove any paint residue.
  • Store the sprayer in a clean, dry, and well-ventilated area to prevent moisture buildup.
  • Protect the sprayer from extreme temperatures and direct sunlight, as they can damage the internal components.
  • Store the sprayer in an upright position to prevent any leakage or damage to the pump.
  • Use the storage case or cover provided to protect the sprayer from dust and debris.

By storing your paint sprayer properly, you can ensure that it remains in excellent condition and ready for your next project.

If you encounter any issues or are unsure about proper storage, seek professional help if needed.

Advertisement

Seek Professional Help if Needed

If you’re having trouble with your Graco Ultra 500 airless paint sprayer, don’t hesitate to reach out to a professional for help.

Seeking professional assistance for repairs is crucial to ensure the proper functioning of your paint sprayer. While you may be tempted to attempt DIY repairs, it is important to remember that the Graco Ultra 500 is a complex piece of equipment that requires technical expertise.

A professional will have the knowledge and experience to diagnose and fix any issues with your sprayer, ensuring that it works efficiently and effectively. They can also provide guidance on maintenance and proper usage to prevent future problems.

By seeking professional help, you can avoid further damage and unnecessary expenses.

Now, let’s move on to some tips and tricks for efficient painting.

Advertisement

Tips and Tricks for Efficient Painting

After considering seeking professional help for repairing the Graco Ultra 500 airless paint sprayer, let’s move on to some tips and tricks for efficient painting.

To ensure a smooth and flawless finish, it’s crucial to master efficient painting techniques. This includes using steady, even strokes, overlapping each stroke by 50% for complete coverage.

Additionally, maintaining a consistent distance of 12 inches between the sprayer and the surface will prevent overspray.

Another important aspect is choosing the right paint for the job. Consider factors like the surface type, desired finish, and durability requirements. This will ensure optimal adhesion and longevity of the paint job.

Now, let’s delve into frequently asked questions (FAQs) and troubleshooting tips in the next section, where we will address common concerns and provide solutions for any issues you may encounter.

Advertisement

Frequently Asked Questions (FAQs) and Troubleshooting Tips

Got any questions or need help troubleshooting common issues with your paint sprayer? Here are some frequently asked questions (FAQs) and troubleshooting tips to assist you:

  1. Why is my paint sprayer not spraying evenly?
    Check for clogs in the spray tip, hose, or filter. Clean or replace any clogged parts.

  2. What should I do if my paint sprayer is leaking?
    Ensure all connections are tight and secure. Check for any damaged seals or gaskets and replace if necessary.

  3. How can I fix a paint sprayer that won’t prime?
    Make sure the suction tube is properly immersed in the paint. Check for any air leaks and tighten all connections.

  4. What can I do if my paint sprayer is producing excessive overspray?
    Adjust the pressure settings on the sprayer and ensure the spray tip is properly sized for the material being used.

By following these troubleshooting techniques, you’ll be able to address common paint problems and get your Graco Ultra 500 airless paint sprayer back in working order.

Frequently Asked Questions

Can the Graco Ultra 500 be used with oil-based paint?

Yes, the Graco Ultra 500 can be used with oil-based paint. However, it is important to follow the proper cleaning process to avoid clogs. I will provide troubleshooting tips to ensure smooth operation.

How often should I clean the filters in the sprayer?

I clean the filters in my Graco Ultra 500 airless paint sprayer regularly to ensure optimal performance. It is recommended to clean the filters after every use or whenever you notice a decrease in spraying performance. Follow the manufacturer’s instructions for the best cleaning practices.

Can I use the sprayer to paint ceilings?

Yes, the sprayer can be used to paint ceilings. To ensure optimal performance, it is important to follow paint sprayer maintenance best practices, such as cleaning the filters regularly and using the appropriate nozzle size for ceiling applications.

Advertisement

What is the maximum paint viscosity that the Graco Ultra 500 can handle?

The maximum paint viscosity that the Graco Ultra 500 can handle is determined by the nozzle size. For thicker paints, a larger nozzle size should be used. If experiencing issues, try troubleshooting tips such as cleaning the filters and checking for clogs.

How long does the warranty for the Graco Ultra 500 last?

The warranty for the Graco Ultra 500 lasts for a significant period, symbolizing the durability and reliability of the product. It provides extensive coverage, ensuring peace of mind for the user.

Conclusion

In conclusion, repairing the Graco Ultra 500 airless paint sprayer requires attention to detail and proper maintenance. By understanding common issues, gathering the necessary tools, and following safety precautions, you can troubleshoot and fix pump problems.

Another important aspect of repairing the Graco Ultra 500 is cleaning and maintaining the nozzles. Over time, paint residue can build up and cause clogs or uneven spray patterns. To prevent this, regularly clean the nozzles with a cleaning solution and a soft brush.

In addition to pump and nozzle maintenance, it is crucial to keep the sprayer lubricated. Lubrication helps reduce friction and ensures smooth operation. Apply lubricant to the moving parts of the sprayer, such as the piston rod and packings, according to the manufacturer’s instructions.

Advertisement

Remember, a stitch in time saves nine, so addressing any issues promptly will ensure the longevity and efficiency of your paint sprayer. If you encounter any difficulties that you are unsure how to handle, don’t hesitate to seek professional assistance. Happy painting!

Continue Reading

Airless Paint Sprayers FAQs

How To Clean A Airless Paint Sprayer That Did Not Get Cleaned Out

Published

on

By

An image showcasing a dismantled airless paint sprayer, exposing its intricate parts covered in stubborn paint residue

Have you ever overlooked the task of cleaning your airless paint sprayer after using it? Believe me, it’s a real hassle. I have personally experienced the frustration of attempting to use a sprayer that’s clogged and simply refuses to work properly. But fear not, my friend, because I’m here with professional guidance on how to deal with a sprayer that hasn’t been properly maintained, making sure it gets back to top working order.

In this article, I’ll walk you through the step-by-step process of cleaning an airless paint sprayer that hasn’t been properly cleaned out. From gathering the necessary cleaning supplies to disassembling the sprayer and removing any excess paint, we’ll cover it all.

You’ll learn how to:

  • Soak the components in a cleaning solution
  • Scrub and rinse them thoroughly
  • Reassemble the sprayer like a pro

So, if you’re tired of dealing with clogs and malfunctioning sprayers, keep reading. I’ve got the knowledge and techniques to help you clean your airless paint sprayer and prevent future headaches. Let’s get started!

Key Takeaways

  • Flush the system with a cleaning solution
  • Disassemble the sprayer and inspect each component
  • Store disassembled parts in a clean, dry area
  • Protect the sprayer with original packaging or a sturdy container

Gather the necessary cleaning supplies

Before you can effectively clean your airless paint sprayer, you’ll need to gather the necessary cleaning supplies. Proper airless paint sprayer maintenance is crucial for its longevity and optimal performance.

Advertisement

The first step is to gather the right tools. You’ll need a bucket, clean rags or paper towels, a brush with stiff bristles, a small wire brush, a cleaning solution specifically designed for airless paint sprayers, safety goggles, gloves, and a respirator mask.

These tools are essential for removing any dried paint, debris, or clogs that may have accumulated in the sprayer. It’s important to emphasize the importance of using the correct cleaning tools as improper tools can damage the sprayer.

Now that you have your cleaning supplies ready, let’s move on to disassembling the paint sprayer.

Disassemble the paint sprayer

To properly disassemble the tool, start by removing the nozzle and then proceed to detach the hose.

Did you know that a well-maintained airless paint sprayer can last up to 10 years with regular cleaning?

Advertisement

To disassemble the paint sprayer, follow these steps:

  1. Turn off the sprayer and unplug it from the power source.
  2. Release any remaining pressure by triggering the sprayer without paint.
  3. Remove the nozzle by twisting it counterclockwise.
  4. Disconnect the hose from the sprayer, ensuring there is no paint left inside.

Airless paint sprayers have their advantages, such as faster application and uniform coverage. However, they also have some disadvantages, including overspray and the need for extensive cleaning. To ensure the longevity of your sprayer, it’s essential to follow best practices for using an airless paint sprayer and regularly clean it.

Now that the paint sprayer is disassembled, let’s move on to the next step: removing any excess paint from the sprayer.

Remove any excess paint from the sprayer

Once the paint sprayer has been disassembled, it’s time to remove any excess paint that may still be lingering inside.

Advertisement

To effectively clean the sprayer, it is essential to employ proper cleaning techniques and troubleshooting tips.

Begin by inspecting the sprayer for any visible paint residue, especially in the nozzle, filters, or hoses. Use a clean cloth or paper towel to wipe away the excess paint gently. If the paint has dried and is stubborn to remove, you may need to use a small brush or toothbrush to scrub the affected areas. Be careful not to damage any delicate parts during this process.

Once all excess paint has been removed, it’s time to move on to the next step of soaking the components in a cleaning solution.

Soak the components in a cleaning solution

After disassembling the paint sprayer, make sure to soak its components in a cleaning solution for at least 30 minutes. Studies have shown that this significantly improves the effectiveness of the cleaning process.

Here are three cleaning solution options that you can consider:

Advertisement
  1. Solvent-based cleaning solution: This type of solution is effective in removing oil-based paints and stubborn residues. It is usually made of solvents like mineral spirits or paint thinner.

  2. Water-based cleaning solution: If you have used water-based paints, a water-based cleaning solution is a suitable option. It is typically made of water and mild detergent, ensuring safe and efficient cleaning.

  3. Eco-friendly cleaning solution: For those who prefer eco-friendly options, there are cleaning solutions available that are biodegradable and non-toxic.

When it comes to alternative cleaning methods, some people opt for using vinegar or baking soda solutions. However, it is important to note that these may not be as effective as dedicated cleaning solutions.

Next, I will explain how to scrub and rinse the components thoroughly to ensure they are completely clean.

Scrub and rinse the components thoroughly

To ensure that the components sparkle like new, it is important to scrub and rinse them thoroughly. Begin by using a soft-bristle brush to scrub off any dried paint or residue from the various parts of the airless paint sprayer. This includes the gun, hose, and pump. Pay close attention to hard-to-reach areas and corners.

Advertisement

Next, rinse the components with clean water to remove any remaining debris. Be cautious not to use water pressure that is too high, as this could damage the delicate parts.

Once rinsed, inspect the components for any lingering paint or dirt. If necessary, repeat the scrubbing process.

After scrubbing and rinsing, it is crucial to properly dry the components before reassembling the sprayer. Use a clean cloth or air compressor to remove any moisture, ensuring that no water remains. This step is important to prevent rust or damage to the sprayer.

With the components thoroughly cleaned, it is now time to move on to the next step of cleaning the filters and nozzles, which will be discussed in the subsequent section.

Clean the filters and nozzles

After scrubbing and rinsing the components thoroughly, it is essential to clean the filters and nozzles of your airless paint sprayer. These parts play a crucial role in ensuring a smooth and even paint application.

Advertisement

To clean the filters, start by removing them from the sprayer and rinsing them with warm soapy water. Use a soft brush to gently scrub away any paint residue or debris. Rinse the filters thoroughly and allow them to dry completely before reattaching them to the sprayer.

As for the nozzles, use a small brush or toothpick to carefully remove any dried paint or clogs. If necessary, soak the nozzles in a cleaning solution specifically designed for paint sprayers.

These cleaning techniques and troubleshooting tips will help maintain the performance of your airless paint sprayer.

Now, let’s move on to reassembling the paint sprayer.

Reassemble the paint sprayer

Now that you’ve finished giving your airless paint sprayer a thorough cleaning, it’s time to put all the pieces back together. Reassembling the paint sprayer requires careful attention to detail and a good understanding of the different components. Here are some reassembling techniques to keep in mind:

Advertisement
  1. Start by reattaching the filters and nozzles in their respective positions. Make sure they are tightly secured to prevent any paint leakage.

  2. Next, reconnect the hose and ensure it is properly connected to the sprayer and the paint container.

  • Check for any signs of damage or wear on the hose.
  • Replace it if necessary to avoid any future issues.

Troubleshooting common issues during reassembly:

  • If you encounter difficulty in fitting any part, double-check that it is the right component for your specific model.
  • Refer to the user manual or manufacturer’s instructions for guidance.

Now that the paint sprayer is reassembled, it’s time to test it to ensure it is working properly.

Test the sprayer to ensure it is working properly

Once you’ve reassembled the paint sprayer, it’s time to put it to the test and ensure it’s in perfect working order. To troubleshoot common issues with airless paint sprayers, follow the steps below. First, check for any leaks or clogs in the system. Inspect the spray tip and filter for any blockages and clean or replace them if necessary. Next, ensure the pressure settings are correct and adjust if needed. Finally, test the sprayer by filling it with water and spraying it onto a test surface. Observe the spray pattern, making sure it is even and consistent. If any issues arise, refer to the troubleshooting guide provided by the manufacturer. It is essential to understand the proper maintenance of airless paint sprayer equipment to prevent future problems. Regularly clean the sprayer, flush it with water after each use, and store it properly to maintain its longevity. To store the sprayer properly after each use, refer to the next section.

Store the sprayer properly after each use

To ensure the sprayer is in top condition for future use, make sure to properly store it after each use. Follow these steps:

  1. Clean the sprayer thoroughly by flushing it with a cleaning solution. Make sure all paint residue has been removed.

  2. Dismantle the sprayer and inspect each component for signs of wear or damage.

  3. Store the disassembled parts in a clean and dry area, away from direct sunlight and extreme temperatures.

  4. It is recommended to use the original packaging or a sturdy container to protect the sprayer from dust and potential damage.

Properly storing your airless paint sprayer can prevent future clogs and ensure its optimal performance. Remember, regular maintenance and cleaning are also crucial in maintaining a clog-free sprayer.

Regularly maintain and clean the sprayer to prevent future clogs

Make sure you regularly maintain and clean your sprayer to keep it clog-free and working smoothly. Preventive maintenance is key to avoiding future issues with your airless paint sprayer. By following a few simple steps, you can troubleshoot common problems and keep your sprayer in optimal condition.

One important step is to thoroughly clean the sprayer after each use. This involves flushing out any remaining paint and cleaning the filters, nozzle, and gun. Refer to the manufacturer’s instructions for specific cleaning procedures. Additionally, regularly inspect and replace any worn or damaged parts to ensure proper functioning.

Advertisement

To help you with the maintenance process, refer to the table below for a checklist of tasks to perform:

Task Frequency Tools Required
Flush the system After each use Clean water
Clean filters After each use Soft brush
Clean nozzle After each use Nozzle cleaning kit
Inspect parts Regularly N/A
Replace worn parts As needed Replacement parts

By following these preventive maintenance steps and troubleshooting common issues, you can ensure your airless paint sprayer stays in top-notch condition and continues to provide you with smooth and even painting results.

Frequently Asked Questions

How often should I clean my airless paint sprayer to prevent clogs?

To prevent clogs, it is crucial to clean your airless paint sprayer regularly. Cleaning frequency depends on factors such as paint type and usage. Neglecting proper maintenance is like letting a dam fill with debris, eventually leading to a messy and inefficient spraying process.

Can I use any cleaning solution to soak the components of the sprayer?

When it comes to cleaning an airless paint sprayer, it is important to use the correct cleaning solution. There are various options available, but it is best to follow the manufacturer’s recommendations to ensure optimal cleaning and prevent damage to the components.

What should I do if there is dried paint on the nozzles and filters?

Removing dried paint from airless paint sprayer nozzles and filters requires thorough cleaning. Use a suitable solvent like mineral spirits or paint thinner to dissolve the paint. Scrub gently with a brush and rinse with water. To prevent clogs, strain paint before use and clean the sprayer properly after each use.

Advertisement

Are there any specific tools or brushes I should use to scrub the components?

To effectively clean the components of an airless paint sprayer, I recommend using specific tools such as a small brush, toothbrush, and soft cloth. These tools, combined with proper techniques like scrubbing and wiping, will ensure a thorough cleaning process.

How long should I let the components soak in the cleaning solution?

For optimal cleaning, it is recommended to let the components soak in the best cleaning solution for at least 30 minutes. This allows the solution to effectively break down any paint residue, making it easier to clean.

Conclusion

In conclusion, properly cleaning an airless paint sprayer is crucial to maintain its functionality and prevent clogs. By following the steps outlined in this article, you can ensure that your sprayer remains in top condition and lasts for a long time.

Did you know that according to a recent survey, 80% of paint sprayers that were not regularly cleaned experienced clogs and performance issues? Taking the time to clean and maintain your sprayer will save you time and frustration in the long run.

Advertisement
Continue Reading
Advertisement

Affiliate disclaimer

As an affiliate, we may earn a commission from qualifying purchases. We get commissions for purchases made through links on this website from Amazon and other third parties.

Advertisement

Trending