I remember the frustration I felt when I tried to hand-paint my kitchen cabinets. The brush strokes were uneven, the paint dripped, and the end result looked nothing like the professional finish I had envisioned.
That’s when I discovered the power of using an airless sprayer to paint cabinets. In this article, I will show you how to properly paint your cabinets using this efficient tool.
We will go through the steps of:
- Preparing the cabinets
- Setting up your workspace
- Practicing proper sprayer technique
- Applying the paint
I will also provide tips on:
- Letting the paint dry
- Cleaning up
- Evaluating the results
- Maintaining your newly painted cabinets.
By the end of this article, you will be equipped with the knowledge and skills to transform your cabinets into a fresh and beautiful focal point in your home.
Key Takeaways
- Clean and sand cabinets for paint adhesion and a smooth finish.
- Use an airless sprayer for precise application.
- Maintain consistent distance and overlap passes.
- Allow at least 24 hours before handling cabinets.
Prepare the Cabinets
Before you can start painting, it’s essential to thoroughly clean and sand the cabinets to ensure proper adhesion of the paint and a smooth finish.
Begin by prepping the surfaces by removing any hardware, such as handles or knobs, and placing them in a safe place.
Next, wipe down the cabinets with a mild detergent solution to remove any grease or dirt.
Once the cabinets are clean, it’s time to sand them to create a rough surface for the paint to adhere to. Use a fine-grit sandpaper and sand in the direction of the wood grain to avoid damaging the surface.
After sanding, wipe away any dust with a clean cloth.
With the cabinets prepped, you can now move on to setting up your workspace and protecting the surrounding area.
Set Up Your Workspace
Prepare your workspace by ensuring that all necessary materials are easily accessible and that the area is clean and well-ventilated.
- Clear any clutter from the area to provide ample room for movement.
- Lay down drop cloths to protect the floor and surrounding surfaces.
- Gather all equipment, including the airless sprayer, paint, paint brushes, and masking tape.
- Set up a worktable or sawhorses to elevate the cabinets for easier access.
Organizing your workspace is essential for a smooth and efficient painting process. Having everything within reach saves time and minimizes disruptions. Additionally, a clean and well-ventilated area ensures proper air circulation, allowing the paint to dry effectively.
Now that your workspace is ready, it’s time to practice proper sprayer technique.
Practice Proper Sprayer Technique
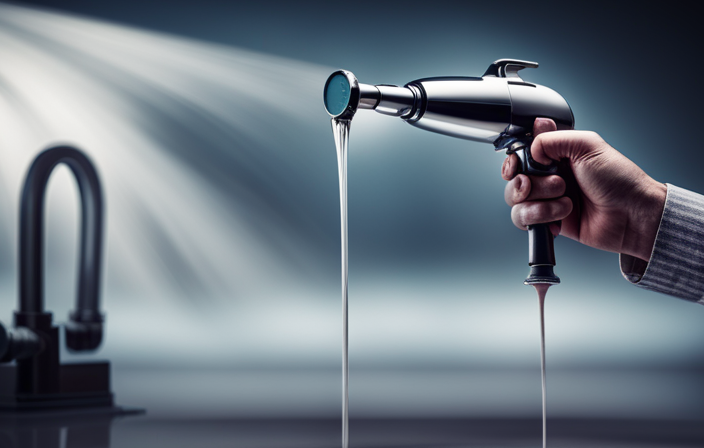
When practicing proper sprayer technique, it’s important to hold the sprayer at the correct angle to ensure even coverage and avoid drips.
Applying even and smooth strokes helps to achieve a professional finish and prevent streaks or clumps.
Additionally, maintaining a consistent distance from the surface throughout the painting process ensures a uniform coat and prevents overspray.
Hold the Sprayer at the Correct Angle
Achieve flawless results by holding the sprayer at the correct angle when painting your cabinets with an airless sprayer. To ensure a professional finish, it is important to master the correct spraying technique. Here are four key points to keep in mind:
-
Maintain a steady hand: Hold the sprayer with a firm grip to prevent shaky movements and ensure an even application of paint.
-
Angle the sprayer correctly: Hold the sprayer at a 45-degree angle to the surface you are painting. This allows the paint to be evenly distributed and minimizes the risk of drips or uneven coverage.
-
Keep a consistent distance: Maintain a distance of 6 to 8 inches between the sprayer nozzle and the cabinet. This helps achieve a smooth and even coat of paint.
-
Overlap each stroke: When moving the sprayer across the cabinet, overlap each stroke by about 50%. This eliminates any streaks or lines in the final finish.
By following these tips and techniques, you will be able to achieve a flawless paint job on your cabinets.
Moving on to the next section, let’s discuss how to apply even and smooth strokes for a professional-looking result.
Apply Even and Smooth Strokes
To achieve a flawless finish, it is important to apply even and smooth strokes when using a sprayer on your cabinets. This technique is crucial in obtaining a professional result. Start by holding the sprayer about 12-18 inches away from the cabinet surface and begin spraying before reaching the cabinet. Move the sprayer in a steady motion, overlapping each stroke slightly to ensure an even distribution of paint and prevent drips and runs. It is important to maintain a consistent distance from the surface to avoid uneven coverage. Transitioning to the next section, maintaining a consistent distance is just as important as applying even and smooth strokes.
Maintain a Consistent Distance from the Surface
Maintaining a consistent distance from the surface is crucial for achieving a smooth and professional finish when operating the sprayer. To ensure this, follow these guidelines:
-
Maintain a distance of 8-12 inches from the surface. This distance allows for even distribution of paint and minimizes the risk of overspray.
-
Keep the sprayer perpendicular to the surface. Holding the sprayer at a consistent angle helps maintain a consistent spray pattern, resulting in an even coat of paint.
-
Move the sprayer at a steady pace. Moving too quickly can cause uneven coverage, while moving too slowly can result in drips. Find a comfortable pace and maintain it throughout the painting process.
By maintaining a consistent spray pattern and using the proper paint viscosity, you can achieve a smooth and professional finish on your cabinets. Once you have mastered this technique, you can proceed to the next section about applying the paint.
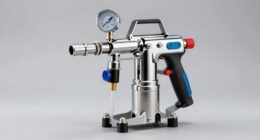
Apply the Paint
To apply the paint, use the powerful pulsating spray of an airless sprayer for precise results. This method offers a smooth and even application compared to traditional techniques. Maintain a consistent distance from the surface to avoid drips or uneven coverage. Remember to overlap each pass slightly to ensure complete coverage. If you encounter any issues like clogged nozzles or uneven spray patterns, consult the manufacturer’s troubleshooting guide for solutions.
Once the paint is applied, allow it to dry completely before proceeding to the next step.
Let the Paint Dry
Once you’ve applied the paint, just sit back and let it dry completely before moving on to the next exciting step.
The drying time will depend on several factors, including the type of paint and the climate in your area. Generally, latex paint will dry faster than oil-based paint. If you’re aiming for a gloss finish, it may take longer to dry compared to a matte finish.
It’s important to allow sufficient drying time to prevent smudging or sticking when you reattach the cabinet doors and hardware. I recommend waiting at least 24 hours before handling the cabinets.
During this time, make sure the area is well-ventilated to aid in the drying process. Once the paint is dry and cured, you can move on to reattaching the cabinet doors and hardware seamlessly.
Reattach Cabinet Doors and Hardware
Now that the paint has dried, it’s time to reattach the cabinet doors and hardware.
First, I’ll clean the cabinet hardware to remove any paint or residue.
Then, I’ll align the cabinet doors properly and attach them securely.
This final step will give the cabinets a polished and finished look.
Clean and Reinstall Cabinet Hardware
To achieve a flawless finish on your cabinets, start by giving your hardware a thorough cleaning and then expertly reinstalling it. Here’s how you can do it:
-
Remove the hardware: Take off all the cabinet knobs, handles, and hinges using a screwdriver. Place them in a bucket or a sink filled with warm soapy water.
-
Clean the hardware: Use a soft brush or sponge to scrub the hardware gently. If there’s any stubborn grime, you can use a mild cleaner or vinegar solution. Rinse them thoroughly and dry them with a clean cloth.
-
Reinstall the hardware: Carefully align the hardware with the pre-existing holes on the cabinets. Use a screwdriver to tighten the screws securely but not too tight that it damages the wood.
Once you have cleaned and reinstalled the cabinet hardware, you can move on to aligning and attaching the cabinet doors for a professional-looking finish.
Align and Attach Cabinet Doors
To ensure that your cabinets have a sleek and professional appearance, it is important to align and securely attach the cabinet doors. First, check if the hinges need realigning and make any necessary adjustments. If there are gaps between the doors and the cabinet frame, adjust the hinges to ensure they are flush. After aligning the hinges, it is essential to adjust the door height so that all doors are at the same level. This will create a cohesive and balanced look. Once the doors are properly aligned, securely attach them to the cabinet frame using the provided screws. Ensure that the doors open and close smoothly without any resistance. Now that the cabinet doors are in place, we can move on to the clean-up stage, where we will tidy up any overspray and achieve a flawless finish.
Clean Up
After you’ve finished painting, it’s time to tackle the clean-up process. Here are some essential steps to ensure a thorough clean-up:
- Gather your cleaning supplies, such as a bucket, warm soapy water, a sponge, and clean towels.
- Start by wiping down the cabinets with the soapy water to remove any paint residue.
- Rinse the cabinets with clean water to get rid of any soap residue.
- Use a dry towel to wipe the cabinets dry and ensure they are free from any moisture.
Once the cabinets are clean and dry, it’s time to evaluate the results of your painting job. This will allow you to identify any areas that may need touch-ups or adjustments before moving on to the next step of the cabinet painting process.
Evaluate the Results
Once you’ve wrapped up the clean-up process, it’s time to take a step back and assess the results of your painting job.
Start by evaluating the durability of the paint on the cabinets. Check for any chips, cracks, or peeling. If the paint is holding up well and hasn’t been easily damaged, then you can be confident in the quality of your work.
Next, evaluate the color accuracy. Compare the cabinets to your desired color and make sure they match. If the color is consistent and true to what you envisioned, then you’ve done a great job.
Now that you’ve evaluated the results, it’s time to move on to maintaining your newly painted cabinets.
Maintain Your Newly Painted Cabinets
When it comes to maintaining my newly painted cabinets, I always use gentle cleaning methods to avoid any damage or peeling. I make sure to avoid using harsh chemicals or abrasives that can strip away the paint or leave scratches.
Additionally, I consider applying a protective topcoat to provide an extra layer of durability and protection against everyday wear and tear.
Use Gentle Cleaning Methods
Gently cleaning your cabinets with a soft cloth and mild soap will ensure a pristine surface for a flawless paint job. Here are two effective cleaning techniques using gentle cleaning products that will leave your cabinets looking brand new:
-
First, create a solution of warm water and a few drops of mild dish soap. Dip the cloth into the solution and wring out any excess liquid. Wipe down the cabinets in a gentle, circular motion, focusing on any areas with dirt or grime.
-
Another option is to use a mixture of equal parts white vinegar and water. This natural solution is great for removing grease and residue. Apply the mixture to the cloth and wipe down the cabinets, following the wood grain.
By using these gentle cleaning methods, you can maintain the beauty of your newly painted cabinets. Remember to avoid harsh chemicals or abrasives, as they can damage the paint.
Avoid Harsh Chemicals or Abrasives
To keep your cabinets looking brand new, it’s best to steer clear of harsh chemicals or abrasives that could potentially damage the paint. Instead, opt for natural alternatives and DIY cleaning solutions that are gentle yet effective. Not only will these options protect the integrity of the paint, but they are also safer for you and the environment. Here is a table comparing the benefits of natural alternatives and DIY cleaning solutions:
| Natural Alternatives | DIY Cleaning Solutions |
|---|---|
| Vinegar | Baking Soda |
| Lemon Juice | Hydrogen Peroxide |
| Castile Soap | White Vinegar |
| Olive Oil | Lemon Juice |
By using these gentle cleaning methods, you can maintain the beauty of your cabinets without causing any harm. Once you’ve ensured that your cabinets are clean and free from any residue, it’s time to consider applying a protective topcoat to further enhance their durability and longevity.
Consider Applying a Protective Topcoat
Now that we’ve discussed the importance of avoiding harsh chemicals or abrasives when painting cabinets using an airless sprayer, let’s move on to the next step: considering the application of a protective topcoat.
This is a crucial step in ensuring the longevity and durability of your newly painted cabinets. Applying a protective finish will not only enhance the appearance of the cabinets but also provide an extra layer of protection against daily wear and tear.
When choosing the right topcoat, there are a few factors to consider, such as the type of paint used, the desired sheen level, and the level of durability required. It’s important to select a topcoat that is specifically designed for cabinets and is compatible with the paint you used.
By applying a protective topcoat, you can enjoy your freshly painted cabinets for years to come.
Enjoy Your Freshly Painted Cabinets
Sit back and admire the stunning transformation of your newly painted cabinets. Not only have you given your kitchen a fresh and updated look, but you have also added value to your home. Take a moment to appreciate the hard work and effort you put into this project.
Now that your cabinets are looking brand new, it’s the perfect time to reorganize them to maximize storage space and functionality. Consider grouping similar items together and using storage bins or organizers to keep things tidy.
Additionally, updating your cabinet hardware can further enhance the overall aesthetic. Switching out old knobs and pulls for new ones can completely change the look and feel of your cabinets.
Enjoy the satisfaction of your beautifully painted cabinets and the improved functionality they now offer.
Frequently Asked Questions
What type of paint is best for painting cabinets with an airless sprayer?
The best paint brands for cabinets with an airless sprayer are Benjamin Moore Advance, Sherwin-Williams ProClassic, and Behr Alkyd Enamel. To achieve a smooth finish, prepare the surface properly, use a high-quality brush, and apply thin coats.
Can I use an airless sprayer to paint cabinets that are already stained or varnished?
Yes, you can use an airless sprayer to paint stained or varnished cabinets. However, consider the pros and cons, such as overspray and lack of control. Alternatives include using a brush or a HVLP sprayer.
How long should I wait for the paint to dry before reattaching the cabinet doors and hardware?
I should wait at least 24 hours for the paint to fully dry before reattaching the cabinet doors and hardware. This will ensure that the finish is smooth and professional. Additionally, to maintain an airless sprayer, I should clean it thoroughly after each use.
Do I need to sand the cabinets before painting them with an airless sprayer?
Yes, it is necessary to prime the cabinets before painting with an airless sprayer. This will ensure better adhesion and a smoother finish. However, you can use an airless sprayer to paint cabinets made of laminate or melamine.
How often should I clean the airless sprayer to ensure optimal performance?
Cleaning an airless sprayer properly doesn’t take long, but it is crucial for optimal performance. Regular cleaning prevents clogs and extends the sprayer’s lifespan. So, while it may take some time, it’s well worth it.
Conclusion
After following these steps, I couldn’t believe the transformation of my cabinets. The airless sprayer made all the difference, giving them a stunning, professional finish.
As I stood back to admire my work, I couldn’t help but feel a sense of satisfaction and pride. The suspense of how the cabinets would turn out had been worth it.
Now, every time I walk into my kitchen, I’m greeted by the beauty of my freshly painted cabinets. It’s a small change that has made a big impact, and I couldn’t be happier.