Connect with us

Airless Paint Sprayers

How to Properly Store Your Airless Paint Sprayer

Optimize the longevity of your airless paint sprayer with essential storage tips; discover the secrets to keeping it in peak condition.

Published

on

airless sprayer storage tips

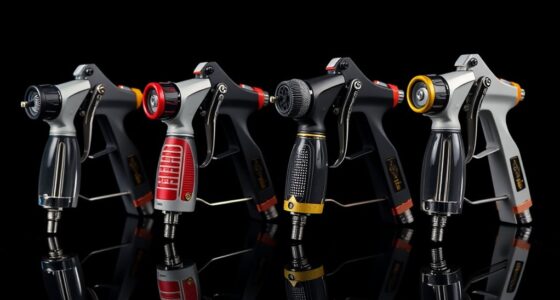
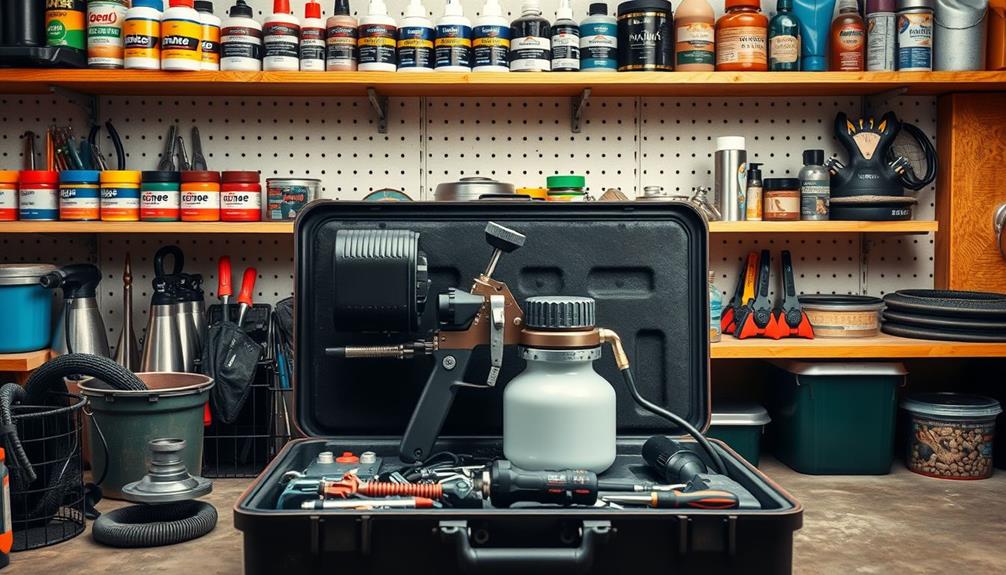
To properly store your airless paint sprayer, start by thoroughly cleaning it to prevent clogs. Release any pressure and flush the system with clean water for short-term storage or use mineral spirits for longer durations. Apply a suitable pump protectant like Graco Pump Armor to preserve seals. Store the sprayer indoors in a stable temperature to avoid freeze damage. Verify suction and drain tubes stay submerged to prevent paint drying. Regular maintenance checks are key to prolonging its lifespan. Want to know more tips to keep your sprayer in top condition? There's plenty more to explore!

Key Takeaways

  • Always perform a thorough cleaning and flushing of the sprayer before storage to prevent clogs and corrosion.
  • Use recommended pump protectants like Graco Pump Armor or a mixture of mineral spirits and engine oil for long-term protection.
  • Store the sprayer indoors in a temperature-controlled environment to avoid freezing damage and maintain optimal performance.
  • Release pressure from the sprayer by pulling the gun trigger before storage to ensure safety and prevent damage.
  • Conduct regular maintenance checks during storage to extend the lifespan and readiness of the airless paint sprayer.

Importance of Proper Storage

Proper storage of your airless paint sprayer is vital for keeping it in top shape. When you take the time to properly clean and maintain your sprayer, you greatly extend its lifespan and reduce costly repairs.

Inadequate storage can lead to malfunctions, especially in freezing temperatures, where water-based paints can expand and cause damage. Additionally, regular maintenance and cleaning practices, such as using appropriate cleaning solutions for different paint types, are important for peak performance and longevity.

Always remember to follow thorough maintenance protocols, even if you only use your sprayer occasionally. This includes making certain that all storage liquid is removed and that the device is clean.

If you neglect proper cleaning and storage, you risk exposing your sprayer to environmental factors like extreme temperatures and moisture, which can lead to corrosion and deterioration.

Storing your airless paint sprayer indoors is a smart move; it protects the equipment from harsh conditions that could compromise its functionality.

Advertisement

By committing to proper storage practices, you not only safeguard your investment but also guarantee that your sprayer will be ready for action when you need it.

Don't forget that neglecting these procedures might even void your warranty, so it's important to treat your airless paint sprayer with care.

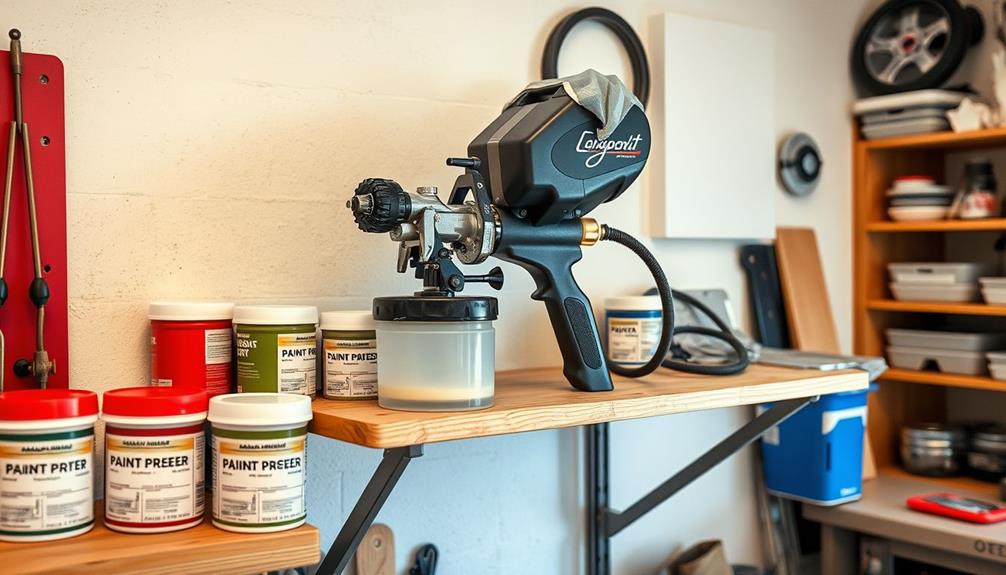
Recommended Pump Protectants

optimal pump safeguard solutions

Choosing the right pump protectant can make a considerable difference in the performance and lifespan of your airless paint sprayer. One of the top recommendations is Graco Pump Armor, well-known for preserving the pump and seals during storage.

Additionally, understanding the importance of key factors in service selection can help you maintain your equipment better and guarantee you have the right tools for the job. When you use Graco Pump Armor, you confirm that your sprayer remains in prime condition, especially during long-term storage.

If you're looking for alternatives, Titan Liquid Shield is another option, but keep in mind it's not freeze-proof, which could be a concern if you live in a colder climate.

For a more versatile choice, you can consider using mineral spirits either on their own or mixed with engine oil. This combination provides solid protection during long-term storage, helping to keep your sprayer functional and ready for use when you need it.

Advertisement

Additionally, there are non-flammable pump protectants available, enhancing safety during your storage procedures.

The effectiveness of your chosen pump protectant will greatly impact your sprayer's performance and longevity, so be sure to select wisely to protect against potential damage from freezing conditions.

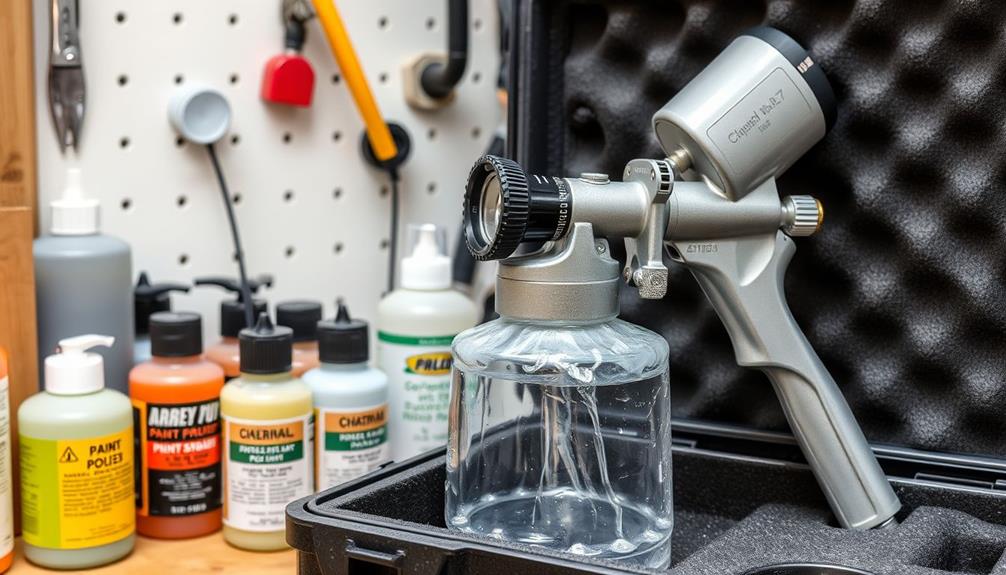
Short-Term Storage Techniques

temporary storage methods explained

When you need to store your airless paint sprayer for a short period, there are some key techniques to keep in mind.

First, always release the pressure by pulling the gun trigger and guarantee the suction and drain tubes stay submerged in the paint can.

Additionally, consider that improper storage can lead to clogs, much like flushing non-flushable items can cause plumbing issues; clogging remedies can be useful to know.

Also, remember that environmental factors like heat and humidity can impact the effectiveness of your temporary storage methods.

Advertisement

Recommended Temporary Methods

For short-term storage of your airless paint sprayer, there are several effective methods you can use to keep it in ideal condition. First, if you're pausing work for an hour to three days, leave the suction and drain tubes submerged in the paint can. This prevents the sprayer from drying out. Make sure to cover the paint can and hoses tightly with plastic wrap to minimize exposure to air and moisture.

Additionally, always release pressure from the sprayer by pulling the gun trigger before storage to avoid accidents and damage. If you're not concerned about freezing temperatures, consider submerging the spray gun in water to keep it wet and functional during temporary storage.

Here's a quick reference table for your temporary storage options:

Method Description
Submerged Tubes Keep suction/drain tubes submerged in paint can.
Plastic Wrap Cover paint can and hoses tightly with plastic wrap.
Release Pressure Pull gun trigger before storage.
Submerged Spray Gun Submerge spray gun in water, avoid freezing conditions.

Using these methods will help maintain your sprayer's performance!

Pressure Release Steps

To guarantee safety and prevent accidental discharge, it's crucial to release the pressure in your airless paint sprayer before short-term storage. Following these pressure release steps will help you properly prepare your sprayer for the next use:

Advertisement
  1. Pull the Gun Trigger: Begin by pulling the trigger on your spray gun to relieve any trapped pressure within the system. This is similar to how air purifiers improve indoor air quality by removing unwanted particles, ensuring your equipment is safely prepared for storage.
  2. Submerge Tubes: Leave the suction and drain tubes submerged in the paint can. This keeps the system primed and ready for quick use.
  3. Cover the Paint Can: Protect the system from drying out by tightly covering the paint can and hoses with plastic wrap. This minimizes exposure to air and contaminants.
  4. Avoid Freezing Conditions: If you're submerging the spray gun in water to prevent paint from drying in the nozzle, make sure you're not doing this in freezing temperatures.

Always make certain that any pressure is completely released and the Prime Valve is opened before any storage procedure.

Following these safety precautions will help maintain your paint sprayer and make sure it's ready for your next project.

Environmental Considerations

Considering the impact of environmental factors on short-term storage techniques is essential for maintaining your airless paint sprayer's performance. When storing paint sprayers for a short duration—between one hour and three days—take proactive steps to prevent clogs and drying paint.

Keeping the suction and drain tubes submerged in the paint can is critical, as this simple action helps avoid the paint from drying out and clogging your sprayer. Additionally, make certain that the storage environment is at a stable temperature to avoid any sudden changes that could affect the paint's consistency, similar to how well-draining soil is significant for preventing root rot in plants.

To minimize air exposure, cover the paint can and hoses tightly with plastic wrap. This prevents skin formation on the paint surface, making sure your materials remain usable.

After releasing pressure from the sprayer, submerge the gun in water to prevent paint from drying inside the nozzle. However, avoid this method in freezing temperatures, as water can freeze and damage your sprayer's internal components.

Advertisement

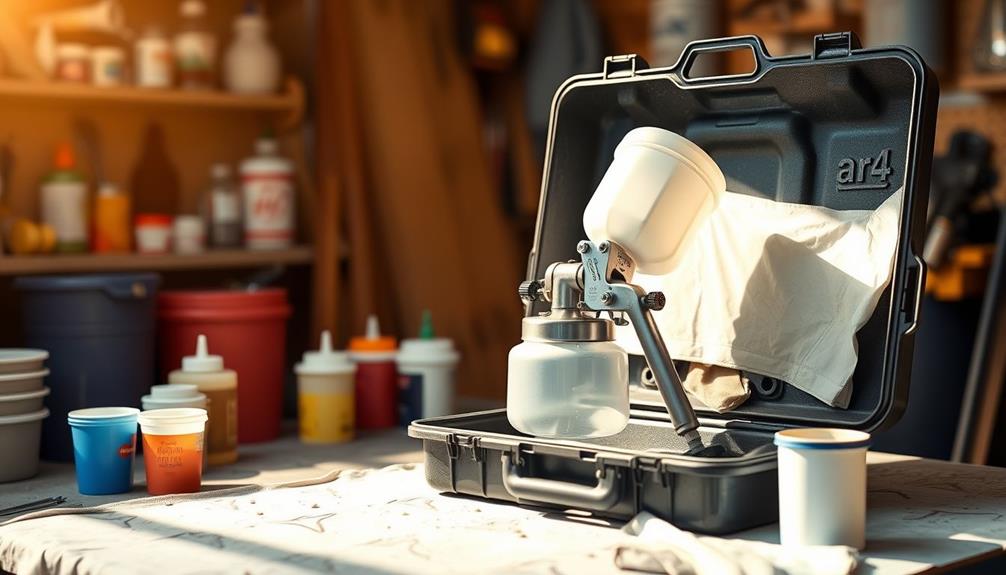
Medium and Long-Term Storage

extended storage solutions available

When it comes to medium and long-term storage of your airless paint sprayer, proper cleaning is essential. Flushing the sprayer with lacquer thinner guarantees that all paint residues are removed, preventing clogs and maintaining performance.

To enhance the longevity of your sprayer, consider using the right oil for lubrication, as correct oil selection guarantees peak sprayer performance and longevity. You'll need to flush the sprayer with lacquer thinner and use appropriate protectants to keep it in top shape.

Additionally, following the right storage techniques can prevent damage and guarantee your sprayer's ready to go when you need it again.

Cleaning Procedures Before Storage

Cleaning your airless paint sprayer before storage is essential to guarantee its longevity and maximum performance. Neglecting this step could lead to clogs and damage, so follow these procedures for effective maintenance.

Additionally, confirming that your tools are well-maintained can enhance your overall painting experience, just like how using high-quality garage door openers can improve home security and convenience.

  1. Relieve Pressure: Always relieve the sprayer's pressure by pulling the gun trigger and opening the Prime Valve before you start cleaning. This confirms safety and prevents any accidents during the process.
  2. Flush with Clean Water: Begin by flushing the system with clean water to remove any paint residue. This is especially important for medium-term storage (3-6 months).
  3. Use Mineral Spirits and Oil: For long-term storage (6 months to 1 year), thoroughly flush the pump with mineral spirits or Pump Armor, followed by adding 30wt oil for added protection against corrosion.
  4. Detach and Soak Parts: Detach the airless tip, guard, and filter. Soak them in a suitable cleaning solution to confirm all paint residue is removed, then reassemble the filter housing without the filter.

Recommended Storage Techniques

After guaranteeing your airless paint sprayer is thoroughly cleaned, proper storage techniques will help maintain its performance and longevity.

For medium-term storage, which lasts about 3 to 6 months, clean the sprayer using lacquer thinner. Assure you cycle fresh mineral spirits or Pump Armor through the system to protect the pump and seals. It's also important to take into account HVAC maintenance as a way to improve overall air quality in your workspace, which can indirectly affect your painting projects.

Advertisement

Always relieve pressure by pulling the gun trigger and make sure the rod is in the down position when turning off the sprayer. This prevents internal damage.

When preparing for long-term storage (6 months to 1 year), use a mixture of Pump Armor or mineral spirits combined with 30-weight oil. During the protectant cycling, apply Graco Throat Seal Liquid (TSL) for added lubrication.

Don't forget to drain all water from the hoses and the gun to prevent corrosion and freezing damage. It's crucial to store the airless sprayer indoors to shield it from extreme temperatures and environmental factors that could affect its functionality.

Very Long-Term Storage Guidelines

extended storage best practices

For very long-term storage of your airless paint sprayer, it's crucial to follow specific guidelines to guarantee its longevity and functionality. Proper maintenance and storage practices can greatly enhance the performance and durability of your equipment, making it ready for use when needed. Here's how you can prepare your sprayer for extended storage:

  1. Thoroughly Clean: Make sure all paint residue is completely removed to prevent clogs and corrosion. Use mineral spirits for effective cleaning.
  2. Lubricate: Mix engine oil with mineral spirits—add a few cap-fulls of oil per quart of spirits. This mixture serves as a protectant, guaranteeing smooth operation when you're ready to use it again.
  3. Seal Maintenance: Apply several drops of Graco Throat Seal Liquid (TSL) while cycling the protectant through the sprayer. This keeps your seals lubricated and functional.
  4. Store Properly: Always store your sprayer indoors, avoiding freezing temperatures that can damage components. Keep the rod in the down position after powering off to prevent pump seal damage.

Regular updates to your maintenance practices can help maintain ongoing functionality, as noted in strategies for increasing topical authority.

Common Issues and Solutions

frequent problems and remedies

Airless paint sprayers can face several common issues that, if not addressed properly, might hinder their performance and longevity. One major problem arises from failing to clean and flush the sprayer before storage. Dried paint residue can cause clogs, complicating future use and leading to costly repairs. Always verify thorough cleaning of filters and spray tips after each use to avoid operational problems.

Additionally, just as with proper storage practices for butter, maintaining your sprayer in an airtight container can help prevent contamination and guarantee its longevity.

Another critical issue is water left in the system, which can freeze and damage the pump assembly. To prevent this, drain all water and consider running antifreeze through the system, especially if you use your sprayer infrequently. Regular maintenance like this helps maintain functionality and prevents pump seizure.

Advertisement

Corrosion and breakage can also occur if improper storage practices are followed. Always use manufacturer-recommended protectants and store your sprayer without pressure.

If you need to use paint thinner for cleaning, make sure to follow up with a flush of water or antifreeze to protect your sprayer's internals. By addressing these common issues proactively, you'll guarantee your airless paint sprayer remains in peak condition for your next project.

Frequently Asked Questions

How Do You Store Graco Paint Sprayer Between Coats?

To store your Graco paint sprayer between coats, keep the suction and drain tubes in the paint can, cover everything tightly with plastic wrap, and release pressure by pulling the gun trigger for safety.

How Do You Store Spray Paint Guns?

To store spray paint guns, clean them thoroughly to remove paint, relieve pressure, and disassemble for detailed cleaning. Use a pump preserver, then keep the gun in a dry place to prevent damage.

Can You Leave Paint in Paint Sprayer Between Coats?

Sure, you can leave paint in your sprayer, right? Just like you can leave ice cream out in the sun. But seriously, it'll clog up if you wait too long—clean it instead!

Advertisement

How Long Can Paint Be Left in an Airless Sprayer?

You shouldn't leave paint in an airless sprayer for more than a few hours. If you're pausing for longer, clean it thoroughly to avoid clogs and guarantee your sprayer stays in great condition.

Conclusion

In summary, storing your airless paint sprayer properly is essential for its longevity and performance. While short-term storage might seem simple, neglecting medium and long-term care can lead to costly repairs. Just as you wouldn't leave a car unprotected through winter, don't overlook the necessary precautions for your sprayer. By following these guidelines, you guarantee it's ready to deliver flawless results whenever you need it, turning a potential hassle into effortless efficiency.

Whether it’s a step-by-step tutorial on achieving flawless finishes or an in-depth analysis of the latest airless paint sprayer models, Joe’s ability to articulate complex ideas in a simple and engaging manner resonates with our diverse audience. His practical tips and techniques empower readers to tackle their projects with confidence.

Continue Reading
Advertisement

Airless Paint Sprayers

How to Properly Thin Paint for Your Airless Sprayer

Understand the essential steps to thin paint for your airless sprayer effectively, ensuring a flawless finish—discover the crucial tips inside!

Published

on

By

thin paint for sprayer

To properly thin paint for your airless sprayer, start by pouring latex paint into a clean bucket. Add about half a cup of water per gallon and stir thoroughly without creating bubbles. Test the viscosity using a funnel to check if it flows freely. Aim to thin by 10-15%, but don't exceed one pint of water per gallon to maintain adhesion. Allow the thinned paint to rest for 10-15 minutes before using it. This guarantees a smoother application and minimizes clogs. For tips on achieving the perfect consistency and avoiding common mistakes, you're in the right place.

Key Takeaways

  • Assess paint viscosity by observing drip rate, conducting spray tests, or using a funnel flow test to determine if thinning is needed.
  • Thin latex paint by adding ½ cup of water per gallon, ensuring not to exceed 1 pint to maintain adhesion.
  • Stir paint thoroughly before adding water, and mix gradually to avoid over-thinning and achieve the desired consistency.
  • Test thinned paint on a sample surface to ensure proper flow and coverage before full application.
  • Allow thinned paint to rest for 10-15 minutes before use to improve flow and reduce clogs in the sprayer.

Understanding Latex Paint

When it comes to modern painting, understanding latex paint is essential. This water-based product, made with synthetic resins, offers several advantages over traditional oil-based paints. Its thinner consistency makes it perfect for use with airless sprayers, allowing you to achieve a smooth finish without the hassle of excessive thinning paint.

Additionally, airless paint sprayers use high pressure to atomize paint, which enhances the overall application process.

One of the key benefits of latex paint is its ease of cleanup. Since it doesn't rely on petroleum-based solvents, you can clean brushes and tools using just soap and water. This makes it a popular choice for DIY enthusiasts and professionals alike.

Latex paint has come a long way since its introduction in the 1940s by Sherwin-Williams as Super Kem-Tone. Today's formulations are specifically designed to work seamlessly with airless spray guns, often eliminating the need for any thinning.

This versatility means you can tackle a variety of projects with confidence, knowing you're using a product that's both effective and user-friendly.

Advertisement

Importance of Thinning Paint

essential for paint application

Thinning paint is essential for achieving a smooth and professional finish, especially with airless sprayers. When you thin latex paint, you enhance its flow and leveling properties, which are critical for ideal performance.

Utilizing the right techniques can also help you achieve a fine finish with Graco FFLP Fine Finish Low Pressure Reversible Tip, designed specifically for intricate projects. Over time, paint can thicken due to loss of water content or exposure to high temperatures, leading to clumpy consistency.

Thinned paint helps restore proper consistency, making it easier to apply and ensuring an even coat on surfaces. Using thicker paint can clog your spray equipment, so proper thinning techniques become essential.

When you thin your paint, you not only improve its adherence to surfaces but also minimize the chances of runs and uneven patches. A well-thinned mixture allows your sprayer to create a finer mist, leading to better coverage and a more uniform finish.

Assessing Paint Consistency

evaluating paint texture quality

To assess paint consistency, start by testing its viscosity with a stick; the drip rate will help you determine if it's too thick.

It's crucial to verify you have the right tools at hand, similar to how a professional uses essential items in their home cleaning kit.

Conduct a spray test on cardboard to identify any thinning indicators, like sputtering or uneven patterns.

Advertisement

These simple methods will guide you in adjusting the paint for peak performance with your airless sprayer.

Viscosity Testing Methods

Evaluating your paint's consistency is essential for achieving a smooth finish with an airless sprayer. You can perform a viscosity test by dipping a stick into the paint and observing the drip rate. A slow, thick stream indicates you might need to thin the paint. To further test the spray performance, apply thinned paint on cardboard; an even spray pattern signifies proper consistency, while sputtering suggests more thinning is necessary.

You can also pour the paint through a funnel to visually check its flow. If it doesn't pour freely, it likely requires additional thinning. Additionally, using a paint strainer can help you check for clogs, ensuring any lumps are removed before spraying.

Here's a quick reference table for your viscosity testing methods:

Method What to Look For Action Required
Viscosity Test Slow drip Thin paint if needed
Spray Performance Test Even spray pattern Adjust thinning as necessary
Funnel Flow Test Free flow Thin paint if not flowing well

Consistent flow and uniformity during these tests indicate that your paint is ready for application.

Advertisement

Identifying Thinning Indicators

Recognizing the signs that your paint needs thinning is essential for achieving ideal results with an airless sprayer. Start by conducting a viscosity test. Dip a stick into the paint and observe the drip rate. If you notice a slow, thick stream, it's time to thin the paint.

Additionally, take into account the environment in which you're painting, as factors like temperature and humidity can affect paint consistency and performance. For example, unique cultural experiences during travel can inspire your choice of colors and textures in your home projects.

Next, spray a sample on cardboard to check for spray consistency. If the paint sputters or leaves globs, it clearly requires thinning for best performance. A uniform flow during your test indicates that the paint may not need further thinning, ensuring a smoother application.

Remember to test the paint's spray consistency before application to avoid clogs or uneven coverage. Regularly assess the paint's consistency, especially if it's been sitting for a while. Older paint tends to thicken, so you may need to take into account thinning latex to achieve the right viscosity.

Thinning Process Steps

thinning procedure detailed steps

Before you start thinning your paint, it's important to have a clean 5-gallon bucket ready. Proper preparation is key for achieving the best results, just like confirming your garage door openers are properly installed for maximum security.

Follow these steps to confirm your paint is properly thinned for your spray gun:

Advertisement
  1. Pour the Paint: Begin by pouring the latex paint into your clean bucket. For every gallon of paint, add approximately ½ cup (118 milliliters) of clean, room temperature water.
  2. Stir Thoroughly: Use an up-and-down motion to mix the paint and water. Be careful to avoid excessive bubbles while confirming even mixing.
  3. Test Viscosity: After mixing, test the paint's viscosity by pouring it through a funnel. If it doesn't flow freely, gradually add an additional ⅓ cup (30 milliliters) of water per gallon and mix again.
  4. Let it Sit: Allow the thinned paint to sit for 10-15 minutes before use. This will confirm proper incorporation of water and help you achieve the desired consistency.

Proper Thinning Techniques

effective plant pruning methods

Achieving the perfect paint consistency is fundamental for a smooth and even finish when using an airless sprayer. To thin latex paint effectively, start by thoroughly stirring it to guarantee an even mixture.

Cats, much like paint, require proper care and attention to avoid issues—cat health and nutrition is essential for their well-being. Use a separate clean bucket for mixing, and gradually add water in small increments. Scrape the sides and bottom of the bucket as you mix, employing an up-and-down stirring motion to minimize bubbles that could affect your spray finish.

Once you've combined the paint and water, let the thinned paint sit for 10-15 minutes. This waiting period allows for proper incorporation of the water, which is critical for achieving the right consistency.

Before you immerse yourself in your final application, always test the thinned paint on a sample surface. This step confirms its flow and performance, verifying you're ready to proceed confidently.

If you find that the mixture isn't flowing well, you might need to adjust it further. Using a paint strainer can help filter out any lumps that may have formed during mixing, guaranteeing the best way to thin your paint.

Following these proper thinning techniques will set you up for success with your airless sprayer.

Advertisement

Tips for Successful Thinning

effective plant thinning strategies

When thinning paint, it's essential to follow specific guidelines to get the right consistency without overdoing it.

Maintaining a healthy lifestyle, as discussed in various healthy lifestyle blogs, can also enhance your overall energy and focus during projects like these.

Always thin only what you'll use right away to maintain quality, and choose a high-quality latex paint designed for airless sprayers for the best results.

Thinning Quantity Guidelines

Success in thinning paint for an airless sprayer hinges on following precise guidelines. When working with latex paint, it's crucial to adhere to specific thinning quantity guidelines to achieve the best results.

To maintain a healthy indoor environment while working on your painting project, consider using an air purifier to reduce dust and allergens.

Here's what you need to know:

Advertisement
  1. Thinning Ratio: Generally, thin latex paint by 10-15%. This means adding about 1/8 to 1/4 cups of water to each gallon.
  2. Maximum Limit: Never exceed 1 pint of water per gallon. Too much thinning can compromise adhesion and finish quality.
  3. Incremental Testing: After each addition of water to thin, test the consistency. This helps guarantee ideal flow and performance before you start spraying.
  4. Immediate Use: Only thin paint you plan to use right away. This prevents spoilage and promotes a consistent application.

Immediate Use Importance

Thinning paint for immediate use is essential to preventing spoilage and guaranteeing a consistent application. When you thin paint, it's important to prepare only what you need for your project. Always thin paint in small batches—typically no more than a gallon at a time—to avoid the risk of over-thinning the entire can. This approach not only helps maintain the quality but also minimizes waste.

Additionally, using quality latex paint specifically designed for airless spraying will yield best results when thinned appropriately, similar to how projector maintenance tips can enhance the longevity of your devices. For professional results, consider using the AEROPRO AP8628 sprayer, as it assures effective atomization and coverage with your thinned paint.

Before you start spraying, always conduct a viscosity test after thinning to confirm the paint's flow is suitable for your airless sprayer. This step is significant, as it determines whether your paint will apply smoothly or if further adjustments are needed.

Quality Paint Selection

Choosing the right paint is essential for achieving perfect results with your airless sprayer. Quality latex paint specifically designed for airless spraying minimizes the need for thinning and enhances performance. Additionally, understanding innovative architectural solutions can inspire creative applications for your painting projects.

Here are some tips to help you select the best paint:

  1. Opt for High-Quality Paint: Always choose premium latex paint to avoid excessive thinning and guarantee a smooth finish.
  2. Check Sprayer Compatibility: Confirm the paint is suitable for your sprayer model. Some sprayers can handle unthinned paint, while others might require a specific thinning ratio for best flow.
  3. Test Before Full Application: Always test a small quantity of paint on a sample surface. This helps you determine the perfect thinning ratio and guarantees compatibility with your sprayer.
  4. Consider Professional Equipment: Using a reliable sprayer like the AEROPRO AP8628 can make a significant difference. It's designed to handle various paint viscosities efficiently, resulting in a professional finish.

Common Thinning Mistakes

avoiding thinning errors commonly

Many DIYers make common thinning mistakes that can compromise their paint job. One major error is over-thinning paint, which often leads to a poor finish and increased runs. When you're adding water to thin your paint, be careful not to go overboard, as excessive thinning can hinder the paint's ability to adhere properly to surfaces.

Another mistake is using solvents like paint thinner instead of water for latex paints. This can ruin the paint's integrity and performance. Always stick to the recommended thinning method for the specific type of paint you're using.

Advertisement

Failing to conduct a viscosity test before you start thinning can also lead to issues. If you don't check the paint's thickness first, you might end up thinning it too much, making it tough to achieve even coverage.

Additionally, neglecting to stir the paint thoroughly before adding water can result in an uneven consistency, causing performance problems during spraying.

Finally, if you're thinning paint meant for long-term storage, remember that this can lead to spoilage—only thin paint you plan to use immediately.

Avoid these mistakes, and you'll set yourself up for a successful painting project.

Final Considerations for Spraying

spraying best practices summary

Before you start spraying, it's crucial to guarantee your paint is properly prepared for the airless sprayer. This means paying close attention to the viscosity and following the manufacturer's recommendations. Here are some final considerations to keep in mind:

  1. Thinning: Ideally, thin latex paint by no more than 10-15% with water for best flow. Remember, excessive thinning can lead to longer drying times and might require extra coats.
  2. Monitor the Spray Pattern: As you spray, keep an eye on the pattern. A smooth, even spray is a good sign that your paint is thinned correctly. If you notice sputtering or inconsistent coverage, it may need further adjustment.
  3. Let It Sit: After thinning, allow your paint to rest for 10-15 minutes. This helps promote proper incorporation and can reduce clogs in your sprayer.
  4. Consult the Manual: Always refer to your airless sprayer's manual for specific guidelines regarding paint consistency. Different models have varying requirements that could impact your results.

Frequently Asked Questions

How Do You Thin Paint for an Airless Spray Gun?

To thin paint for an airless spray gun, mix in 10-15% water, using clean, room temperature water. Test the viscosity by pouring it through a funnel until it flows freely for best performance.

How Much to Thin Paint for an Airless Sprayer?

To thin paint for your airless sprayer, aim for 10-15% dilution, which means adding 1/8 to 1/4 cup of water per gallon. Don't exceed 1 pint to maintain paint performance. Always check manufacturer guidelines.

Advertisement

What Is the Ratio of Paint to Thinner for a Spray Gun?

When thinning paint for a spray gun, start with a 10% water-to-paint ratio. If needed, adjust up to 20%, but remember to test the viscosity to guarantee it flows smoothly without clogging.

How Much Water to Thin a Gallon of Paint?

Did you know that nearly 70% of DIY painters struggle with paint consistency? To thin a gallon of paint, start by adding ½ cup of water, mix well, and adjust for the desired flow.

Conclusion

In summary, properly thinning paint for your airless sprayer is vital for achieving a smooth finish. Did you know that over 50% of paint application issues stem from incorrect consistency? By following the steps and techniques outlined, you can avoid common mistakes and guarantee a successful project. Remember, the right thickness not only improves the sprayer's performance but also enhances the overall appearance of your work. So, take the time to thin your paint correctly and enjoy the results!

Continue Reading

Airless Paint Sprayers

Airless Paint Sprayer Vs. Roller: Which Is Faster?

Overwhelmed by choosing between an airless paint sprayer and a roller? Discover the surprising truths about speed and efficiency in your painting projects.

Published

on

By

sprayer vs roller speed comparison

When it comes to speed, airless paint sprayers usually outpace rollers, especially for larger projects. They cover vast areas quickly and deliver a smooth finish, making them ideal for open spaces. However, don't overlook the prep and cleanup time; sprayers require extensive masking and thorough cleaning, which can offset some of that speed. On the other hand, rollers are easier to use, letting you pause easily without wasting paint. If you want to know more about the specific pros and cons of each method, keep going to discover the best fit for your painting needs.

Key Takeaways

  • Airless paint sprayers cover large areas faster than rollers, making them ideal for expansive spaces and large projects.
  • Sprayers provide a smoother finish, enhancing professional results but may require additional touch-ups due to streaking.
  • Rollers allow for easier pauses and can be started immediately with less prep, making them efficient for smaller jobs.
  • Although sprayers save time in application, longer prep and cleanup times can offset this advantage.
  • Overall, sprayers are faster for big projects, while rollers excel in controlled, smaller applications.

Overview of Painting Methods

When you're deciding how to tackle a painting project, it's essential to understand the two main methods: airless paint sprayers and rollers. Each has its advantages and is suited for different tasks. An airless paint sprayer can cover large areas considerably faster than a roller, making it ideal for expansive spaces or complex textures.

For example, painting a 900 sq. ft. loft with a sprayer might only take two long days, while using a roller could stretch that project to several days. Additionally, airless sprayers provide a more even finish, which is beneficial for achieving professional results on surfaces like walls and ceilings to learn more about sprayer benefits.

However, don't overlook the overall project time. While spraying reduces the application time, it often increases prep and cleanup time. You might find that the total duration of using a sprayer could end up being similar to rolling methods.

Additionally, there's a learning curve with sprayers that could impact your initial speed. If you're new to painting, rolling might be the more intuitive choice, allowing for quicker starts.

Ultimately, the best painting method depends on your specific project needs, space, and comfort level with the tools at hand. Consider these factors carefully as you plan your next painting endeavor.

Advertisement

Speed Comparison

velocity assessment analysis

When it comes to speed, airless paint sprayers outpace rollers by covering large areas much faster. These sprayers can also deliver a smoother finish, which can save time in the overall process.

While you'll need to invest time in prep and cleanup, the overall application time is greatly reduced, making sprayers ideal for big projects. Plus, you'll find that touch-ups are quicker with a sprayer, allowing you to finish your job efficiently.

Additionally, utilizing modern tools can enhance your work efficiency in various home improvement tasks, such as garage door openers.

Application Time Efficiency

Choosing between an airless paint sprayer and a roller often boils down to application time efficiency. Paint sprayers excel in covering large areas quickly, letting you finish entire rooms in just a couple of days. In contrast, rolling paint can take several days, especially for bigger projects. Here's a quick comparison to illustrate the differences:

Method Application Time Efficiency
Airless Paint Sprayer Fast for large areas, multiple coats dry quickly
Roller Slower, but easier to pause and resume in small spaces

While spraying is faster, keep in mind that the extensive prep work can offset those time savings. You might find that overall project times can be similar to rolling in some cases. Plus, for large, flat surfaces, paint sprayers allow quick drying between layers. However, rollers offer a more straightforward cleanup process, which can enhance overall efficiency. Ultimately, consider your project size and specific needs when deciding which method best suits your application time efficiency goals.

Prep and Cleanup Duration

Typically, the prep and cleanup time for an airless paint sprayer can be considerably longer than that for a roller. When you're getting ready to use a sprayer, you'll need extensive masking and taping to prevent overspray, which adds significant time to your prep work. This is similar to the care needed for gas appliances during power outages, where proper precautions must be taken to guarantee safety.

Advertisement

In contrast, rolling requires much less initial setup, allowing you to dive right into your painting project.

Once you've finished, the cleanup process with an airless sprayer is also more complex. You'll need to thoroughly clean the spray gun, hoses, and any other equipment, which can take a lot longer than just rinsing out a roller and tray.

Although airless sprayers can cover large areas quickly once they're set up, the time saved in application may be offset by the longer prep and cleanup times.

For smaller projects, you might find that the overall time is similar whether you choose a sprayer or a roller. It's important to weigh the initial time savings against the additional time required for setup and cleanup to determine which method best fits your needs.

Touch-Up Needs Comparison

The speed of touch-ups can vary greatly between airless paint sprayers and rollers. While sprayers can cover large areas quickly, allowing for multiple coats in a single day, they often lead to more touch-up needs due to potential streaking and overspray. This means that despite the initial speed advantage, you might find yourself spending extra time fixing those imperfections later on.

Advertisement

Additionally, achieving a smooth finish is vital for creating a serene atmosphere in your home, similar to the calming effects of a modern farmhouse bedroom which emphasizes tranquility.

On the other hand, rollers may take longer to set up and apply, but they offer better control over paint thickness. This control can greatly reduce the likelihood of uneven patches, meaning fewer touch-ups in the long run.

Rollers can be paused easily without wasting paint, making them a practical option for smaller touch-up jobs where precision is key.

Surface Preparation Techniques

effective surface preparation methods

When you're preparing a surface for painting, you need to focus on cleaning and priming to guarantee the best adhesion, especially with an airless sprayer.

It's essential to recognize that maintaining a clean indoor environment can greatly improve the overall air quality while you work, making it more comfortable and healthy reduce allergens.

Sanding rough areas helps the paint stick better, while masking with painter's tape protects edges and keeps your work neat.

Advertisement

Don't forget to take into account environmental factors like humidity and temperature, as they play a vital role in the paint's performance.

Cleaning and Priming Surfaces

Successful paint application hinges on meticulous surface preparation, which includes thorough cleaning and priming.

Whether you're using an airless paint sprayer or a roller, proper cleaning is essential to guarantee ideal adhesion. For airless sprayers, you'll want to meticulously clean rough surfaces, as this enhances paint adhesion and allows for a smooth application.

If the surface is porous or uneven, applying primer is a crucial step; it not only improves the overall finish but also increases durability. Additionally, making sure that your cleaning supplies, such as microfiber cloths and multi-surface cleaners, are at hand can streamline the preparation process, akin to the essential items in a home cleaning kit.

While rollers usually require less stringent preparation, you shouldn't overlook cleaning. Masking with painter's tape remains important to protect adjacent surfaces and achieve crisp lines.

Advertisement

Keep in mind that environmental conditions, like humidity and temperature, can greatly influence paint adhesion. Before you begin, it's wise to check these factors to avoid potential issues.

Sanding for Adhesion

Sanding plays an indispensable role in preparing surfaces for painting, as it enhances adhesion and guarantees a long-lasting finish. When you sand surfaces, you create a rough texture that helps the paint grip better, resulting in a more durable outcome.

For ideal results, it's best to use medium-grit sandpaper, around 120-150 grit, especially on rough surfaces before applying primer or paint. Additionally, verifying that the surface is free of contaminants will improve the overall quality of your finish, especially when using techniques like proper dilution of paint for airless sprayers.

If you're working with previously painted surfaces, sanding is vital. It helps remove any gloss, allowing the new paint to adhere more effectively and reducing the risk of peeling down the line.

However, don't forget to clean up the dust created during sanding. Use a damp cloth or vacuum to confirm the surface is free of contaminants before applying paint.

Advertisement

Proper surface preparation, including effective sanding, can greatly reduce the need for additional coats of paint. This not only saves you time but also cuts down on material costs, making your painting project more efficient.

Masking for Protection

After guaranteeing your surface is properly sanded and free of contaminants, it's time to focus on masking for protection.

Proper masking is vital when using an airless paint sprayer, as it prevents overspray from damaging adjacent surfaces. For best results, consider using well-draining soil techniques to maintain a clean work area.

Here's what you need to do:

  • Use high-quality painter's tape for clean lines and to avoid paint bleed.
  • Apply the tape at a 45-degree angle to enhance adhesion and achieve sharper edges.
  • Cover furniture and floors with drop cloths or plastic sheeting to catch any overspray.
  • Check your masking job for gaps or areas needing extra tape before spraying.
  • Remove the tape while the paint is still slightly wet to guarantee smooth edges.

Cost Analysis

financial expense evaluation

Considering your budget, understanding the cost implications of airless paint sprayers versus rollers is essential. Airless paint sprayers start at around $300, making them a significant initial investment. In contrast, rollers require minimal supplies, costing under $50, which makes them more accessible for DIY enthusiasts.

If you're looking to rent an airless sprayer, be prepared to spend between $40 and $100 per day, adding to your overall expense for short-term projects. Additionally, using tools that are budget-friendly vacuum cleaners can help you maintain a clean workspace, which is vital when painting.

Advertisement

Another important factor in this cost analysis is how much paint each method uses. Sprayers typically consume about 33% more paint due to overspray, which can inflate your material costs, especially on large jobs. In the long run, rollers tend to have lower ongoing expenses, thanks to reduced paint waste and fewer tool replacements compared to airless sprayers.

While airless paint sprayers might save you time, their higher upfront and material costs can make rollers a more budget-friendly choice for many projects. Ultimately, weighing the costs against your specific needs will help you decide which option is best suited to your financial situation.

Finish Quality

high standards assurance

When it comes to finish quality, airless paint sprayers often shine, delivering a smoother and more uniform application than rollers. If you're aiming for a high-gloss surface without lap marks, sprayers are your go-to option.

Rollers can leave a slight texture, especially with certain nap sizes, which may not meet your desired finish quality. Additionally, employing techniques that promote relaxation and focus, such as practicing meditation, can help you maintain precision during painting, leading to better results.

Here are some key points to take into account:

  • Sprayers excel in intricate designs and hard-to-reach areas.
  • They provide a finish that can greatly enhance the overall aesthetic of your project.
  • Achieving a smoother finish requires careful technique, particularly with darker colors to avoid streaking.
  • The type of paint you choose can also impact the finish; some paints don't perform well with sprayers, making rollers a better choice in those cases.
  • Overall, while both methods have their merits, sprayers typically offer a more polished result for professional-looking outcomes.

User Experience and Learning Curve

user experience learning curve

Using an airless paint sprayer can feel like stepping into a whole new world of painting for many beginners. The user experience with a sprayer often involves a considerable learning curve. You'll need to master the right distance and spray intensity to avoid drips and uneven application. If you're inexperienced, you might find yourself struggling with streaking, especially when working with darker colors.

On the other hand, rolling paint is more intuitive and easier for most newbies. It allows for better control over your application without the steep learning curve associated with sprayers. While rollers can be simpler to use initially, they mightn't yield the smooth finishes that proficient sprayer users achieve.

Advertisement

As you gain experience, mastering spray techniques can lead to faster application times and superior results. However, if you're just starting, you may find rollers to be more manageable.

Ultimately, your experience level will considerably impact the effectiveness of either method, making it essential to reflect on where you're at in your painting journey before diving into the world of airless paint sprayers.

Ideal Use Cases

optimal application scenarios

For those tackling larger painting projects, airless paint sprayers shine in their ability to cover vast areas quickly and efficiently. When you have an expansive space, like an exterior wall or an empty interior, a sprayer can greatly reduce your project time.

Here are some ideal use cases for each method:

  • Large exteriors: Sprayers handle expansive surfaces effortlessly.
  • Intricate textures: Airless sprayers excel at tackling detailed areas and hard-to-reach spots.
  • Open interiors: If you're painting a big, empty room, a sprayer will save you hours.
  • Occupied spaces: Rollers are better for occupied interiors since they require less prep and allow for quick pauses.
  • Thicker paint applications: Rollers may take longer but often need fewer coats on flat surfaces.

While sprayers are fantastic for speed, remember that their initial setup and cleanup can offset those benefits.

In some cases, your overall project time might end up similar to using rollers. Ultimately, choosing between a sprayer and rollers depends on the specifics of your project and the space you're working in.

Frequently Asked Questions

Is a Paint Sprayer Faster Than a Roller?

Yes, a paint sprayer's often faster than a roller, letting you cover large areas quickly. However, don't forget about the prep work needed; that can balance out the speed advantage when you're painting.

Advertisement

How Much Faster Is Using a Paint Sprayer?

Using a paint sprayer can save you significant time, often completing large areas in just two days. While it's quicker for application, don't forget to factor in the prep and cleanup involved.

What Are the Disadvantages of an Airless Paint Sprayer?

You'll love the overspray that dances around, wasting paint. Sure, it's costly, but who doesn't enjoy a good cleanup? And don't worry about mastering the technique—it's fun to embrace those drips and uneven coverage!

How Fast Is Airless Paint Sprayer?

An airless paint sprayer can cover up to 300 square feet per hour, letting you finish large areas quickly. Though setup takes time, the actual painting process is considerably faster than traditional methods.

Conclusion

In the battle of airless paint sprayers versus rollers, speed takes center stage. While sprayers can coat large areas in a flash, rollers offer precision in tight spots. Imagine the sprayer dancing across a wall, leaving a smooth finish, while the roller methodically fills in corners. Each method has its place: sprayers for efficiency and rollers for detail. Ultimately, your choice hinges on the job at hand, merging speed with quality for the perfect paint project.

Advertisement
Continue Reading

Airless Paint Sprayers

How to Use an Airless Paint Sprayer for Staining

Immerse yourself in the art of using an airless paint sprayer for staining, and discover essential tips for achieving a flawless finish!

Published

on

By

airless sprayer staining guide

Using an airless paint sprayer for staining can transform your wood projects quickly and efficiently. Start by preparing your surface; power-wash it and let it dry completely. Choose the right spray tip and adjust your settings to minimize overspray. Maintain a consistent spraying distance of about 12 inches, spraying with the grain of the wood and overlapping your passes by about 50%. Always wear protective gear and guarantee good ventilation while working. After finishing, clean the sprayer thoroughly to prevent clogs. Stick around to uncover more tips and techniques for a flawless staining experience!

Key Takeaways

  • Prepare the surface by power-washing and ensuring it is completely dry before staining for optimal adhesion.
  • Choose the appropriate spray tip and adjust pressure settings to minimize overspray while ensuring even application.
  • Maintain a consistent distance of 12 inches from the surface and spray with the wood grain for uniform coverage.
  • Clean the sprayer immediately after use using the Power Flush method to prevent clogging and ensure longevity.
  • Always wear protective gear and ensure proper ventilation to safeguard against harmful vapors during the staining process.

Project Overview

When tackling a staining project, using an airless paint sprayer can greatly enhance both efficiency and results. This tool is designed to apply stain evenly while protecting the wood from sun and weather damage.

With a Control Pro High Efficiency Airless Sprayer, you can cover an 8 x 6 ft. privacy fence in under a minute, considerably speeding up your project. Best Airless Paint Sprayer options are available that reduce overspray and improve coverage.

Staining isn't just about aesthetics; it's about maintaining the longevity of your wooden surfaces. Regular staining every 1-2 years is vital for ideal protection and appearance. An airless paint sprayer makes this task easier, producing 55% less overspray compared to traditional sprayers. This means cleaner results and reduced material waste, allowing you to focus on the job at hand without worrying about excess mess.

Before you start, remember to wear protective gear and guarantee adequate ventilation. Safety is key when using an airless paint sprayer, especially when handling stains that can emit harmful fumes.

Suggested Tools and Equipment

recommended tools and gear

When you're ready to start your staining project, choosing the right airless sprayer is essential; consider models like the Graco Control Pro series or Wagner's Universal Sprayer W 690 HVLP for ideal results.

To achieve an exceptional finish, you might also want to explore using the Graco FFLP Fine Finish Low Pressure Reversible Tip which is designed for intricate projects.

Advertisement

You'll also want to gather essential preparation tools, such as paint strainer bags, empty buckets, and protective gear.

With these items in hand, you'll set yourself up for a successful and efficient staining experience.

Recommended Sprayer Models

Choosing the right airless paint sprayer can make a significant difference in your staining projects. For ideal results, consider the Graco, Magnum, and TrueCoat models, which are highly recommended sprayer models known for their efficiency and versatility.

These airless sprayers excel at handling various staining materials, making them perfect for different types of wood projects. Additionally, when selecting a sprayer, it's important to think about the key factors in choosing a service that align with your specific needs.

If you're looking for something versatile, the Wagner Universal Sprayer W 690 HVLP is a great option. It works well with both stain and lacquer, catering to both DIY enthusiasts and professionals alike.

Advertisement

Another excellent choice is the Wagner HEA Control PRO 250 M, which features high-efficiency airless technology to minimize overspray and deliver a clean finish on larger surfaces.

Before you start spraying, don't forget your protective gear, such as gloves, goggles, and masks, to guarantee a safe working environment.

Essential Preparation Tools

Prepare your workspace effectively to guarantee a smooth staining process. Start by gathering essential tools and materials for your project. You'll need the appropriate paint or stain, spray tips suited for the surface, and empty buckets for mixing and transporting. Don't forget to include paint strainer bags to filter out debris and prevent clogging in your sprayer.

To guarantee overspray protection, cover surrounding areas, like lawns and shrubs, with tarps or plastic sheeting. This will keep your landscape safe from unwanted stains. Optional tools, such as a pressure roller kit or additional airless hose sections, can enhance your sprayer's efficiency and reach.

Here's a quick reference table to help you organize your preparation tools:

Advertisement
Essential Tools Purpose
Appropriate Paint The color and finish for staining
Spray Tips Suited for the specific surface
Paint Strainer Bags Prevent clogging during application
Tarps/Plastic Sheeting Overspray protection

With these tools in hand, you're ready to plunge into the staining process with confidence!

Preparation Steps

essential planning process

Before you start using an airless paint sprayer, it's essential to get everything ready for a smooth application.

Begin by power-washing the fence or deck several days prior to staining. This helps guarantee proper adhesion of the stain or paint to the surface. After washing, let the surface dry completely to prevent trapping moisture beneath the finish. Additionally, consider checking the weather conditions, as painting on a damp or windy day can affect the quality of the finish, similar to how safety features in tools promote better performance.

Next, clear the spraying area by moving outdoor furniture away and covering nearby plants and surfaces with tarps. This step is important to avoid any accidental staining and to keep your work area organized.

Collect all necessary tools and materials, including the sprayer, your chosen stain or paint, and the appropriate spray tips. Having everything at hand streamlines the preparation steps, making it easier to shift into the actual staining process.

Sprayer Setup

sprayer configuration instructions

When you're ready to set up your airless paint sprayer, start by selecting the right spray tip for your project to guarantee precision. This is especially important as using the wrong tip can lead to uneven application or excessive overspray, similar to how regular servicing of HVAC systems can improve efficiency.

Next, adjust the pressure settings to minimize overspray while maintaining an even application. Finally, test the spray pattern on cardboard to fine-tune your setup before you begin painting.

Advertisement

Selecting Right Spray Tip

Choosing the right spray tip is vital for achieving the best results with your airless paint sprayer. When you're staining wood surfaces, opt for a narrow spray tip to gain better control and precision in your application. A tip size between .015 and .019 inches is typically recommended for stains, as it provides an ideal balance for coverage while minimizing excessive overspray.

For projects that require attention to detail, consider exploring unique cultural experiences that can inspire your creative choices. Before diving into your project, always test the spray pattern on a piece of cardboard. This allows you to make any necessary adjustments for peak results. Additionally, set your sprayer to the lowest pressure setting when working with lighter materials like stains. This adjustment helps you achieve a smooth finish and reduces the risk of runs or drips.

While you're spraying, regularly check and clean the spray tip to prevent clogging. A clean tip guarantees consistent spray performance, which is imperative for a uniform application.

Adjusting Pressure Settings

After selecting the right spray tip, the next step is adjusting the pressure settings on your airless paint sprayer.

Start by choosing the lowest pressure setting, especially when applying lighter materials like stains. This helps you achieve a smooth finish while minimizing overspray.

Advertisement

For projects where you're working with different surfaces, consider using a cordless vacuum cleaner to quickly clean up any dust or debris that may affect your staining results.

Once you've set the pressure, test the spray pattern on a piece of cardboard. Adjust the pressure until you find a balance that delivers even coverage without runs or drips. If you're using a narrow spray tip, it's essential to maintain that low pressure to guarantee the stain atomizes correctly and adheres well to the surface.

If you notice uneven coverage, gradually increase the pressure, but be careful not to exceed the recommended settings outlined in your sprayer's manual. This will help prevent excessive overspray and waste.

Always refer to the specific instructions in your operation manual for the ideal pressure settings tailored to the type of stain you're using.

Testing Spray Pattern

Testing the spray pattern is essential for achieving a flawless finish with your airless paint sprayer. Before diving into your project, take a moment to test the spray pattern on a piece of cardboard. This helps you make necessary adjustments and prevents any overspray issues during application.

Advertisement

Start by adjusting the spray tip and pressure settings according to the type of stain and surface you're working with; a narrow tip is often recommended for a more precise finish. Additionally, maintaining ideal air quality in your workspace can enhance your overall painting experience, as air purifiers reduce allergens that may affect your health.

Once you've set up, hold the sprayer about 12 inches away from the surface. This distance helps maintain a consistent spray pattern and minimizes the risk of bouncing back the stain. To perfect your technique, practice starting and ending your spray slightly off the board. This way, you avoid drips and guarantee an even coat.

With the Control Pro series sprayers, you can take advantage of High Efficiency Airless technology, which allows for a clean spray pattern with 55% less overspray compared to traditional sprayers.

Application Techniques

methods for effective application

When you're ready to plunge into using an airless paint sprayer, mastering the right application techniques can make all the difference in achieving a professional finish.

Start by spraying with the grain of the wood; this guarantees even absorption and minimizes the risk of streaking. Incorporating proper best window treatments can also enhance the overall look of your space after the staining process.

Maintaining a distance of about 12 inches from the surface is essential for preventing overspray and achieving a consistent application without bounce-back.

Advertisement

Here are some key tips to keep in mind:

  • Overlap each pass by 50% for uniform coverage and to avoid missed spots.
  • Begin and end each spray pass slightly off the edge of the board to prevent drips.
  • Use a brush to quickly address any drips or runs during the application.

Clean-Up Procedures

sanitation and maintenance protocols

After you finish painting, it's vital to clean your airless paint sprayer right away to keep it in top shape.

Regular maintenance is essential for ensuring the longevity of your equipment, much like how implementing home security systems can protect your belongings.

Start by using proper cleaning techniques to remove all paint residue, ensuring smooth operation for your next project.

Then, store the sprayer safely to prevent damage and prolong its life.

Proper Cleaning Techniques

To keep your airless paint sprayer in top shape, it's crucial to clean it immediately after use. If you let the stain dry, it can clog the system, causing you headaches down the road. Follow the manufacturer's instructions for the best results.

Advertisement

For cleaning with water-based materials, utilize the Power Flush cleaning method. Connect a garden hose to the sprayer and flush water through the system. This effectively removes leftover stain and keeps your equipment functioning well.

Here are some key steps to follow:

  • Remove any remaining stain from the pick-up tube and filter by rinsing them thoroughly.
  • Regularly inspect hoses and connections for leaks or damage during the cleaning process.
  • Store the sprayer in a dry and cool place after cleaning to prolong its lifespan.

Safe Storage Practices

Putting your airless paint sprayer away properly is just as important as cleaning it. To guarantee safe storage practices, clean the sprayer immediately after use by following the manufacturer's instructions. Use the Power Flush method for water-based stains; connect a garden hose and flush with water until it runs clear. After cleaning the sprayer, disassemble all components and store them in a dry, cool place.

Here's a quick reference table for maintenance:

Maintenance Task Frequency
Inspect hoses and connections After each use
Clean the sprayer After each project
Check the manual for maintenance schedules As needed

Regularly inspect the hoses for leaks or wear, replacing them as necessary to maintain peak performance for future projects. Keep the sprayer's manual handy for specific maintenance schedules and procedures tailored to your model. By following these steps, you'll prolong the lifespan of your equipment and guarantee it's ready for your next staining job.

Safety Precautions

implementing essential safety measures

Using an airless paint sprayer can be efficient, but safety precautions are essential to protect yourself and your workspace.

First and foremost, always wear protective gear. This includes gloves, goggles, and a mask to shield against overspray and harmful fumes during the staining process.

Advertisement

Make sure your work area is well-ventilated. Open windows and use exhaust fans to help reduce the concentration of harmful vapors.

Here are a few additional safety measures to contemplate:

  • Keep a first aid kit nearby in case of accidental exposure or injury.
  • Avoid working in wet or damp conditions to prevent electrical hazards.
  • Refer to the specific safety instructions in your sprayer's operation manual for tailored precautions.

Final Touches

last minute adjustments

After finishing your staining project, it's vital to pay attention to the final touches that guarantee a professional-looking result. First, allow sufficient drying time as recommended by the manufacturer. This step is important before removing coverings from plants and surfaces, as it prevents any unwanted damage.

While waiting, check for any areas where overspray may have occurred during the staining process. Using cardboard or drop cloths behind gaps in fence boards can effectively catch any excess stain.

Once everything is dry, return outdoor furniture and items to their original locations to restore the area's functionality and appearance. This will help tie the whole project together and allow you to enjoy your newly stained surfaces fully.

Don't forget to clean the airless paint sprayer immediately after use. Following the user manual will help prevent clogging and maintain the longevity of the equipment.

Advertisement

Maintenance and Care

routine upkeep and management

Taking care of your airless paint sprayer is just as important as the project itself. Proper maintenance guarantees peak performance and extends the life of your sprayer. Here are some key steps to follow:

  • Clean immediately after use: Follow the manufacturer's instructions to avoid clogging and guarantee smooth operation.
  • Inspect and replace worn parts: Regularly check spray tips and filters for wear. Replacing them when needed can greatly improve performance.
  • Store properly: Keep your sprayer in a dry, cool place to protect it from moisture and temperature extremes that can cause damage.

Additionally, don't forget to follow the manufacturer's maintenance schedule for periodic checks.

Inspect hoses and connections for leaks or damage, as these can lead to uneven application and further issues.

By prioritizing cleaning and maintenance, you'll keep your airless paint sprayer in top shape, ready for your next staining project.

Take these steps seriously, and you'll enjoy consistent, high-quality results every time you use your sprayer.

Support Options

assistance availability choices

When you encounter issues with your airless paint sprayer, knowing where to turn for support can make all the difference. Whether you're staining your deck or operating the sprayer for the first time, help is just a call or click away.

For immediate assistance, you can call support at 888-541-9788, available 24/7. If your inquiry isn't urgent, emailing support is another option for guidance on sprayer operation and maintenance.

Here's a quick overview of the available support options:

Advertisement
Support Option Details
24/7 Phone Support Call 888-541-9788 for immediate assistance.
Email Support Use email for non-urgent inquiries.
Find a Retailer Locate retailers for sprayer and accessories.
Online Resources Access manuals and project guidance online.

Don't forget to check the privacy notice and terms of service when seeking support or using the products. With these resources at your fingertips, you can confidently tackle your staining projects and guarantee your airless paint sprayer operates smoothly.

Frequently Asked Questions

Can You Use an Airless Paint Sprayer for Stains?

Yes, you can definitely use an airless paint sprayer for stains. It'll help you achieve a quicker, more even finish. Just make sure to choose the right spray tip and maintain your sprayer properly.

How to Use a Paint Sprayer for Stains?

Using a paint sprayer for stains is like painting with the wind—quick and fluid. Choose the right tip, test your pattern, maintain distance, and clean promptly to keep your sprayer in top shape.

How to Spray Stains With a Graco Paint Sprayer?

To spray stains with a Graco paint sprayer, choose the right tip, test your spray pattern, and mix stains well. Maintain a 12-inch distance, overlapping passes, then clean the sprayer right after to avoid clogs.

How to Spray Stains With a Graco Paint Sprayer?

Did you know that using a sprayer can cut your project time in half? To spray stains with a Graco paint sprayer, choose the right tip, mix stains, adjust pressure, and follow the wood grain.

Advertisement

Conclusion

Now that you've mastered using an airless paint sprayer for staining, you'll find it's just as easy to tackle other projects around your home. Coincidentally, as you're sprucing up that fence, you might discover a hidden talent for DIY! Remember to maintain your sprayer and always prioritize safety. With a little practice, you'll achieve stunning results, turning every staining project into a rewarding experience. So grab your sprayer and get started on your next masterpiece!

Continue Reading
Advertisement

Affiliate disclaimer

As an affiliate, we may earn a commission from qualifying purchases. We get commissions for purchases made through links on this website from Amazon and other third parties.

Advertisement

Trending