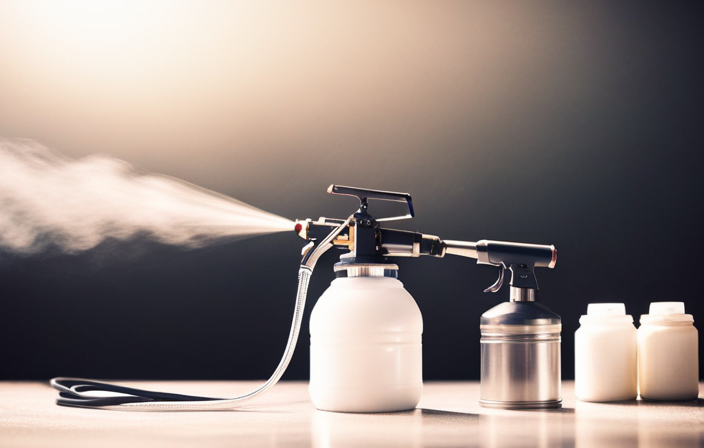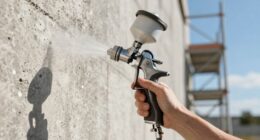

Standing here, ready to start the process of lubricating my Graco airless paint sprayer, I feel a sense of anticipation. The humming of the sprayer’s motor signals its power, and with proper maintenance, it will prove to be a dependable tool for years to come. In the upcoming article, I will guide you through the step-by-step process of oiling your Graco airless paint sprayer to ensure optimal performance and longevity.
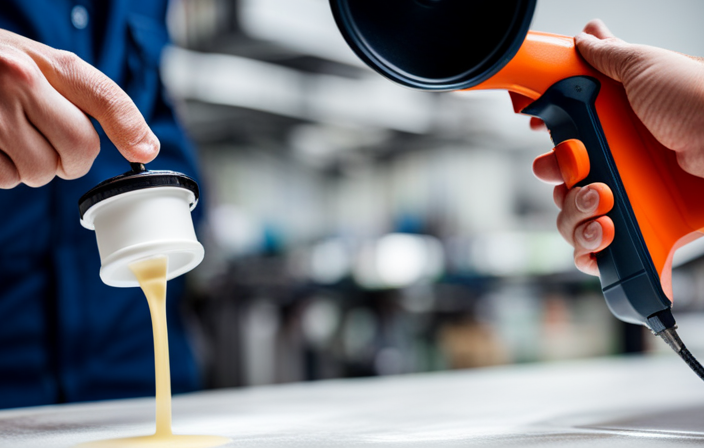
To begin, we must gather the necessary tools and materials, preparing the sprayer for oil application. Locating the oil fill port is crucial, as is selecting the appropriate oil for your specific sprayer. With these elements in place, adding the oil is a straightforward process.
However, we must not overlook the importance of testing the sprayer afterward to guarantee proper oil distribution. Finally, we must clean up any spills or excess oil and regularly monitor and maintain the oil levels in our sprayer.
So, let’s dive into the world of oiling our Graco airless paint sprayers and unlock their true potential.
Key Takeaways
- Regularly checking and topping up oil levels is important to prevent the sprayer from running dry and avoid damage and decreased performance.
- Monitoring oil levels allows for timely repairs or adjustments, maintains optimal performance, and extends the lifespan of the sprayer.
- Seeking professional assistance for sprayer issues is crucial to avoid potential risks and further damage, as professionals have the knowledge and experience needed.
- Proper oil application, following the manufacturer’s instructions and using the recommended type and amount of oil, is essential to maintain the performance and efficiency of the Graco sprayer.

Gyfent X9 Airless Paint Sprayer, 0.39GPM Paint Sprayer for Home Interior 650W 3000psi Airless Sprayer with Low Overspray Adjustable Pressure & Motor Speed for House Painting DIY Garage
X9 Airless Paint Sprayer: This airless paint sprayer has soft spraying effect, which can make the paint spray...
As an affiliate, we earn on qualifying purchases.
Gather the Necessary Tools and Materials
Before you can begin, make sure you have all the tools and materials you’ll need for the job, such as the oil and the Graco airless paint sprayer.
When adding oil to a Graco airless paint sprayer, it’s important to avoid common mistakes that could potentially damage the equipment and affect its functionality.
Firstly, ensure that you use the recommended type of oil specified by the manufacturer for your specific model. Using the wrong oil can lead to clogs and malfunctions.
Additionally, be cautious not to overfill the oil reservoir as it can cause leaks and compromise the sprayer’s performance.
To prolong the lifespan of your Graco airless paint sprayer, regular maintenance is crucial. This includes cleaning the sprayer after each use and inspecting for any damage or wear.
By taking these steps, you can prepare the sprayer for oil application smoothly and efficiently.

MaXpray M1 Airless Paint Sprayer, Highly Efficient Thinning-Free Minimal Overspray for Up to 10 Gallon DIY Painting Projects Home Interior & House Exterior, Comes with Sprayer Accessories
Your DIY Partner - All DIY Homeowners, upgrade your DIY game with the MaXpray M1 airless paint sprayer—far...
As an affiliate, we earn on qualifying purchases.
Prepare the Sprayer for Oil Application
To get started, let’s prepare the sprayer for a smooth application of your favorite lubricant. Before applying oil to your Graco airless paint sprayer, it is important to take certain precautions. Proper oil maintenance is crucial for the longevity and optimal performance of your sprayer. To emphasize this point, refer to the table below:
| Precautions for Oil Application |
|---|
| 1. Ensure the sprayer is turned off and unplugged. |
| 2. Wear protective gloves to avoid direct contact with the oil. |
| 3. Use a clean, lint-free cloth to wipe any excess oil from the sprayer. |
| 4. Store the oil in a cool, dry place away from direct sunlight. |
By following these precautions, you can ensure a safe and effective oil application. Now, let’s move on to locating the oil fill port on the sprayer.

Graco Magnum 257025 Project Painter Plus Paint Sprayer
Ideal for projects up to 5 gallons in size, allowing you to tackle a range of projects every...
As an affiliate, we earn on qualifying purchases.
Locate the Oil Fill Port on the Sprayer
First, let’s find where you can fill the oil on your sprayer.
To check the oil level and ensure proper oil application, locating the oil fill port is crucial. The oil fill port is typically located on the top or side of the sprayer, near the pump or motor. It is important to consult your sprayer’s manual for the exact location.
Once you have located the oil fill port, make sure the sprayer is turned off and relieve any pressure in the system. Remove the cap or plug from the oil fill port and insert a funnel to prevent spills. Slowly pour the recommended amount of oil into the port, ensuring it reaches the proper level.
Now, let’s move on to choosing the right type of oil for your sprayer.

VEVOR 750W Stand Airless Paint Sprayer, 3000PSI High Efficiency Electric Airless Sprayer, Fine and Even Painting Effect, Handheld Paint Sprayers for Home Interior and Exterior Furniture and Fences
Efficient Painting: Our stand airless paint sprayer is equipped with a powerful 750W motor, capable of delivering up...
As an affiliate, we earn on qualifying purchases.
Choose the Right Type of Oil for Your Sprayer
Once you’ve located the oil fill port, it’s crucial to choose the right type of oil for your sprayer. Just like selecting the perfect shade of paint for a masterpiece, choosing the right oil for your sprayer is essential. This ensures proper oil maintenance for optimal performance.
The type of oil you select will depend on the specific model and brand of your Graco airless paint sprayer. It is recommended to refer to the sprayer’s user manual or contact the manufacturer for guidance on the appropriate oil to use.
Using the wrong type of oil can lead to poor performance and even damage the sprayer. So, take the time to research and select the correct oil for your sprayer to keep it running smoothly and efficiently.
With the right oil chosen, it’s time to add it to the sprayer and continue with the maintenance process.
Add the Oil to the Sprayer
When adding the oil to your sprayer, be sure to carefully pour it into the designated fill port to ensure smooth and efficient operation. This step is crucial for sprayer maintenance and will help prolong the lifespan of your equipment.
To add the oil, locate the fill port on your sprayer, usually located on the top or side of the machine. Remove the cap or plug from the fill port and pour the oil slowly and steadily into the opening. Take care not to overfill the sprayer, as this can lead to leaks or malfunctions.
Once the oil has been added, securely close the oil fill port to prevent any spills or contamination. By following these steps, you can ensure that your sprayer is properly lubricated and ready for use.
Securely Close the Oil Fill Port
To ensure smooth operation and prevent any spills or contamination, it’s important to securely close the fill port after adding the oil to your sprayer. Here are some tips for proper oil storage and common mistakes to avoid when closing the oil fill port:
- Make sure the oil fill port cap is clean and free from any debris or paint residue.
- Use the correct amount of force to tighten the cap. It should be snug but not overly tight to avoid damaging the threads.
- Check for any signs of leaks or oil seepage around the fill port after closing it to ensure a proper seal.
By following these steps, you can ensure that your oil fill port is securely closed, reducing the risk of oil spills and contamination.
Now, let’s move on to the next step and test the sprayer to ensure proper oil distribution.
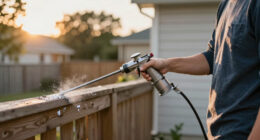
Test the Sprayer to Ensure Proper Oil Distribution
Before moving forward, it’s important to give your sprayer a test run to ensure proper oil distribution and check that everything is in good working order. Once you have securely closed the oil fill port, it’s time to test the sprayer’s functionality. Connect it to a power source and fill the paint container with a small amount of oil. Turn on the sprayer and adjust the pressure settings according to the manufacturer’s instructions. Spray the oil onto a test surface, observing the spray pattern and consistency. Make sure the oil is distributed evenly without any clogs or splattering. If you detect any issues, troubleshoot and make necessary adjustments before proceeding. This step is crucial in identifying potential problems with oil distribution and allowing for proper adjustments or maintenance. Remember to clean up any spills or excess oil to maintain a clean and safe working environment.
Clean Up any Spills or Excess Oil
After testing the sprayer and ensuring proper oil distribution, it’s important to clean up any spills or excess oil to prevent contamination. Here’s a step-by-step guide to help you with this task:
- Use absorbent materials like rags or paper towels to immediately soak up any spilled oil.
- Gently wipe the affected area to remove any remaining oil residue.
- Dispose of the used materials properly, following local regulations for oil disposal.
- Rinse the area with water and mild detergent to remove any lingering traces of oil.
By cleaning up spills and excess oil in a prompt and thorough manner, you can prevent oil contamination and maintain the efficiency of your sprayer.
To further ensure its performance, it’s essential to regularly maintain and monitor the oil levels in your sprayer. This will help you avoid any potential issues and keep your equipment running smoothly.
Regularly Maintain and Monitor the Oil Levels in Your Sprayer
Regularly maintaining and monitoring the oil levels in your sprayer is crucial for optimal performance and efficiency. Before each use, it is important to check the oil levels and top up if necessary. Simply remove the oil cap and use a dipstick to measure the oil level. Make sure the oil reaches the recommended level as stated in the sprayer’s manual. Regular maintenance will prevent the sprayer from running dry, which can cause damage and decrease performance. Monitoring the oil levels also allows you to identify any leaks or excessive oil consumption, so you can make timely repairs or adjustments. If you encounter any difficulties or uncertainties, it is always recommended to seek professional assistance.
Seek Professional Assistance if Needed
If you find yourself in a bind with your sprayer, don’t hesitate to seek professional assistance and let them work their magic. They have the knowledge and experience to handle any issues that may arise with your Graco airless paint sprayer.
Attempting to fix the problem yourself can lead to potential risks and further damage to your sprayer. It is crucial to follow the manufacturer’s guidelines for oil application in your Graco airless paint sprayer. This ensures that you are using the correct type and amount of oil, which is essential for maintaining the optimal performance of your sprayer.
Taking the time to consult with a professional will save you from unnecessary headaches and potentially costly mistakes. Remember, when in doubt, leave it to the experts.
Frequently Asked Questions
How often should I add oil to my graco airless paint sprayer?
I add oil to my Graco airless paint sprayer every 50 hours of use or as recommended in the user manual. Regular oiling helps maintain optimal performance and prevents common issues like clogs and uneven spray patterns. Make sure to clean the sprayer thoroughly before oiling.
Can I use any type of oil for my graco airless paint sprayer?
I wouldn’t put just any oil in my Graco airless paint sprayer. It’s best to use the specific oil recommended by the manufacturer. Follow their guidelines for oiling, ensuring proper maintenance and optimal performance.
What happens if I accidentally spill oil while adding it to the sprayer?
If I accidentally spill oil while adding it to the sprayer, I must immediately clean up the spill to prevent oil contamination and potential damage. This involves using absorbent materials, disposing of them properly, and taking safety precautions to avoid future spills.
Is there a specific method to test the sprayer after adding oil?
To test the oil in a Graco airless paint sprayer, I recommend conducting a spray pattern test. Ensure the sprayer is properly primed and spray a small amount of paint onto a test surface. Observe the pattern for any irregularities or inconsistencies. Take precautions when adding oil to avoid spills.
What are the signs that indicate I need professional assistance with my graco airless paint sprayer?
If you notice any of these signs of trouble with your Graco airless paint sprayer, it is advisable to seek professional assistance: loss of pressure, excessive overspray, clogged nozzle, inconsistent spray pattern, or unusual noises.
Conclusion
In conclusion, putting oil in a Graco airless paint sprayer is a simple and important maintenance task that can help prolong the life and performance of your sprayer. By following the steps outlined in this article, you can ensure that your sprayer is properly lubricated and ready for use.
Remember to choose the right type of oil, add it to the sprayer carefully, and test for proper oil distribution. Regular maintenance and monitoring of oil levels will keep your sprayer running smoothly.
If you have any doubts or difficulties, don’t hesitate to seek professional assistance. Happy painting!