Have you ever had the frustration of trying to paint something, only for your paint sprayer to malfunction? Trust me, I understand. That’s why I’m here to provide tips on how to replace the primer/spray in your Titan airless paint sprayer. I’ve dealt with every issue imaginable – from clogged nozzles to uneven spray patterns.
But with a little know-how and the right tools, we can get your paint sprayer back in tip-top shape. In this article, I’ll guide you through each step of the process, from understanding the parts of your sprayer to troubleshooting any issues that may arise.
So, let’s roll up our sleeves and get ready to tackle this project together. Soon enough, you’ll be back to effortlessly transforming your walls with a fresh coat of paint.
Key Takeaways
- Understanding the parts of your Titan airless paint sprayer is essential before replacing the primer/spray.
- Gathering the necessary tools and materials, such as replacement primer/spray and safety equipment, is important for the replacement process.
- Preparing your work area by thoroughly cleaning the surface and covering furniture or objects is crucial to avoid any damage or contamination.
- Disconnecting and emptying the sprayer properly, turning off the power, releasing pressure, and cleaning the sprayer are necessary steps before replacing the primer/spray.
Understand the Parts of Your Titan Airless Paint Sprayer
Now that you’ve got your hands on a Titan Airless Paint Sprayer, let’s dive in and explore the different parts that make up this powerful painting tool.
Understanding the parts identification is crucial for troubleshooting any issues that may arise during your painting project. The main components include:
- The spray gun, which is responsible for delivering the paint.
- The pump, which pressurizes the paint.
- The hose, which connects the gun and pump.
Additionally, there are filters, tips, and pressure control knobs that allow for customization of the spray pattern and pressure.
Familiarizing yourself with these parts will enable you to efficiently troubleshoot and resolve any problems that may occur.
Now, let’s move on to the next section where we will gather the necessary tools and materials.
Gather the Necessary Tools and Materials
First, make sure you’ve got all the tools and materials you need, because this step is crucial to getting the job done right! Here’s a list of what you’ll need:
-
Replacement primer/spray: Choose the right one for your specific needs, considering factors such as the type of paint and surface.
-
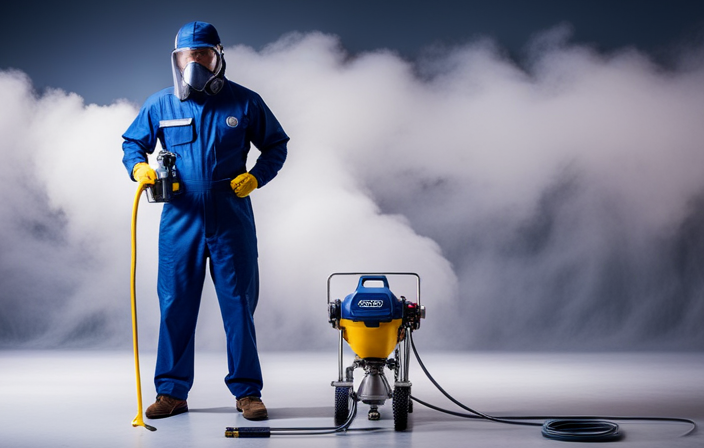
Safety equipment: Protect yourself! Wear safety goggles, a respirator mask, and gloves.
-
Cleaning supplies: Properly dispose of the old primer/spray. Prepare a container for disposal and have rags or paper towels handy for spills or drips.
-
Screwdriver or wrench: Depending on your airless paint sprayer model, you may need a screwdriver or wrench to remove the old primer/spray.
Once you have everything ready, you can move on to preparing your work area.
Prepare Your Work Area
To prepare your work area, follow these steps:
-
Clean your work surface thoroughly, removing any dust or debris. This will help the paint adhere better and result in a more professional finish.
-
Cover any furniture or objects that you don’t want to get paint on. This will protect them from accidental splatters or spills.
-
Take safety precautions by wearing protective goggles, a mask, and gloves. This will shield you from any potential hazards and keep you safe during the painting process.
Once your work area is ready, you can proceed to the next step of disconnecting and emptying the sprayer, which we will discuss in the following section.
Disconnect and Empty the Sprayer
To disconnect and empty the sprayer, follow these steps:
-
First, turn off the power and release any pressure in the sprayer to ensure safety.
-
Carefully empty the paint container, making sure to dispose of any remaining paint properly.
-
Lastly, clean the sprayer thoroughly to remove any paint residue and ensure it is ready for the next use.
Turn off the power and release any pressure
To begin the process, make sure to power down the unit and carefully release any built-up pressure, like a deflating balloon. This step is crucial to ensure your safety and avoid any accidental spraying. To release pressure, locate the pressure release valve on the sprayer and slowly turn it counterclockwise. As the pressure is released, you may hear a hissing sound. Once the pressure is completely released, turn off the power switch on the sprayer. This will prevent any accidental spraying while you continue with the next steps. With the power off and pressure released, you can now proceed to empty the paint container and clean the sprayer. This will ensure that your titan airless paint sprayer is ready for the next use.
Empty the paint container and clean the sprayer
After the power is turned off and the pressure is released, it’s important to empty the paint container and properly clean the sprayer. The cleaning process ensures that the new primer or spray will adhere properly and that there is no residue left from the previous paint job.
To begin, remove the paint container and pour any remaining paint into a suitable disposal container. Next, rinse the container with water until it is clean. Then, use a clean cloth or brush to wipe down the inside of the container, ensuring that all paint is removed.
Additionally, take safety precautions by wearing gloves and eye protection during the cleaning process.
Once the sprayer and paint container are clean, you can move on to the next step, which is to remove the old primer/spray.
Remove the Old Primer/Spray
To remove the old primer/spray, I always make sure to carefully follow the manufacturer’s instructions for removal. This ensures that I am using the correct method and avoiding any potential damage to the sprayer.
Using the appropriate tools, I detach the part by loosening any screws or clamps that are holding it in place. This allows for a smooth and efficient removal process.
Follow the manufacturer’s instructions for removal
Before removing the primer/spray from your titan airless paint sprayer, it is crucial to carefully follow the manufacturer’s instructions. These instructions will guide you through the proper removal process, preventing any potential damage to the sprayer and ensuring its continued functionality. Take note of any recommended tools or techniques provided by the manufacturer. By adhering to these instructions, you can safely and effectively remove the old primer/spray. Once you have familiarized yourself with the manufacturer’s instructions, you can proceed to the next section, which will cover the use of appropriate tools for detaching the part.
Use the appropriate tools to detach the part
Using the right tools is essential when detaching the primer/spray on a Titan airless paint sprayer. Here are three essential tools you will need:
-
Wrench or pliers: Use these tools to loosen screws or bolts holding the primer/spray in place.
-
Screwdriver: Depending on the model, you may need a screwdriver to remove screws securing the part.
-
Allen wrench: Some airless paint sprayers require an Allen wrench to detach specific components.
By using these detaching techniques and the appropriate tools, you can safely and efficiently remove the primer/spray from your Titan airless paint sprayer. Now, let’s move on to the next step of installing the new primer/spray.
Install the New Primer/Spray
To install the new primer/spray, follow these steps:
-
Carefully remove the old primer/spray from your titan airless paint sprayer, handling it with care.
-
Align the nozzle with the sprayer body and firmly push it into place until it clicks. Ensure it is securely attached to prevent leaks or malfunctions during operation.
-
If you encounter any issues during installation, such as difficulty fitting the new primer/spray or leaks, check for debris or damage that may be causing the problem.
-
Thoroughly clean the nozzle and sprayer body before attempting to install the new primer/spray again.
-
Once the new primer/spray is securely installed, proceed to reassemble the sprayer, ensuring all parts are properly fitted together.
Remember to take your time and be cautious when handling the primer/spray to avoid any accidents or damage.
Reassemble the Sprayer
After securely attaching the new primer/spray, proceed to reassemble the components of the sprayer, ensuring a precise fit for optimal functionality.
Start by reattaching the spray tip, making sure it is aligned properly with the nozzle guard. Use a wrench to tighten it securely.
Next, reattach the paint container, ensuring that it is firmly locked into place.
Then, reattach the handle and tighten the screws to secure it.
Finally, reattach the power cord and make sure it is properly connected.
If you encounter any difficulties during reassembly, refer to the instruction manual for reassembling techniques. Troubleshooting tips can also be found in the manual if you encounter any issues.
Once the sprayer is fully reassembled, you can proceed to the next step of testing its functionality.
Test the Sprayer
Now that the sprayer is fully reassembled, it’s time to put it to the test and witness its powerful potential firsthand. Here are four steps to test the sprayer and ensure it’s functioning properly:
-
Fill the paint reservoir with water and attach it back to the sprayer. This will help identify any leaks or blockages in the system.
-
Turn on the sprayer and adjust the pressure settings according to the paint manufacturer’s recommendations. This will ensure optimal performance and prevent overspray.
-
Spray a small amount of water onto a test surface, such as a piece of cardboard. Check for an even spray pattern and any irregularities in the flow.
-
Pay attention to any unusual noises or vibrations while spraying. These could indicate issues with the motor or pump.
Once you have tested the sprayer and are satisfied with its performance, it’s important to move on to clean up and maintenance tips to ensure its longevity and continued functionality.
Clean Up and Maintenance Tips
When it comes to clean up and maintenance of my Titan airless paint sprayer, I always make sure to dispose of any waste materials properly to avoid any environmental hazards.
Regularly cleaning and maintaining my sprayer is also essential to ensure its optimal performance and longevity. I follow a strict routine of cleaning the nozzle, filters, and other parts to prevent clogging and maintain consistent spray patterns.
Dispose of any waste materials properly
Make sure you dispose of any waste materials properly, so you can protect the environment and contribute to a cleaner future.
Proper waste disposal is crucial to minimize the environmental impact of using a titan airless paint sprayer. When cleaning your sprayer, collect any leftover paint, primer, or cleaning solutions in a designated container. Avoid pouring them down the drain or into the soil, as they can contaminate water sources and harm ecosystems.
Check local regulations for proper disposal methods, such as taking them to a hazardous waste facility or contacting a waste management company for assistance. By disposing of waste materials responsibly, you can prevent pollution and ensure a safer environment for everyone.
Now, let’s move on to how to regularly clean and maintain your titan airless paint sprayer.
Regularly clean and maintain your Titan airless paint sprayer
Taking care of your Titan airless paint sprayer is like giving it a gentle hug, ensuring its longevity and peak performance. Regularly cleaning and maintaining your sprayer is essential for its proper functioning.
Start by disconnecting the sprayer from the power source and relieving any pressure in the system. Remove the spray tip, guard, and filter housing, and clean them thoroughly with warm soapy water or an appropriate cleaning solution. Pay close attention to any clogs or debris that may have accumulated. Avoid using harsh chemicals or abrasive materials that can damage the sprayer components.
Additionally, make sure to lubricate the piston rod and packings regularly to prevent leaks and ensure smooth operation. By following these cleaning tips and avoiding common mistakes, you can keep your Titan airless paint sprayer in top shape.
Moving on to troubleshooting and support, let’s address any issues you may encounter during the painting process.
Troubleshooting and Support
To troubleshoot and get support for your Titan airless paint sprayer, you should reach out to the manufacturer or visit their website for assistance. They are the best source of information when it comes to resolving any issues you may encounter.
Here are some common troubleshooting techniques and issues that you may encounter with your Titan airless paint sprayer:
-
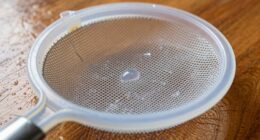
Clogged Nozzle:
-
Remove the nozzle and clean it thoroughly with warm water or a cleaning solution.
-
Use a small brush to remove any dried paint or debris from the nozzle.
-
Ensure that the nozzle is properly aligned and tightened before reattaching it.
-
Inconsistent Spray Pattern:
-
Check the paint viscosity and adjust it according to the manufacturer’s recommendations.
-
Inspect the spray tip for any damage or wear, and replace if necessary.
-
Make sure the pump pressure is set correctly for the desired spray pattern.
-
Motor Not Starting:
-
Check the power source and ensure it is properly connected.
-
Inspect the power cord for any damage or fraying.
-
Reset the motor by turning it off and on again.
Remember, if you are unable to resolve the issue on your own, contacting the manufacturer or visiting their website for further support is always a good option.
Frequently Asked Questions
Can I use any brand of primer/spray with the Titan airless paint sprayer?
Choosing the right primer/spray for your titan airless paint sprayer is crucial for optimal results. Not all brands may be compatible, so it’s recommended to use products specifically designed for your sprayer. Follow manufacturer guidelines for best performance.
How often should I replace the primer/spray on my Titan airless paint sprayer?
Replacing the primer/spray on a Titan airless paint sprayer is like giving your sprayer a fresh breath of air. To ensure optimal performance, replace it regularly, following the manufacturer’s recommendations, and dispose of the old primer/spray using proper methods.
Can I clean the old primer/spray and reuse it?
No, it is not recommended to clean and reuse old primer/spray. The cleaning process may not fully remove contaminants, affecting the paint quality. Using new primer/spray ensures optimal results and avoids potential issues.
Is it necessary to wear protective gear while replacing the primer/spray on the Titan airless paint sprayer?
It is crucial to wear protective gear when replacing the primer/spray on the Titan airless paint sprayer. Not wearing proper gear can expose you to health risks such as inhalation of toxic fumes and skin irritation.
Are there any specific maintenance tips for prolonging the life of the primer/spray on the Titan airless paint sprayer?
Maintenance tips for prolonging the life of the primer/spray on the titan airless paint sprayer include proper cleaning after each use. This ensures the components stay clear of paint residue and prevents clogs or damage.
Conclusion
In conclusion, replacing the primer/spray on your Titan Airless Paint Sprayer is a simple task that can be done with the right tools and materials.
Just like a skilled artist creating a masterpiece, maintaining your sprayer is vital for achieving professional-quality results.
By following the steps outlined in this guide, you’ll be able to keep your sprayer in top shape and ensure smooth and even paint application.
Remember, a well-maintained sprayer is like a well-tuned instrument in the hands of a maestro, producing flawless strokes of color on any surface.