Connect with us

Airless Paint Sprayers FAQs

How To Run An Airless Paint Sprayer Video

Published

on

An image showcasing a skilled painter wearing protective gear, confidently operating an airless paint sprayer

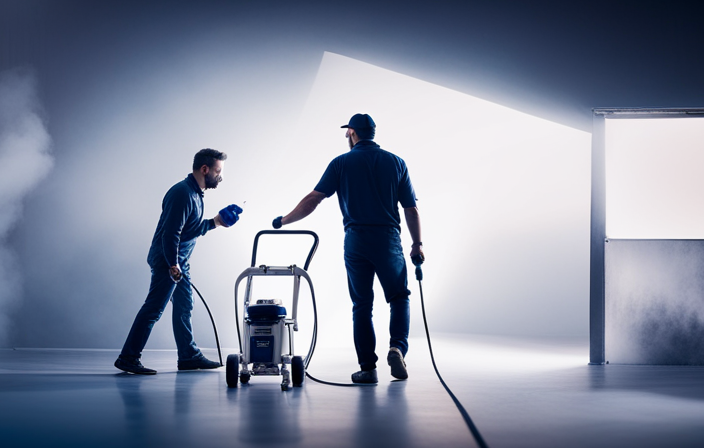
Tired of the slow and tedious task of painting? I have a solution for you – the airless paint sprayer! This incredible tool will revolutionize your painting process, making it faster, easier, and much more effective than you could imagine. Trust me, once you try it, you won’t even consider going back to traditional brushes.

In this video, I’ll guide you through the process of running an airless paint sprayer, providing you with all the knowledge and techniques you need to achieve professional-looking results. From understanding the components of the sprayer to choosing the right paint and properly cleaning up afterwards, I’ll cover it all.

So, if you’re ready to take your painting game to the next level, grab your airless paint sprayer and join me in this video tutorial. Get ready to transform your space with ease and precision, all thanks to the power of the airless paint sprayer.

Let’s get started!

Key Takeaways

  • Benefits of airless paint sprayers: faster and easier painting, even coverage, efficient for large areas and thick coatings, professional finish without brush strokes or roller marks
  • Proper techniques for using an airless paint sprayer: hold sprayer 12 inches away from surface, move in smooth, continuous motion, overlap each stroke by 50%, grip handle firmly, maintain consistent distance from surface
  • Safety tips and precautions: wear protective gear, properly maintain equipment, select appropriate respiratory protection, ventilate the area, cover nearby furniture and surfaces, clean the sprayer after each use
  • Proper cleaning and storage of the sprayer: prepare a cleaning solution, disassemble and soak removable components, flush out the sprayer, clean and dry all components before storage, check seals and gaskets regularly, store in a clean, dry, and well-ventilated area

Introduction to Airless Paint Sprayers

Advertisement

Now let’s dive into the world of airless paint sprayers and discover how you can effortlessly transform your space with a smooth and flawless coat of paint.

Airless paint sprayers are a revolutionary technology that use high pressure to atomize the paint, resulting in a fine mist that evenly covers surfaces. One of the major advantages of using an airless paint sprayer is its efficiency. It can cover large areas quickly and can handle thick coatings with ease.

Additionally, airless sprayers provide a professional finish with no brush strokes or roller marks. However, there are some drawbacks to consider. They can be expensive to purchase and maintain, and they can also create a significant amount of overspray.

Understanding the components of an airless paint sprayer will help you make the most out of this powerful tool.

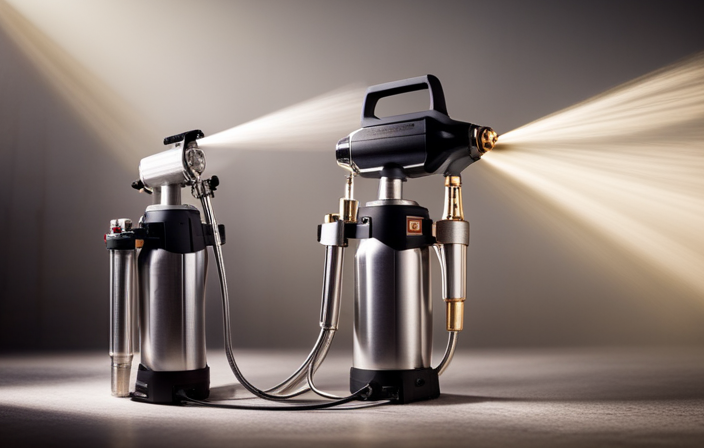
Understanding the Components of an Airless Paint Sprayer

First, let’s take a look at the different parts that make up an airless paint sprayer. The main components of an airless paint sprayer include the motor, pump, hose, and gun. These parts work together to ensure a smooth and efficient painting experience.

Advertisement

Understanding nozzle sizes is crucial when using an airless paint sprayer. Different nozzle sizes determine the width of the spray pattern and the amount of paint that’s released. Choosing the right nozzle size for your project is essential to achieve the desired results.

Troubleshooting common issues is also an important skill to have when using an airless paint sprayer. Some common issues include clogging, uneven spray pattern, and inconsistent pressure. By understanding how to identify and troubleshoot these issues, you can save time and ensure a successful painting job.

Now that we have a good understanding of the components of an airless paint sprayer and how to troubleshoot common issues, let’s move on to preparing your work area and surface for painting.

Preparing Your Work Area and Surface

Advertisement

To ensure a successful painting project, start by clearing your work area of any obstacles and protecting nearby furniture and floors with drop cloths. Work area organization is key to maintaining a smooth workflow and minimizing any potential accidents or mishaps.

Take the time to remove any furniture or objects that may be in the way and make sure to cover them with drop cloths to prevent any accidental splatters or spills. Additionally, it’s essential to properly prepare the surface you’ll be painting. This may involve cleaning the surface, removing any loose paint or debris, and applying a primer if necessary.

By following these surface preparation techniques, you can ensure that your paint job will adhere properly and provide optimal results.

Now, let’s move on to choosing the right paint and diluting if necessary.

Choosing the Right Paint and Diluting if Necessary

When selecting the ideal paint for your project, it’s crucial to consider factors such as color, finish, and durability. This ensures a stunning end result that will stand the test of time.

Advertisement

Start by choosing paint colors that complement your space and evoke the desired mood. Take into account the lighting and existing decor to make an informed decision.

To estimate the paint quantity needed, measure the square footage of the area to be painted and refer to the paint manufacturer’s coverage specifications. It’s always a good idea to buy a little extra to account for touch-ups or future use.

If needed, dilute the paint according to the manufacturer’s instructions, making sure to maintain the desired consistency.

With the right paint selected and prepared, let’s move on to the subsequent section about proper techniques for using an airless paint sprayer.

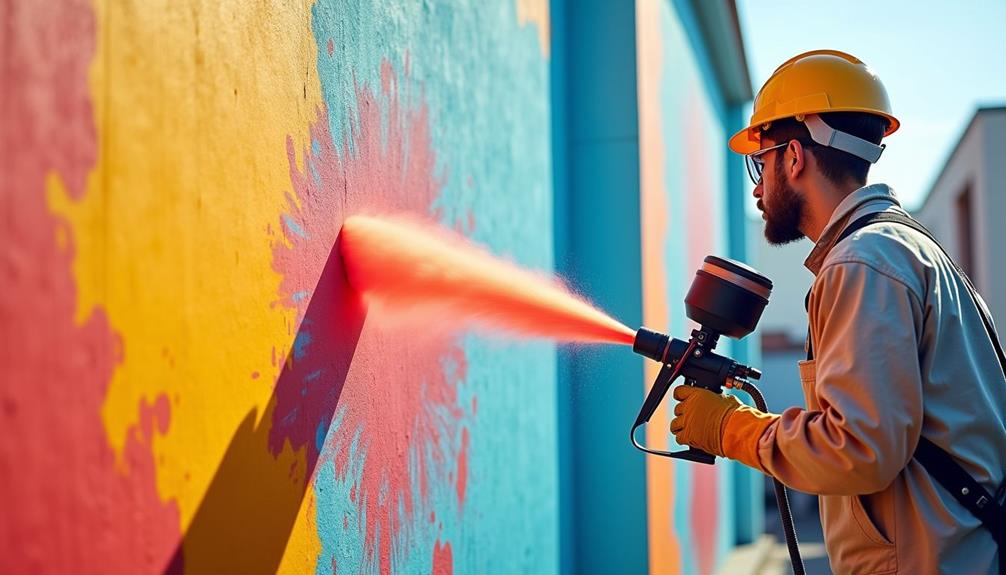
Proper Techniques for Using an Airless Paint Sprayer

Advertisement

Mastering the art of using an airless paint sprayer will elevate your painting skills to a whole new level, allowing you to effortlessly create professional-looking finishes with ease.

To achieve a smooth finish, it’s crucial to hold the sprayer correctly and utilize proper techniques. Here are three key points to keep in mind:

  • Maintain a consistent distance: Hold the sprayer approximately 12 inches away from the surface you’re painting. This ensures an even application and prevents overspray.

  • Keep a steady pace: Move the sprayer in a smooth, continuous motion at a moderate speed. Avoid pausing or dwelling on one area, as it can result in uneven coverage.

  • Overlap each stroke: To achieve a seamless finish, overlap each stroke by 50%. This helps blend the paint and eliminate any visible lines or streaks.

By implementing these techniques, you’ll be able to achieve a professional-looking finish with your airless paint sprayer. Holding the sprayer correctly is just the first step towards creating stunning results.

Holding the Sprayer Correctly

Holding the sprayer in the correct position is like finding the key to unlocking a world of flawless finishes. Proper hand position is crucial for maintaining control and achieving professional results.

Advertisement

To hold the sprayer correctly, grip the handle firmly with one hand, while using the other hand to support the weight of the sprayer. This will help you maintain a steady rhythm and prevent hand fatigue during long painting sessions. Keep your wrist straight and your arm relaxed to ensure smooth movements. By following these simple tips, you can achieve a steady and even paint application.

Now that we’ve covered holding the sprayer correctly, let’s move on to maintaining a consistent distance from the surface.

Maintaining a Consistent Distance from the Surface

Achieving a flawless finish requires maintaining a consistent distance from the surface while operating the sprayer. By keeping a steady distance, you can ensure an even application of paint without any splatters or uneven spots. To help you visualize the proper distance, refer to the table below:

Distance from Surface Effect on Paint Application
Too Close Heavy and uneven coverage
Optimal Distance Smooth and even coverage
Too Far Thin and patchy coverage

Maintaining the right distance is crucial to avoid wasting paint and achieving professional-looking results. It may take some practice to find the sweet spot, but it is worth the effort. Once you have mastered the art of maintaining distance, you can move on to the next step of overlapping strokes for even coverage.

Overlapping Strokes for Even Coverage

To ensure a flawless finish, you need to understand the importance of overlapping strokes for even coverage. When using an airless paint sprayer, overlapping strokes are crucial in achieving a smooth finish and minimizing overspray.

Advertisement

By applying each stroke slightly overlapping the previous one, you ensure that the paint is evenly distributed across the surface. This technique helps to eliminate any gaps or inconsistencies in the paint application, resulting in a professional-looking finish. It’s important to maintain a consistent speed and distance from the surface while overlapping the strokes to avoid any patchiness or streaks.

By following this method, you can achieve a seamless and uniform coat of paint.

Moving forward, let’s discuss some safety tips and precautions to keep in mind while operating an airless paint sprayer.

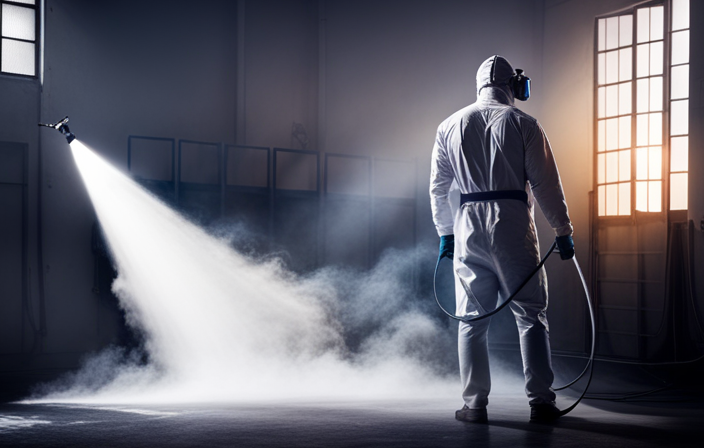
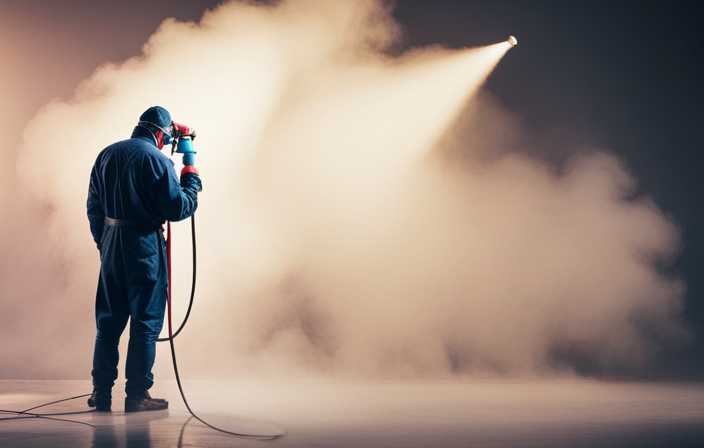
Safety Tips and Precautions

Make sure you follow these safety tips and precautions to ensure a smooth and worry-free experience while using an airless paint sprayer. Safety precautions are essential when using any type of equipment, including an airless paint sprayer.

First, always wear protective gear such as goggles, gloves, and a mask to protect yourself from potential hazards.

Advertisement

Second, make sure to properly maintain your equipment by regularly cleaning it and checking for any damage or leaks. This will not only prolong the lifespan of your sprayer but also ensure that it functions properly and safely.

Remember, safety should always be your top priority when using an airless paint sprayer.

Now let’s move on to the next section about wearing protective gear.

Wearing Protective Gear

Now that we’ve covered the importance of safety tips and precautions, let’s dive into the next crucial aspect of running an airless paint sprayer: wearing protective gear. When it comes to operating a paint sprayer, selecting appropriate respiratory protection is essential to protect yourself from inhaling harmful fumes and particles. This can include using a respirator mask with the right filter cartridges that can effectively filter out paint particles and volatile organic compounds (VOCs). Additionally, eye protection is equally important to shield your eyes from paint overspray and any potential debris. Wearing safety goggles or a full-face shield can prevent eye injuries and ensure clear vision throughout the painting process. As we move forward, we will now discuss the next step: ventilating the area to further enhance safety and efficiency.

Ventilating the Area

Ensure a safer and more enjoyable painting experience by properly ventilating the area before starting. Proper ventilation is essential to prevent the buildup of fumes and ensure good air quality. Before beginning, make sure all windows and doors are open to allow for proper airflow. If there’s no natural ventilation, consider using fans or other mechanical ventilation systems.

Advertisement

It’s also important to wear a respirator to protect against harmful chemicals in the air. Additionally, take safety precautions such as covering nearby furniture and surfaces to prevent paint overspray. By following these steps, you can create a well-ventilated environment that minimizes health risks and allows for a smoother painting process.

Moving on to the next section on cleaning and maintaining the sprayer, it’s important to keep the equipment in good condition for future use.

Cleaning and Maintaining the Sprayer

First things first, let’s give the sprayer a good scrub to keep it in top-notch shape for future projects. Cleaning an airless paint sprayer is crucial to ensure its longevity and optimal performance.

Here are three effective cleaning techniques to prevent rust and maintain the sprayer’s functionality:

  1. Thoroughly rinse the sprayer with clean water after each use. This removes any leftover paint residue and prevents clogging in the nozzle.

  2. Use a mild detergent solution to clean the sprayer’s components, such as the nozzle, filters, and hoses. Gently scrub them with a soft brush to remove any stubborn paint buildup.

  3. Regularly inspect the sprayer for any signs of rust or corrosion. If you spot any, remove it using a rust remover and apply a rust-resistant coating to protect the sprayer’s metal parts.

By following these cleaning techniques, you can keep your airless paint sprayer in excellent condition. Now, let’s move on to troubleshooting common issues that may arise during your painting projects.

Advertisement

Troubleshooting Common Issues

If you encounter any problems while using your airless paint sprayer, troubleshooting common issues can help you overcome them and achieve a flawless finish. Here are some common problems with paint sprayers and how to troubleshoot them:

Problem Possible Cause Solution
No spray or uneven spray pattern Clogged tip or filter Clean or replace the tip and filter
Paint spitting or sputtering Paint viscosity is too high Thin the paint or adjust the pressure
Motor not running Power supply issue Check the power cord and outlet
Excessive overspray Incorrect spray tip size Use the appropriate tip for the paint type
Paint leaking from the sprayer Loose or damaged fittings Tighten or replace the fittings

By following these troubleshooting steps, you can easily address common problems with airless paint sprayers and ensure a smooth painting experience. Now, let’s move on to the next section on clogging or dripping.

Clogging or Dripping

Addressing clogging or dripping issues can save you time and frustration when using your airless paint sprayer. To prevent clogging, it’s important to properly strain your paint before pouring it into the sprayer. This’ll remove any debris or clumps that could potentially clog the nozzle.

Additionally, using the correct tip size for your paint viscosity will help minimize clogging. If you notice dripping, check the sprayer’s pressure settings. Adjusting the pressure can help control the flow of paint and prevent dripping.

It’s also important to maintain a consistent distance from the surface while spraying to avoid excessive buildup and dripping. By following these steps, you can prevent clogging and minimize dripping, ensuring a smooth and even spray pattern for your painting project.

Advertisement

Uneven Spray Pattern

To achieve a groovy and even spray pattern, make sure to maintain a consistent distance from the surface while using your airless paint sprayer. Improper technique can lead to an uneven spray pattern and inadequate paint coverage. Here are some tips to avoid these issues:

  • Hold the sprayer parallel to the surface and keep it at a distance of around 12 inches.
  • Move the sprayer in a slow and steady motion, overlapping each pass by about 50%.
  • Avoid excessive spraying in one area, as it can result in unevenness.

By following these guidelines, you can ensure a smooth and consistent paint application.

In the next section, we’ll discuss another common problem with airless paint sprayers: loss of pressure.

Loss of Pressure

To address the issue of an uneven spray pattern, it’s important to understand the potential causes and troubleshooting solutions. However, a related problem that can also affect the quality of your paint job is a loss of pressure in your airless paint sprayer. This can lead to an inconsistent spray and unsatisfactory results. To prevent a loss of pressure, there are a few key steps you can take. Firstly, make sure that your sprayer’s filters are clean and free from debris, as clogs can restrict the flow of paint and reduce pressure. Additionally, check that your spray tip is properly sized for the material you are using, as using the wrong size can result in pressure loss. Regular maintenance and cleaning of your equipment will also help to prevent issues with pressure. By following these troubleshooting solutions and taking preventative measures, you can ensure a consistent and high-quality spray pattern.

Moving forward, let’s explore some tips for achieving a professional finish.

Tips for Achieving a Professional Finish

For a flawless and polished result, you’ll need to master these essential tips to achieve a professional finish.

Advertisement

Here are four key strategies to help you achieve a smooth finish and avoid overspray:

  1. Proper preparation: Before you start painting, make sure to clean the surface thoroughly and remove any loose debris or dirt. This will ensure that the paint adheres smoothly and evenly.

  2. Use the right technique: Hold the sprayer at a consistent distance from the surface, usually around 12 inches. Move the sprayer in a steady back-and-forth motion, overlapping each pass slightly to avoid streaks or lines.

  3. Adjust the pressure: Experiment with different pressure settings to find the sweet spot that gives you the best coverage without excessive overspray. Start with a low pressure setting and gradually increase it until you achieve the desired result.

  4. Practice makes perfect: Before tackling a large project, practice on a small, inconspicuous area to get a feel for the sprayer and perfect your technique.

By following these tips, you’ll be well on your way to achieving a professional finish.

Next, let’s dive into the importance of applying multiple coats.

Applying Multiple Coats

If you’re wondering why applying multiple coats is necessary, let me assure you that it’s the key to achieving a flawless and long-lasting finish.

When using an airless paint sprayer, it’s crucial to apply thin coats rather than thick ones. This allows for better control and prevents drips or uneven coverage. Additionally, applying multiple coats ensures that the paint adheres properly to the surface, resulting in a more durable finish.

Advertisement

To estimate the drying time between coats, it’s important to follow the manufacturer’s instructions on the paint can. Factors such as temperature and humidity can also affect drying time, so it’s essential to take those into consideration.

Once the previous coat is dry to the touch, you can proceed with applying the next coat. This will provide a smooth and professional result.

Moving on to the next section about using a primer, it’s an essential step to prepare the surface before applying the paint.

Using a Primer

Now that we’ve discussed applying multiple coats, let’s move on to the next step: using a primer. A primer is an essential part of the painting process as it provides a smooth base for the paint to adhere to, ensuring better coverage and durability. While most people use an airless paint sprayer for applying paint, using a brush to apply a primer can be beneficial in certain situations. It allows for more precise application, especially in tight corners or intricate areas. However, if you prefer to use the airless paint sprayer for priming as well, there are alternative methods such as thinning down the primer to a suitable consistency for the sprayer. This can save time and effort, but make sure to follow the manufacturer’s instructions for proper dilution. Moving forward, let’s delve into the next section where we will discuss practicing on scrap materials.

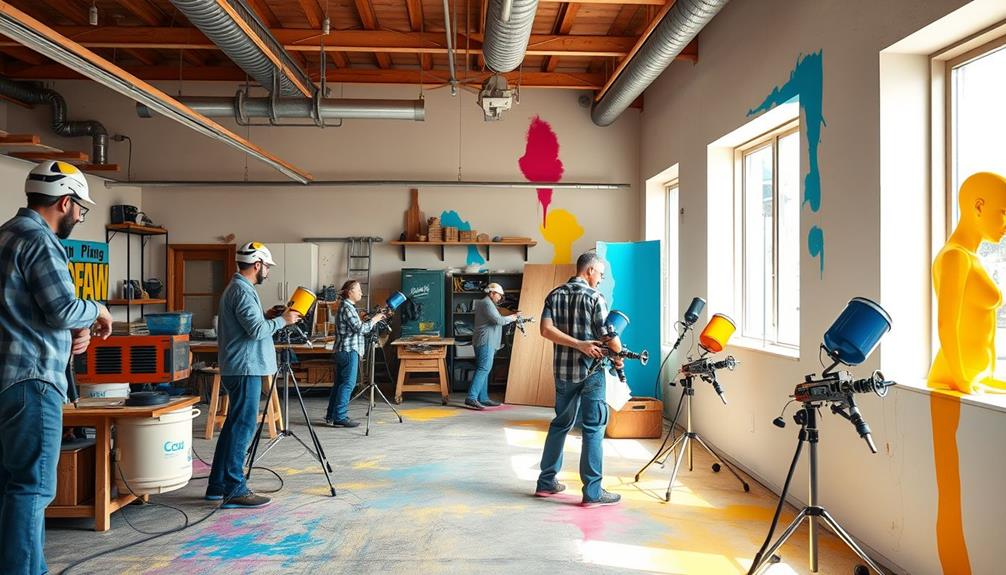
Practicing on Scrap Materials

Priming with a brush allows for more precise application, especially in tight corners or intricate areas, which can greatly enhance the overall quality of the painting.

Advertisement

When practicing techniques with an airless paint sprayer, it’s important to choose the right materials to work on. Here are three key factors to consider:

  1. Start with scrap materials: Using scrap materials allows you to experiment and perfect your technique without worrying about ruining a finished project. This gives you the freedom to try different spray patterns, adjust the pressure, and get comfortable with the sprayer.

  2. Use different surfaces: Practice on a variety of surfaces, such as wood, metal, or plastic, to understand how the sprayer performs on each material. This will help you determine the best settings and techniques for different projects.

  3. Test different paint types: Try spraying different paint types, such as latex or oil-based, to see how they behave with the sprayer. This will allow you to understand their viscosity and adjust the sprayer accordingly.

Now that you’ve practiced on scrap materials and mastered your technique, it’s time to move on to the next step: cleaning up after using an airless paint sprayer.

Cleaning Up After Using an Airless Paint Sprayer

After using an airless paint sprayer, cleaning up is as important as the final strokes on a masterpiece. It requires meticulous attention to detail. To ensure a thorough clean, I start by preparing a cleaning solution according to the manufacturer’s instructions. This usually involves diluting a specific cleaning agent with water.

Next, I carefully disassemble the sprayer, taking care not to damage any delicate parts. I soak the removable components in the cleaning solution for a recommended amount of time to loosen any paint residue. Once soaked, I use a brush to scrub away any remaining paint.

It’s crucial to dispose of the cleaning solution properly, as it may contain harmful chemicals. I always follow local regulations for safe disposal.

Advertisement

With the cleaning complete, I transition into the next step of flushing out the sprayer.

Flushing Out the Sprayer

To ensure your sprayer continues to perform at its best, the next step is to thoroughly flush out all the remaining paint residue. This is a crucial step in maintaining the longevity of your equipment and preventing any clogs or blockages.

Start by removing the spray tip and guard, and then attach a clean bucket to the sprayer’s intake tube. Fill the bucket with a cleaning solution specifically designed for airless sprayers.

Turn on the sprayer and let the cleaning solution circulate through the system, flushing out any paint residue. Once the solution runs clear, you can remove the bucket and reattach the spray tip and guard.

Properly storing the equipment is the next important step in ensuring its longevity and preventing any damage.

Advertisement

Properly Storing the Equipment

After flushing out the sprayer, it’s important to properly store the equipment to ensure its longevity and continued functionality.

Storing your airless paint sprayer correctly will not only protect it from damage but also make it easier to use in the future. Start by cleaning all the components thoroughly and making sure they’re completely dry.

Store the sprayer in a clean, dry, and well-ventilated area to prevent rust or corrosion. It’s also a good idea to cover the equipment with a cloth or plastic bag to keep it dust-free.

Regular equipment maintenance, such as checking for any leaks or clogs, should be done before storing the sprayer.

By taking these steps, you can ensure that your airless paint sprayer will be ready for use whenever you need it.

Advertisement

Now, let’s move on to the conclusion and final thoughts.

Conclusion and Final Thoughts

In wrapping up, it’s important to ensure that your equipment is properly stored and maintained so that it remains in top-notch condition for all your future painting projects.

Here are three essential tips for troubleshooting common issues and best practices for achieving a smooth finish:

  1. Clean the sprayer thoroughly after each use to prevent clogs and buildup. Use warm, soapy water and a soft brush to remove any paint residue from the nozzle, hose, and other components.

  2. Check the seals and gaskets regularly to ensure they’re tight and not damaged. Replace any worn-out parts to prevent leaks and maintain optimal performance.

  3. Store the airless paint sprayer in a clean, dry area away from extreme temperatures. Use the manufacturer’s recommended storage method, such as hanging it on a wall or placing it in a protective case, to prevent damage and prolong its lifespan.

By following these tips and best practices, you can keep your airless paint sprayer running smoothly and achieve professional-quality results with every project.

Frequently Asked Questions

How do I troubleshoot common issues with an airless paint sprayer?

To troubleshoot common issues with an airless paint sprayer, follow these maintenance techniques and troubleshooting tips. Check for clogged nozzles, ensure proper pressure settings, clean or replace filters, and inspect the pump for any leaks or malfunctions.

Advertisement

What should I do if the sprayer is clogging or dripping?

If the sprayer is clogging or dripping, first, I would clean the sprayer thoroughly to remove any paint residue. Then, I would adjust the nozzle to ensure a proper spray pattern and prevent any further issues.

How can I fix an uneven spray pattern?

To fix an uneven spray pattern with an airless paint sprayer, I would adjust the nozzle by turning it clockwise or counterclockwise until the desired pattern is achieved. It’s also important to maintain the correct spraying distance to prevent overspray.

What should I do if I experience a loss of pressure while using the sprayer?

If I experience a loss of pressure while using the sprayer, I’ll troubleshoot by checking for clogs, ensuring proper nozzle size, and adjusting the pressure settings. Maintaining an even spray is crucial, so I’ll be meticulous and thorough.

What are some tips for achieving a professional finish with an airless paint sprayer?

To achieve a professional finish with an airless paint sprayer, it’s crucial to use proper technique. Start by ensuring the surface is clean and smooth, then apply thin coats with even strokes, overlapping each pass for a seamless result.

Conclusion

In conclusion, using an airless paint sprayer can greatly simplify the painting process and provide professional results. By understanding the components and properly preparing your work area, you can achieve a smooth and even finish.

Advertisement

Choosing the right paint and diluting if necessary is crucial for optimal performance. Mastering the proper techniques and taking the time to clean up and store the equipment properly will ensure its longevity.

So why settle for tedious and time-consuming painting methods when you can effortlessly transform your space with an airless paint sprayer?

With James‘ articles, you can expect comprehensive breakdowns of airless paint sprayer features, performance assessments, and expert insights into the latest industry innovations. His meticulous approach ensures that readers gain a thorough understanding of the equipment they are considering, helping them make well-informed choices.

Continue Reading
Advertisement

Airless Paint Sprayers FAQs

How To Unclog Graco 360 Airless Paint Sprayer

Published

on

By

An image showcasing a step-by-step guide on unclogging a Graco 360 Airless Paint Sprayer, depicting a user removing the nozzle, flushing it with water, clearing the filter, and reassembling it meticulously

Have you ever found yourself in the middle of a painting project only to have your Graco 360 airless paint sprayer clog up on you? Dealing with a clog can be frustrating and a waste of time, but fear not! I am here to guide you through the process of unclogging your Graco 360 airless paint sprayer.

In this article, I will provide you with step-by-step instructions on how to:

  1. Identify the clog
  2. Release pressure
  3. Disassemble the sprayer
  4. Clean the spray tip and filter
  5. Reassemble the sprayer

I will also share tips on how to prevent future clogs and when it may be necessary to seek professional help.

So, grab your tools and get ready to tackle that clog head-on. By the end of this article, you’ll have your Graco 360 airless paint sprayer working like new again.

Let’s dive in and get your painting project back on track!

Key Takeaways

  • Troubleshooting tips for Graco 360 airless paint sprayer include checking power supply, priming and flushing properly, verifying paint viscosity, and inspecting for clogs or blockages.
  • To prevent future clogs, strain paint before pouring, clean filters and nozzles regularly, use appropriate paint viscosity, follow prevention techniques, and perform regular maintenance.
  • Professional help is important for complex clogs that require expertise, time constraints that necessitate professional assistance, lack of experience that can lead to accidents, situations where DIY solutions may not be effective, and to ensure efficiency and safety.
  • Signs of complex clogs include unsuccessful DIY methods, persistent clogs despite attempts, indication of more intricate issues, requirement of professional expertise, and the need to avoid potential damage or accidents.

Identify the Clog

Advertisement

To effectively troubleshoot the issue, it’s crucial to first identify the specific area where the clog is occurring within the Graco 360 airless paint sprayer. When it comes to troubleshooting common clog causes, there are a few things to keep in mind.

Start by checking the spray tip, as it is often the primary culprit. Inspect it for any debris or dried paint that may be causing the blockage.

Additionally, inspect the suction tube and filter for any obstructions. These areas can easily accumulate paint particles and cause clogs.

Once the clog is identified, it’s important to release the pressure and remove any remaining paint from the sprayer. This can be done by following the manufacturer’s instructions for releasing pressure and cleaning the system.

By taking these steps and implementing tips for preventing clogs in the future, you can ensure a smooth and efficient painting process.

Advertisement

Release Pressure and Remove Paint

First, make sure the pressure is released and all the paint is removed from the machine. To clean the Graco 360 airless paint sprayer effectively, follow these troubleshooting tips and cleaning techniques:

  • Begin by removing the spray tip and guard, using a wrench if necessary.
  • Next, detach the suction tube from the paint container, ensuring no paint remains inside.
  • Take off the prime valve and filter housing, carefully inspecting them for any clogs or debris.
  • Clean all the removed components thoroughly with warm, soapy water or a suitable cleaning solution.
  • Use a small brush or toothpick to remove any stubborn clogs from the spray tip or filter.
  • Rinse all parts with clean water, ensuring no residue remains.

By following these cleaning techniques and troubleshooting tips, you can effectively unclog your Graco 360 airless paint sprayer.

Now, let’s move on to the next section and disassemble the sprayer for further cleaning.

Disassemble the Sprayer

Now it’s time to break down the sprayer and delve into the inner workings of this powerful machine. Sprayer maintenance is crucial to ensure optimal performance and longevity.

Advertisement

To disassemble the sprayer, start by removing the spray gun from the hose.

Next, unscrew the tip guard and carefully take out the spray tip.

Use a wrench to disconnect the filter housing from the sprayer body.

Once the filter housing is removed, take out the filter and inspect it for any clogs or debris. Cleaning or replacing the filter may be necessary if it is dirty or damaged.

Troubleshooting tips for disassembling the sprayer include following the manufacturer’s instructions, wearing protective gloves, and working in a well-ventilated area.

Advertisement

With the sprayer disassembled, we can now move on to cleaning the spray tip and filter.

Clean the Spray Tip and Filter

Before you begin cleaning the spray tip and filter, it’s important to note that a clogged filter can decrease the efficiency of your sprayer by up to 50%.

To clean the spray tip:

  • Start by removing it from the sprayer gun using a wrench.
  • Once removed, inspect the tip for any clogs or debris.
  • If you notice any blockages, use a small wire brush or toothpick to carefully remove them.

To clean the filter:

  • Unscrew the housing and remove it from the sprayer.
  • Rinse the filter thoroughly with warm water to remove any paint residue or debris.
  • Gently tap the filter on a hard surface to dislodge any stubborn particles.

Finally, reassemble the spray tip and filter, ensuring they are securely tightened.

In the next section, we will discuss how to use a cleaning solution or solvent to further clean your sprayer.

Use a Cleaning Solution or Solvent

Advertisement

To ensure optimal performance, it’s important to enhance the effectiveness of your sprayer by using a cleaning solution or solvent.

When it comes to cleaning solution alternatives, there are a few options to consider. One commonly used option is a mixture of warm water and mild detergent. This mixture can effectively remove any paint residue from the sprayer.

Another alternative is using a commercial paint sprayer cleaner. These cleaners are specifically designed to break down paint and unclog the system, making them a great choice for thorough cleaning.

Whichever option you choose, it’s important to follow safety precautions. Always wear protective gloves and eyewear when handling cleaning solutions or solvents. Additionally, make sure to work in a well-ventilated area to avoid inhaling any fumes.

Advertisement

Now that you have cleaned the spray tip and filter, let’s move on to the next step: using a cleaning brush or needle.

Use a Cleaning Brush or Needle

Using a cleaning brush or needle is like giving your sprayer a thorough scrub, ensuring that every nook and cranny is free from any debris or buildup. Cleaning techniques using a brush or needle are alternative methods to unclog your Graco 360 airless paint sprayer. These tools allow you to manually remove any paint or residue that may be obstructing the spray nozzle or other components. The cleaning brush is perfect for scrubbing the larger parts of the sprayer, such as the spray tip, while the needle can be used to clean the smaller, harder-to-reach areas, like the nozzle or the filter. By using these tools, you can effectively dislodge any clogs and restore the proper functioning of your sprayer. After cleaning, you can proceed to reassemble the sprayer, ensuring all components are properly aligned and tightened.

Reassemble the Sprayer

Now that you have thoroughly cleaned all the components, it’s time to put everything back together and ensure a proper fit for your sprayer. Here are some reassemble techniques and troubleshooting tips to help you with this process:

  • Start by reattaching the spray gun to the hose, ensuring a secure connection.

  • Next, attach the hose to the pump, making sure it is tightly screwed in.

  • Reinstall the suction tube into the pump, ensuring it is properly seated.

  • Attach the spray tip guard to the spray gun, securing it in place.

  • Finally, test the trigger on the spray gun to ensure it is working smoothly.

By following these reassemble techniques and troubleshooting tips, you can ensure that your Graco 360 airless paint sprayer is properly put back together and ready for use.

Now, let’s move on to the next step and test the sprayer.

Advertisement

Test the Sprayer

Once everything is back together, it’s time for you to see the sprayer in action and put it to the test. To ensure that your Graco 360 airless paint sprayer is working properly after reassembling, follow these sprayer maintenance and troubleshooting tips.

First, check if the sprayer is priming correctly. Fill the paint container with water and turn on the sprayer. The water should flow smoothly through the nozzle without any sputtering or clogging. If there are any issues, refer back to the previous steps to troubleshoot and fix the problem.

Next, test the spray pattern by spraying water onto a test surface. The spray pattern should be even and consistent, without any splattering or uneven distribution. Adjust the spray tip if necessary to achieve the desired pattern.

Finally, check for any leaks or unusual noises during operation. If you notice any leaks, tighten the connections or replace any damaged parts. If there are unusual noises, it could indicate a problem with the motor or pump, and you may need to consult the user manual or contact Graco customer support for further assistance.

By following these troubleshooting tips, you can ensure that your Graco 360 airless paint sprayer is working efficiently. In the next section, we will discuss how to prevent future clogs and maintain the sprayer for long-lasting performance.

Advertisement

Prevent Future Clogs

To prevent future clogs in your Graco 360 airless paint sprayer, there are some important steps you can take:

  • Always strain your paint before pouring it into the sprayer. This will remove any debris or clumps that could potentially clog the nozzle.

  • Regularly clean the filters and nozzles of your sprayer to maintain optimal performance.

  • Use the appropriate paint viscosity for your sprayer. Using thicker paints can increase the risk of clogs.

By following these prevention techniques and regular maintenance tips, you can ensure that your Graco 360 airless paint sprayer stays clog-free and ready for your next project.

Remember, if you encounter persistent clogs or issues, it may be necessary to seek professional help.

Seek Professional Help if Needed

If you’re feeling overwhelmed or frustrated with persistent clogs, don’t hesitate to reach out to a professional for assistance. Knowing when to call a professional can save you time, money, and frustration. While unclogging a Graco 360 airless paint sprayer can often be done as a DIY project, there are times when it is best to seek professional help. Here are some situations where calling a professional is recommended:

  1. Complex clogs: If you’ve tried multiple DIY methods and the clog is still not resolved, it may be a sign of a more complex issue that requires professional expertise.

  2. Time constraints: If you have a tight deadline and cannot afford any delays, it’s best to let a professional handle the unclogging process to ensure efficiency and effectiveness.

  3. Lack of experience: If you’re not familiar with the inner workings of the paint sprayer or are unsure about the correct procedure, it’s safer to leave it to a professional to avoid potential damage or accidents.

Remember, while DIY solutions can work in many cases, there are times when professional help is the best choice. Don’t hesitate to call a professional if you’re unsure or experiencing difficulties.

Advertisement

Frequently Asked Questions

Can I use any cleaning solution or solvent to unclog my Graco 360 airless paint sprayer?

No, it is not recommended to use any cleaning solution or solvent for unclogging the Graco 360 Airless Paint Sprayer. It is important to follow the manufacturer’s instructions and use the recommended cleaning methods to prevent clogs.

How often should I clean the spray tip and filter to prevent clogs?

An ounce of prevention is worth a pound of cure. To prevent clogs in your paint sprayer, it’s important to regularly clean the spray tip and filter. This maintenance ensures optimal performance and avoids costly downtime.

What is the recommended method for disassembling the sprayer?

To disassemble the sprayer, follow these steps: 1) Turn off and unplug the sprayer. 2) Remove the spray tip, guard, and filter. 3) Use a wrench to loosen and remove the fluid section. Recommended tools for this process include a wrench and pliers.

Are there any specific cleaning brushes or needles that are recommended for unclogging the sprayer?

To effectively clean and unclog a Graco 360 airless paint sprayer, it is recommended to use cleaning tools such as brushes and needles specifically designed for this purpose. Regular maintenance tips should also be followed to prevent clogging issues.

What are some common signs or symptoms of a clogged Graco 360 airless paint sprayer?

Some common signs or symptoms of a clogged Graco 360 airless paint sprayer include poor spray pattern, spitting or sputtering, and reduced or uneven paint flow. Troubleshooting tips can help identify and resolve these issues.

Advertisement

Conclusion

When it comes to unclogging a Graco 360 Airless Paint Sprayer, there are a few steps you can follow. First, make sure to disconnect the sprayer from the power source and relieve any pressure in the system. Next, remove the spray tip and filter from the gun and clean them thoroughly. If the clog persists, you may need to disassemble the gun and clean the internal components. Be sure to refer to the manufacturer’s instructions for guidance on this step. Once everything is clean, reassemble the gun and test it to ensure the clog is fully cleared. Regular maintenance, such as cleaning the sprayer after each use and using the appropriate paint filters, can help prevent clogs in the future.

Continue Reading

Airless Paint Sprayers FAQs

How To Paint Underside Of Pipe Fence With Airless Sprayer

Published

on

By

An image capturing a skilled painter effortlessly coating the underside of a sturdy pipe fence with an airless sprayer
  • In my opinion, painting the lower section of a pipe fence can be challenging. However, with the right tools and techniques, it can be very rewarding.

  • That’s why I’m here to share my expertise on how to paint the underside of a pipe fence with an airless sprayer. This method not only saves time but also ensures a smooth and even finish.

  • By using an airless sprayer, you can easily reach those hard-to-access areas and achieve professional results.

  • In this article, I will guide you through the step-by-step process, from preparing your fence for painting to properly storing your equipment.

  • So, if you’re ready to transform your fence and give it a fresh new look, let’s dive in and get started!

Key Takeaways

  • Painting the underside of a pipe fence with an airless sprayer provides protection against rust, corrosion, moisture seepage, and rot, while enhancing the fence’s aesthetic appeal and property value.
  • Regular inspection and maintenance of the painted fence, including touch-ups and applying a protective clear coat, ensures durability, longevity, and the preservation of the property’s stunning feature.
  • To prevent paint overspray and equipment damage, proper painting techniques, appropriate equipment and materials, surface covering, maintaining a suitable spraying distance, and proper cleaning and storage of the equipment should be followed.
  • Using an airless sprayer for painting offers efficient and even coverage, reduced overspray and waste, faster application, the ability to reach tight or difficult areas, and suitability for various types of surfaces.

Prepare Your Fence for Painting

Now that you’ve gathered all your materials, it’s time to get your fence ready for a fresh coat of paint.

Choosing the right paint color is important for achieving the desired look and protecting the metal surface from rust. Opt for a paint that is specifically designed for use on metal, as it will provide better adhesion and durability.

Before painting, it’s crucial to prepare the surface by sanding and priming it. Sanding helps to remove any rust or loose paint, ensuring a smooth and even finish.

After sanding, apply a coat of primer to promote better paint adhesion and prevent future rusting.

Advertisement

Once the surface is prepped and primed, you’re ready to move on to the next step of gathering your materials and equipment for painting the underside of your pipe fence.

Gather Your Materials and Equipment

To start, gather all the necessary materials and equipment for the job. This includes a sturdy ladder, protective clothing, and a reliable paint application tool.

When choosing the paint color, consider the overall look you want to achieve and how it will complement your surroundings.

For hard-to-reach areas, an airless sprayer with an extended nozzle can provide even coverage. Don’t forget to have a paint shield or drop cloth to protect the ground or nearby objects from overspray.

Once you have all your materials ready, it’s time to set up a proper work area for a smooth painting process.

Advertisement

Set Up a Proper Work Area

To create a comfortable and efficient workspace, follow these steps:

  • Organize your tools: Keep your paint, sprayer, and other equipment easily accessible so you don’t waste time searching for them.

  • Lay down a drop cloth: Protect the ground from overspray and drips by covering it with a drop cloth. This will also make cleanup easier.

  • Clear any obstacles: Remove any objects that could hinder your movement or potentially get in the way while you’re painting.

  • Designing a comfortable workspace: Arrange your tools and materials in a way that allows you to move freely and comfortably around the fence.

Maximizing efficiency during the painting process is crucial to save time and effort. By setting up a proper work area, you can work more efficiently and avoid unnecessary delays.

Now, let’s talk about how to practice proper safety precautions while painting the underside of a pipe fence.

Advertisement

Practice Proper Safety Precautions

Ensure your safety while painting by following proper precautions and taking necessary steps to protect yourself.

One important safety precaution is the usage of a respirator to protect your lungs from inhaling paint fumes. Make sure to wear a properly fitted respirator that is suitable for painting tasks.

Additionally, it is crucial to practice ladder safety when working on the underside of the pipe fence. Ensure the ladder is stable and secure before climbing up. Always maintain three points of contact with the ladder, and avoid overreaching to prevent falls or accidents.

Once you have taken these safety measures, you can confidently start painting the underside of the fence, knowing that you have done everything necessary to protect yourself.

Start Painting the Underside of the Fence

Advertisement

As you start painting the underside of the fence, there are a few tips to keep in mind for a successful paint job.

First, it’s important to avoid overspray. Adjust the spray pattern and pressure on your airless sprayer according to the manufacturer’s instructions to prevent wasted paint and a messy surrounding area.

When painting hard-to-reach areas, use an extension pole or a ladder to get closer to the fence. This will provide better control and accuracy.

In the next section, we will discuss proper technique and angles to achieve a smooth and even finish.

Advertisement

Use Proper Technique and Angles

Using the right technique and angles while painting is essential for achieving a professional finish. Hold the sprayer perpendicular to the surface and maintain a consistent distance of about 12 inches. Start spraying from one end, moving in a smooth, sweeping motion. Overlap each pass by 50% to prevent streaks and ensure complete coverage.

Pay attention to the spray angle as well. Aim for a 45-degree angle to reach all the nooks and crannies of the fence. This will help ensure that every part of the fence is evenly coated.

By using proper technique and angles, you can achieve a flawless paint job that will enhance the appearance and durability of your pipe fence.

Now, let’s discuss the importance of taking breaks and allowing for proper drying time.

Take Breaks and Allow for Drying Time

Take a moment to rest and give your project the time it needs to dry properly. Proper drying time management is crucial for achieving a flawless finish and avoiding paint drips on the underside of your pipe fence. Here are some tips to help you manage the drying process effectively:

Advertisement
  • Plan your breaks strategically: Take short breaks between painting sessions to allow the paint to dry partially. This will help prevent any accidental smudging or smearing when you resume painting.

  • Allow for sufficient drying time: Don’t rush the process. Ensure that each coat of paint has ample time to dry before applying the next one. This will help the paint adhere better and reduce the risk of drips or uneven coverage.

Inspect and touch up as needed: Once the paint has fully dried, inspect the surface for any missed spots or imperfections. Touch up these areas as necessary to ensure a flawless finish.

Transitioning into the next section, it’s important to thoroughly inspect your painted pipe fence to ensure a professional-looking result.

Inspect and Touch Up as Needed

Now that we have taken breaks and allowed for drying time, it’s important to inspect and touch up the painted pipe fence as needed. This step ensures that the paint job is thorough and long-lasting. Inspect the fence carefully, looking for any missed spots or areas that may require additional attention. Use touch up techniques such as applying paint with a small brush or roller to these areas. Additionally, selecting the right paint color is crucial for achieving a seamless finish. Consider matching the color to the existing fence or choosing a complementary shade. To emphasize these touch up techniques and color selection, refer to the following table:

Touch Up Techniques Selecting the Right Paint Color
Small brush or roller Match existing fence color
Fill in missed spots Choose complementary shade

With the fence inspected and touched up, we can now move on to the next section about clean up and properly storing our equipment.

Clean Up and Properly Store Your Equipment

To ensure the longevity of your newly painted pipe fence, it’s essential to clean up and store your equipment properly. According to a study conducted by paint manufacturers, cleaning and storing painting tools can extend their lifespan by up to 50%. Here are a few tips to help with proper equipment care:

Advertisement
  • Thoroughly clean your airless sprayer by flushing it with clean water or recommended solvent for the paint type used.
  • Remove any leftover paint from hoses, filters, and nozzles to prevent clogs and ensure smooth operation in the future.
  • Store your equipment in a clean, dry place to prevent rust or damage.

By following these steps, you can prevent paint overspray and keep your equipment in excellent condition for future projects.

Now, let’s move on to the next section and admire your newly painted fence.

Admire Your Newly Painted Fence

Stand back and bask in the beauty of your freshly coated and vibrant barrier. Painting the underside of a pipe fence offers numerous benefits.

Firstly, it provides an added layer of protection against rust and corrosion, extending the lifespan of your fence.

Additionally, painting the underside prevents moisture from seeping into the metal, reducing the risk of rot and weakening.

Moreover, a well-painted fence enhances the overall aesthetic appeal of your property, adding value and curb appeal.

Advertisement

To maintain and preserve your newly painted fence, it is essential to regularly inspect for any signs of wear or damage. Touch up any chipped or scratched areas promptly to prevent further deterioration.

Additionally, consider applying a protective clear coat to further enhance the durability and longevity of your paint job.

With proper care and maintenance, your beautifully painted fence will remain a stunning feature of your property for years to come.

Frequently Asked Questions

How long does it take for the paint to dry on the underside of the fence?

To speed up the drying process of paint on the underside of the fence, try using a fan or a heat gun. These techniques can help to increase air circulation and evaporate moisture faster. Additionally, using a paint with a quick drying formula can also help.

Can I use a regular paintbrush instead of an airless sprayer?

When it comes to painting the underside of a pipe fence, using a paintbrush instead of an airless sprayer has its pros and cons. While a brush offers more control, it may take longer and require more effort to achieve a smooth and even finish. To ensure a great result, make sure to choose a high-quality brush, use long and even strokes, and apply thin coats of paint.

Advertisement

Do I need to apply a primer before painting the underside of the fence?

I recommend applying a primer before painting the underside of the fence. Using a primer helps improve adhesion and durability of the paint. However, if you prefer not to use a primer, be aware that the paint may not adhere as well.

What type of paint is recommended for painting the underside of a pipe fence?

The best paint brand for painting the underside of a pipe fence is one that is specifically designed for overhead surfaces. Some tips for painting overhead surfaces include using a roller or brush, using a paint with good coverage, and applying thin, even coats.

How often should I touch up the paint on the underside of the fence?

I recommend touching up the paint on the underside of the fence every 1-2 years to maintain its durability and appearance. Some of the best paint brands for this task include Sherwin-Williams, Behr, and Rust-Oleum.

Conclusion

There you have it! Painting the underside of a pipe fence with an airless sprayer is not as daunting as it may seem. With a little preparation, the right equipment, and some safety precautions, you can achieve a professional-looking finish.

First, make sure to clean the surface of the pipe fence thoroughly. This will ensure that the paint adheres properly and lasts longer. Use a wire brush or sandpaper to remove any rust or loose paint.

Advertisement

Next, protect the surrounding area by covering it with drop cloths or plastic sheets. This will prevent overspray and keep your work area clean.

Now, it’s time to set up your airless sprayer. Follow the manufacturer’s instructions for assembly and make sure you have the appropriate paint and nozzle size for the job. Fill the sprayer with paint and test it on a scrap piece of material to ensure it’s working properly.

When you’re ready to start painting, position yourself underneath the pipe fence and hold the sprayer about 12 inches away from the surface. Begin spraying in a smooth, sweeping motion, overlapping each pass to ensure even coverage.

Take breaks as needed and allow for drying time between coats. This will help prevent drips and ensure a professional finish. Be sure to wear protective clothing, gloves, and a mask to protect yourself from paint fumes and overspray.

Once you’ve finished painting the underside of the pipe fence, step back and inspect your work. Look for any areas that may need touch-ups or additional coats. It’s better to catch these now than to discover them later.

Advertisement

Finally, clean up your equipment according to the manufacturer’s instructions. Properly store any leftover paint and dispose of any waste materials responsibly.

Now, step back and admire your newly painted fence. You’ve done a great job!

Continue Reading

Airless Paint Sprayers FAQs

How To Remove Exterior Paint From Airless Paint Sprayer

Published

on

By

An image showcasing a hand wearing protective gloves, holding an airless paint sprayer nozzle, while pointed towards a weathered wooden surface

If you have ever had to clean exterior paint from an airless paint sprayer, you know how time-consuming and labor-intensive it can be. Trust me, I have been there.

But fear not, my fellow DIY enthusiasts, because I’m here to share with you my tried-and-true method for getting that stubborn paint off your sprayer and back to its pristine state.

In this article, I will guide you through each step of the process, from gathering the necessary materials to properly storing the sprayer for future use.

With my knowledgeable, precise, and detailed instructions, you’ll be able to tackle this daunting task with confidence and efficiency.

So, let’s dive in and say goodbye to that pesky exterior paint once and for all!

Advertisement

Key Takeaways

  • Choose suitable cleaning solutions for the type of paint being used
  • Disconnect and prepare the sprayer for paint removal by removing the nozzle and spray tip
  • Use brushes or toothpicks to remove dried paint from the sprayer
  • Flush the sprayer with water to remove excess paint and clean the components thoroughly

Gather the necessary materials

To effectively remove exterior paint from an airless paint sprayer, it is imperative to gather all the necessary materials.

First, you will need cleaning solution alternatives that are suitable for the type of paint you are removing. It is important to choose the right cleaning solution to ensure the paint is effectively stripped off the sprayer.

Additionally, you should gather the best practices for spray gun maintenance. This includes having a brush or a toothpick to remove any dried paint from the nozzle or the tip of the gun. It is also helpful to have a clean cloth or paper towels to wipe down the exterior of the sprayer.

Once you have all the materials ready, you can proceed to disconnect and prepare the sprayer for paint removal.

Disconnect and prepare the sprayer

To prepare the sprayer for use, start by disconnecting it. This is crucial for safety reasons and to prevent accidents. Make sure the sprayer is turned off and unplugged from the power source.

Next, remove the nozzle and spray tip from the sprayer and clean them thoroughly. This step is important to avoid any clogs or blockages during the paint removal process.

Advertisement

In addition, check the hose for any leaks or damages. It’s always a good idea to ensure that the equipment is in proper working condition before using it.

To protect yourself from potential paint splatters, it’s recommended to wear protective gloves and goggles. Safety should always be a priority when working with any type of equipment.

Once the sprayer is disconnected and prepared, you can proceed to the next step of removing excess paint from the sprayer.

Remove excess paint from the sprayer

Advertisement

Now, let’s tackle any leftover paint that may be lingering in your trusty sprayer.

To remove excess paint from the sprayer, there are a few cleaning techniques and maintenance tips you can follow.

First, ensure that the sprayer is disconnected from the power source and any paint supply.

Then, remove the spray tip and guard, as well as any filters or screens.

Use a clean cloth or rag to wipe away any paint residue on the exterior of the sprayer.

Advertisement

For stubborn paint, you can use a brush or toothbrush to scrub it away. Remember to be gentle to avoid damaging the sprayer.

Once you have removed all excess paint, you can proceed to the next step of flushing the sprayer with water.

Flush the sprayer with water

After disconnecting the sprayer from the power source and any paint supply, it’s time to give it a good flush with water. Flushing is an essential step in removing excess paint and preventing clogs. To effectively flush the sprayer, follow these steps:

  1. Fill a bucket with clean water.
  2. Attach the sprayer’s hose to the bucket, ensuring a secure connection.
  3. Turn on the sprayer and spray the water into a waste container until it runs clear.
  4. Release the trigger and turn off the sprayer.
  5. Disconnect the hose from the bucket and empty any remaining water.

Common mistakes to avoid while flushing an airless paint sprayer include not using enough water and not thoroughly cleaning the sprayer’s components. By properly flushing the sprayer, you can maintain its longevity and prevent paint buildup. In the next section, we will discuss how to disassemble and clean the spray gun, ensuring its optimal performance.

Disassemble and clean the spray gun

Advertisement

To properly maintain your spray gun, you’ll need to disassemble and clean it thoroughly. Here are some cleaning techniques and maintenance tips to help you with this task:

  1. Start by removing the nozzle and the tip guard from the spray gun. This will allow you to access all the internal components that need to be cleaned.

  2. Use a cleaning brush or a toothbrush to scrub off any paint residue from the spray gun body. Pay close attention to the areas around the trigger and the air inlet.

  3. Soak the disassembled parts in a bucket of warm soapy water for about 15 minutes. This will help to loosen any stubborn paint particles.

  4. Rinse all the parts thoroughly with clean water to remove any soap residue. Make sure to inspect each component for any signs of damage or wear.

Now that the spray gun is clean, let’s move on to the next step of the process: cleaning the filters and nozzles.

Clean the filters and nozzles

After disassembling and cleaning the spray gun, it’s important to clean the filters and nozzles of your airless paint sprayer. These components play a crucial role in ensuring a smooth and consistent paint flow.

To clean the filters, remove them from the sprayer and rinse them thoroughly with water. Use a soft brush to gently scrub away any paint residue or debris.

For the nozzles, soak them in a bucket filled with warm soapy water for about 15 minutes. Then, use a small brush to remove any remaining paint or clogs. Rinse the nozzles with clean water and ensure they are completely dry before reassembling the sprayer.

Advertisement

These cleaning techniques and maintenance tips will help maintain the performance and longevity of your airless paint sprayer.

Moving on to the next section, let’s discuss how to use a cleaning solution for stubborn paint.

Use a cleaning solution for stubborn paint

If stubborn paint is giving you trouble, try using a cleaning solution to easily tackle the problem. Cleaning solutions are a great alternative to remove exterior paint from airless paint sprayers. They are specially formulated to break down and dissolve paint, making it easier to remove.

Here are three cleaning solution alternatives that can help you get the job done effectively and efficiently:

  • Acetone: This powerful solvent can quickly dissolve paint buildup and leave your sprayer clean and ready for use.
  • Vinegar: A natural and cost-effective option, vinegar can help prevent paint buildup and keep your sprayer in good condition.
  • Paint thinner: This versatile solution can effectively remove stubborn paint and restore your sprayer to its optimal performance.

By regularly using these cleaning solutions, you can prevent paint buildup and ensure the longevity of your airless paint sprayer. Once you have successfully cleaned the filters and nozzles, it’s time to move on to the next step: rinse and dry the sprayer components.

Rinse and dry the sprayer components

To ensure optimal performance and prevent potential damage, it is important to thoroughly rinse and dry all the components of your sprayer. Properly cleaning and maintaining your sprayer can increase its lifespan by up to 50%. Rinsing and drying the components is a crucial step in airless paint sprayer maintenance. After using a cleaning solution to remove stubborn paint, it is important to rinse off any residue to prevent clogs in the sprayer. Thoroughly rinse all the parts, including the spray gun, hose, and filters, using clean water. Once rinsed, make sure to dry each component thoroughly before reassembling the sprayer. This will help prevent any moisture-related issues and ensure that your sprayer functions at its best. Now, let’s move on to how to reassemble the sprayer and get it ready for your next painting project.

Advertisement

Reassemble the sprayer

To reassemble the sprayer, carefully fit the cleaned and dried components together like puzzle pieces, ensuring a snug and secure fit. Here are some important steps to follow in the reassembly process:

  • Start by reattaching the spray gun to the hose, making sure the connection is tight.
  • Next, insert the suction tube into the paint container, ensuring it is securely in place.
  • Attach the pump housing to the sprayer body, aligning the tabs and locking it into position.
  • Once the pump housing is secured, reattach the power cord to the sprayer.
  • Finally, double-check all connections to ensure they are tight and secure before testing the sprayer.

If you encounter any issues during the reassembly process, refer to the troubleshooting tips provided in the sprayer’s instruction manual.

Now that the sprayer is reassembled, let’s move on to how to properly store it for future use.

Properly store the sprayer for future use

After reassembling the sprayer, it’s time to store it properly for future use.

Properly cleaning the sprayer after each use is crucial to ensure its longevity and effectiveness.

First, I recommend flushing the sprayer with water or a cleaning solution to remove any leftover paint residue. This will prevent clogging and maintain the sprayer’s performance.

Advertisement

Next, disassemble the nozzle and clean it thoroughly, removing any dried paint or debris.

It’s also important to lubricate the sprayer’s moving parts to prevent rust and keep them in good working condition.

Regular maintenance is key to prolonging the life of your airless paint sprayer.

By following these steps and storing the sprayer in a clean, dry place, you’ll be ready for your next painting project with a sprayer that’s in top-notch shape.

Frequently Asked Questions

Can I use any type of cleaning solution to remove stubborn paint from the sprayer?

Sure, you can use a variety of cleaning solutions to tackle stubborn paint on your sprayer. Options like vinegar, rubbing alcohol, or paint thinner can be effective alternatives. Just be sure to follow safety precautions and test a small area first.

Advertisement

How often should I clean the filters and nozzles of the airless paint sprayer?

To keep your airless paint sprayer in optimal condition, it is important to clean the filters and nozzles regularly. This helps prevent clogs and ensures a smooth painting process. Troubleshoot common issues by checking for debris or worn-out parts.

Is it necessary to disassemble the spray gun in order to clean it properly?

To properly clean the spray gun, it is necessary to disassemble it. This allows for a thorough cleaning of all the components. There are also alternative cleaning solutions available that can help remove paint effectively.

Can I use a pressure washer to flush the sprayer with water?

I wouldn’t recommend using a pressure washer to flush an airless paint sprayer with water. It could damage the delicate parts. Instead, use a garden hose or consider alternative methods like using paint thinner or specialized cleaning solutions.

What is the best way to store the airless paint sprayer for future use?

Storing an airless paint sprayer properly is crucial for its future use. To ensure the best paint sprayer maintenance, clean the sprayer thoroughly, lubricate the parts, and store it in a dry, temperature-controlled environment. Preventing clogs in the airless paint sprayer is essential and can be achieved by using the right filters, strainers, and properly thinning the paint.

Conclusion

In conclusion, removing exterior paint from an airless paint sprayer requires careful preparation and thorough cleaning. By following the steps outlined in this article, you can ensure the longevity and efficiency of your sprayer.

Advertisement

Remember the old saying, ‘A clean tool is a happy tool.’ So, take the time to disassemble, clean, and reassemble your sprayer properly.

With regular maintenance and proper storage, your sprayer will be ready for future painting projects. Happy painting!

Continue Reading
Advertisement

Affiliate disclaimer

As an affiliate, we may earn a commission from qualifying purchases. We get commissions for purchases made through links on this website from Amazon and other third parties.

Advertisement

Trending