Did you know that the Graco 390 Airless Paint Sprayer is considered a top choice for professional painters? Its popularity is due to its effectiveness and user-friendly design. In this article, I will guide you through the process of setting up and maintaining this impressive tool.
First, we’ll start with unboxing and familiarizing yourself with the Graco 390 Airless Paint Sprayer. Then, we’ll move on to assembling the components and preparing both the surface and paint for spraying. Adjusting the spray settings for your desired coverage will be crucial to achieving the perfect finish.
I will also show you how to start and stop the paint sprayer, as well as provide detailed instructions for disassembling and cleaning the spray gun. Flushing the paint sprayer system is an essential step to prevent clogging and maintain its performance.
Finally, I’ll share some tips on proper storage and maintenance, as well as troubleshooting common issues that may arise. By the end of this article, you’ll be a pro at using and maintaining the Graco 390 Airless Paint Sprayer.
Let’s dive in!
Key Takeaways
- Gather necessary equipment and materials
- Connect sprayer to power source and prime pump
- Adjust pressure settings according to project requirements
- Clean sprayer before and after each use and properly store sprayer after cleaning and maintenance
Unboxing and Familiarizing Yourself with the Graco 390 Airless Paint Sprayer
Now that you’ve got your hands on the amazing Graco 390 Airless Paint Sprayer, it’s time to unbox it and get familiar with all its fantastic features!
The first step in the unboxing process is to carefully remove the paint sprayer from its packaging, ensuring that you don’t damage any of the components.
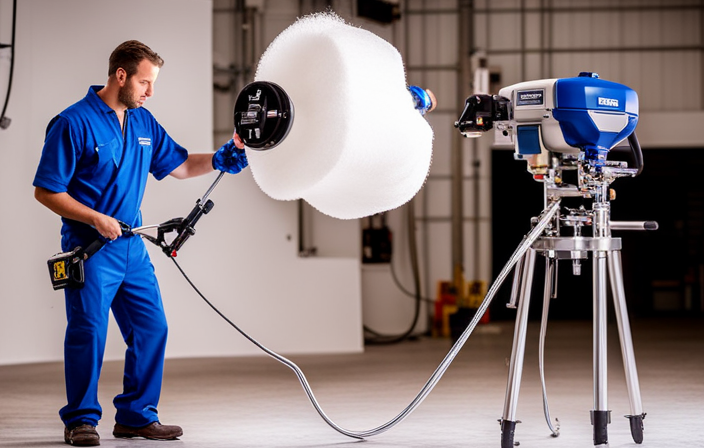
Once it’s out, take a moment to inspect the sprayer and familiarize yourself with its various features, such as the pressure control knob, the spray gun, and the hose. Understanding these features is crucial for proper operation and maintenance of the paint sprayer.
After you’ve unboxed and familiarized yourself with the paint sprayer, it’s time to move on to assembling the components and getting everything ready for your painting project.
Assembling the Components of the Paint Sprayer
To start the process, you’ll need to put together all the different parts of the sprayer. Here are some assembling tips to help you out:
- Make sure to read the instruction manual carefully before starting.
- Lay out all the components on a clean and flat surface.
- Attach the handle to the sprayer body using the provided screws and a screwdriver.
- Connect the hose to the sprayer by twisting it clockwise until it locks into place.
- Install the spray gun onto the hose by aligning the arrows and pushing it in until you hear a click.
By following these steps, you’ll have your Graco 390 Airless Paint Sprayer ready to go. If you encounter any issues during assembly, refer to the troubleshooting tips in the manual. Once assembled, you can move on to preparing the surface and paint for spraying.
Preparing the Surface and Paint for Spraying
To prepare the surface for spraying, follow these steps:
-
Clean the surface thoroughly by removing any dirt, dust, or debris. Use a mild detergent and water, and scrub with a brush or sponge. Rinse the surface with clean water and allow it to dry completely before painting.
-
Choose the right paint for your project. Consider the type of surface you are painting and the desired finish. Ensure the paint is compatible with your Graco 390 airless paint sprayer.
-
Adjust the spray settings for desired coverage. This includes adjusting the pressure, spray pattern, and flow rate of the paint sprayer. Test the settings on a small area before spraying the entire surface.
Remember, proper surface preparation and paint selection are key to achieving a flawless finish. Take your time and follow these steps to ensure a successful spray painting project.
Adjusting the Spray Settings for Desired Coverage
Ensure you have the perfect coverage by adjusting the spray settings on your Graco 390. To adjust the spray pattern, locate the spray tip guard and turn it clockwise or counterclockwise to change the fan width. A narrow fan width will provide more concentrated coverage, while a wider fan width will cover a larger area.
Additionally, you can adjust the pressure control knob to increase or decrease the paint flow. If you encounter a clogged nozzle, first, make sure the sprayer is turned off, then remove the nozzle and clean it with a nozzle cleaning tool or a small brush. Reattach the nozzle and test the spray pattern to ensure it is clear and even.
Now that you have adjusted the spray settings, you are ready to move on to starting and stopping the paint sprayer, ensuring seamless application.
Starting and Stopping the Paint Sprayer
Starting and stopping the paint sprayer is a seamless process once you’ve mastered adjusting the spray settings. This allows for effortless application.
To start the Graco 390 airless paint sprayer, simply turn on the power switch and squeeze the spray gun trigger. The sprayer will begin pumping paint through the hose and out of the nozzle.
If you’re experiencing any issues with starting, make sure the power source is connected and the spray gun is properly primed. If the motor doesn’t start, check the fuse and replace if necessary.
To stop the sprayer, release the spray gun trigger and turn off the power switch. This will stop the pump and prevent any paint from being sprayed.
Now, let’s move on to cleaning the paint sprayer after use and ensuring its longevity.
Cleaning the Paint Sprayer After Use
After you’ve finished using the paint sprayer, it’s time to give it a thorough cleaning to ensure optimal performance for future projects.
Cleaning the paint sprayer involves a few key techniques. First, remove any remaining paint from the sprayer by spraying a cleaning solution through the nozzle and into a waste container.
Next, disassemble the paint sprayer and clean each part individually. Use a brush and solvent to remove any dried paint or debris. Pay special attention to the filters, as they can easily become clogged.
Once all the parts are clean, reassemble the sprayer and run clean water through it to flush out any remaining residue. It’s important to use the best cleaning products recommended by Graco to ensure the longevity of your sprayer.
With the sprayer clean and ready for the next job, it’s time to move on to disassembling and cleaning the spray gun.
Disassembling and Cleaning the Spray Gun
To properly maintain your spray gun and ensure its longevity, it’s crucial to disassemble and thoroughly clean it after each use.
The disassembling process involves removing the spray tip, guard, and filter from the gun. Carefully unscrew the tip using a wrench, then detach the guard by unscrewing the retaining nut.
Next, remove the filter from the gun handle. Once disassembled, clean each part separately. Use a brush and solvent to remove any paint residue from the spray tip and guard. For the filter, rinse it with warm soapy water until clean.
Dry all parts thoroughly before reassembling the spray gun. With the gun disassembled and cleaned, you can now move on to the next step of flushing the paint sprayer system, which ensures a clean and efficient operation.
Flushing the Paint Sprayer System
Now that we’ve disassembled and cleaned the spray gun, let’s move on to the exciting step of giving our paint sprayer system a refreshing flush. Proper paint sprayer maintenance includes regular cleaning, as it helps to maintain the performance and longevity of the equipment. Flushing the paint sprayer system removes any leftover paint or debris, preventing clogs and ensuring a smooth spraying process. To flush the system, follow these steps:
| Step | Procedure |
|---|---|
| 1 | Fill the paint sprayer with a cleaning solution or water. |
| 2 | Connect the sprayer hose and gun to the paint sprayer. |
| 3 | Turn on the sprayer and adjust the pressure to the lowest setting. |
| 4 | Spray the cleaning solution or water into a bucket or waste container until it runs clear. |
| 5 | Disconnect the hose and gun, and rinse them thoroughly with water. |
Regular cleaning and flushing of the paint sprayer system is crucial for optimal performance and durability. This ensures that the equipment is always ready for your next painting project. In the next section, I will discuss the proper storage and maintenance of the Graco 390 airless paint sprayer.
Proper Storage and Maintenance of the Graco 390 Airless Paint Sprayer
Make sure you take care of your investment by properly storing and maintaining the powerful Graco 390 Airless Paint Sprayer. When it comes to storage, it’s important to keep the sprayer in a clean and dry area, preferably in its original box or a protective case. Avoid exposing it to extreme temperatures or humidity, as this can damage the internal components.
Additionally, make sure to remove any leftover paint from the sprayer and clean it thoroughly before storing.
In terms of maintenance, one common mistake is neglecting regular lubrication of the sprayer’s moving parts. It’s crucial to lubricate the piston rod and packings with Graco’s recommended lubricant to ensure smooth operation. Another mistake is using the wrong type of paint or solvent, which can lead to clogs and damage the sprayer. Always refer to the manufacturer’s guidelines for the compatible materials.
To troubleshoot common issues with the paint sprayer, such as uneven spray pattern or loss of pressure, refer to the next section for detailed instructions.
Troubleshooting Common Issues with the Paint Sprayer
One interesting statistic to note is that a study found that approximately 70% of common issues with paint sprayers can be resolved through troubleshooting techniques. Troubleshooting is an essential skill for maintaining and using the Graco 390 Airless Paint Sprayer effectively. Here are some common issues that you may encounter and their corresponding troubleshooting techniques:
| Common Issue | Troubleshooting Technique |
|---|---|
| Clogged Spray Tip | Clean the spray tip thoroughly using a brush and solvent, ensuring there is no dried paint or debris present. |
| Uneven Spray Pattern | Check the paint viscosity and adjust it accordingly. Also, inspect and clean the spray tip for any blockages. |
| Low Pressure | Verify that the pump is properly primed and there are no leaks. Adjust the pressure settings as needed. |
| Excessive Overspray or Sputter | Check for any worn or damaged parts, such as the spray tip or filters, and replace them if necessary. |
By troubleshooting these common issues, you can save time and money, as well as ensure the optimal performance of your Graco 390 Airless Paint Sprayer.
Frequently Asked Questions
How long does it take to assemble the components of the Graco 390 Airless Paint Sprayer?
It typically takes about 15-20 minutes to assemble the components of the Graco 390 airless paint sprayer. Make sure to follow the user manual for proper instructions and ensure all connections are secure.
Can I use any type of paint with the Graco 390 Airless Paint Sprayer?
Yes, you can use various types of paint with the Graco 390 airless paint sprayer. However, it’s important to consider compatibility. The best options include latex, enamels, and oil-based paints for optimal results.
What is the recommended cleaning solution for the paint sprayer after use?
The recommended cleaning solution for the paint sprayer after use is a mixture of warm water and mild detergent. To maintain the Graco 390 airless paint sprayer, it is important to clean the filters regularly and lubricate the pump.
How often should I clean the spray gun of the Graco 390 Airless Paint Sprayer?
To keep your Graco 390 airless paint sprayer performing its best, clean the spray gun regularly. Use the recommended cleaning solution and follow the manufacturer’s instructions for how to clean the spray gun for optimal performance.
What is the warranty period for the Graco 390 Airless Paint Sprayer?
The warranty period for the Graco 390 airless paint sprayer is 1 year. If you have any issues, Graco’s customer support is available to assist you with any questions or concerns you may have.
Conclusion
In conclusion, setting up and cleaning the Graco 390 Airless Paint Sprayer has been an exhilarating experience.
From unboxing and assembling the components to adjusting the spray settings and starting/stopping the sprayer, every step was a breeze.
The disassembly and cleaning of the spray gun, as well as the flushing of the system, ensured optimum performance.
With proper storage and maintenance, this paint sprayer will continue to be a game-changer in the world of painting.
Trust me, you won’t find a more efficient and reliable sprayer anywhere else!
