Imagine finding yourself in front of a blank canvas, set to transform it into an artistic masterpiece. Visualize having a tool that allows you to flawlessly bring your imaginative visions to life with precision and ease. That tool is the Graco 395 Airless Paint Sprayer.
In this article, I will guide you through the process of setting up and operating this powerful machine, so you can unleash your creativity and achieve professional-quality results.
From unboxing and assembly to understanding the components and controls, I will walk you through every step of the way.
We will explore how to prepare your painting area and surface, choose the right paint and dilution ratio, and set up the paint sprayer for operation.
I will also provide tips on maintaining and cleaning the sprayer, troubleshooting common issues, and ensuring your safety throughout the process.
So, let’s dive in and unlock the full potential of the Graco 395 Airless Paint Sprayer together.
Get ready to elevate your painting experience to new heights and create art that truly speaks to the soul.
Key Takeaways
- Check for nozzle clogs or wear and clean or replace if necessary
- Adjust pressure settings for proper atomization
- Ensure proper fan width and pressure settings to minimize overspray
- Regularly maintain and clean the spray gun, checking for worn or damaged parts
Unboxing and Assembly of the Graco 395 Airless Paint Sprayer
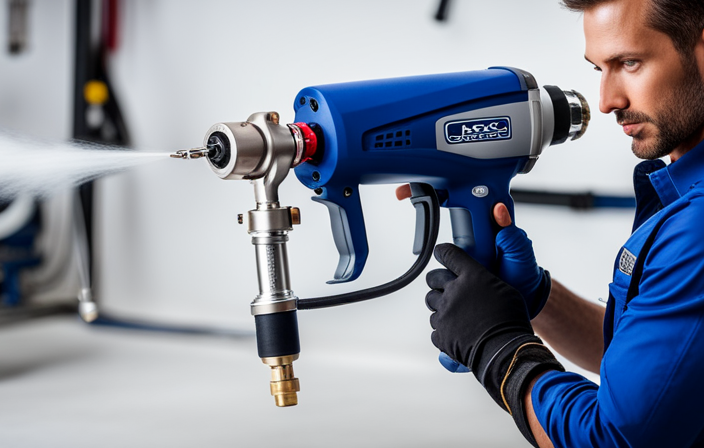
Get ready to unbox and assemble your Graco 395 Airless Paint Sprayer and start your painting project in no time! The unboxing process is straightforward. Simply open the package and remove the sprayer, hose, gun, and other accessories.
Next, assemble the sprayer by attaching the hose to the gun and the other end to the pump. Connect the power cord to an electrical outlet. Familiarize yourself with the components and controls, such as the pressure adjustment knob and trigger lock.
Once you’ve assembled the sprayer and become familiar with its components and controls, you’re ready to move on to the next section. In the next section, we’ll discuss how to prepare the paint and the surface for spraying.
Familiarizing Yourself with the Components and Controls
Take time to acquaint yourself with the various parts and knobs of the high-performance 395 machine to effortlessly master its mechanics. The Graco 395 Airless Paint Sprayer is equipped with several important components and controls that play a crucial role in achieving optimal results.
First, familiarize yourself with the pressure settings adjustment knob, which allows you to control the amount of pressure applied to the paint. This feature is essential for achieving the desired finish and preventing overspray.
Additionally, understanding spray patterns is key to achieving even coverage. The Graco 395 offers various spray patterns, such as horizontal, vertical, and circular, which can be adjusted using the pattern control knob.
By mastering these components and controls, you will be well-prepared to move on to the next section, where we will discuss preparing your painting area and surface.
Preparing Your Painting Area and Surface
Make sure you’ve got a clean and well-ventilated space ready for your painting project. Before starting, it’s important to prepare your painting area and surface properly.
Begin by clearing the area of any furniture or objects that may obstruct your work. Cover the floor and any nearby surfaces with drop cloths or plastic sheets to protect them from paint splatters.
Next, inspect the surface you’ll be painting and address any issues such as cracks, holes, or rough spots. Sanding the surface can help create a smooth and even finish.
Additionally, choosing the right paintbrush is crucial for achieving the desired results. Consider the type of paint you’ll be using and the surface texture. A brush with synthetic bristles works well for latex paints on smooth surfaces, while natural bristles are better suited for oil-based paints on rough surfaces.
Moving forward to the next section about choosing the right paint and dilution ratio, it is essential to select the appropriate paint and dilution ratio for optimal spraying performance.
Choosing the Right Paint and Dilution Ratio
Once you’ve ensured a clean and well-ventilated painting area, it’s crucial to choose the right paint and dilution ratio for optimal results.
When choosing paint colors, it’s important to consider the type of surface you’ll be painting and the desired finish. Different types of paint finishes, such as matte, satin, or gloss, offer varying levels of durability and sheen. For example, matte finishes are great for hiding imperfections, while gloss finishes provide a durable and shiny surface.
To determine the correct dilution ratio for your paint, refer to the manufacturer’s instructions or consult a paint professional. Proper dilution ensures that the paint flows smoothly through the sprayer without clogging or spattering.
With the right paint and dilution ratio selected, you can now move on to setting up the paint sprayer for operation, ensuring a smooth and efficient painting process.
Setting Up the Paint Sprayer for Operation
Before getting started, it’s crucial to prepare your paint sprayer for optimal performance. Maintaining your paint sprayer is essential to ensure consistent results and avoid any potential issues during operation. Regularly cleaning and inspecting the sprayer for any clogs or damage is part of good paint sprayer maintenance.
Additionally, check the filters and replace them if necessary to prevent any paint particles from clogging the system. Troubleshooting tips for common paint sprayer issues include checking the pressure settings, ensuring proper priming, and adjusting the spray tip size according to your project’s requirements.
These maintenance and troubleshooting practices will help you achieve excellent results and avoid any interruptions while using the Graco 395 airless paint sprayer.
Now, let’s move on to discussing the proper techniques for using the sprayer.
Proper Techniques for Using the Graco 395 Airless Paint Sprayer
After setting up the Graco 395 Airless Paint Sprayer for operation, it’s important to use proper techniques to ensure a smooth and efficient painting process. To start, make sure to hold the sprayer firmly and maintain a consistent distance from the surface being painted. This will help to achieve an even and uniform coat. Additionally, always move the sprayer in a steady back and forth motion, overlapping each pass by about 50%. This will prevent any streaks or uneven coverage. If any issues arise during operation, such as clogging or uneven spray patterns, consult the Graco 395 Airless Paint Sprayer troubleshooting guide for assistance. Lastly, proper maintenance is crucial for the longevity of the sprayer. Regularly clean and inspect the sprayer, following the guidelines outlined in the Graco 395 Airless Paint Sprayer maintenance manual. This will ensure optimal performance and extend the lifespan of the sprayer. Now, let’s move on to maintaining and cleaning the sprayer after use.
Maintaining and Cleaning the Sprayer After Use
To ensure your sprayer stays in optimal condition and ready for your next painting project, it’s essential to properly maintain and clean it after each use. Here’s a recommended cleaning process and maintenance tips to keep your Graco 395 Airless Paint Sprayer in top shape:
-
Start by disconnecting the sprayer from the power source and relieve any pressure by triggering the gun into a waste container.
-
Remove the spray tip, guard, and filter housing, and clean them using warm soapy water or a suitable solvent.
-
Flush the system with a cleaning solution, such as Graco Pump Armor, to prevent corrosion and maintain the pump’s longevity.
-
After cleaning, inspect the hoses, fittings, and seals for any damage or wear and replace if necessary.
Following these maintenance steps will ensure your sprayer’s longevity and optimal performance.
In the next section, we’ll discuss troubleshooting common issues and provide tips for achieving optimal performance without any interruptions.
Troubleshooting Common Issues and Tips for Optimal Performance
If you want to achieve flawless painting results and avoid common issues, troubleshooting and following these tips for optimal performance is crucial. Here are some common issues you may encounter with your Graco 395 airless paint sprayer and tips on how to resolve them:
| Common Issue | Troubleshooting Tips |
|---|---|
| Uneven Spray Pattern | Check the nozzle for clogs or wear, and clean or replace if necessary. Adjust the pressure settings to ensure proper atomization. |
| Excessive Overspray | Adjust the fan width and pressure settings to achieve the desired spray pattern. Use a smaller tip size for more control. |
| Paint Leaking from Gun | Check all connections for tightness and replace worn seals or gaskets. Ensure the gun filter is clean and free from debris. |
| Motor Not Starting | Check the power source and ensure it is connected properly. Inspect the power cord for any damage. Reset the motor by turning it off and then on again. |
By troubleshooting these common issues and following these tips, you can optimize the performance of your Graco 395 airless paint sprayer. In the next section, we will discuss important safety precautions and best practices to keep in mind while using the sprayer.
Safety Precautions and Best Practices
Before using the Graco 395 airless paint sprayer, it’s important to familiarize yourself with safety precautions and best practices to ensure a smooth and accident-free painting experience.
-
First and foremost, always wear the appropriate personal protective equipment, including safety goggles, gloves, and a respirator. Respirator requirements may vary depending on the type of paint being used, so be sure to check the manufacturer’s recommendations.
-
Additionally, proper spray gun maintenance is crucial for optimal performance. Regularly clean the gun, remove any clogs or debris, and check for any worn or damaged parts that may affect the spray pattern.
-
Finally, always operate the paint sprayer in a well-ventilated area and away from open flames or sparks to prevent any potential fire hazards.
By following these safety precautions and best practices, you can ensure a safe and efficient painting experience.
Now, let’s explore advanced techniques and additional accessories to get the most out of your Graco 395 airless paint sprayer.
Getting the Most Out of Your Graco 395 Airless Paint Sprayer: Advanced Techniques and Additional Accessories
Maximize your painting potential with the Graco 395 airless paint sprayer by exploring advanced techniques and utilizing additional accessories.
To achieve professional results, consider incorporating advanced painting techniques such as crosshatching, feathering, and back rolling. Crosshatching involves crisscrossing your spray pattern to ensure even coverage. Feathering refers to blending the edges of your paint strokes for a seamless finish. Back rolling helps to smooth out any texture left by the sprayer.
Additionally, consider using specialty accessories to enhance your painting experience. Accessories such as extension poles, spray tips, and filters can provide greater reach, precision, and filtration for a cleaner finish.
By mastering advanced techniques and utilizing specialty accessories, you can take your painting projects to the next level with the Graco 395 airless paint sprayer.
Frequently Asked Questions
Can the Graco 395 Airless Paint Sprayer be used for both indoor and outdoor painting projects?
Yes, the Graco 395 airless paint sprayer is versatile for both indoor and outdoor painting projects. It effortlessly transforms blank canvases into vibrant masterpieces, whether inside the walls of your home or under the open sky.
What is the maximum tip size that can be used with the Graco 395 Airless Paint Sprayer?
The maximum tip size for the Graco 395 airless paint sprayer is 0.023 inches. This allows for a variety of spray patterns to be achieved, making it suitable for a wide range of painting projects.
How do I adjust the pressure settings on the Graco 395 Airless Paint Sprayer?
To adjust the pressure settings on the Graco 395 airless paint sprayer, locate the pressure control knob on the sprayer. Turn it clockwise to increase pressure and counterclockwise to decrease pressure. Troubleshooting pressure issues may require checking for clogs or leaks.
Is it necessary to strain the paint before using it with the Graco 395 Airless Paint Sprayer?
Yes, it is necessary to strain the paint before using it with the Graco 395 airless paint sprayer. Straining removes any impurities or debris that can affect the paint quality and clog the sprayer.
Can I use the Graco 395 Airless Paint Sprayer to spray lacquer or other solvent-based finishes?
Using lacquer with the Graco 395 is like driving a sports car on a smooth road. It’s possible, but requires thorough cleaning afterward. Follow proper cleaning procedures to avoid damage and maintain optimal performance.
Conclusion
In conclusion, operating the Graco 395 Airless Paint Sprayer has been a game-changer for my painting projects. With its efficient and powerful performance, I can achieve professional results in no time.
Just like a well-oiled machine, this sprayer effortlessly glides over surfaces, leaving a smooth and flawless finish. It’s like having an artist’s brush in my hand, creating masterpieces with precision and ease.
So, if you’re ready to take your painting skills to the next level, the Graco 395 is the perfect tool to help you unleash your inner artist.
