As I took a step back and noticed the worn and lackluster look of my house, a strong feeling of determination came over me. It was time to rejuvenate my home with a vibrant, new look. And what better way to achieve this transformation than with the help of a paint sprayer?
With its efficiency and ease of use, an airless sprayer seemed like the perfect tool for the job. In this article, I will guide you through the steps of how to spray a house with a paint sprayer, from gathering the necessary tools and materials to admiring your newly painted masterpiece.
We’ll cover everything, from preparing the surface to working in sections and applying multiple coats if needed. So, let’s dive in and transform our homes with the power of a paint sprayer.
Key Takeaways
- Safety precautions, such as ensuring a well-ventilated area and wearing safety gear, are essential when using a paint sprayer.
- Proper surface preparation, including cleaning and repairing imperfections, is necessary before using a paint sprayer.
- Choosing the right nozzle size for the desired spray pattern and coverage is important for achieving the desired results.
- Working in sections and paying attention to detail, such as covering windows and using a brush for hard-to-reach areas, are crucial for a successful paint spraying project.

HomeRight Super Finish Max HVLP Paint Sprayer - 450 Watts, Model# C800971.M
PAINT SPRAYER FOR COUNTLESS DIY PROJECTS: The HomeRight Super Finish Max paint sprayer offers the ultimate DIYing experience....
As an affiliate, we earn on qualifying purchases.
Gather the Necessary Tools and Materials
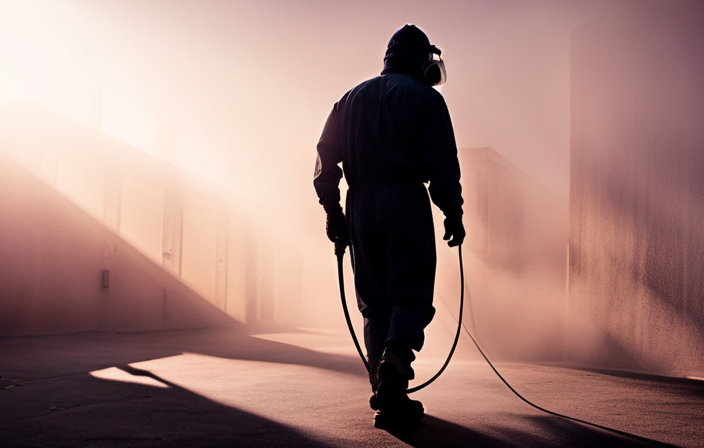
Before you start, make sure you have all the tools and materials you’ll need for the job. When it comes to spraying a house with a paint sprayer, having the right tools and equipment is crucial. You will need an airless sprayer, paint, a paint strainer, a paint gun, a hose, and a paint roller. Additionally, make sure you have safety gear such as goggles, a respirator mask, gloves, and protective clothing to protect yourself from any potential hazards.
Before you begin spraying, it’s important to take some safety precautions. Make sure the area is well-ventilated and cover any nearby objects or surfaces that you don’t want to be painted. Also, remember to read and follow the manufacturer’s instructions for your specific airless sprayer model.
Once you have gathered all the necessary tools and equipment and taken the required safety precautions, you can proceed to the next step of preparing the surface for painting.

VEVOR 750W Stand Airless Paint Sprayer, 3000PSI High Efficiency Electric Airless Sprayer, Fine and Even Painting Effect, Handheld Paint Sprayers for Home Interior and Exterior Furniture and Fences
Efficient Painting: Our stand airless paint sprayer is equipped with a powerful 750W motor, capable of delivering up...
As an affiliate, we earn on qualifying purchases.
Prepare the Surface for Painting
To ensure a flawless and long-lasting finish, start by meticulously prepping the surface you’re about to transform with your trusty tool. Surface preparation is crucial for a professional-looking paint job. Here are three important steps to follow:
-
Clean the surface: Remove any dirt, dust, or grease by washing it with a mild detergent or using a pressure washer. This will ensure that the paint adheres properly.
-
Repair any damage: Inspect the surface for cracks, holes, or imperfections. Fill them with a suitable filler and sand them smooth. This will create a seamless canvas for your paint.
-
Apply a primer: Priming the surface is essential for better adhesion and durability of the paint. Choose a primer that is compatible with the surface material and apply it evenly using a brush or roller.
Now that the surface is prepped and primed, you’re ready to set up the paint sprayer and start transforming your house.

Graco Magnum 257025 Project Painter Plus Paint Sprayer
Ideal for projects up to 5 gallons in size, allowing you to tackle a range of projects every...
As an affiliate, we earn on qualifying purchases.
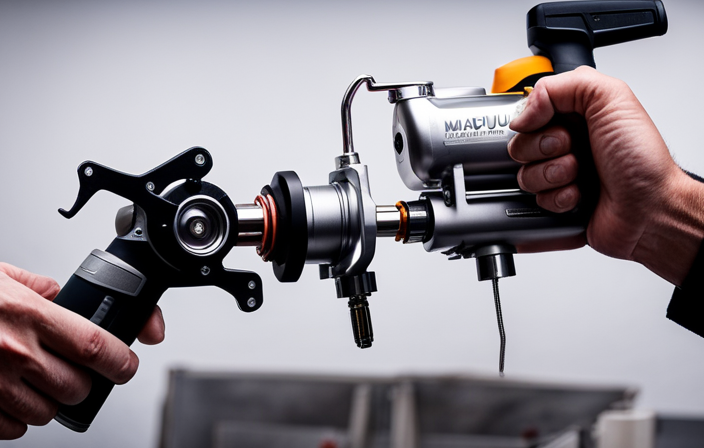
Set up the Paint Sprayer
First, I make sure to choose the right nozzle size for my paint sprayer. This is important because different nozzle sizes will produce different spray patterns and coverage.
Next, I check the consistency of the paint and dilute it if necessary. This ensures that the paint flows smoothly through the sprayer and produces an even coat.
Lastly, I always test the sprayer on a scrap surface before starting the actual painting. This allows me to make any adjustments to the spray pattern or pressure before applying the paint to the desired surface.
Choose the Right Nozzle Size
When selecting the nozzle size for your paint sprayer, you’ll want to make sure it’s the perfect fit for achieving a flawless finish on your house. The nozzle size determines the amount of paint that is sprayed out and the spray pattern it creates.
To choose the right nozzle size, consider the thickness of the paint you’ll be using and the desired coverage. If you’re using a thick paint, like latex, a larger nozzle size would be suitable to handle the higher viscosity. On the other hand, for thinner paints, such as stains or lacquers, a smaller nozzle size would be more appropriate.
Additionally, adjusting the nozzle pressure can help control the spray pattern, allowing you to achieve even coverage. Once you’ve chosen the right nozzle size and adjusted the spray pattern, you can move on to the next step of diluting the paint if necessary to ensure smooth application.
Dilute the Paint if Necessary
If the paint is too thick, you may need to dilute it before applying. Diluting the paint can help achieve the right consistency for optimal spraying. There are various dilution techniques you can use, depending on the type of paint you’re working with. Before diluting, refer to the paint manufacturer’s instructions for specific guidelines. To give you an idea, here is a table outlining three common dilution ratios based on paint type:
| Paint Type | Dilution Ratio |
|---|---|
| Latex | 10-20% water |
| Oil-based | 10-25% mineral spirits |
| Acrylic | 10-30% water or acrylic thinner |
By following these ratios, you can ensure the paint flows smoothly through the sprayer without clogging or splattering. Once you’ve diluted the paint, it’s time to test the sprayer on a scrap surface to ensure proper functionality and paint coverage.
Test the Sprayer on a Scrap Surface
Before moving forward, it’s essential to put the sprayer to the test on a spare surface. This will ensure it’s primed and ready to deliver flawless results. Testing the sprayer on a scrap surface allows you to evaluate its performance and identify any issues before spraying your house.
Start by adjusting the pressure settings according to the manufacturer’s instructions. Then, spray a small section of the scrap surface to observe the spray pattern and coverage. Pay attention to any uneven spraying or clogging of the nozzle.
If the test results are not satisfactory, troubleshoot by checking the paint viscosity, cleaning the nozzle, and adjusting the pressure.
Once you are satisfied with the test results, you can confidently move on to the next section and start spraying your house for a professional finish.

Graco Magnum 262800 X5 Stand Airless Paint Sprayer, Blue
Just right for DIY Homeowners and Remodelers looking for more power and mobility when tackling larger projects
As an affiliate, we earn on qualifying purchases.
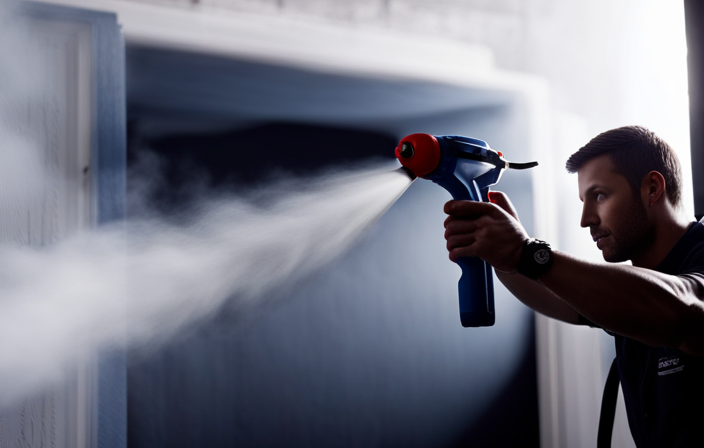
Start Spraying
To kick off the painting process, let’s dive right in and unleash the vibrant colors onto your house with the power of an airless paint sprayer. It’s important to start spraying using the correct working technique to achieve the best results. Here are some troubleshooting tips to keep in mind:
- Maintain the proper distance between the sprayer and the surface to ensure even coverage.
- Move the sprayer in a smooth and steady motion, overlapping each pass by about 50%.
- Adjust the spray pattern and pressure as needed to control the flow of paint.
- Keep the sprayer at a consistent angle to avoid uneven application.
- Regularly clean the spray tip to prevent clogging and maintain a steady spray pattern.
By following these tips, you’ll be able to spray your house efficiently and achieve a professional-looking finish.
Now, let’s move on to the next section and talk about how to work in sections for better control and coverage.
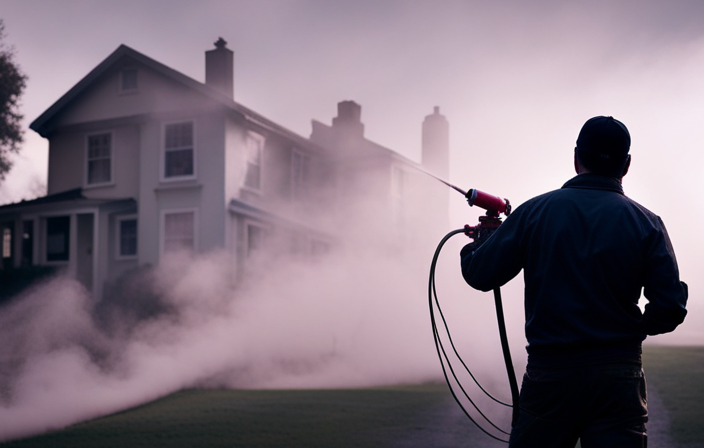
Work in Sections
Now, let’s tackle the next step and divide your project into manageable sections for better control and coverage.
Working efficiently is key when using a paint sprayer. By breaking your house into sections, you can work on one area at a time, ensuring that you cover every surface evenly. This also helps in avoiding overspray, as you can focus on one section without worrying about getting paint where it doesn’t belong.
Start by spraying the edges and corners, then move on to the larger surfaces. Be methodical and work in a consistent pattern to ensure uniformity. Remember to pay attention to detail, as this will give your project a professional finish.
With each section complete, you’re one step closer to a beautifully painted house.
Pay Attention to Detail
When it comes to paying attention to detail while using a paint sprayer, it’s important to cover windows, doors, and trim to protect them from overspray. This can be done by using plastic sheeting or masking tape.
Additionally, for hard-to-reach areas such as corners or edges, it’s recommended to use a brush instead of relying solely on the sprayer.
By following these steps, you can ensure a professional-looking paint job with clean lines and no damage to surrounding surfaces.
Cover Windows, Doors, and Trim
First, protect your windows, doors, and trim by covering them with plastic or masking tape. Make sure to create a tight seal and smooth edges to prevent paint seepage.
Next, choose the appropriate drop cloths for your floors and furniture. Opt for heavyweight canvas or plastic drop cloths that can cover the entire area. Secure them with tape or weights to prevent shifting while spraying.
Once you have covered the windows, doors, and trim, you can proceed to the next step. Use a brush to reach difficult areas like corners and edges, ensuring complete coverage.
Use a Brush for Hard-to-Reach Areas
After properly covering the windows, doors, and trim, it’s time to tackle those hard-to-reach areas that the paint sprayer may not be able to reach. This is where using a brush comes in handy.
Brush techniques can be used to apply paint to narrow corners, tight spaces, and intricate details that may be missed by the sprayer. It’s important to choose a brush with the appropriate bristle type and size for the specific area you are painting.
Dip the brush into the paint and apply it carefully and evenly to these hard-to-reach spots. While using a brush may take more time and effort compared to the sprayer, it ensures that every nook and cranny is properly coated.
If you prefer alternative methods, there are also small rollers or sponge brushes available. These can provide a similar effect in reaching tight areas.
Now, let’s move on to the next step, which is applying multiple coats if needed.
Apply Multiple Coats if Needed
When applying multiple coats of paint, it’s important to allow sufficient drying time between each coat. This ensures that the previous coat is fully dry and prevents any mixing or blending of wet and dry paint.
Additionally, it’s crucial to inspect each coat for any imperfections such as streaks, drips, or uneven coverage. If any imperfections are found, touch them up as necessary before proceeding to the next coat.
Taking these steps will result in a smooth and professional finish for your painted surface.
Allow Sufficient Drying Time between Coats
To ensure a flawless finish, it is important to allow sufficient drying time between coats. Proper ventilation is crucial during the drying process as it helps the paint dry evenly and prevents the accumulation of fumes. Open windows or use fans to promote air circulation.
The optimal drying conditions depend on the type of paint being used. For latex paint, it is recommended to wait at least four hours between coats. Oil-based paint may require longer drying times and may benefit from using a dehumidifier.
By allowing sufficient drying time between coats and maintaining proper ventilation, you can avoid issues like blistering or peeling. Once the paint has dried, inspect for any imperfections and touch up as necessary.
Inspect for any Imperfections and Touch up as Necessary
After allowing sufficient drying time between coats, it’s crucial to inspect the painted surface for any imperfections. This step ensures that the final result is flawless and professional-looking.
To inspect effectively, I recommend using good lighting and a keen eye. Look closely for any drips, streaks, or uneven coverage. If you spot any imperfections, don’t worry! Touching up is easy and will make a significant difference in the overall appearance.
Simply use a small brush or roller to apply additional paint to the affected areas until they blend seamlessly with the rest of the surface. Take your time and be meticulous in your touch-up work.
Once you’re satisfied with the results, you can smoothly transition to the next step: cleaning up the paint sprayer and the work area.
Clean Up
To clean up after using a paint sprayer, I always make sure to flush out the sprayer with water or a cleaning solution. This helps to remove any leftover paint and prevent clogs in the nozzle.
Additionally, it is important to properly dispose of any paint waste, such as empty paint cans or used cleaning solution, according to local regulations. Taking these steps ensures that the paint sprayer is ready for the next use and helps to protect the environment.
Flush out the Sprayer with Water or Cleaning Solution
Flush out the sprayer by running water or cleaning solution through it. Cleaning techniques and avoiding common mistakes are important to ensure proper functioning of the paint sprayer. Here are some key points to remember:
| Column 1 | Column 2 | Column 3 |
|---|---|---|
| Use water or cleaning solution | Follow manufacturer’s instructions | Wear protective gloves |
First, choose whether to use water or a specific cleaning solution recommended by the manufacturer. Then, carefully follow the manufacturer’s instructions for flushing out the sprayer. This will help remove any leftover paint residue or clogs. Make sure to wear protective gloves to prevent any contact with the cleaning solution.
By flushing out the sprayer, you will maintain its longevity and prevent any contamination of future paint jobs. Once the sprayer is clean, you can proceed to the next step of properly disposing of any paint waste.
Properly Dispose of any Paint Waste
Make sure you dispose of any leftover paint waste properly to avoid environmental harm and comply with regulations. Improper paint disposal can have a negative impact on the environment, as the chemicals in paint can contaminate soil and water sources. Here are some tips for proper paint disposal:
- Check local regulations: Different areas may have specific guidelines for paint disposal, so it’s important to research and follow the rules in your location.
- Donate or reuse: If you have leftover paint that is still in good condition, consider donating it to a local community organization or using it for future projects.
- Dry out latex paint: If you have small amounts of latex paint, you can let it dry out by leaving the can open in a well-ventilated area. Once it’s completely dry, you can dispose of it in the regular trash.
- Dispose of oil-based paint: Oil-based paint is considered hazardous waste and should be taken to a designated disposal facility or a household hazardous waste collection event.
- Recycle empty paint cans: Empty paint cans can often be recycled. Check with your local recycling center to see if they accept them.
By properly disposing of paint waste, you can minimize your environmental impact.
Now, let’s move on to the next section about how to maintain and store your paint sprayer.
Maintain and Store Your Paint Sprayer
Properly caring for and storing your paint sprayer will ensure that it continues to work efficiently for your next painting project. After using the sprayer, it is important to clean it thoroughly to prevent any paint residue from clogging the nozzle or any other components.
To clean the sprayer, disassemble the parts and soak them in a paint thinner or cleaning solution. Use a brush to remove any stubborn paint. Once cleaned, dry the parts thoroughly before reassembling them.
When it comes to storing your paint sprayer, it is recommended to keep it in a cool and dry place. Store it in its original case or a clean box to protect it from dust and potential damage. Avoid storing it near extreme temperatures or in direct sunlight.
By following these cleaning and storage techniques, you can ensure that your paint sprayer remains in good condition and ready for your next project. Now, you can admire your newly painted house without any worries.
Admire Your Newly Painted House
Now that my paint job is complete, I take a step back and marvel at the transformation of my home. It’s amazing how a fresh coat of paint can breathe new life into a space.
Maintaining a paint sprayer is crucial to ensure its longevity and performance. After each use, I clean the sprayer thoroughly to prevent any clogs or build-up. Storing it in a dry and cool place also helps to keep it in good condition.
Another important aspect of painting is choosing the right color. I suggest considering the style of your home and the surrounding environment. It’s also helpful to get color swatches or test samples to see how they look in different lighting.
Taking the time to maintain the paint sprayer and choose the perfect color will ensure a beautiful and long-lasting paint job.
Frequently Asked Questions
How long does it take for the paint to dry after using a paint sprayer?
The paint drying time depends on various factors such as humidity, temperature, and type of paint used. Generally, it can take anywhere from a few hours to a couple of days for the paint to completely dry.
Can I use a paint sprayer to paint the interior walls of my house?
Sure, you can use a paint sprayer to paint the interior walls of your house. It’s faster than a paint roller, but the cons are more overspray and masking.
What type of paint is best to use with a paint sprayer?
The best paint to use with a paint sprayer depends on the surface and desired finish. Some popular options are latex and acrylic paints. It’s important to choose quality paint and practice proper paint sprayer techniques for the best results.
How do I clean the paint sprayer after using it?
To clean the paint sprayer after use, follow these paint sprayer maintenance and cleaning tips. Start by flushing the system with water or cleaning solution, disassembling the parts, and thoroughly cleaning them. Finally, reassemble and store the sprayer properly.
Are there any safety precautions I should take when using a paint sprayer?
When using a paint sprayer, it’s important to take safety precautions. Make sure to wear protective clothing and goggles, and work in a well-ventilated area. Proper ventilation helps minimize the risk of inhaling harmful fumes.
Conclusion
In conclusion, spraying a house with a paint sprayer can be a daunting task, but with the right tools and preparation, it becomes a rewarding experience.
Just like an artist creates a masterpiece with a brush, you can transform your house into a work of art with a paint sprayer.
As the paint flows effortlessly onto the surface, you’ll feel a sense of accomplishment and pride.
So go ahead, embrace your inner artist and give your house a fresh, vibrant look that will leave everyone in awe.