
Using an airless paint sprayer is a highly effective method for applying gelcoat to a boat. It allows you to achieve a smooth and professional finish quickly. In this article, I will provide a detailed guide on how to apply gelcoat to a boat using an airless paint sprayer.
First, we will gather all the necessary materials and safety equipment to ensure a safe working environment.
Then, we will prepare the surface of the boat by cleaning and sanding it properly.
Next, we will mix and prepare the gelcoat, taking into account the correct ratio and any additives needed.
Once we are ready, we will set up the airless paint sprayer and practice our spraying technique to achieve an even and consistent coat.
After allowing the gelcoat to cure, we will inspect and polish the finish to perfection.
Finally, we will clean up our equipment and admire the newly sprayed gelcoat on our boat.
So, let’s get started and transform your boat with a flawless gelcoat finish.
Key Takeaways
- Apply gelcoat in thin, even coats using a gelcoat brush or roller
- Allow each coat to partially cure before applying the next
- Inspect and polish the gelcoat finish for a flawless appearance
- Clean and properly store equipment for long-term durability
Gather Your Materials and Safety Equipment
Now it’s time for you to gather all the materials and safety equipment you’ll need to spray gelcoat on your boat with an airless paint sprayer. So, grab your gear and let’s get started!
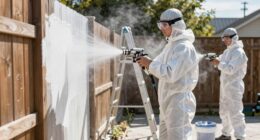
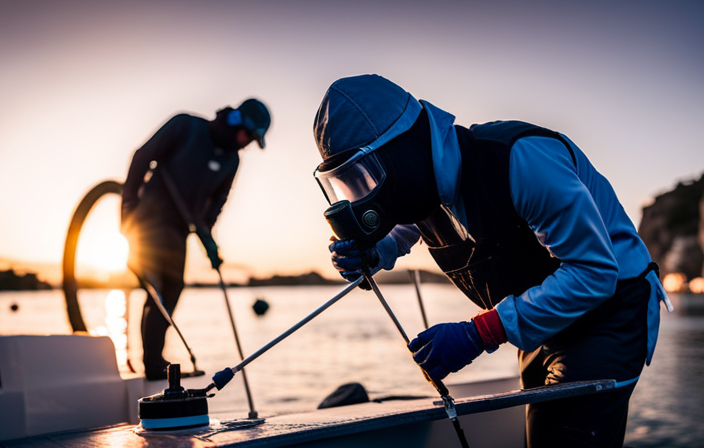
Choosing the right safety equipment is crucial to protect yourself during the gelcoat application process. Make sure to wear a respirator mask to avoid inhaling any harmful fumes or particles. Additionally, protective goggles and gloves are essential to shield your eyes and hands from the gelcoat and any potential splatters.
Tips for avoiding airless paint sprayer mishaps include carefully reading and following the manufacturer’s instructions, maintaining a safe distance from the spray nozzle, and practicing on a test surface before applying the gelcoat to your boat.
With all your safety equipment in place, it’s time to move on to preparing the surface of the boat for the gelcoat application.
Prepare the Surface of the Boat
Before applying gelcoat to a boat with an airless paint sprayer, it’s crucial to properly prepare the surface. Here’s how I do it:
-
First, I clean the surface thoroughly to remove any dirt, grime, or contaminants that could affect the adhesion of the gelcoat.
-
Next, I carefully sand the surface to create a rough texture, ensuring better adherence of the gelcoat.
-
Finally, I use masking tape and plastic sheeting to mask off any areas that I don’t want to paint, such as hardware or windows, to protect them from overspray.
By following these steps, I ensure that the surface is clean, properly textured, and protected before applying the gelcoat.
Clean and Sand the Surface
Start by thoroughly cleaning the surface of your boat, removing any dirt, grease, or old paint, to ensure a smooth and pristine foundation for your gelcoat application. This is a crucial step in surface preparation, as any contaminants can negatively affect the adhesion and appearance of the gelcoat. Use a mild detergent and water to wash the boat, paying special attention to areas with heavy buildup. Rinse thoroughly and allow the surface to dry completely before moving on to the next step.
Once the boat is clean, it’s time to sand the surface. Start by using a coarse-grit sandpaper to remove any rough spots or imperfections. Follow up with progressively finer grits to create a smooth and even surface. This step helps promote better adhesion between the gelcoat and the boat.
When the surface is clean and sanded, you can then move on to the next section about masking off any areas you don’t want to paint.
Mask Off Any Areas You Don’t Want to Paint
To ensure a clean and professional finish, it is crucial to carefully mask off any areas you don’t want to paint. This will prevent overspray and ensure that only the intended surfaces receive the gelcoat.
To begin, use high-quality masking tape to cover all areas adjacent to the surface you’ll be spraying. Take your time to ensure a tight seal between the tape and the boat, as any gaps can result in unwanted paint reaching those areas.
Once the gelcoat spraying is complete and it has dried, it’s time to remove the masking tape. Start by peeling it off slowly and at a low angle to prevent any damage to the freshly painted surface. Be cautious not to pull too hard, as this can cause the tape to tear and leave behind adhesive residue.
With the masking tape removed, you’re now ready to mix and prepare the gelcoat for application.
Mix and Prepare the Gelcoat
First things first, make sure you’ve got all your materials and ingredients ready to mix up the gelcoat for spraying on your boat with an airless paint sprayer. When it comes to gelcoat mixing tips, accuracy is crucial. Start by gathering your gelcoat, catalyst, and a mixing container. Follow the manufacturer’s instructions to determine the proper mixing ratio. Measure out the gelcoat and catalyst according to the ratio, making sure to use accurate measuring tools. Once you have the correct amounts, pour the gelcoat into the mixing container, followed by the catalyst. Use a mechanical mixer to blend the two components together thoroughly. Take note of the gelcoat’s pot life, as it can vary. Troubleshooting gelcoat spraying can be challenging, but ensuring a well-mixed gelcoat is a good starting point. With the gelcoat mixed and ready, let’s move on to setting up your airless paint sprayer for a flawless application.
Set Up Your Airless Paint Sprayer
After successfully mixing and preparing the gelcoat, it’s time to set up your airless paint sprayer. This crucial step ensures that your sprayer is ready to deliver a smooth and even coat of gelcoat on your boat’s surface.
To begin, gather all the necessary equipment, including the airless paint sprayer, the gelcoat, and the appropriate nozzle for your desired spray pattern.
Next, attach the sprayer to a clean and dry air compressor, making sure all connections are secure. Adjust the pressure settings on the sprayer to achieve the desired flow rate and pattern.
Before you start spraying, it’s essential to troubleshoot common issues that may arise with the airless paint sprayer, such as clogs or uneven spray patterns. Ensure that the sprayer is free from any obstructions and that the nozzle is clean and properly aligned.
Now that your airless paint sprayer is set up, it’s time to practice your spraying technique and achieve professional results.
Practice Your Spraying Technique
Get ready to unleash your artistic skills and create a flawless masterpiece as you perfect your technique with the power of the airless paint sprayer. To improve spray control and troubleshoot common spraying issues, it is crucial to practice your spraying technique before applying gelcoat to your boat. By mastering your technique, you can ensure an even and professional-looking finish. To help you in this process, refer to the following table which highlights key techniques and troubleshooting tips:
| Technique | Troubleshooting Tips |
|---|---|
| Maintain proper distance from the surface | Clogging of the spray tip can occur if too close |
| Use smooth, sweeping motions | Uneven spray pattern may result from jerky movements |
| Overlap each pass by 50% | Inconsistent coverage may be caused by insufficient overlap |
| Adjust pressure for desired flow rate | Low pressure can cause orange peel texture |
With these techniques in mind, you are now ready to move on to the next section, where you will learn how to apply the gelcoat in thin and even layers without any hiccups.
Apply the Gelcoat in Thin and Even Layers
To perfect your application of the glossy gelcoat, smoothly and swiftly spread thin and even layers for a flawless finish. When applying gelcoat evenly, keep these tips in mind.
First, ensure that the gelcoat is thoroughly mixed and free of any air bubbles. Use a paint stirrer and let the gelcoat sit for a few minutes after mixing.
Next, hold the airless paint sprayer about 12 inches away from the boat’s surface and maintain a consistent distance throughout the application process. Move the sprayer in a steady back-and-forth motion, overlapping each pass by about 50%. This will ensure even coverage and prevent streaks or uneven patches.
Remember to work in small sections, allowing each layer to dry slightly before applying the next.
By following these tips for gelcoat application, you will achieve a professional-looking finish. Allow the gelcoat to fully cure before moving on to the next step of boat maintenance.
Allow the Gelcoat to Cure
Once the glossy gelcoat has been applied, it’s crucial to give it ample time to cure completely before moving forward with any additional boat maintenance. The curing time for gelcoat can vary depending on factors such as temperature and humidity, but generally, it takes around 24 to 48 hours for the gelcoat to fully cure.
During this time, it’s important to keep the boat in a controlled environment to ensure optimal curing conditions. Avoid exposing the gelcoat to excessive heat or moisture, as this can affect the curing process.
Once the gelcoat has cured, you can proceed with post-application maintenance, such as inspecting and polishing the gelcoat finish. This will ensure that the gelcoat has a smooth and flawless appearance, enhancing the overall aesthetic of your boat.
Inspect and Polish the Gelcoat Finish
After allowing the gelcoat to cure, it is crucial to inspect and polish the gelcoat finish to ensure a smooth and flawless surface. Gelcoat maintenance is essential for preserving the appearance and protecting the underlying fiberglass from damage.
During the inspection, carefully examine the gelcoat for any imperfections such as air bubbles, runs, or uneven spots. These common gelcoat problems can be addressed through polishing.
Using a high-quality gelcoat polish and a buffing pad, gently rub the surface in circular motions to remove any blemishes and bring out the shine. Take your time during this process, as rushing can lead to further damage.
Once the gelcoat is polished to your satisfaction, it is time to clean up your equipment and prepare for the next steps in the boat restoration process.
Clean Up Your Equipment
Before moving on to the next steps, make sure to clean up your equipment properly to maintain its longevity and efficiency. For example, imagine finishing a long day of boat restoration and neglecting to clean your tools, only to find them rusted and unusable the next time you need them. To properly store your equipment and maintain your airless paint sprayer, follow these tips:
| Clean Up | Proper Storage | Maintenance |
|---|---|---|
| After each use, thoroughly clean all parts of the sprayer, including the nozzle, hoses, and pump. | Store your sprayer in a clean, dry area, away from extreme temperatures and direct sunlight. | Regularly inspect and replace any worn or damaged parts, such as seals or filters. |
| Use a solvent or cleaning solution recommended by the manufacturer to remove any built-up paint or residue. | Keep the sprayer in an upright position to prevent leakage or damage to the internal components. | Lubricate moving parts, such as the pump piston, according to the manufacturer’s instructions. |
| Flush the sprayer with clean water or solvent to remove any remaining paint or chemicals. | Cover the sprayer with a protective cover or bag to prevent dust or debris from accumulating. | Follow the recommended maintenance schedule, which may include tasks such as changing the oil or inspecting the motor. |
By properly cleaning and storing your equipment, as well as performing regular maintenance, you can ensure that your airless paint sprayer is always ready for the next project. Now, let’s move on to the exciting part – enjoying your newly sprayed gelcoat.
Enjoy Your Newly Sprayed Gelcoat
Now that your restoration project is complete, it’s time to sit back and admire the beautiful finish on your boat. Here are some tips for maintaining a gelcoat finish and troubleshooting common gelcoat spraying issues:
-
Regular cleaning: To keep your gelcoat looking its best, wash it regularly with a mild detergent and water. Avoid using abrasive cleaners or scrub brushes, as they can damage the surface.
-
Waxing: Applying a high-quality wax to your gelcoat can provide an extra layer of protection against UV rays and help maintain its shine. Be sure to follow the manufacturer’s instructions for application.
-
Repairing scratches: Minor scratches can be buffed out using a gelcoat repair kit. Simply follow the instructions provided with the kit to achieve a seamless repair.
-
Dealing with orange peel or uneven texture: If you notice an uneven texture or orange peel effect on your gelcoat, it may be due to improper spraying technique or equipment issues. Double-check your spray gun settings and make adjustments as necessary. If the problem persists, consult a professional for assistance.
By following these tips and troubleshooting any issues that arise, you can enjoy your newly sprayed gelcoat for years to come.
Frequently Asked Questions
Can I use a regular paint sprayer instead of an airless paint sprayer to apply gelcoat on a boat?
Using a regular paint sprayer instead of an airless one for gelcoat application has pros and cons. While it can be cheaper, it may result in a less even application and require more sanding.
How long does it take for gelcoat to cure before I can use the boat?
Gelcoat typically takes 24-48 hours to fully cure, depending on temperature and humidity. Before applying gelcoat, ensure the boat surface is clean, dry, and sanded smooth. Use a gelcoat spray gun for an even, professional finish.
Can I apply gelcoat directly on top of existing paint on the boat?
No, it is not recommended to apply gelcoat directly on top of existing paint on a boat. Gelcoat and paint serve different purposes in boat maintenance. Gelcoat provides a protective layer, while paint offers aesthetics.
What type of safety equipment is necessary when spraying gelcoat with an airless paint sprayer?
To spray gelcoat with an airless paint sprayer, safety precautions are crucial. Necessary equipment includes a respirator, goggles, gloves, and protective clothing. These items protect against inhalation of fumes, eye irritation, and skin contact with the chemical gelcoat.
How do I clean the airless paint sprayer after using it to spray gelcoat?
To clean the airless paint sprayer after using it to spray gelcoat, follow these maintenance tips. First, disconnect the sprayer from the power source and remove the spray tip. Then, flush the sprayer with an appropriate solvent and clean the filters. Finally, reassemble the sprayer and store it properly.
Conclusion
In conclusion, spraying gelcoat on a boat with an airless paint sprayer is a technical and detailed process that requires the right materials and proper technique. By following the steps outlined in this article, you can achieve a professional and polished gelcoat finish on your boat.
While some may argue that this method is time-consuming, the results speak for themselves. Investing the time and effort into properly spraying gelcoat will ensure a long-lasting and beautiful finish for your boat.