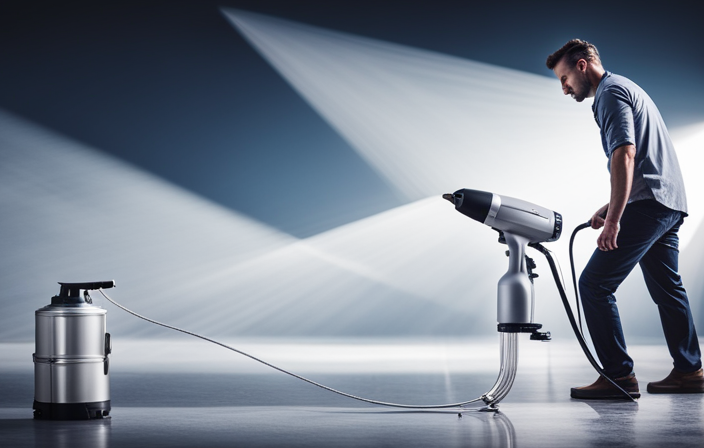

Have you ever caught yourself staring at your ceiling, contemplating the need for a fresh coat of paint? Well, you’re in luck! I’m here to help. Let me guide you through the process of using an airless sprayer to apply a new layer of paint to your ceiling.
With the right materials and a systematic approach, you’ll have a beautifully painted ceiling in no time.
In this article, I will provide you with step-by-step instructions on how to properly prepare the room, dilute the paint, and test the spray pattern.
I will also share tips on maintaining a consistent distance and speed while spraying, and how to apply multiple coats as needed.
Additionally, I will emphasize the importance of drying time and ventilation, as well as how to clean and maintain your sprayer for future use.
So, let’s get started and transform your ceiling into a work of art with the help of an airless sprayer!
Key Takeaways
- Cleaning and maintaining the sprayer is important for extending its lifespan and ensuring optimal performance, as well as avoiding costly repairs and preventing clogs and buildup.
- Proper cleaning techniques include flushing out remaining paint after each use, regularly inspecting and cleaning filters, and addressing loose or damaged parts promptly.
- Achieving a beautifully painted ceiling requires maintaining a consistent spray pattern, keeping a steady hand to avoid drips and streaks, overlapping each pass for even coverage, and starting in a corner and working your way out.
- Overall satisfaction and pride can be achieved by executing a well-done painting project.
Gather the Necessary Materials and Equipment
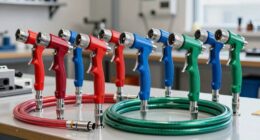
Before you begin, make sure you have all the materials and equipment you’ll need for spray painting a ceiling with an airless sprayer. Here’s a materials list to help you gather everything you need:
- An airless sprayer
- Paint
- A paint strainer
- A paint bucket
- A paint roller
- A paint tray
- A paintbrush
- A ladder
- Drop cloths or plastic sheeting
- Painter’s tape
- Safety gear such as goggles, gloves, and a mask
Once you have all these items ready, you can follow this step-by-step process for spray painting your ceiling.
Now, let’s move on to the next section where we’ll discuss how to prepare the room and protect surrounding surfaces.
Prepare the Room and Protect Surrounding Surfaces
To ensure a clean and professional finish, it’s essential to adequately safeguard the surrounding areas and prepare the room when using an airless sprayer for ceiling application. Here are some steps to follow:
- Cover the floor and furniture with drop cloths or plastic sheets to prevent paint drips from damaging them.
- Use painter’s tape to protect the edges of walls, windows, and trim from accidental overspray.
- Remove any light fixtures or ceiling fans and cover electrical outlets with plastic sheeting to avoid paint getting on them.
- Hang plastic sheeting from the ceiling to create a makeshift spray booth and contain the overspray.
By taking these precautions, you can prevent paint drips and minimize overspray, ensuring a smooth and even application on your ceiling.
Now, let’s move on to diluting the paint and testing the spray pattern.
Dilute the Paint and Test the Spray Pattern
Once you’ve prepared the room and protected surrounding surfaces, it’s time to dilute the paint and test the spray pattern.
Diluting the paint is essential to ensure smooth and even application through the airless sprayer. Follow the manufacturer’s instructions for the proper dilution ratio, usually a mix of paint and water. This ratio may vary depending on the type and brand of paint you’re using. Take your time and measure accurately to achieve the desired consistency.
After diluting the paint, it’s crucial to test the spray pattern before starting the actual painting process. This step allows you to adjust the sprayer settings and ensure that the paint is being evenly distributed. Hold the sprayer about 12 inches away from a test surface and spray in a sweeping motion. Observe the spray pattern for any inconsistencies such as drips, uneven coverage, or clogs. Make any necessary adjustments to the sprayer settings to achieve a smooth and consistent spray pattern.
Now that you’ve diluted the paint and tested the spray pattern, you can confidently start spraying in a systematic pattern for optimal coverage and a professional finish.
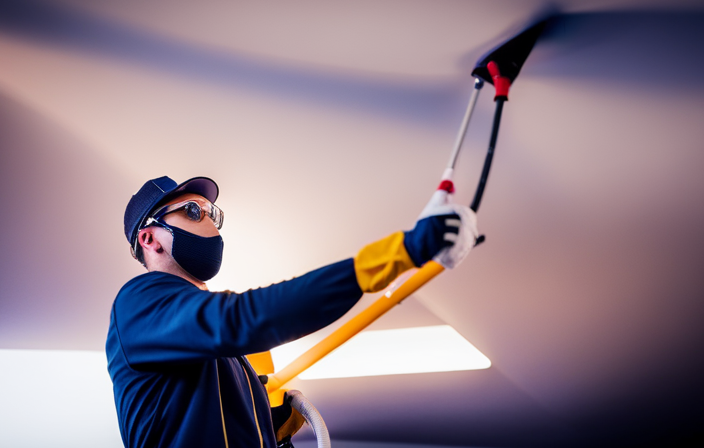
Start Spraying in a Systematic Pattern
Now that you’ve got everything set up and the paint diluted, it’s time to start spraying in a systematic pattern for a flawless finish. Here are some key spraying techniques to keep in mind to avoid overspray:
- Begin at one corner of the ceiling and work your way across in straight lines, overlapping each pass slightly.
- Maintain a consistent distance from the surface, typically around 12 inches, to ensure even coverage.
- Keep the sprayer moving at a steady speed to prevent pooling and drips.
- Use a smooth, sweeping motion, ensuring that each stroke overlaps the previous one.
By following these techniques, you can achieve a professional-looking result without any unsightly overspray.
Now, let’s move on to the next step where we’ll discuss how to maintain a consistent distance and speed while spraying.
Maintain a Consistent Distance and Speed
As I glide across the surface, the steady rhythm of my movement and the unwavering distance from my target create a dance of precision and finesse. Maintaining a consistent distance and controlling spray speed are crucial for achieving a flawless finish.
By keeping the sprayer at a consistent distance from the ceiling, typically around 12 inches, I ensure that the paint is evenly distributed and does not pool in certain areas. Controlling the spray speed is equally important, as moving too quickly can result in a thin coat of paint, while moving too slowly can lead to drips and runs.
As I maintain this delicate balance, I create a smooth and even coat of paint across the ceiling. This seamless transition ensures that each pass overlaps the previous one, guaranteeing even coverage without any noticeable gaps.
Overlap each Pass for Even Coverage
With each smooth glide, the layers seamlessly blend, ensuring complete and even coverage. When using an airless sprayer to spray paint a ceiling, it is crucial to overlap each pass for consistent results. This technique helps to avoid any missed spots and ensures that the paint is evenly distributed across the entire surface. By overlapping each pass, you create a uniform layer of paint that hides any imperfections or unevenness in the ceiling. To help visualize this technique, refer to the table below:
| Overlap Technique | Result |
|---|---|
| 50% | Good |
| 75% | Better |
| 100% | Best |
By following these overlap techniques, you can achieve a professional-looking finish without any drips or uneven patches. Once you have mastered this technique, you can proceed to the next step of applying multiple coats as needed.
Apply Multiple Coats as Needed
To achieve a flawless finish, you’ll want to build up layers with multiple coats, like a skilled artist adding brushstrokes to a canvas. This not only ensures even coverage but also enhances the durability and longevity of the paint job.
When applying primer, make sure to choose one that’s specifically formulated for use on ceilings. This’ll help the paint adhere better and provide a smooth surface for the topcoat.
Additionally, selecting the right paint color is crucial in creating the desired ambiance and aesthetic in the room. Consider factors such as lighting, room size, and existing decor when making your choice.
By applying multiple coats and carefully selecting your primer and paint color, you’ll create a stunning and long-lasting finish.
Now, let’s move on to the next section about paying attention to drying time and ventilation.
Pay Attention to Drying Time and Ventilation
Make sure to closely monitor the drying time and ensure proper ventilation for a flawless and professional-looking finish. The drying time is an essential factor in achieving a successful spray painting job. It is crucial to allow each coat to dry completely before applying the next one. Rushing the drying process can lead to uneven results and may require additional touch-ups. Additionally, proper ventilation is key to ensure the paint dries evenly and quickly. Adequate airflow helps to prevent the paint from pooling or dripping, resulting in a smoother finish. To help with drying time and ventilation, consider using a fan or opening windows and doors to increase air circulation. By paying attention to the drying time and ventilation, you can achieve a flawless and professional-looking finish. As you move on to the next section about cleaning and maintaining your sprayer properly, it is important to ensure that your equipment is in good condition for future projects.
Clean and Maintain Your Sprayer Properly
Properly cleaning and maintaining your sprayer is crucial for extending its lifespan and ensuring optimal performance. To keep your airless sprayer in top condition, it’s important to follow proper cleaning techniques.
After each use, make sure to flush out any remaining paint by running a cleaning solution through the sprayer. This will prevent any clogs or buildup that could affect the spray pattern.
Additionally, regularly inspect and clean the filters, as they can accumulate debris over time. Troubleshooting tips include checking for any loose or damaged parts and addressing them promptly.
By taking the time to clean and maintain your sprayer, you can avoid costly repairs and enjoy consistent, high-quality results.
With your sprayer in great shape, you can now move on to the next step and enjoy your newly painted ceiling!
Enjoy Your Newly Painted Ceiling!
Now that you’ve learned how to clean and maintain your sprayer properly, it’s time to step back and enjoy the fruits of your labor with your newly painted ceiling! There’s a sense of satisfaction that comes from completing a painting project, and I want to make sure you fully enjoy the experience.
One tip for avoiding drips and streaks is to maintain a consistent spray pattern and keep a steady hand as you move the sprayer across the ceiling. Additionally, make sure to overlap each pass slightly to ensure even coverage.
Another helpful tip is to start painting in a corner and work your way out, using long, smooth strokes. By following these tips and taking the time to enjoy the painting process, you’ll be rewarded with a beautifully painted ceiling that you can be proud of.
Frequently Asked Questions
Can I use a regular paintbrush or roller instead of an airless sprayer to paint my ceiling?
Using a paintbrush or roller for ceiling painting is a viable alternative to an airless sprayer. The pros include more control and less overspray, while the cons are that it can be more time-consuming and may not achieve the same smooth finish.
How long should I wait for the paint to dry before applying another coat?
I usually wait around 2-4 hours for the first coat of paint to dry before applying another coat. This allows enough time for the paint to set and ensures a smooth finish.
What kind of paint should I use for a ceiling?
For a ceiling, there are different types of paint available. Matte paint hides imperfections but may be difficult to clean. Satin paint offers a subtle sheen and is easier to clean. Consider the pros and cons before selecting the best paint for your ceiling.
Can I use an airless sprayer to paint textured ceilings?
Yes, you can use an airless sprayer to paint textured ceilings. Airless sprayer techniques allow for even coverage and can easily reach into the nooks and crannies of a textured ceiling. The benefits of using an airless sprayer for textured ceilings include faster application and a smoother finish.
How do I clean the airless sprayer after I’m done painting?
Cleaning the airless sprayer after painting can be a daunting task, but fear not! I’ve got you covered. The cleaning process is simple and efficient, with alternative methods available if needed. Let me guide you through it step by step.
Conclusion
After following these steps, you’ll be able to successfully spray paint your ceiling using an airless sprayer. It may seem like a daunting task, but with the right materials and equipment, proper preparation, and careful application, you can achieve a professional-looking finish.
Did you know that using an airless sprayer can save you up to 50% of the time compared to traditional painting methods? This statistic shows just how efficient and effective this technique can be.
So go ahead and give it a try, and enjoy your newly painted ceiling!