An old saying suggests that “A picture is worth a thousand words.” How can you add vitality and color to your projects than using chalk paint? If you’re like me, you value the versatility and charm that chalk paint brings to any surface. However, have you ever considered using it with an airless paint sprayer? Trust me, it changes the game entirely.
In this article, I’ll guide you through the steps of using chalk paint in an airless paint sprayer. From choosing the right paint to preparing and maintaining your sprayer, I’ll cover all the necessary techniques to ensure a flawless finish. With a little dilution, some adjusting of settings, and the application of thin and even coats, you’ll be amazed at the smooth and professional results you can achieve.
So, grab your airless paint sprayer and let’s dive into the world of chalk paint together. Get ready to transform your projects into works of art that will leave everyone in awe.
Key Takeaways
- Chalk paint brings vibrancy and life to projects when used with an airless paint sprayer.
- When choosing chalk paint, consider quality, color options, and compatibility with the surface.
- Prepare the airless paint sprayer by gathering necessary tools, familiarizing yourself with the troubleshooting guide, and following safety precautions.
- Dilute and mix the chalk paint according to the manufacturer’s ratio and accurately measure and mix the paint and water.

HomeRight C800971 Super Finish Max, Includes 3 Brass Spray Tips, 3 Spray Patterns, Easy to Clean HVLP Paint Sprayer, Great for Furniture, Cabinets, Trim & More, Sprays Stains, Sealers & Latex Paints
- Versatile DIY Paint Sprayer: Ideal for furniture, cabinets, and more
- Multiple Spray Patterns: Horizontal, vertical, and round options
- Adjustable Material Flow: Control knob for output customization
As an affiliate, we earn on qualifying purchases.
As an affiliate, we earn on qualifying purchases.
Choose the Right Chalk Paint for Your Project
Choosing the right chalk paint for your project is absolutely crucial in achieving a beautifully transformed surface with your airless paint sprayer. When selecting a chalk paint, consider its quality, color options, and compatibility with your intended surface.
Look for a paint that’s specifically formulated for use with airless sprayers to ensure optimal performance. Additionally, it’s important to choose a chalk paint that offers a smooth application and dries to a durable, matte finish. Experimenting with different brush techniques can also enhance the final result, giving your project a unique texture or distressed look.
Furthermore, don’t limit yourself to traditional uses for chalk paint – it can be a versatile option for furniture, walls, and even fabric.
Now that you’ve chosen the right chalk paint, let’s move on to preparing your airless paint sprayer.
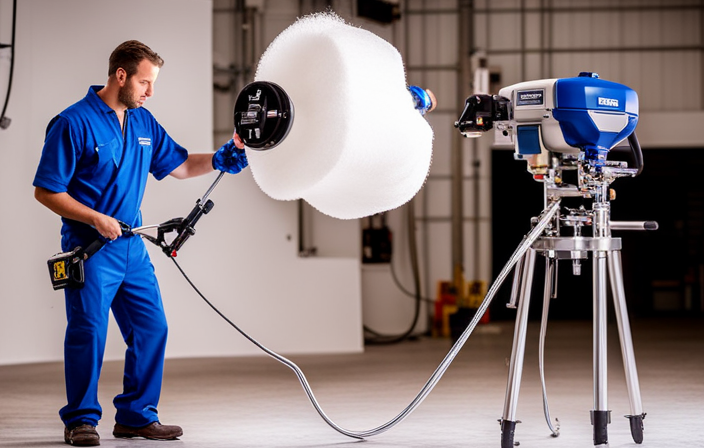
Prepare Your Airless Paint Sprayer
Before getting your airless paint sprayer ready, make sure to gather all the necessary tools and equipment. This includes the airless paint sprayer itself, a clean container for the paint, a mixing stick, and a safety mask and goggles.
Once you have everything, it’s important to familiarize yourself with the airless paint sprayer troubleshooting guide to address any potential issues that may arise during the process. Additionally, it’s crucial to follow safety precautions when using an airless paint sprayer, such as wearing protective clothing and ensuring proper ventilation in the workspace.
Now that you have everything ready, you can move on to the next step: dilute the chalk paint properly.
Dilute the Chalk Paint Properly
Once you’ve gathered all the necessary tools and equipment, it’s essential to ensure that you dilute the chalk paint properly for optimal results when using your airless paint sprayer.
Start by checking the dilution ratio recommended by the paint manufacturer. This ratio will determine the amount of water you need to add to the paint.
Measure the paint and water accurately to maintain the correct consistency. To mix the paint and water, use a mixing technique that thoroughly combines the two ingredients. You can use a stir stick or an electric mixer for this step.
Once the paint is properly diluted, you can move on to the next step of testing the sprayer and adjusting the settings. This will ensure that the paint sprays evenly and smoothly on your desired surface.
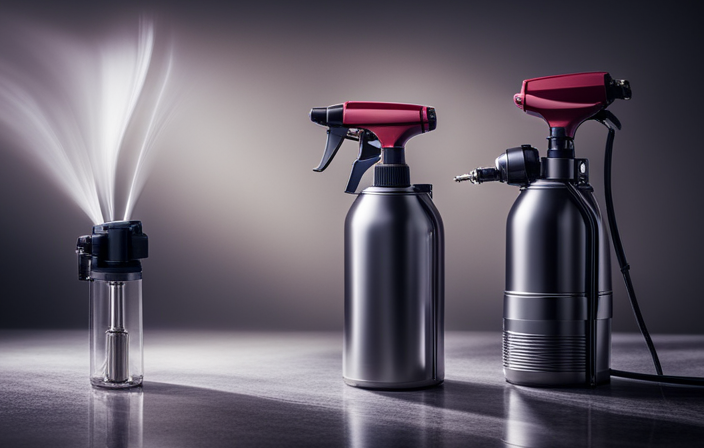
Test the Sprayer and Adjust the Settings
Now that you’ve got your paint all mixed up and ready to go, it’s time to put your sprayer to the test and tweak those settings for a flawless finish.
Start by testing the sprayer on a scrap piece of wood or cardboard to get a feel for how the paint is coming out. Adjust the spray patterns according to your desired coverage – whether you want a narrow or wide spray.
If the paint is coming out too thick or too thin, adjust the nozzle or pressure settings accordingly. Troubleshoot common issues such as clogging or uneven spray by cleaning the nozzle or adjusting the pressure.
Once you’re satisfied with the spray pattern, you can move on to applying thin and even coats of chalk paint.
Apply Thin and Even Coats of Chalk Paint
To achieve a flawless finish, make sure to apply each coat of your chalk paint thinly and evenly. When applying with a brush, use long, smooth strokes to prevent streaks and visible brush marks. If you encounter any issues with clumping or rough texture, try adding a small amount of water to thin out the paint. Also, be sure to mix the paint thoroughly before each use to prevent separation.
By applying thin and even coats, you will create a smooth and professional-looking finish. However, it’s crucial to allow sufficient drying time between coats to avoid smudging or mixing of the layers.
Allow Sufficient Drying Time Between Coats
Make sure you give each coat of your chalk paint enough time to dry properly between applications, or else you may end up with a sticky mess that’ll ruin your hard work.
Proper drying time is crucial for achieving a smooth and even finish with chalk paint. It’s recommended to allow at least 2-4 hours of drying time between coats, depending on the temperature and humidity of your working environment.
Additionally, ensure that you have proper ventilation in the area where you’re painting to help speed up the drying process.
To prevent drips and runs, apply thin and even coats of chalk paint, moving the sprayer in a steady and controlled manner. This’ll help avoid the accumulation of excess paint that can lead to uneven drying and drips.
Once your coats are dry, you can proceed to the next section and learn how to clean and maintain your airless paint sprayer efficiently.
Clean and Maintain Your Airless Paint Sprayer
Keeping your airless paint sprayer clean and well-maintained is essential for ensuring its longevity and optimal performance, allowing you to enjoy seamless and hassle-free painting experiences.
To clean your airless paint sprayer, start by flushing it with a cleaning solution recommended by the manufacturer. This will remove any leftover paint or debris from the system. Pay special attention to the filters and nozzles, as these can easily get clogged and affect the spray pattern.
Regularly inspect and replace worn-out or damaged parts to prevent any issues during painting. Troubleshooting tips include checking for leaks, ensuring proper pressure settings, and priming the sprayer before each use.
Now that your airless paint sprayer is clean and maintained, you can move on to the next step of sanding and sealing your chalk painted surface.
Sand and Seal Your Chalk Painted Surface
After thoroughly cleaning and maintaining your airless paint sprayer, it’s time to move on to the next step in using chalk paint: sanding and sealing your painted surface. This crucial step ensures a smooth and durable finish.
To achieve the best results, here are some sealing techniques to consider:
- Apply a clear wax sealant using a lint-free cloth.
- Use a brush-on polyurethane sealer for added protection.
- Consider using a spray-on sealer for larger surfaces.
- Avoid over-brushing or over-applying the sealant to prevent streaks or drips.
- Allow sufficient drying time before applying additional coats or using the surface.
In addition, it’s important to be aware of common issues that may arise during this process, such as brush marks or uneven coverage. Troubleshooting these problems will help you achieve a flawless finish.
Moving forward, we’ll explore how to add finishing touches and decorative techniques to further enhance your chalk-painted surface.
Add Finishing Touches and Decorative Techniques
To truly elevate your chalk-painted masterpiece, why not explore the art of embellishing and adding creative touches? One way to enhance the vintage look of your piece is by using distressing techniques. This involves sanding certain areas of the surface to create a worn and aged appearance. You can also experiment with stenciling ideas to add unique patterns and designs to your project. Stencils can be used to create intricate motifs or simple borders, depending on your preference. To engage the audience, here is a table with three popular distressing techniques and three stenciling ideas:
| Distressing Techniques | Stenciling Ideas |
|---|---|
| Dry Brushing | Moroccan Tiles |
| Antiquing | Floral Patterns |
| Chalkboard Effect | Geometric Shapes |
By incorporating these techniques and ideas, you can achieve a truly personalized and artistic finish for your chalk-painted surface. Enjoy your beautifully chalk-painted project and showcase your creativity!
Enjoy Your Beautifully Chalk Painted Project
Indulge in the beauty of your chalk-painted masterpiece and savor the satisfaction of a project well-done.
After completing your chalk paint application, it’s time to enjoy the fruits of your labor. Take a step back and admire the smooth, matte finish that chalk paint provides.
If you’re looking to enhance the look of your project even further, consider experimenting with different chalk paint techniques. These can include distressing, layering colors, or creating a weathered effect.
However, if you encounter any issues during the application process, troubleshooting chalk paint problems is relatively easy. Simply sand down any rough spots, apply an additional coat of paint if needed, or use a wax or topcoat to protect the finish.
With these simple steps, you can ensure that your beautifully chalk-painted project remains stunning for years to come.
Frequently Asked Questions
Can I use regular paint in an airless paint sprayer instead of chalk paint?
Yes, you can use regular paint in an airless paint sprayer instead of chalk paint. However, using chalk paint offers benefits such as better adhesion, durability, and a matte finish.
How long does it take for chalk paint to dry before I can apply another coat?
Chalk paint typically dries within 30 minutes to an hour, allowing for multiple coats to be applied swiftly. To ensure a smooth finish, lightly sand between coats and remember to seal your final layer for lasting results.
Is it necessary to sand the chalk painted surface before sealing it?
Sanding is not necessary before sealing a chalk painted surface. However, it is recommended to clean and prepare the surface for optimal adhesion. For troubleshooting, tips on sealing, maintaining an airless paint sprayer, and alternative uses for chalk paint, continue reading.
Can I use an airless paint sprayer for small touch-up projects?
Using an airless paint sprayer for small touch-up projects is like using a bazooka to kill a fly. The pros of using an airless paint sprayer include speed and coverage, but the cons are overspray and difficulty in controlling the spray for small areas.
Are there any specific safety precautions I should take when using an airless paint sprayer with chalk paint?
Proper ventilation is crucial when using an airless paint sprayer with chalk paint to ensure harmful fumes are dispersed. Wearing protective gear, such as a respirator, goggles, and gloves, is also essential for personal safety.
Conclusion
After following these steps, I’ve successfully used chalk paint in my airless paint sprayer. It was a smooth and efficient process, with the sprayer evenly distributing the paint onto the surface.
The result was a beautifully chalk painted project, with a matte and velvety finish. It felt like I was creating a work of art, effortlessly transforming the surface with each stroke of the sprayer.
Now, I can sit back and admire my masterpiece, knowing that I’ve achieved a flawless finish.