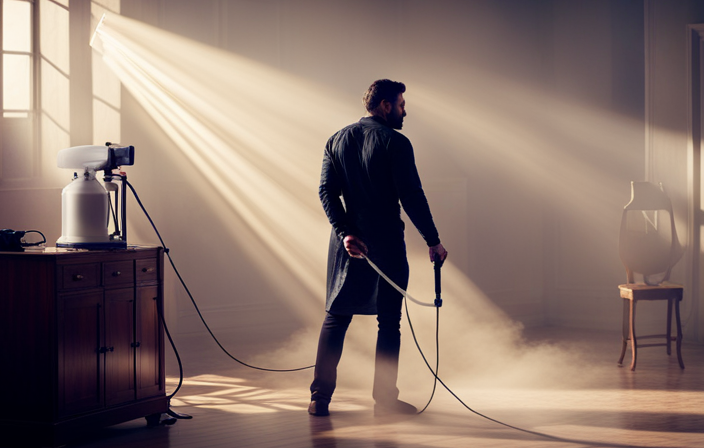
Revamping the interior of your home can be greatly improved with a fresh coat of paint. To achieve results that rival those of professionals, choosing an airless paint sprayer is the optimal decision.
Picture this: effortlessly gliding across the walls, evenly distributing paint with each stroke, and finishing the job in a fraction of the time it would take with a brush or roller. It sounds like a dream, right?
Well, with the right technique and a little practice, it can become a reality. In this article, I will guide you through the process of spraying with an airless paint sprayer for your interior projects. From preparing the room to troubleshooting common issues, I’ll cover everything you need to know to achieve a flawless finish.
So, let’s dive in and get ready to transform your space with ease.
Key Takeaways
- Group 1: Clothing and protective gear contribute to comfort and safety while using an airless paint sprayer.
- Group 2: Maintaining a good working environment and taking breaks can optimize productivity and results when using an airless paint sprayer for interior painting.
- Group 4: Troubleshooting paint clogs by checking viscosity, straining paint, and cleaning or replacing spray tips is essential for smooth operation with an airless paint sprayer.
- Group 5: Ensuring an even spray pattern by proper calibration, even paint flow, and adjusting pressure and fan width is crucial for achieving a professional finish with an airless paint sprayer for interior painting.
Prepare the Room for Painting
Now you’re ready to tackle the fun part – getting your room prepped and primed for a flawless paint job!
Before you start spraying with your airless paint sprayer, it’s important to take some protective measures. Cover the floor with a drop cloth or plastic sheeting to prevent any accidental spills or drips. Use painter’s tape to protect trim, windows, and electrical outlets from any overspray. Also, don’t forget to remove furniture from the room or cover it with plastic to keep it paint-free.
Once you’ve taken these precautions, it’s time to move on to choosing the right paint and equipment. But before we get into that, let’s talk about the importance of proper room preparation. By taking these steps, you ensure a clean and organized space for a smooth painting process.
So, let’s dive into the next section and find out how to select the perfect paint and equipment for your airless paint sprayer.
Choose the Right Paint and Equipment
To achieve flawless results, it’s crucial to select the perfect combination of color and tools for your indoor masterpiece.
When choosing paint colors, consider the overall aesthetic of the room, as well as the mood you want to create. Lighter colors can make a space feel larger and brighter, while darker colors can add depth and drama.
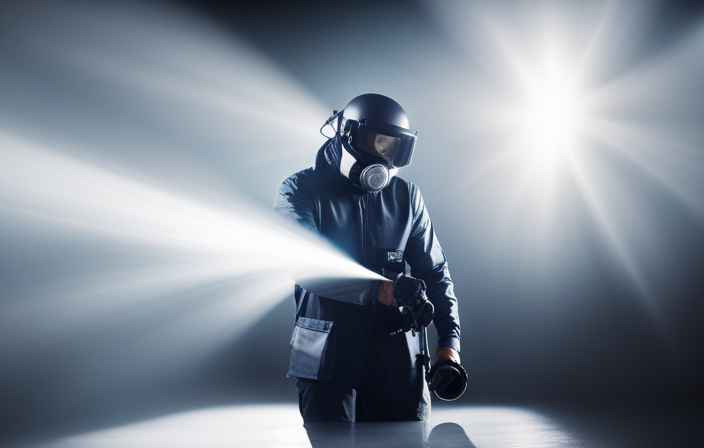
Additionally, it’s important to take safety precautions while using an airless paint sprayer. Wear protective goggles, a respirator mask, and gloves to protect yourself from paint particles and fumes. Make sure to properly ventilate the room and cover any furniture or flooring that you want to keep paint-free.
With these considerations in mind, let’s move on to the next section about practicing proper technique for using an airless paint sprayer.
Practice Proper Technique
When practicing proper technique with an airless paint sprayer, it’s important to hold the sprayer at the correct distance from the wall. This will ensure that the paint is applied evenly and without any drips or uneven coverage.
Additionally, using smooth, even strokes to apply the paint will result in a professional-looking finish.
Lastly, it’s crucial to overlap each pass when spraying to create a seamless finish and avoid any visible lines or gaps.
Hold the Sprayer at the Correct Distance from the Wall
Positioning the sprayer at the optimal distance from the wall ensures a smooth and even paint application, resulting in a professional-looking finish. To achieve this, it is crucial to practice proper spray technique and adjust the spray pattern according to the desired coverage. Holding the sprayer too close can cause drips and uneven application, while holding it too far can result in overspray and wasted paint.
To help you visualize the correct distance, refer to the table below:
| Distance from Wall | Spray Pattern |
|---|---|
| 12 inches | Narrow fan pattern |
| 18 inches | Medium fan pattern |
| 24 inches | Wide fan pattern |
| 36 inches | Vertical or horizontal pattern |
| 48 inches | Circular pattern |
By following these guidelines, you can ensure that the paint is evenly distributed and avoid any unnecessary wastage. After understanding the correct distance, the next step is to use smooth, even strokes to apply the paint, which will be discussed in the subsequent section.
Use Smooth, Even Strokes to Apply the Paint
Achieve a flawless finish by smoothly and evenly stroking the paint onto the wall – can’t you imagine the satisfaction of seeing a seamless coat of color? To achieve this, it’s crucial to use smooth strokes and maintain an even application throughout the process.
Begin by holding the sprayer at the correct distance from the wall, as we discussed earlier. Then, with a steady hand, move the sprayer in a back-and-forth motion, making sure to maintain a consistent speed. This will ensure that the paint is applied evenly, without any streaks or uneven patches.
By using smooth, even strokes, you’ll be able to achieve a professional-looking finish that’ll transform your interior space.
Transitioning into the next section, remember to overlap each pass for a seamless finish.
Overlap each Pass for a Seamless Finish
To ensure a flawless result, make sure to smoothly and evenly stroke the paint onto the wall, overlapping each pass for a seamless finish.
Here are some techniques to achieve a seamless finish:
-
Control the spray pattern: Adjust the nozzle to create a fan-shaped pattern that covers the desired area evenly.
-
Maintain consistent speed: Move the sprayer at a steady pace to avoid uneven paint application.
-
Keep the sprayer at the correct distance: Hold the sprayer about 12 inches away from the wall to ensure even coverage.
-
Watch for drips and runs: Check the surface regularly to catch any drips or runs and fix them immediately.
By following these seamless finish techniques and avoiding common mistakes like spraying too quickly or too close to the wall, you can achieve a professional-looking result.
Now, let’s move on to the next section and start painting.
Start Painting
Once you’ve got your airless paint sprayer ready, it’s time to dive into the exciting world of interior painting.
Before you start painting, make sure you’ve chosen the right paint color and have properly prepped the walls. This includes cleaning the walls, removing any dirt or grease, and patching any holes or imperfections.
Once the walls are prepped, it’s time to start painting! Begin by spraying the paint in a smooth and even motion, starting at the top of the wall and working your way down. Remember to overlap each pass to ensure a seamless finish.
As you go along, keep an eye out for any drips or runs and fix them immediately.
Once you’re done painting, it’s important to clean the sprayer thoroughly to avoid any clogs or damage.
Transitioning into the next section, let’s talk about how to clean the sprayer effectively.
Clean the Sprayer
Get ready to tackle the task of cleaning your paint sprayer effectively to ensure its longevity and maintain its optimal performance. Proper sprayer maintenance is essential in preventing clogs and keeping your sprayer in top shape.
After you’ve finished painting, start by removing any remaining paint from the sprayer. Disconnect the sprayer from the power source and disassemble the components. Clean each part thoroughly using warm soapy water or a suitable cleaning solution. Pay special attention to the nozzle and filters, as they’re prone to clogging. Use a brush or a toothpick to remove any dried paint or debris.
Rinse all the parts with clean water and let them dry completely before reassembling the sprayer. By taking the time to clean your sprayer properly, you can ensure that it’ll continue to work efficiently.
Now, let’s move on to the next section about taking breaks and maintaining a good working environment.
Take Breaks and Maintain a Good Working Environment
Make sure you take regular breaks and create a comfortable work environment to ensure a pleasant painting experience.
When using an airless paint sprayer for interior projects, it’s important to prioritize your well-being and manage fatigue during long painting sessions. To create a comfortable workspace, consider setting up a clean and organized area with proper lighting and ventilation.
Take short breaks every hour or so to rest your body and mind, hydrate, and stretch. This will help prevent muscle strain and keep you focused. Additionally, wearing comfortable clothing and protective gear will contribute to your overall comfort and safety.
By maintaining a good working environment and taking breaks, you can optimize your productivity and achieve professional-looking results.
Now, let’s move on to troubleshooting common issues that may arise during the painting process.
Troubleshooting Common Issues
Taking breaks and maintaining a good working environment are essential when using an airless paint sprayer. However, sometimes issues can arise that require troubleshooting.
Two common problems that may occur are paint clogs and uneven spray patterns. To troubleshoot paint clogs, start by checking the paint viscosity and straining the paint to remove any debris. If the issue persists, you may need to clean or replace the spray tip.
When dealing with an uneven spray pattern, ensure that the sprayer is properly calibrated and that the paint is flowing evenly. Adjusting the pressure and the fan width can also help to achieve a more even application.
By troubleshooting these common issues, you can ensure a smooth and professional finish.
Now, let’s move on to the final section where we will discuss the finishing touches.
Finishing Touches
To add those final touches, don’t forget to give your project a thorough inspection for any imperfections.
After spraying the interior with an airless paint sprayer, it’s important to check for any areas that may need touch up techniques. This could include spots where the paint coverage is uneven, drips, or any missed spots.
Use a small brush or roller to carefully touch up these areas, ensuring a seamless finish. Additionally, selecting the right paint color is crucial for achieving the desired look. Consider factors such as lighting and the overall aesthetic of the space when choosing the color.
Once you’ve addressed any imperfections and are satisfied with the results, you can move on to enjoying your newly painted space.
Enjoy your Newly Painted Space
Once you’ve given your project a thorough inspection and made any necessary touch-ups, it’s time to sit back and enjoy your newly painted space.
Here are some tips to ensure that you fully appreciate the results of your hard work:
-
Take a moment to admire the flawless finish achieved with the airless paint sprayer. The even application and smooth texture will make your space look professionally painted.
-
Notice how the color you’ve selected enhances the overall ambiance of the room. Whether you’ve chosen a bold statement or a calming hue, the right color can transform the entire space.
-
Appreciate the time and effort saved by using an airless paint sprayer. The efficiency and speed of this tool allowed you to complete the project in a fraction of the time it would’ve taken with traditional painting methods.
-
Consider the long-lasting results of your painting techniques. The durability of the paint job will ensure that your newly painted space remains beautiful for years to come.
Now that you’ve enjoyed the fruits of your labor, let’s discuss how to properly maintain and care for your airless paint sprayer.
Maintenance and Care for your Airless Paint Sprayer
When it comes to maintaining and caring for my airless paint sprayer, there are three key points that I always keep in mind.
First, I make sure to regularly clean and maintain the sprayer to prevent any clogs or malfunctions. This includes cleaning the filters, nozzles, and hoses after every use.
Second, I always store the sprayer in a safe and dry location to protect it from any damage or moisture.
Lastly, I’m proactive in replacing or repairing any damaged parts as needed to ensure that the sprayer continues to work efficiently.
By following these steps, I can prolong the lifespan of my airless paint sprayer and ensure that it always performs at its best.
Regularly Clean and Maintain the Sprayer
Regularly cleaning and maintaining your airless paint sprayer is essential for optimal performance and a longer lifespan. To keep your sprayer in top shape, it’s important to follow proper cleaning techniques and establish a maintenance schedule.
After each use, I make sure to clean the sprayer thoroughly by flushing it with water or a recommended cleaning solution. This helps remove any leftover paint residue and prevents clogging. Additionally, I pay close attention to the filters, hoses, and nozzles, cleaning or replacing them as needed.
It’s also important to lubricate the moving parts and check for any signs of wear or damage. By following these steps, I can ensure that my sprayer operates efficiently and lasts longer.
Now, let’s talk about how to store the sprayer in a safe and dry location.
Store the Sprayer in a Safe and Dry Location
To keep your sprayer in tip-top shape and avoid any potential mishaps, you must find the absolute safest and driest location for storage. Proper storage is crucial for sprayer maintenance and extends the life of your equipment. Here are some key tips for storing your airless paint sprayer:
-
Clean the sprayer thoroughly before storage to remove any paint residue or debris that could cause clogs or damage.
-
Store the sprayer in a cool, dry place to prevent rust or corrosion. Avoid storing it in areas with extreme temperatures or high humidity.
-
Keep the sprayer away from direct sunlight to prevent fading or damage to the plastic components.
By following these storage guidelines, you can ensure that your sprayer remains in top condition and ready for use whenever you need it. After proper storage, it’s important to regularly inspect and replace or repair any damaged parts as needed. This will help maintain the sprayer’s performance and prevent any issues during your next painting project.
Replace or Repair any Damaged Parts as Needed
Make sure you keep an eye out for any damaged parts and promptly replace or repair them as needed, to ensure optimal performance and avoid any potential problems during your next painting project. When it comes to an airless paint sprayer, there are common damages that can occur over time.
Here are some repairing techniques to address these issues:
-
Check the spray tip for any signs of wear or clogging. Clean or replace it if necessary.
-
Inspect the hose for any leaks or cracks. Use tape or replace the hose if needed.
-
Examine the gun trigger for any sticking or malfunctioning. Lubricate or replace it as required.
-
Look for any loose or broken seals in the pump. Tighten or replace them to prevent leaks.
-
Inspect the motor for any unusual noises or overheating. Consult the manufacturer or a professional for repair guidance.
By regularly inspecting and repairing these common damages, you can ensure that your airless paint sprayer continues to perform effectively and efficiently.
Frequently Asked Questions
Can I use an airless paint sprayer for exterior painting as well?
Yes, an airless paint sprayer can be used for exterior painting as well. It is important to perform regular maintenance on the sprayer and follow best practices, such as using the correct pressure and distance from the surface for optimal results.
How long does it take for the paint to dry after using an airless paint sprayer?
How long does it take for paint to dry after using an airless paint sprayer? Speed up drying time by increasing ventilation and using a dehumidifier. To prevent paint from drying too quickly, avoid direct sunlight and use a slower-drying paint.
What safety precautions should I take when using an airless paint sprayer?
When using an airless paint sprayer, it’s important to follow safety guidelines. Wear protective goggles, gloves, and a mask. Keep the work area well-ventilated and avoid spraying near open flames.
Can I use multiple colors of paint with an airless paint sprayer?
Yes, you can use multiple colors of paint with an airless paint sprayer. However, it is important to note that different colors may have different viscosities, so you may need to adjust the settings accordingly.
How often should I clean the filters on my airless paint sprayer?
I clean the filters on my airless paint sprayer every time I finish a painting project. Regular cleaning is important for optimal performance and to prevent clogs. It’s a simple maintenance tip that ensures smooth, uninterrupted spraying.
Conclusion
In conclusion, using an airless paint sprayer for interior painting is a convenient and efficient way to achieve a professional finish. With proper preparation, the right equipment, and good technique, you can transform any space in no time.
So why settle for brush strokes and roller marks when you can have smooth and even coverage? Give it a try and see the difference for yourself.
Happy painting!