If you’re feeling exhausted from the manual labor involved in painting walls and surfaces, consider an airless paint sprayer as your new best friend for all your painting projects. Trust us, this game-changing tool will revolutionize your painting tasks like never before. With its powerful and precise spraying abilities, you’ll be able to efficiently cover large areas, resulting in a smooth and professional-looking finish that will impress everyone.
In this article, I will guide you through the ins and outs of using an airless paint sprayer, ensuring that you have all the knowledge and techniques necessary for success. From understanding how the sprayer works to choosing the right paint and equipment, and from preparing your workspace to troubleshooting common issues, I’ve got you covered.
Plus, I’ll share some safety precautions, tips, and tricks that will take your painting game to the next level. So get ready to unleash your inner artist and transform any space with ease using an airless paint sprayer.
Key Takeaways
- Safety precautions are important when using an airless paint sprayer, such as wearing a respirator and using protective clothing.
- Achieving a smooth finish requires proper surface preparation, using a high-quality primer, and applying multiple thin coats.
- Overlapping strokes during spraying helps to ensure even coverage, and testing on scrap materials first allows for adjustments and fine-tuning of technique.
- Airless paint sprayers offer benefits such as even coverage, time-saving, versatility, and precise control, but proper maintenance and cleaning are necessary for optimal performance.

InoKraft MaXpray M1 Airless Paint Sprayer, 3000 PSI 550W Corded Electric, Thinning-Free for Latex & Stain, DIY Home Interior Exterior Walls Fences Decks, Includes Spray Gun Kit & 12" Tip Extension
- Fast Painting Speed: 5X faster than rolling, 12X faster than brushing
- High-Pressure Performance: 3000 PSI, 0.29 GPM for even coverage
- Direct from Bucket: Draw paint from 5-gallon bucket for large projects
As an affiliate, we earn on qualifying purchases.
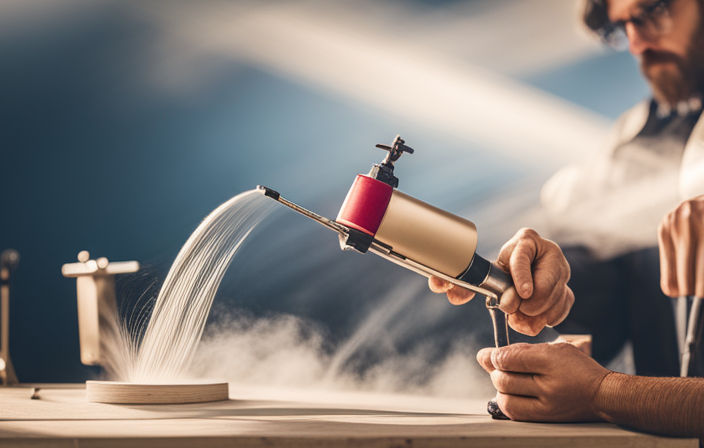
Understanding How an Airless Paint Sprayer Works
Now, let me show you how an airless paint sprayer actually works.
Understanding nozzle types is crucial when using an airless paint sprayer. The nozzle is responsible for controlling the spray pattern and the amount of paint being released. There are different types of nozzles available, such as fan-shaped and round-shaped, each suitable for different painting tasks.
Another important factor to consider is the thinning of paint. Airless paint sprayers work best with paint that has been properly thinned. Thinning the paint allows for smoother and more even coverage. It is essential to follow the manufacturer’s instructions on how much to thin the paint for optimal results.
With a good understanding of nozzle types and the importance of thinning paint, you can now move on to choosing the right paint and equipment for your project.
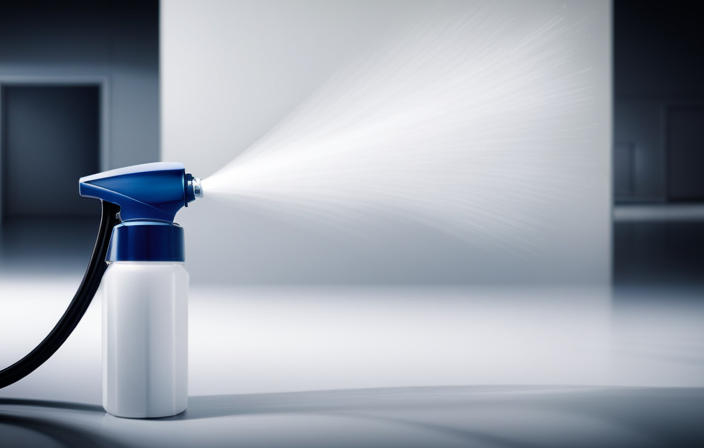
Choosing the Right Paint and Equipment
First and foremost, it’s crucial to select the perfect type of paint and the right equipment for your project in order to achieve stunning results.
When choosing paint colors, consider the desired effect and overall theme of your space. Take into account factors such as lighting, room size, and existing decor.
It’s also important to choose a paint that is suitable for the surface you’ll be working on, whether it’s wood, metal, or concrete.
When it comes to equipment, an airless paint sprayer can provide a smooth and even finish. Look for a sprayer that has adjustable pressure settings to prevent overspray and ensure precision.
Additionally, make sure to wear protective gear such as goggles and a mask to avoid inhalation of paint particles.
By selecting the right paint and equipment, you’re setting yourself up for success in your painting project.
In the subsequent section about preparing your workspace, we’ll discuss the importance of proper surface preparation.
Preparing Your Workspace
To create a truly inspiring painting, ensure your workspace is properly prepared. Workspace organization is crucial for efficiency and ease of use. Before you start, gather all the necessary tools and materials and arrange them in a neat and accessible manner. This will save you time and prevent any unnecessary interruptions during the painting process. Additionally, it is important to prioritize safety by wearing the appropriate safety gear. This includes goggles to protect your eyes from paint particles, a mask to prevent inhalation of fumes, and gloves to keep your hands clean and protected. By organizing your workspace and wearing the necessary safety gear, you can focus on the task at hand and achieve professional results. Now that your workspace is ready, let’s move on to the proper spray technique section.
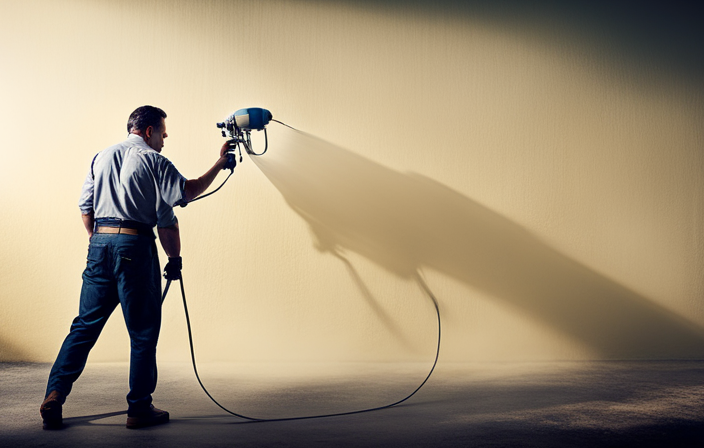
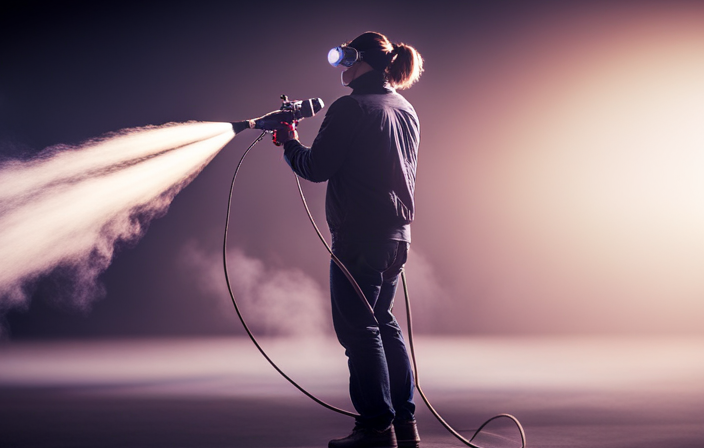
Proper Spray Technique
Mastering the art of proper spray technique is essential for achieving stunning and professional results in your painting projects.
To achieve consistency in your paint application, start by holding the sprayer nozzle approximately 12 inches away from the surface you are painting.
Move the sprayer in a smooth and consistent motion, overlapping each pass by about 50%. This ensures an even distribution of paint and prevents uneven coverage.
Additionally, maintaining a steady hand and consistent distance from the surface will help you avoid overspray, which can result in wasted paint and a messy work area.
By following these techniques, you can achieve a flawless finish and minimize the need for touch-ups.
Now, let’s move on to troubleshooting common issues and ensuring a smooth painting process.
Troubleshooting Common Issues
When it comes to using an airless paint sprayer, there are a few common issues that can arise. Dealing with clogs or drips is one of them. It’s important to know how to troubleshoot and fix these problems.
Another key point to consider is adjusting the pressure and flow rate of the sprayer. This can greatly affect the quality of the paint job. By understanding these two aspects, you’ll be well-equipped to handle any issues that may come up while using an airless paint sprayer.
Dealing with Clogs or Drips
If you’re experiencing clogs or drips with your airless paint sprayer, it’s crucial to troubleshoot the issue to ensure a smooth and consistent painting process.
Dealing with nozzle clogs is a common problem that can be resolved with a few simple steps. First, you’ll want to remove the nozzle and soak it in warm water or a cleaning solution to break up any dried paint. Use a small brush or toothpick to remove any remaining debris.
Second, make sure to strain your paint before pouring it into the sprayer to prevent clogs caused by particles in the paint.
When it comes to preventing paint drips, one effective method is to maintain a steady and consistent pace while spraying. Avoid stopping or starting abruptly, as this can cause excess paint to accumulate and lead to drips.
By following these tips, you can minimize clogs and drips to achieve a professional-looking finish.
Now, let’s move on to adjusting pressure and flow rate to further optimize your paint spraying process.
Adjusting Pressure and Flow Rate
To optimize your paint spraying process, it’s important to make adjustments to the pressure and flow rate of your airless sprayer.
The first step in adjusting the pressure is to check the manufacturer’s recommendations for your specific paint sprayer. This will give you a starting point for the pressure settings. Once you have the recommended pressure, you can fine-tune it by adjusting the pressure control knob on the sprayer.
If you’re experiencing clogs or drips, you may need to adjust the nozzle size as well. A smaller nozzle size can help reduce clogs, while a larger nozzle size can increase the flow rate.
Additionally, consider the paint viscosity. Thicker paints may require higher pressures and larger nozzle sizes.
As you make these adjustments, be sure to test spray on a scrap surface to ensure the desired results.
Now that you’ve adjusted the pressure and flow rate, it’s time to move on to the next step: cleaning and maintenance.
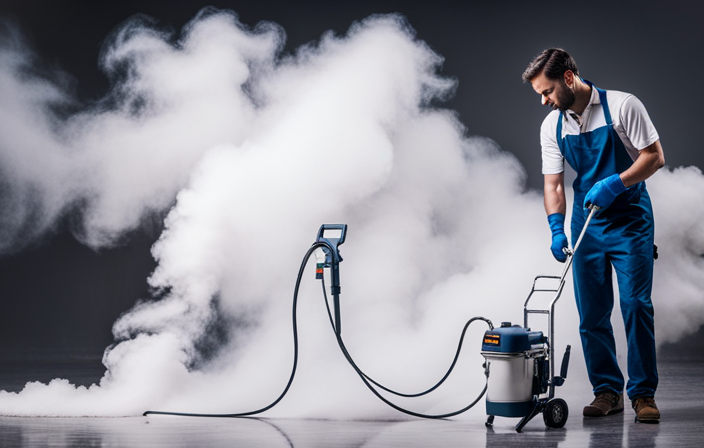
Cleaning and Maintenance
Maintaining the cleanliness of your airless paint sprayer is essential for optimal performance. To keep your sprayer in top condition, it is important to regularly clean and maintain it.
Cleaning techniques for an airless paint sprayer typically involve flushing the system with water or a cleaning solution after each use. This helps prevent paint buildup and ensures that the sprayer continues to work efficiently.
Additionally, it is important to clean the filters and nozzles regularly to avoid clogs and maintain a consistent spray pattern.
Proper maintenance of your sprayer includes inspecting and replacing worn or damaged parts, lubricating moving components, and storing the sprayer in a clean, dry place.
By following these cleaning and maintenance practices, you can prolong the lifespan of your airless paint sprayer and ensure that it continues to deliver excellent results.
Now, let’s move on to discussing some important safety precautions to keep in mind while using an airless paint sprayer.
Safety Precautions
Ensuring your safety is of utmost importance when operating an airless paint sprayer. It involves handling high pressure and potentially hazardous materials. To protect yourself, always wear a respirator when using the sprayer to prevent inhalation of paint particles or fumes.
Additionally, it is crucial to wear protective clothing such as coveralls, gloves, and safety goggles. These items will shield your skin and eyes from any splatters or overspray.
When working in enclosed spaces, make sure there is proper ventilation to avoid the buildup of fumes. This will help maintain a safe working environment.
It is also important to read the manufacturer’s instructions and follow all safety guidelines provided. These guidelines are specifically designed to ensure your safety while operating the airless paint sprayer.
By taking these precautions, you can safely operate the airless paint sprayer and minimize any potential risks.
Moving on to achieving a smooth finish, let’s discuss some techniques to ensure a professional-looking result.
Achieving a Smooth Finish
To achieve a smooth finish when using an airless paint sprayer, there are two key aspects to focus on: smooth finish techniques and surface preparation. Here are five essential tips to help you achieve that professional-looking paint job:
-
Thoroughly clean the surface you plan to paint by removing any dirt, dust, or grease using a mild detergent and water solution.
-
Use a high-quality primer to create a smooth and even base for your paint. This will help hide imperfections and ensure better adhesion.
-
Practice the right spraying technique. Hold the sprayer at a consistent distance from the surface, typically around 12 inches, and move it in a steady, overlapping motion to avoid streaks or uneven coverage.
-
Apply multiple thin coats instead of one thick coat. This will help prevent drips and allow each layer to dry properly.
-
Always inspect your work in good lighting and make any necessary touch-ups before the paint fully dries.
By following these smooth finish techniques and properly preparing your surface, you can achieve professional results with your airless paint sprayer.
Now, let’s move on to some additional tips and tricks for success in using this versatile tool.
Tips and Tricks for Success
When using an airless paint sprayer, it’s important to achieve even coverage on your surfaces. One way to achieve this is by overlapping your strokes as you spray. This ensures that each area is covered multiple times, resulting in a smooth and consistent finish.
Additionally, it’s always a good idea to test your spray settings and techniques on scrap materials before starting on your actual project. This allows you to make any necessary adjustments and ensure that you are achieving the desired results.
Overlapping Strokes for Even Coverage
To achieve a smooth and even finish, try overlapping your strokes when using an airless paint sprayer. This technique is essential for efficiency and avoiding overspray. Here are some key tips to keep in mind:
- Start by holding the sprayer about 12 inches away from the surface.
- Move the sprayer in a steady, back-and-forth motion.
- Overlap each stroke by about 50%.
- Maintain a consistent speed and pressure for even distribution.
- Pay extra attention to corners and edges, overlapping the strokes for complete coverage.
By following these guidelines, you can achieve a professional-looking finish that is free of streaks and uneven patches. Now, before moving on to the next step of testing on scrap materials first, it’s important to master the overlapping technique for optimal results.
Testing on Scrap Materials First
Before you start painting, it’s crucial to test the airless paint sprayer on scrap materials first. This will ensure the desired coverage and help you avoid any potential mistakes. Testing techniques are essential in determining the right settings and spray pattern for your project.
Start by adjusting the pressure and nozzle size based on the type of paint you’re using and the surface you’re working on. Spray a coat on the scrap material, making sure to overlap each stroke for even coverage.
Afterwards, compare the results to see if any adjustments need to be made. Look for any unevenness, drips, or areas that may need more or less paint. This step will help you fine-tune your technique and achieve professional-looking results.
Now that you’re confident with the airless paint sprayer, let’s move on to project ideas and inspiration.
Project Ideas and Inspiration
Looking for some out-of-this-world project ideas and inspiration? Look no further!
When it comes to project planning, one of the most exciting parts is choosing a color scheme that will bring your vision to life. With an airless paint sprayer, the possibilities are endless.
You can transform a dull room into a vibrant oasis or give new life to old furniture. One idea is to create a stunning accent wall using bold and contrasting colors.
Another option is to revamp your outdoor space by painting your patio furniture in vibrant shades that complement your garden. If you’re feeling adventurous, try experimenting with different textures and stencils to create unique patterns and designs.
With an airless paint sprayer, your imagination is the only limit! So go ahead, get inspired, and let your creativity flow.
Frequently Asked Questions
Are airless paint sprayers suitable for all types of paint?
Yes, airless paint sprayers are suitable for all types of paint. They offer many advantages, such as faster coverage and a smoother finish. However, common mistakes to avoid include using the wrong tip size and not properly cleaning the equipment.
How long does it take for the paint to dry when using an airless paint sprayer?
To speed up paint drying time when using an airless paint sprayer, you can ensure good ventilation, use a heater or fan, and thin the paint if necessary. To prevent paint from drying too quickly, avoid painting in direct sunlight or on hot surfaces.
Can I use an airless paint sprayer to paint ceilings and high walls?
Yes, airless paint sprayers can be used for exterior painting. They have several advantages for ceilings and high walls, including faster coverage, even application, and the ability to reach high areas easily.
Do I need to thin the paint before using it with an airless paint sprayer?
Yes, it is important to thin the paint before using it with an airless paint sprayer. Thinning paint helps it flow smoothly through the sprayer and ensures an even coat. Different techniques can be used to achieve the right consistency.
Are there any specific safety precautions I should take when using an airless paint sprayer?
When using an airless paint sprayer, it’s important to prioritize safety precautions and follow best practices. Wear protective gear like goggles and gloves, ensure proper ventilation, and be mindful of your surroundings to prevent accidents and ensure a successful painting experience.
Conclusion
In conclusion, using an airless paint sprayer can be a game-changer when it comes to achieving a smooth and professional finish on your painting projects.
With the right equipment, proper technique, and a little troubleshooting know-how, you’ll be able to transform any space with ease.
Just like an artist with a brush, the airless paint sprayer becomes your magic wand, effortlessly bringing color and life to your walls.
So go ahead, unleash your creativity, and let the paint fly!