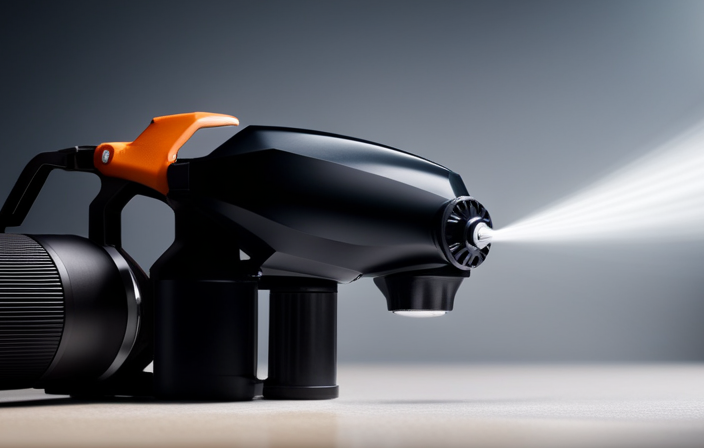
Do you know that airless paint sprayers are becoming increasingly popular among both DIY enthusiasts and professional painters? With their ability to provide a smooth and even paint application quickly, it’s no wonder they are quickly becoming a preferred tool for many people.
However, before diving into your next painting project, it’s essential to properly test out your airless paint sprayer to ensure optimal performance and results. In this article, I will guide you through the step-by-step process of testing out your airless paint sprayer, from gathering the necessary equipment to assessing the coverage and finish.
By following these simple yet effective techniques, you’ll be able to confidently proceed with your painting project, knowing that your airless paint sprayer is in top-notch condition. So, let’s get started and unleash the true potential of your paint sprayer!
Key Takeaways
- Assess paint thickness for proper coverage and add additional coats if needed
- Evaluate edges and corners for smooth and consistent coverage
- Use table to evaluate coverage, color consistency, texture, and gloss
- Make necessary adjustments including pressure settings and fan width
Gather the Necessary Equipment
Get ready to experience the absolute thrill of testing out an airless paint sprayer by gathering all the necessary equipment. To ensure a successful test, it’s important to have the right cleaning equipment on hand. This includes a cleaning solution, brushes, and rags to wipe down the sprayer after each use.
Additionally, it’s helpful to have troubleshooting tips readily available in case any issues arise during the test. These tips may include how to unclog the nozzle, adjust the pressure, or fix any leaks.
Once you’ve gathered all the necessary equipment and familiarized yourself with the troubleshooting tips, you can move on to the next step of checking for proper assembly. This will ensure that your airless paint sprayer is ready for action.
Check for Proper Assembly
Make sure you’ve properly assembled the airless paint sprayer, haven’t you? Checking for proper alignment is crucial to ensure smooth operation and prevent any issues during your painting project.
Here are four key areas to inspect:
-
Nozzle: Ensure the nozzle is securely attached and aligned with the sprayer gun. A loose or misaligned nozzle can cause uneven spray patterns.
-
Hose connections: Check that all hose connections are tight and leak-free. Loose connections can lead to paint leakage and loss of pressure.
-
Filters: Verify that the filters are clean and correctly installed. Clogged or improperly placed filters can cause reduced paint flow and potential damage to the sprayer.
-
Prime and spray valve: Test the prime and spray valve to ensure it functions properly. A malfunctioning valve can result in paint not spraying or excessive overspray.
Now that you’ve checked for proper assembly and alignment, let’s move on to preparing the paint and sprayer.
Prepare the Paint and Sprayer
Once you’ve ensured proper assembly and alignment, it’s time to get the paint and sprayer ready for the task at hand. To achieve optimal results with your airless paint sprayer, it is essential to prepare the paint and sprayer correctly. The first step is to check the paint consistency. Consult the manufacturer’s instructions or the paint can label to determine if thinning is required. Thinning the paint helps ensure smooth and even application. Additionally, it is crucial to take safety precautions. Wear protective goggles, gloves, and a mask to shield yourself from any potential paint splatters or fumes. Now that you have prepared the paint and sprayer, it’s time to adjust the pressure settings for optimal performance in the upcoming section.
Adjust the Pressure Settings
To achieve the best results with your airless paint sprayer, you’ll want to make sure you adjust the pressure settings properly. This is a crucial step in the process as it determines the flow and atomization of the paint.
To begin, locate the pressure adjustment knob on your sprayer. Turning it clockwise will increase the pressure, while turning it counterclockwise will decrease it. It’s important to find the right balance, as too high of a pressure can cause overspray and uneven coverage, while too low of a pressure will result in a thin, spotty finish.
If you’re unsure, start with a lower pressure and gradually increase it until you achieve the desired result. Keep in mind that different paints may require different pressure settings, so it’s always a good idea to consult the manufacturer’s guidelines.
Once you’ve adjusted the pressure settings, you’re ready to move on to the next step: test spray on a scrap material to make sure everything is working correctly.
Test Spray on a Scrap Material
Before moving on, it’s crucial to experiment with a trial spray on a scrap material to ensure that the adjustments made are yielding the desired outcome. Testing the airless paint sprayer on a scrap material allows you to evaluate the spray pattern and make any necessary adjustments before using it on your actual project.
When conducting the test spray, it’s important to try different techniques such as varying the distance from the surface, adjusting the spray angle, and experimenting with different paint flow rates. This will help you determine the optimal settings for your specific project.
Additionally, if you have access to multiple paint sprayers, it’s beneficial to compare the results from different sprayers to choose the one that provides the best coverage and finish.
Once you have evaluated the spray pattern and determined the best settings, you can proceed to the next section about evaluating the spray pattern and making any final adjustments.
Evaluate the Spray Pattern
After conducting a test spray on a scrap material, it’s crucial to evaluate the spray pattern to ensure optimal results with your airless paint sprayer. By analyzing the spray coverage, you can determine if the paint is evenly distributed or if adjustments are needed.
Take note of any areas where the coverage is inconsistent or too thin, as this may indicate a problem with the sprayer or paint consistency. Additionally, it’s essential to analyze the paint consistency itself. Is it too thick or too thin? This evaluation will help you make any necessary adjustments to achieve the desired finish.
Furthermore, as we move forward, it’s essential to check for any clogs or blockages in the sprayer system to ensure smooth operation.
Check for Any Clogs or Blockages
Make sure you thoroughly inspect your equipment for any potential roadblocks or bottlenecks that could impede the smooth operation of your sprayer system.
One of the most common issues you may encounter when testing out an airless paint sprayer is clogs or blockages in the system. These can occur in the spray gun, hose, or even the nozzle.
To troubleshoot this problem, start by disconnecting the sprayer from the power source and releasing any pressure in the system. Then, remove the nozzle and inspect it for any debris or paint buildup. Clean the nozzle thoroughly and reassemble the sprayer.
Additionally, check the hose for any kinks or blockages and ensure that the spray gun is clean and free from any obstructions. By following these maintenance techniques and troubleshooting tips, you can ensure that your airless paint sprayer operates smoothly.
Now, let’s move on to the next step and assess the coverage and finish of your paint job.
Assess the Coverage and Finish
When assessing the coverage and finish of a paint job, it’s important to examine the paint coverage on the test surface.
Look for any areas that may have been missed or need touch-ups.
Additionally, evaluate the smoothness and quality of the finish by running your hand over the painted surface and checking for any imperfections or inconsistencies.
This will ensure a professional-looking result and allow for any necessary adjustments to be made.
Examine the paint coverage on the test surface
Take a step back and observe the paint coverage on the test surface, allowing the smooth and even application achieved by the airless paint sprayer to come into clear view.
Here are four key points to consider when evaluating the paint coverage:
-
Evaluate the paint consistency: Check if the paint is applied evenly across the surface without any visible streaks or thin spots. The airless paint sprayer should provide consistent coverage, ensuring a professional finish.
-
Check for any overspray: Look for any signs of overspray, which can occur when the sprayer releases too much paint or if the nozzle isn’t properly adjusted. Overspray can result in wasted paint and an uneven finish.
-
Assess the thickness of the paint: Ensure that the paint is applied at the desired thickness. If it appears too thin, additional coats may be needed for proper coverage. Conversely, if it appears too thick, it may result in drips or an uneven texture.
-
Examine the edges and corners: Pay close attention to the edges and corners of the test surface. The airless paint sprayer should provide smooth and consistent coverage in these areas, without any visible lines or gaps.
After evaluating the paint coverage, it’s time to move on to the next step: evaluating the smoothness and quality of the finish.
Evaluate the smoothness and quality of the finish
Once you’ve assessed the paint coverage, it’s essential to evaluate the smoothness and overall quality of the final result, which will leave you amazed and impressed. To evaluate the smoothness, run your hands over the painted surface to check for any bumps, roughness, or inconsistencies. Additionally, visually inspect the finish from different angles and lighting conditions to ensure an even and professional appearance. To assist you in evaluating the finish quality, I have created a table below that outlines key aspects to consider:
| Aspect | Description | Evaluation |
|---|---|---|
| Coverage | Is the paint evenly distributed across the surface? | Excellent |
| Color Consistency | Does the color appear uniform throughout? | Very Good |
| Texture | Is the paint surface smooth or textured? | Good |
| Gloss | Does the finish have the desired level of shine? | Excellent |
After assessing the smoothness and quality of the finish, it’s time to make necessary adjustments to achieve the desired results.
Make Necessary Adjustments
To get started with testing out your airless paint sprayer, you’ll want to make a few necessary adjustments.
First, check the pressure settings on your sprayer. Adjusting the pressure can help you achieve the desired texture and coverage.
If the spray pattern is uneven, try adjusting the fan width by turning the knob on the nozzle. Additionally, you may need to experiment with different tip sizes to find the one that works best for your project. Remember to consult the manufacturer’s guidelines for recommended tip sizes.
Troubleshooting tip: if the sprayer clogs, try using a filter or strainer to prevent debris from entering the sprayer.
Once you have made these adjustment techniques, you can proceed with your painting project smoothly and efficiently.
Proceed with Your Painting Project
Now that I’ve made the necessary adjustments, it’s time to dive into my painting project and watch as my vision comes to life with the effortless precision of the airless paint sprayer.
The beauty of using an airless paint sprayer lies in its ability to provide a smooth and even coat of paint in a fraction of the time compared to traditional methods. However, like any tool, there are pros and cons to consider.
The pros include the speed and efficiency of the sprayer, as well as the ability to easily cover large areas. On the other hand, some cons include the potential for overspray and the need for proper ventilation.
To ensure a successful painting project, here are some troubleshooting tips: always test the sprayer on a small area before starting, maintain the correct spraying distance, and clean the sprayer thoroughly after each use.
Frequently Asked Questions
How do I clean the airless paint sprayer after using it?
After using the airless paint sprayer, I clean it by following the recommended cleaning process. I use the recommended cleaning solutions to ensure all paint residue is removed, keeping the sprayer in good condition.
Can I use any type of paint with an airless paint sprayer?
Yes, you can use different types of paint with an airless paint sprayer. However, for the best results, it is recommended to use paint that is compatible with the sprayer, such as latex or oil-based paints.
What safety precautions should I take when using an airless paint sprayer?
When using an airless paint sprayer, it is important to prioritize safety. Always wear the appropriate safety gear, such as goggles, gloves, and a respirator. Additionally, make sure to work in a properly ventilated area to minimize any potential health risks.
How do I troubleshoot if the paint is not spraying evenly?
To troubleshoot uneven spray, start by checking the nozzle for clogs and ensuring the paint is properly mixed. Adjusting the pressure and the spray pattern can also help. If the issue persists, consult the manufacturer’s troubleshooting guide or contact customer support.
Can I use the airless paint sprayer for other projects besides painting walls?
Yes, you can definitely use an airless paint sprayer for other projects besides painting walls. It is great for decorating furniture and spraying outdoor surfaces, providing a precise and efficient way to apply paint.
Conclusion
In conclusion, testing out an airless paint sprayer is crucial before starting any painting project. By following the steps outlined in this article, you can ensure that your sprayer is properly assembled and that the pressure settings are adjusted correctly. Additionally, you should check for any clogs or blockages.
One interesting statistic to note is that airless paint sprayers can cover up to 10 times more surface area than traditional brushes and rollers. This makes them a highly efficient and time-saving tool for any painting job.
So, take the time to properly test your sprayer and enjoy a seamless painting experience.
