I’ve always had a deep appreciation for the art of painting, but achieving a professional finish has always been challenging for me. However, that all changed when I found the Ryobi RAP200G Airless Paint Sprayer.
This powerful tool has revolutionized my painting experience, allowing me to effortlessly achieve smooth and even coats of paint with minimal effort.
In this article, I will guide you through the step-by-step process of using the Ryobi RAP200G Airless Paint Sprayer. Here’s what we’ll cover:
- Unboxing and setting up the sprayer
- Properly diluting the paint
- Adjusting the spray pattern and pressure
- Tips on cleaning and maintaining the sprayer
- Troubleshooting common issues
- Important safety precautions
Whether you’re a seasoned painter or a DIY enthusiast, this guide will equip you with the knowledge and skills to achieve professional results with the Ryobi RAP200G Airless Paint Sprayer. Let’s get started!
Key Takeaways
- Proper maintenance and troubleshooting techniques are necessary for optimal performance of the Ryobi RAP200G Airless Paint Sprayer.
- Safety gear such as goggles, respirator mask, and gloves should be worn to protect against potential hazards while using the paint sprayer.
- The high-pressure spray, paint fumes, and risk of electrocution are some potential hazards associated with the Ryobi RAP200G Airless Paint Sprayer.
- Creating a safe work area, following proper operating procedures, and choosing the right safety gear are crucial for safe and effective use of the paint sprayer.
Unboxing and Setting Up Your Ryobi RAP200G Airless Paint Sprayer
Now, let’s move on to unboxing and setting up your Ryobi RAP200G Airless Paint Sprayer!
When unboxing, carefully remove all the components from the packaging and check for any damage.
Take note of the instruction manual as it will guide you through the setup process.
Begin by attaching the spray gun to the hose using the quick-connect feature, ensuring a secure connection.
Next, fill the paint container with your desired paint, making sure to strain it to remove any impurities.
Connect the hose to the pump and turn on the sprayer to prime the system.
If you encounter any issues during setup, consult the troubleshooting tips in the manual.
With the sprayer set up, you can now move on to preparing your painting area, ensuring a smooth and efficient painting process.
Preparing Your Painting Area
Before you start, make sure your painting area is well-prepared and free of obstacles. Studies show that a clutter-free workspace can increase productivity by 20%.
First, ensure proper ventilation in the room. Open windows or use fans to promote airflow and prevent paint fumes from building up.
Next, protect surrounding surfaces by covering them with drop cloths or plastic sheets. This will prevent accidental overspray and paint splatters from damaging furniture or floors.
Consider using painter’s tape to mask off any areas you don’t want to be painted.
Once your painting area is properly prepared and ventilated, you can move on to the next step of diluting your paint, which we will discuss in the next section.
Properly Diluting Your Paint
To ensure a flawless painting experience, it is important to properly dilute your paint. This will allow for smooth and even coverage on your chosen surface. Here are some important points to consider when diluting your paint:
- Check the paint manufacturer’s instructions for the recommended dilution ratio.
- Use a measuring cup to accurately measure the paint and diluent.
- Slowly add the diluent to the paint while stirring continuously to achieve a consistent mixture.
- Consider the type of surface you are painting and adjust the dilution ratio accordingly.
- Experiment with different dilution ratios to find the optimal one for your desired painting techniques.
- Choose the right paint formula for your project, considering factors such as durability, finish, and application method.
By properly diluting your paint and selecting the appropriate formula, you can ensure optimal results when using the Ryobi RAP200G airless paint sprayer.
Next, we will discuss adjusting the spray pattern and pressure for even better control and precision.
Adjusting the Spray Pattern and Pressure
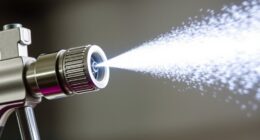
To achieve greater control and precision with your Ryobi RAP200G, you can adjust the spray pattern and pressure. To adjust the spray pattern, simply twist the spray nozzle clockwise or counterclockwise. This allows you to switch between a narrow or wide spray pattern, depending on the surface you are painting.
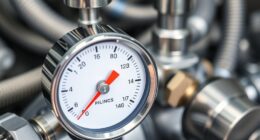
If you are experiencing pressure issues, start by checking the paint viscosity. If the paint is too thick, it can cause the pressure to drop. In this case, you may need to dilute the paint further or use a larger nozzle.
If the pressure is still not sufficient, check for any clogs or blockages in the spray gun or hose. Clearing any obstructions will help ensure proper pressure.
Once you have adjusted the spray pattern and pressure, you are ready to move on to applying the first coat of paint. This will help you achieve a smooth and flawless finish.
Applying the First Coat of Paint
Once you’ve adjusted the spray pattern and pressure, it’s time to apply the first coat of paint for a flawless finish.
Choosing the right paint color is crucial to achieving the desired look. Make sure to thoroughly mix the paint before pouring it into the sprayer’s container.
Start by painting a small test area to ensure the color and consistency are to your liking. When applying the paint, maintain a consistent distance of about 8-12 inches from the surface and use smooth, overlapping strokes. This will help prevent drips and runs.
Keep the sprayer moving at a steady pace to ensure an even application. Take your time and apply the paint in thin layers, allowing each coat to dry before applying the next. This will help prevent the paint from sagging or running.
Transitioning into the subsequent section about techniques for achieving a smooth finish, it’s important to master these fundamental steps before moving on to advanced techniques.
Techniques for Achieving a Smooth Finish
Mastering the art of achieving a smooth finish is like a painter creating a masterpiece with their brushstrokes. When using the Ryobi RAP200G airless paint sprayer, it’s crucial to select the right paint type and consistency. This will ensure an even application and a flawless finish.
First, choose a paint type that is suitable for the surface you are painting. For example, if you are painting a wall, use a latex or acrylic paint.
Next, consider the paint consistency. Thin the paint if needed, using water or a paint thinner, to achieve the desired flow and coverage. However, be cautious not to thin it too much as it may result in drips or a lack of coverage.
By carefully selecting the right paint type and consistency, you can achieve a smooth finish that is both professional and durable.
Moving forward to the next section about cleaning and maintaining your Ryobi RAP200G airless paint sprayer, it is important to keep your equipment in good condition to ensure optimal performance.
Cleaning and Maintaining Your Ryobi RAP200G Airless Paint Sprayer
To ensure the longevity and optimal performance of your Ryobi RAP200G, it is crucial not to neglect the essential task of cleaning and maintaining this powerful tool. Proper cleaning techniques are necessary to keep your airless paint sprayer in top shape. Here are some recommended cleaning products and steps to follow:
- Use a mild detergent mixed with water to clean the exterior and remove any dirt or debris.
- Flush the system with clean water after each use to prevent clogs and build-up.
- Use a brush or toothpick to remove any dried paint from the nozzle and other small parts.
- Check and clean the filters regularly to maintain proper airflow.
- Lubricate the moving parts with a recommended lubricant to ensure smooth operation.
By following these cleaning techniques and using the recommended cleaning products, you can keep your Ryobi RAP200G airless paint sprayer in excellent condition.
Now, let’s move on to troubleshooting common issues that may arise with this tool.
Troubleshooting Common Issues
Experiencing problems with your trusty Ryobi RAP200G? Let’s dive into troubleshooting common issues and get your painting projects back on track!
When it comes to troubleshooting tips for the Ryobi RAP200G airless paint sprayer, there are a few common problems encountered. One issue that may arise is inconsistent spray patterns. This can be caused by a clogged nozzle or a worn-out spray tip. To fix this, clean the nozzle thoroughly or replace the spray tip if necessary.
Another common problem is paint leakage. Check all the connections and make sure they are tight. If there are any damaged seals or gaskets, replace them.
Lastly, if the motor fails to start, check the power source and ensure it is properly connected.
Now that we have addressed troubleshooting, let’s move on to safety tips for using the Ryobi RAP200G airless paint sprayer.
Safety Tips for Using the Ryobi RAP200G Airless Paint Sprayer
To ensure the safe and effective operation of the Ryobi RAP200G, it is important to follow these guidelines for proper usage:
-
Choosing the right safety gear: Before using the Ryobi RAP200G, make sure to wear protective clothing, including safety goggles, a respirator mask, and gloves. This will help protect you from any potential hazards and ensure your safety throughout the painting process.
-
Understanding the potential hazards: Familiarize yourself with the potential risks associated with using the airless paint sprayer. These may include high-pressure spray, paint fumes, and the risk of electrocution if not used properly. Understanding these hazards will help you take the necessary precautions to prevent accidents and injuries.
-
Maintaining a safe work area: Clear the area of any potential tripping hazards and ensure that there is adequate ventilation. Keep bystanders away from the spraying area to avoid any accidental contact with the paint.
-
Following proper operating procedures: Read the user manual thoroughly and follow the manufacturer’s instructions for operating the Ryobi RAP200G. This will ensure that you are using the paint sprayer correctly and minimize the risk of accidents.
In conclusion, by choosing the right safety gear, understanding the potential hazards, maintaining a safe work area, and following proper operating procedures, you can use the Ryobi RAP200G airless paint sprayer safely and effectively.
Final Thoughts and Recommendations
For a successful and enjoyable painting experience, it’s important to keep these final thoughts and recommendations in mind. When comparing the Ryobi RAP200G Airless Paint Sprayer to other similar products on the market, it stands out for its ease of use and efficient performance. With its powerful motor and adjustable pressure settings, it allows for precise control and even coverage. The lightweight design and comfortable grip make it comfortable to use for extended periods of time. Additionally, the quick and easy cleaning process saves both time and effort. Overall, the Ryobi RAP200G Airless Paint Sprayer is a reliable and convenient tool for any painting project. Whether you’re a professional painter or a DIY enthusiast, this sprayer is a worthwhile investment.
Frequently Asked Questions
Can I use the Ryobi RAP200G Airless Paint Sprayer for outdoor projects?
Yes, the Ryobi RAP200G airless paint sprayer can be used for outdoor projects. However, if you encounter any issues, such as clogging or uneven spray, refer to the Ryobi RAP200G airless paint sprayer troubleshooting guide for solutions.
How long does it take for the paint to dry after using the Ryobi RAP200G Airless Paint Sprayer?
After using the Ryobi RAP200G airless paint sprayer, paint typically takes around 2-4 hours to dry completely. To properly clean the spray gun, disassemble it, soak the parts in warm soapy water, and use a brush to remove any remaining paint residue.
Can I use the Ryobi RAP200G Airless Paint Sprayer for textured surfaces?
Yes, the Ryobi RAP200G airless paint sprayer can be used on textured surfaces. However, there are alternative paint sprayers specifically designed for textured surfaces that may provide better results.
How often do I need to clean the spray gun of the Ryobi RAP200G Airless Paint Sprayer?
Cleaning the spray gun of the Ryobi RAP200G airless paint sprayer is essential for its proper functioning. On average, it is recommended to clean the spray gun after every use to prevent clogs and ensure consistent performance. Here are some tips for maintaining and troubleshooting common issues with the Ryobi RAP200G airless paint sprayer.
Can I use the Ryobi RAP200G Airless Paint Sprayer with different types of paint (e.g., latex, oil-based)?
Yes, the Ryobi Rap200g airless paint sprayer can be used with different types of paint such as latex and oil-based. Latex paint is easier to clean and dries quickly, while oil-based paint provides a more durable finish.
Conclusion
So there you have it – the complete guide on how to use the Ryobi RAP200G Airless Paint Sprayer.
I hope this article has provided you with all the information you need to confidently tackle your next painting project.
Remember, the key to success is in the preparation and proper maintenance of your sprayer.
By following the steps outlined in this guide, you’ll be able to achieve professional-looking results every time.
So go ahead, grab your Ryobi RAP200G and let your creativity flow.
Happy painting!
