
The saying, “One stroke of the brush can transform a room,” is accurate. If you want to achieve a professional, smooth finish with your chalk paint, using an airless paint sprayer is the way to go. Hi there, I’m here to guide you through the process of applying chalk paint with an airless paint sprayer.
In this article, we will start by understanding the basics of chalk paint and its unique properties. Then, we’ll delve into choosing the right airless paint sprayer for the job and preparing your surface for painting.
I’ll also share tips on mixing and diluting chalk paint for optimal spraying, as well as adjusting the settings on your airless paint sprayer.
We’ll cover everything from achieving a smooth and even finish to cleaning and maintaining your sprayer. And if you encounter any issues along the way, I’ve got you covered with troubleshooting tips.
So let’s get started and unlock the potential of your airless paint sprayer with chalk paint!
Key Takeaways
- Troubleshoot clogs by adjusting water content and ensuring no debris is present
- Achieve even coverage by checking the spray pattern and adjusting pressure accordingly
- Thoroughly mix chalk paint before using to prevent nozzle clogs and ensure a smooth flow
- Adjust spray pattern and pressure settings to achieve desired coverage, texture, and results

Baotree Airless Paint Sprayer, High-Pressure Electric Paint Spray Gun with Extension Rod, Thinning-Free Professional Painting Tool for Interior/Exterior Walls, Fences, Ceilings, Cabinets
1. High efficiency and time saving, the spraying speed is 5 times faster than traditional brushing ✅ High...
As an affiliate, we earn on qualifying purchases.
Understanding the Basics of Chalk Paint
Understanding the basics of chalk paint is important before diving into its application with an airless paint sprayer. Chalk paint techniques offer a unique and versatile way to transform furniture and other surfaces. One advantage of using chalk paint is its ability to adhere to various materials without the need for extensive prep work. Whether you’re painting wood, metal, or even fabric, chalk paint can provide a beautiful, matte finish that adds character and charm to any piece. Another advantage is its ease of use. Chalk paint can be applied directly without the need for priming or sanding, making it a time-saving option. Now that you understand the basics of chalk paint, let’s move on to choosing the right airless paint sprayer for the job.

VEVOR 750W Stand Airless Paint Sprayer, 3000PSI High Efficiency Electric Airless Sprayer, Fine and Even Painting Effect, Handheld Paint Sprayers for Home Interior and Exterior Furniture and Fences
Efficient Painting: Our stand airless paint sprayer is equipped with a powerful 750W motor, capable of delivering up...
As an affiliate, we earn on qualifying purchases.
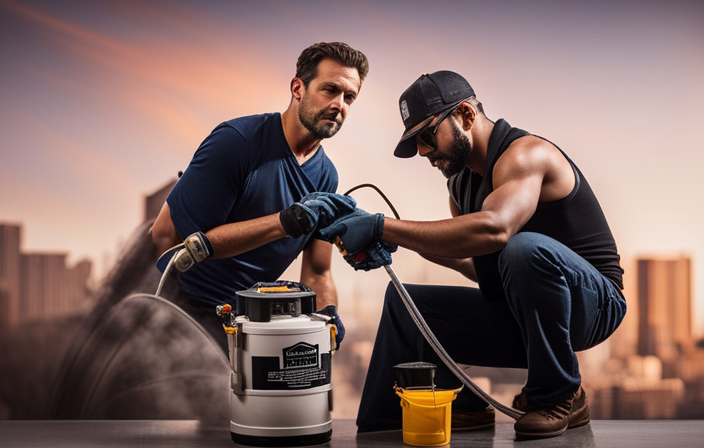
Choosing the Right Airless Paint Sprayer
To ensure optimal results, it’s important to select the appropriate airless sprayer for your project. When choosing an airless paint sprayer, consider factors such as:
- The size of your project
- The type of paint you’ll be using
- Your level of experience
It’s also essential to properly maintain the airless paint sprayer to avoid any issues during the painting process. Regularly check the spray tip for clogs and clean it thoroughly. Additionally, inspect the hose for any leaks or damage and replace if necessary.
Troubleshooting common airless paint sprayer issues, such as uneven spray patterns or excessive overspray, can be done by adjusting the pressure settings or cleaning the filters.
By taking these steps, you’ll ensure a smooth and efficient painting experience.
Now, let’s move on to preparing your surface for painting.

MaXpray M1 Airless Paint Sprayer, Highly Efficient Thinning-Free Minimal Overspray for Up to 10 Gallon DIY Painting Projects Home Interior & House Exterior, Comes with Sprayer Accessories
Your DIY Partner - All DIY Homeowners, upgrade your DIY game with the MaXpray M1 airless paint sprayer—far...
As an affiliate, we earn on qualifying purchases.
Preparing Your Surface for Painting
Before beginning your painting project, it is imperative to properly prepare the surface you will be working on. Surface preparation is key to achieving a smooth and long-lasting finish with chalk paint. One important step in surface preparation is sanding, which helps to remove any imperfections and create a clean and smooth surface for painting. When sanding, it is important to use the right techniques. Start by using a medium-grit sandpaper to remove any rough spots or old paint. Then, switch to a fine-grit sandpaper to smooth out the surface. Finally, use a tack cloth to remove any dust or debris before painting. By following these sanding techniques, you will ensure that your surface is ready for painting. Now, let’s move on to the next step of mixing and diluting chalk paint for spraying.

Graco Magnum 262805 X7 Cart Airless Paint Sprayer, Gray
CONTROL PAINT FLOW: Fully adjustable pressure to give you ultimate control of paint flow for any project size;...
As an affiliate, we earn on qualifying purchases.
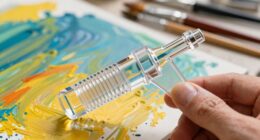
Mixing and Diluting Chalk Paint for Spraying
When you’re ready to transform your surface with a burst of color, it’s time to mix and dilute your chalk paint for a smooth and even spray, like a gentle mist floating effortlessly onto a canvas.
To achieve the perfect consistency, there are a few mixing techniques you can use. Start by stirring your chalk paint thoroughly to ensure an even distribution of pigments. If the paint is too thick for your airless paint sprayer, you can add a small amount of water to thin it out. However, be cautious not to add too much water, as it can affect the integrity of the paint.
A recommended paint ratio is typically one part water to two parts chalk paint. Once mixed, you can transition into adjusting the airless paint sprayer settings for optimal spraying results.
Adjusting the Airless Paint Sprayer Settings
Once you’ve got your chalk paint mixed and ready to go, it’s time to fine-tune the settings on your trusty paint sprayer.
The first thing you’ll want to do is adjust the pressure on the sprayer. This will depend on the thickness of your chalk paint and the desired coverage. Start with a lower pressure and gradually increase until you achieve the desired spray pattern.
Next, you’ll need to select the appropriate nozzle for your paint sprayer. The size of the nozzle will determine the width of the spray pattern. For chalk paint, a larger nozzle size, such as a 0.017 or 0.019, is usually recommended.
Once you’ve adjusted the pressure and selected the nozzle, you’re ready to move on to the next step – applying chalk paint with an airless paint sprayer.
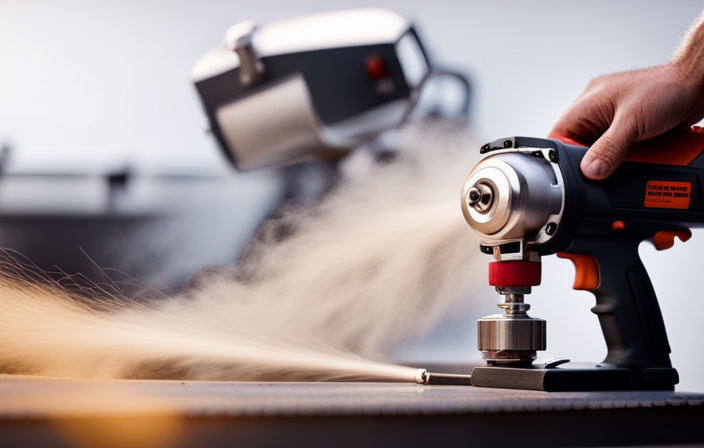
Applying Chalk Paint with an Airless Paint Sprayer
To achieve a flawless finish, confidently glide the nozzle of your paint sprayer over the surface. Effortlessly transform it with the smooth, velvety texture of chalk paint.
When applying chalk paint with an airless paint sprayer, mastering the spraying technique is important. Hold the sprayer about 12 inches away from the surface. Move it in a steady, controlled motion to ensure even coverage.
Pros of using an airless paint sprayer for chalk paint include its ability to cover large areas quickly and efficiently, saving you time and effort. It also provides a smooth and even finish, eliminating brush strokes or roller marks.
However, there are cons to consider as well. Airless paint sprayers can produce overspray, which may require additional masking or protection of surrounding surfaces. They can also be more challenging to clean than traditional brushes or rollers.
Now, let’s move on to the next section about achieving a smooth and even finish.
Achieving a Smooth and Even Finish
After applying chalk paint with an airless paint sprayer, the next step is achieving a smooth and even finish. This is crucial to achieving a professional look on your painted surface.
To achieve this, it is important to troubleshoot common problems that may arise during the painting process. One common issue is overspray, which can result in a blotchy or uneven finish. To prevent this, make sure to adjust the spray pattern and pressure settings on your sprayer according to the manufacturer’s instructions.
Additionally, keep the sprayer moving at a consistent speed and distance from the surface to ensure even coverage. Another problem that can occur is clogging of the sprayer nozzle. To avoid this, regularly clean and maintain your sprayer as per the manufacturer’s instructions.
By addressing these common issues, you can achieve a smooth and professional finish with your airless paint sprayer.
Moving on to the next section, let’s discuss cleaning and maintaining your sprayer for optimal performance.
Cleaning and Maintaining Your Airless Paint Sprayer
Regularly cleaning and maintaining your sprayer is essential for optimal performance and longevity. Follow proper cleaning techniques when using chalk paint in an airless paint sprayer to prevent clogs and maintain efficiency.
After each use, thoroughly flush the sprayer with clean water to remove any residual paint. Clean the spray tip and filter as well to prevent buildup.
If you encounter a stubborn clog, use a cleaning solution designed for paint sprayers. Regularly inspect and lubricate the sprayer’s parts to prevent future issues.
Taking these preventative measures will keep your airless paint sprayer in top shape and minimize the need for troubleshooting common issues in the next section.
Troubleshooting Common Issues
If you’re experiencing any issues with your sprayer, troubleshooting common problems can help you get back to enjoying your painting projects quickly and easily. Two common issues that may arise when using an airless paint sprayer with chalk paint are clogs and uneven coverage. To troubleshoot clogs, start by checking the viscosity of your paint. Chalk paint is thicker than regular paint, so you may need to thin it slightly with water. Additionally, make sure the nozzle and filters are clean and free from debris. For troubleshooting uneven coverage, check the spray pattern and adjust the pressure accordingly. It’s also important to maintain a consistent distance from the surface being painted. By following these troubleshooting tips, you can overcome these common issues and achieve a smooth, even finish with your airless paint sprayer. In the next section, I will provide some helpful tips and tricks for using chalk paint in an airless paint sprayer.
Tips and Tricks for Using Chalk Paint in an Airless Paint Sprayer
Now that we’ve discussed troubleshooting common issues with using chalk paint in an airless paint sprayer, let’s move on to some tips and tricks for achieving the best results.
When it comes to using chalk paint in an airless paint sprayer, there are a few things to keep in mind.
First, make sure to thoroughly mix the chalk paint before pouring it into the sprayer to avoid clogging the nozzle.
Additionally, adjust the spray pattern and pressure settings on the sprayer to achieve the desired level of coverage and texture.
If you’re looking to achieve a distressed look with chalk paint, consider lightly sanding the surface after painting and using a wax or glaze to add depth and character.
By following these tips and tricks, you’ll be able to achieve a beautiful finish with chalk paint using an airless paint sprayer.
Frequently Asked Questions
Can I use regular paint in an airless paint sprayer instead of chalk paint?
Yes, regular paint can be used in an airless paint sprayer as an alternative to chalk paint. However, it is important to ensure the paint is compatible with the sprayer and to follow the manufacturer’s instructions for proper use and cleaning.
What are the advantages of using an airless paint sprayer instead of a brush or roller for applying chalk paint?
Using an airless paint sprayer for applying chalk paint offers several advantages. Achieving a smooth finish is easier, with less brush or roller marks. It also allows for faster and more efficient coverage, saving time and effort.
Can I use a primer before applying chalk paint with an airless paint sprayer?
Yes, using a primer before applying chalk paint with an airless paint sprayer is recommended. It helps to create a smooth and even surface for the paint to adhere to. An airless paint sprayer is more efficient than a brush or roller, providing a faster and more consistent application.
How long does it take for chalk paint to dry when applied with an airless paint sprayer?
When using an airless paint sprayer, the drying time for chalk paint can be sped up by using a hairdryer on a low heat setting. To achieve a smooth finish, it’s best to apply thin coats and sand between layers.
Is it necessary to seal the chalk paint after applying it with an airless paint sprayer?
Yes, it is necessary to seal chalk paint applied with an airless paint sprayer. Sanding the surface before application ensures better adhesion. To achieve a smooth finish, use even strokes and maintain the recommended distance between the sprayer and the surface.
Conclusion
In conclusion, using chalk paint in an airless paint sprayer can be a game-changer for your painting projects. It allows for a smooth and even finish, while also saving you time and effort. By understanding the basics of chalk paint and choosing the right sprayer, you can achieve stunning results.
Remember to properly prepare your surface, mix and dilute the paint, and adjust the sprayer settings for optimal performance.
With proper cleaning and maintenance, your airless paint sprayer will continue to be a valuable tool for future projects.