
To spray fences with pickets and spindles effectively, set up your equipment with proper spray tips and maintain a consistent distance of about 10-12 inches from the surface. Use smooth, overlapping strokes, and control your speed for even coverage. For detailed parts, use short, controlled passes and inspect carefully for missed spots or drips. With careful technique and prep, you’ll achieve a professional finish—continue to explore tips for perfect results.
Key Takeaways
- Use high-quality sprayers with appropriate tips and maintain steady, 10-12 inch distance for detailed areas.
- Clean and dry pickets and spindles thoroughly before spraying to ensure proper adhesion.
- Use controlled, overlapping strokes and adjust spray technique for tight spaces and intricate parts.
- Short, careful passes help penetrate narrow gaps without oversaturating or causing runs.
- Inspect and touch up detailed areas with a brush for even coverage and a professional finish.

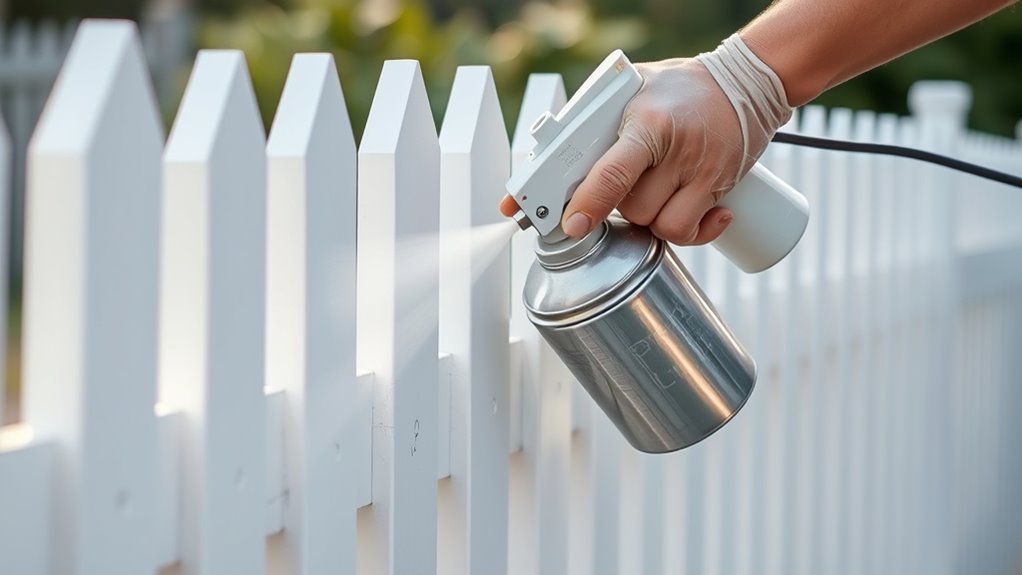
Spraying fences is an efficient way to achieve a smooth, even coat of paint or stain, saving you time and effort compared to traditional brushing or rolling. When tackling fences with pickets and spindles, proper technique and the right spray equipment make all the difference. You’ll want to start by choosing the appropriate spray equipment, such as a high-quality airless sprayer or a HVLP (high volume, low pressure) system, which can handle the intricate details of fencing with multiple pickets. These tools enable you to cover large areas quickly while maintaining control, ensuring you don’t miss spots or create drips.
Spraying fences with the right equipment ensures a smooth, efficient finish on detailed pickets and spindles.
Before you begin, prepare your surface thoroughly. Clean the fence to remove dirt, dust, or old paint, and let it dry completely. Mask off any areas you don’t want to paint, like hardware or adjacent surfaces. Once you’re ready, set up your spray equipment according to the manufacturer’s instructions. Adjust the pressure and spray tip size for precision, especially when working on narrow pickets and spindles. Proper setup helps you avoid over-spraying or uneven coverage, which can lead to drips or runs.
When applying the paint or stain, your brush techniques come into play. However, for fences with detailed pickets and spindles, spray application is usually faster and more consistent. Keep the spray gun at a steady distance—about 10-12 inches from the surface—and use smooth, overlapping strokes. Start moving the spray gun before you pull the trigger, and release the trigger before stopping at the end of each pass. This technique prevents buildup and ensures an even coat. Maintain a consistent speed; moving too fast can cause thin coverage, while moving too slow may lead to runs.
For the intricate parts, like spindles, you should pay special attention to angles and spray patterns. Short, controlled passes can help you get into tight spaces without oversaturating. If you notice pooling or runs, back off the spray and adjust your technique or equipment settings. After completing a section, inspect your work closely and do touch-ups with a brush if needed to reach areas where spray might not have penetrated fully.
Using the right brush techniques in conjunction with proper spray equipment setup helps you attain a professional finish on your fence. With patience and practice, you’ll find that spraying fences with pickets and spindles becomes a quick, effective way to enhance your outdoor space.
Frequently Asked Questions
What Is the Best Type of Paint for Spraying Pickets and Spindles?
For spraying pickets and spindles, you should choose a high-quality, exterior acrylic latex paint with a semi-gloss or satin finish. This type offers durability and easy cleaning, perfect for outdoor conditions. Use a spray technique with a fine tip nozzle to achieve a smooth, even coat. Make sure you prep the surface properly and apply multiple thin coats for the best paint finish that lasts.
How Do I Prevent Overspray When Spraying Fences?
Think of overspray as a ghost you must tame. To prevent it, choose the right spray tip—preferably a narrow or adjustable one—and practice consistent distance. Use masking techniques to shield nearby surfaces, much like a painter’s shield guarding their masterpiece. Keep your movements steady and overlap each pass slightly. With careful spray tip selection and thorough masking, you’ll minimize overspray and achieve a neat, professional finish on your fence.
Can I Spray Fences in Rainy or Humid Conditions?
You shouldn’t spray fences in rainy or humid conditions, as weather considerations affect paint adhesion and drying. High humidity slows drying, leading to drips and uneven coats. Always wear protective clothing to prevent paint contact with your skin and eyes. Wait for clear, dry weather with low humidity to ensure a smooth finish. Protect yourself and your project by checking weather forecasts and postponing spraying if conditions aren’t optimal.
How Long Should I Wait Between Coats of Paint?
Like waiting for a fine wine to mature, you should wait about 2 to 4 hours between coats, depending on your paint type and weather conditions. This drying time guarantees proper paint adhesion and reduces streaks. If you apply a second coat too soon, it can lead to peeling or uneven finish. Always check your paint’s label for specific recommendations, and verify the surface is dry and dust-free before applying the next coat.
What Safety Gear Is Recommended for Fence Spraying?
You should wear protective eyewear and a respirator mask when spraying your fence to stay safe. Protective eyewear shields your eyes from paint splatters and fumes, while a respirator mask filters out harmful vapors. Always make certain your gear fits properly and is rated for paint fumes. Taking these precautions helps prevent health issues and keeps you comfortable during the job. Safety first keeps the process smooth and your fence looking great.
Conclusion
Now that you’ve mastered spraying fences with pickets and spindles, your garden’s new coat of paint is like a fresh coat of armor, ready to stand tall and proud. Think of your brush as a magic wand, transforming dull wood into a vibrant, protective shield. With each spray, you’re painting not just a fence, but a lively scene that invites admiration. So, grab your sprayer and let your craftsmanship bloom like flowers in spring.