Airless Paint Sprayer Maintenance and Troubleshooting
Troubleshooting Guide: Fixing Common Issues with Airless Paint Sprayers
Introduction
Are you tired of dealing with troublesome airless paint sprayers, whether you’re a dedicated DIYer or an experienced painting professional? Fear not! This troubleshooting guide delves into common issues faced by airless paint sprayer users and provides practical solutions to resolve them.
Whether it’s clogged nozzles, uneven spray patterns, or inconsistent pressure, we’ve got your back. So grab your tools and let’s get ready to tackle those painting projects like a pro!
Common Airless Sprayer Problems and How to Solve Them
Airless paint sprayers are a popular choice for both professional painters and DIY enthusiasts. They offer convenience, speed, and efficiency when painting large surfaces. However, airless sprayers can encounter issues that may hinder their performance like any tool. This section will explore some common problems you might face while using an airless paint sprayer and provide practical solutions to troubleshoot them.
One of the most common issues with airless sprayers is clogging. This can occur when the spray tip becomes blocked by dried paint or debris. To solve this problem, you can try cleaning the tip with warm water or a specialized cleaning solution. Additionally, using a strainer or filter before pouring paint into the sprayer’s container can help prevent clogs.
Another issue that users often encounter is uneven spraying or spattering. This could be due to improper pressure settings or a worn-out spray tip. Adjusting the pressure according to the manufacturer’s recommendations and replacing worn spray tips should resolve this problem.
Leaks are another frequent problem with airless sprayers. These leaks usually occur at connection points such as hoses or fittings. Ensuring proper tightness of these connections and inspecting them regularly for wear or damage can prevent leaks from happening.
Inconsistent spray patterns can also be frustrating when using an airless sprayer. This problem may arise from incorrect material viscosity or an improperly adjusted fan pattern on the spray gun nozzle. Following the recommended viscosity guidelines for your specific type of paint and making necessary adjustments to achieve an even fan pattern should solve this issue.
If your airless sprayer fails to start or experiences intermittent power loss, check if there is sufficient electrical supply reaching the unit by testing outlets with other devices first. If power supply isn’t the issue, inspect cords for any damages along their length before considering contacting customer support.
By understanding and addressing these common problems that can occur with airless paint sprayers, you can get the most out of your equipment and ensure a successful painting job.
Tips for Maintaining Your Airless Sprayer
Regular maintenance is key to keeping your airless paint sprayer in top condition and ensuring it performs optimally. Here are some simple yet effective tips to help you maintain your sprayer:
1. Clean after Every Use: After each painting session, make sure to thoroughly clean the sprayer. Disassemble the components and rinse them with water or an appropriate cleaning solution to remove any paint residue.
2. Check Filters Regularly: Airless sprayers have filters that prevent debris from clogging the nozzle. Inspect these filters regularly and clean or replace them as needed. This will ensure a smooth flow of paint and prevent blockages.
3. Lubricate Moving Parts: Proper lubrication is essential for smooth operation of your airless sprayer. Apply lubricant to moving parts such as pistons, rods, and swivel joints according to the manufacturer’s instructions.
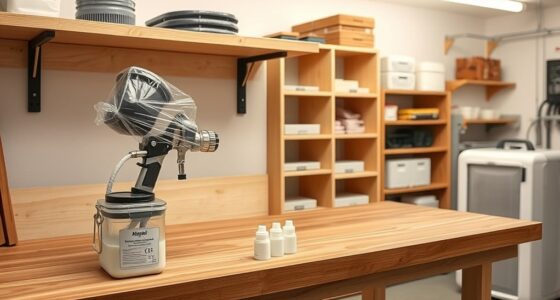
4. Store Properly: When not in use, store your airless sprayer in a cool, dry place away from extreme temperatures and direct sunlight. Protect it from dust by covering it with a cloth or plastic bag.
5. Conduct Routine Maintenance Checks: Schedule regular maintenance checks for your airless sprayer to identify any potential issues before they become major problems. Inspect hoses, nozzles, seals, O-rings, and other parts for wear or damage.
By following these maintenance tips consistently, you can extend the lifespan of your airless paint sprayer and ensure its reliable performance on every project!
Conclusion
Airless paint sprayers are a valuable tool for any DIY enthusiast or professional painter. They offer efficiency and convenience in completing painting projects quickly and with excellent results. However, like any equipment, they can sometimes encounter issues that need troubleshooting.
By identifying common problems such as clogged nozzles, uneven spray patterns, or leaking seals, you can take the necessary steps to fix them and get your sprayer back in working order. Regular maintenance is also crucial to ensure optimal performance and longevity of your airless paint sprayer.
Remember to always follow the manufacturer’s instructions for proper use and maintenance of your specific model. By taking good care of your sprayer and addressing any issues promptly, you can enjoy seamless painting experiences every time.
So next time you encounter a problem with your airless paint sprayer, don’t panic! Refer back to this troubleshooting guide for step-by-step solutions. With a little patience and know-how, you’ll be able to tackle those pesky issues head-on and get back on track with your painting project!
Happy spraying!
Whether it’s a step-by-step tutorial on achieving flawless finishes or an in-depth analysis of the latest airless paint sprayer models, Joe’s ability to articulate complex ideas in a simple and engaging manner resonates with our diverse audience. His practical tips and techniques empower readers to tackle their projects with confidence.
Airless Paint Sprayer Maintenance and Troubleshooting
How To Clean Airless Paint Sprayer
I get it – cleaning an airless paint sprayer can seem like a hassle. I’ve been there myself. But trust me, with the right tools and a little know-how, it’s not as difficult as it seems.
In this article, I’ll walk you through the step-by-step process of cleaning your airless paint sprayer, ensuring that it stays in top shape and ready for your next project.
First, we’ll gather all the necessary materials, including cleaning solutions and brushes. Then, we’ll prepare the sprayer by removing any excess paint and ensuring it is properly disconnected.
Next, we’ll disassemble the components and give them a thorough cleaning, making sure to soak and rinse them to remove any paint residue.
After that, we’ll move on to cleaning the sprayer body itself, paying special attention to any clogs or blockages. We’ll then flush the system with clean water to ensure that all traces of paint are removed.
Finally, we’ll test the sprayer to make sure it’s working properly and discuss how to store it correctly.
By following these detailed instructions and maintaining a regular cleaning schedule, you’ll be able to keep your airless paint sprayer in excellent condition, ready for your next paint job. So let’s dive in and learn how to clean your airless paint sprayer like a pro.
Key Takeaways
- Proper cleaning technique is important for maintaining the performance and lifespan of an airless paint sprayer.
- Regular cleaning of the sprayer is crucial for optimal performance, as neglecting to clean it can lead to clogs, uneven spray patterns, and reduced efficiency.
- Gather the necessary materials and equipment such as cleaning solutions, brushes, bucket/container, and rags/paper towels for effective cleaning.
- Follow the cleaning process, which includes releasing pressure and removing the nozzle, emptying remaining paint from the container, disassembling and cleaning components, soaking and rinsing components, cleaning the sprayer body, reassembling the sprayer, and performing a test spray with clean water.
Gather the Necessary Materials
Now that you’ve familiarized yourself with the airless paint sprayer, it’s time to gather all the materials you’ll need for the cleaning process.
To clean your airless paint sprayer effectively, you’ll need a few essential cleaning supplies. Firstly, make sure you have a bucket or container to hold the cleaning solution. You’ll also need a cleaning brush or a soft cloth to remove any paint residue. Additionally, gather some rags or paper towels to wipe down the sprayer and absorb any excess cleaning solution.
It’s important to follow the proper cleaning technique to ensure thorough cleaning. By using the right materials and techniques, you can maintain the sprayer’s performance and prolong its lifespan.
Now, let’s move on to the next section and prepare the sprayer for cleaning.
Prepare the Sprayer for Cleaning
To prepare the airless paint sprayer for cleaning, the first step is to release the pressure and remove the nozzle. This is done by turning off the sprayer and loosening the nozzle with a wrench.
Next, empty any remaining paint from the container and dispose of it properly.
Finally, disconnect any attachments or hoses from the sprayer to ensure a thorough cleaning process.
Release pressure and remove the nozzle
First, you’ll need to release the pressure and take off the nozzle. This step is crucial to remove paint residue and prevent clogging. To release the pressure, turn off the sprayer and disconnect the power source. Then, locate the pressure relief valve and slowly open it to release any built-up pressure. Next, remove the nozzle by twisting it counterclockwise. This will allow you to access the inside of the sprayer for thorough cleaning. To help you visualize the process, here is a table outlining the steps:
Step | Action |
---|---|
1 | Turn off the sprayer and disconnect the power source |
2 | Locate the pressure relief valve and slowly open it |
3 | Twist the nozzle counterclockwise to remove it |
Now that the pressure is released and the nozzle is removed, we can move on to the next step: emptying the remaining paint from the container.
Empty remaining paint from the container
After releasing the pressure and removing the nozzle, it’s time to get rid of the remaining paint from the container, making sure not to leave even a drop.
Proper disposal of leftover paint is essential to protect the environment. To empty the container, follow these steps:
-
Prepare a clean, empty container to transfer the remaining paint.
- Place a funnel on top of the container to avoid spills.
- Make sure the container is large enough to hold all the paint.
-
Slowly pour the paint from the airless paint sprayer container into the empty container through the funnel.
- Take your time to prevent splashing or spilling.
Now that you have successfully emptied the remaining paint, it’s time to move on to the next step: disconnect any attachments or hoses.
Disconnect any attachments or hoses
Now that you’ve successfully emptied out all the remaining paint, it’s time to disconnect any attachments or hoses. Start by carefully removing any cleaning attachments, such as spray tips or filters, from the airless paint sprayer. These attachments can accumulate paint residue, so it’s important to clean them separately.
Next, detach the hoses from both the sprayer and the paint container. Gently twist and pull the hoses to disconnect them, being cautious not to damage any of the components. Once detached, inspect the hoses for any clogs or buildup and clean them thoroughly if necessary. This step is crucial to ensure that your airless paint sprayer functions properly and delivers a clean spray.
With the attachments and hoses disconnected, we can now move on to the next section and learn how to disassemble and clean the components.
Disassemble and Clean the Components
To properly maintain your airless paint sprayer, it is imperative to dismantle and cleanse its various components. Disassembling the sprayer allows for a thorough cleaning, ensuring optimal performance for your next paint job. Here are some disassembling tips and effective cleaning methods to follow:
Component | Cleaning Method |
---|---|
Spray Gun | Remove the nozzle and filter, clean with warm soapy water, and use a brush to remove any clogs or debris. |
Pump Assembly | Disconnect the pump from the motor, clean the intake valve and filter with a solvent, and inspect for any damage or wear. |
Hose | Disconnect the hose from the sprayer, flush it with clean water to remove any paint residue, and inspect for any leaks or cracks. |
Pressure Control Knob | Remove the knob and clean it with a mild detergent, making sure to remove any paint buildup or debris. |
Once all the components are disassembled and cleaned, it’s time to move on to the next step: soak and rinse the components.
Soak and Rinse the Components
Don’t forget to give your components a good soak and rinse to ensure they’re ready for your next project! Soaking the components in a cleaning solution can help break down any residual paint or debris that may be stuck.
However, it’s important to consider the pros and cons of using cleaning solutions. While they can be effective in removing stubborn stains, they may also contain harsh chemicals that can be harmful to your health or damage the components. If you choose to use a cleaning solution, make sure to follow the manufacturer’s instructions and wear protective gloves and goggles.
After soaking, rinse the components thoroughly with clean water to remove any remaining cleaning solution. This step is crucial to ensure that no residue is left behind, as it can affect the performance of the paint sprayer.
Once the components are rinsed, it’s time to dry them effectively. To speed up the drying process, you can use a clean cloth or towel to gently pat them dry. Alternatively, you can let them air dry naturally, but this may take longer.
Now that the components are clean and dry, it’s time to move on to the next step: cleaning the sprayer body.
Clean the Sprayer Body
The heart of your painting arsenal, the sprayer body, deserves some TLC to keep it performing at its peak. To clean the sprayer body, you’ll need a cleaning solution specifically designed for airless paint sprayers. Before you start, remember to take proper safety precautions such as wearing gloves and safety goggles.
Here’s a quick and easy way to clean the sprayer body:
- Begin by disconnecting the sprayer from the power source and removing the nozzle and filters.
- Wipe down the exterior of the sprayer body with a clean cloth dampened with the cleaning solution.
- Use a small brush or toothbrush to scrub away any dried paint or debris from the body.
- Rinse the body thoroughly with water to remove any remaining cleaning solution.
Once the sprayer body is clean, it’s time to reassemble the sprayer and get ready for your next painting project.
Reassemble the Sprayer
Once you’ve finished cleaning, it’s time to put all the pieces of the sprayer back together and get ready for your next painting adventure. Reassembling the sprayer may seem daunting, but with the right techniques, it can be a breeze. Start by referring to the manual for specific instructions on how to reassemble each component. Make sure to align the parts correctly and securely tighten any screws or fittings. To ensure a smooth operation, lubricate any moving parts with the recommended oil or grease. If you encounter any difficulties, consult troubleshooting tips in the manual or contact customer support for assistance. Remember, a properly reassembled sprayer is crucial for achieving optimal painting results. Now, let’s move on to the next section and learn how to flush the system for a clean start.
Flush the System
To flush the system of an airless paint sprayer, I first fill the sprayer with clean water. Then, I connect the sprayer to a water source, ensuring a steady flow. Finally, I flush the system by spraying water through the nozzle, effectively removing any remaining paint or residue.
Fill the sprayer with clean water
Start by filling the sprayer with fresh, clean water. This is an important step in cleaning your airless paint sprayer as it helps to flush out any remaining paint or residue.
Here are some cleaning solution options you can use with the water:
- Vinegar and water mixture: This is a natural cleaning solution that helps to remove any built-up paint or debris.
- Bleach and water mixture: This solution is effective in killing any bacteria or mold that may have formed in the sprayer.
- Commercial paint sprayer cleaner: These cleaners are specifically designed to remove paint and clean the inside of the sprayer.
- Warm soapy water: This is a simple and effective solution for cleaning the sprayer.
Regularly cleaning your sprayer is crucial to maintain its performance and prolong its lifespan.
Once the sprayer is filled with water, you can then proceed to connect it to a water source for further cleaning.
Connect the sprayer to a water source
After filling the sprayer with water, it is important to connect it to a water source in order to effectively clean and maintain its performance. Did you know that regularly cleaning your sprayer can increase its lifespan by up to 50%? To ensure proper connectivity, follow these steps:
Step | Action |
---|---|
1 | Check the water source connection for any leaks or damages. |
2 | Attach the sprayer’s inlet hose to the water source using a secure connector. |
3 | Turn on the water source and adjust the water pressure control knob on the sprayer for optimal cleaning. |
Connecting your sprayer to a water source may resolve any connectivity issues and allow for an efficient cleaning process. Controlling the water pressure ensures thorough cleaning without causing damage to the sprayer. Once connected, you can proceed to the next step of flushing the system by spraying water through the nozzle.
Flush the system by spraying water through the nozzle
Now, let’s give your sprayer a refreshing cleanse by spraying water through the nozzle and rejuvenating its performance.
Flushing the system is an essential step in cleaning your airless paint sprayer and ensuring its longevity. To start, attach the sprayer to a water source, making sure the water pressure is set to the lowest setting.
Next, hold a bucket or container under the nozzle to catch the water that will be expelled. Activate the sprayer and spray water through the nozzle for a few minutes, allowing any leftover paint or debris to be flushed out.
If you notice any clogs or inconsistencies in the spray pattern, try adjusting the pressure or cleaning the nozzle with a small brush. Now, you’re ready to move on to the next step and test the sprayer’s functionality.
Test the Sprayer
First, you’ll want to grab a piece of scrap material to test the airless paint sprayer and make sure it’s working properly. This step is crucial to test the accuracy of the sprayer and troubleshoot any potential issues.
Connect the sprayer to the paint container and turn it on. Slowly squeeze the trigger to allow the paint to flow through the nozzle. Observe the spray pattern and make sure it’s even and consistent. Check for any clogs or irregularities in the spray.
If the sprayer isn’t working correctly, consult the user manual or contact the manufacturer for troubleshooting tips.
Once you’ve confirmed that the sprayer is functioning properly, you can move on to the next section on how to store the sprayer properly.
Store the Sprayer Properly
To ensure your sprayer remains in perfect condition for future use, it’s crucial to securely store it, preserving its power like a hidden treasure waiting to be unleashed. Proper storage is essential in preventing clogs and maintaining the efficiency of your airless paint sprayer. Here are some tips for storing your sprayer properly:
-
Clean the sprayer thoroughly: Before storing, make sure to clean the sprayer according to the manufacturer’s instructions. Remove any excess paint and clean all the components to prevent buildup and clogs.
-
Disassemble and organize: Take apart the sprayer and organize all the parts in a secure and labeled container. This will help you easily locate and assemble the sprayer when you need it again.
-
Store in a cool and dry place: Find a cool and dry place to store the sprayer. Avoid extreme temperatures and humidity, as they can damage the sprayer over time.
By following these proper storage techniques, you can ensure that your sprayer remains in optimal condition. In the next section, we will discuss how to maintain a regular cleaning schedule to further extend the life of your airless paint sprayer.
Maintain Regular Cleaning Schedule
Maintaining a regular cleaning schedule for my airless paint sprayer is crucial in ensuring its optimal performance. After each use, I make it a point to thoroughly clean the sprayer, removing any paint residue or debris that may have accumulated.
Additionally, regularly inspecting and replacing worn or damaged parts is essential to prevent any potential issues or malfunctions. I always adhere to the manufacturer’s instructions for maintenance, as they provide valuable guidance on how to properly care for and extend the lifespan of my sprayer.
Clean the sprayer after each use
After using the airless paint sprayer, make sure to clean it thoroughly. This is essential to maintain the sprayer’s performance and longevity.
Start by disconnecting the sprayer from the power source and relieving any pressure in the system. Then, disassemble the spray gun, nozzle, and filters. Use a suitable cleaning solution to remove any paint residue, ensuring all parts are thoroughly cleaned. Rinse them with water and allow them to dry completely before reassembling.
Pay attention to the filters and replace them if necessary. Regularly inspect and replace worn or damaged parts to ensure optimal functionality.
By following these cleaning and maintenance steps, you can keep your airless paint sprayer in excellent condition for future use.
Next, let’s discuss how to regularly inspect and replace worn or damaged parts.
Regularly inspect and replace worn or damaged parts
Regularly checking for signs of wear or damage is crucial for ensuring the longevity and optimal functionality of your sprayer.
Inspecting worn parts, such as the nozzle, seals, and hoses, is essential to identify any potential issues that may affect the performance of your airless paint sprayer.
Worn or damaged parts can lead to leaks, uneven spray patterns, or even complete breakdown of the sprayer.
If you notice any signs of wear or damage, it’s important to promptly replace the affected parts to maintain the efficiency of your sprayer.
By taking the time to regularly inspect and replace worn or damaged parts, you can avoid costly repairs and ensure that your sprayer continues to deliver professional-quality results.
Following the manufacturer’s instructions for maintenance will further enhance the performance and longevity of your airless paint sprayer.
Follow manufacturer’s instructions for maintenance
By adhering to the guidelines provided by the manufacturer, you can ensure that your sprayer remains in optimal condition for long-term use. Following the manufacturer’s instructions for maintenance is crucial to keep your airless paint sprayer working efficiently. Regular maintenance will not only extend the lifespan of your sprayer but also improve its overall performance.
Here are some essential maintenance tips to follow. Firstly, clean the sprayer thoroughly after each use to prevent any buildup or clogs. Secondly, inspect the filters and replace them if they’re worn or damaged. Additionally, regularly check the spray tip for any wear and tear and replace it if necessary.
Lastly, familiarize yourself with troubleshooting techniques provided by the manufacturer to address any issues that may arise during operation. By following these maintenance tips and troubleshooting techniques, you can ensure that your airless paint sprayer continues to deliver optimal results.
Frequently Asked Questions
How often should I clean my airless paint sprayer?
I recommend replacing the filters in your airless paint sprayer every 6-12 months to ensure optimal performance. Regularly cleaning your sprayer removes clogs and debris, leading to smoother paint application and a longer lifespan for your equipment.
Can I use any type of cleaning solution for the components?
Yes, you can use different types of cleaning solutions for the components of your airless paint sprayer. However, it is important to follow best practices for cleaning solution disposal to ensure proper safety and environmental protection.
Is it necessary to disassemble the components before cleaning?
Before cleaning, it’s crucial to disassemble airless paint sprayer components. This step ensures proper maintenance and efficient cleaning. By taking apart the parts, you can thoroughly remove paint residue and debris, ensuring optimal performance and longevity of the sprayer.
How long should I soak the components in the cleaning solution?
I recommend soaking the components in a suitable cleaning solution for at least 30 minutes. The soaking time allows the solution to effectively break down any paint residue. Make sure to use a cleaning solution specifically designed for airless paint sprayers.
Can I use a pressure washer to clean the sprayer body?
Using a pressure washer for sprayer cleaning is not recommended as it can damage the delicate components. Instead, opt for alternative cleaning methods such as using a brush, cloth, or a mild cleaning solution.
Conclusion
In conclusion, keeping your airless paint sprayer clean is crucial for its optimal performance. By following the steps outlined in this article, you can ensure that your sprayer remains in top shape and continues to deliver professional-quality results.
Remember, a clean sprayer is like a breath of fresh air for your painting projects, allowing you to breeze through them with ease. So don’t neglect the maintenance of your sprayer and enjoy the smooth and efficient painting experience it provides.
Keep painting, keep shining!
Whether it’s a step-by-step tutorial on achieving flawless finishes or an in-depth analysis of the latest airless paint sprayer models, Joe’s ability to articulate complex ideas in a simple and engaging manner resonates with our diverse audience. His practical tips and techniques empower readers to tackle their projects with confidence.
Airless Paint Sprayer Maintenance and Troubleshooting
How To Clean A Airless Paint Sprayer
Did you know that by cleaning your airless paint sprayer thoroughly, you can extend its lifespan by up to 50%? Regular maintenance and cleaning are essential to keep your sprayer in optimal condition and ensure a flawless paint job.
In this article, I will guide you through the step-by-step process of cleaning an airless paint sprayer, so you can maintain its performance and longevity.
First, we will gather the necessary cleaning supplies, including a cleaning solution, a brush, and a bucket.
Then, I will show you how to safely disconnect the sprayer from the power source and release any remaining pressure.
Next, we will tackle the spray tip and guard, removing and cleaning them thoroughly.
After that, we will disassemble the sprayer components, scrubbing away any paint residue.
Once everything is spotless, we will rinse and dry the components before reassembling the sprayer.
Finally, I will provide tips on how to store the sprayer properly for future use.
By following these simple steps, you can keep your airless paint sprayer in top shape and achieve professional-quality results every time. Let’s get started!
Key Takeaways
- Remove all paint from the sprayer components and thoroughly rinse and dry them
- Be cautious of leaving lint or fibers behind, and consider using air drying or a fan for faster drying
- Double-check all connections, inspect for any loose parts, and align the components correctly during reassembly
- Properly store the sprayer in a clean and dry environment, away from extreme temperatures and direct sunlight, and always store it upright to prevent leakage or damage.
Gather the necessary cleaning supplies
To clean your airless paint sprayer, you’ll need to gather the necessary cleaning supplies. These supplies include a bucket, cleaning solution, a brush, and some rags. Proper storage of these supplies is crucial to ensure they are readily available for future use.
Additionally, it’s important to take safety precautions while cleaning the sprayer. Make sure to wear protective gloves and eyewear to avoid any potential accidents.
Once you have gathered all the necessary supplies and taken the required safety measures, the next step is to disconnect the sprayer from the power source. This will ensure that you can clean the unit safely without any risk of electrical shock.
Disconnect the sprayer from the power source
After unplugging the power cord, it’s important to double-check that the sprayer is completely disconnected from any electrical source. This step is crucial for disconnecting safety and preventing damage. To ensure a safe disconnection, follow these steps:
Electrical Connections | Safety Measures |
---|---|
Unplug the power cord | Wear protective gloves |
Remove any extension cords | Use a voltage tester to confirm power is off |
Disconnect the sprayer from the power source | Inspect cord for any damage |
Store the power cord in a safe place | Keep children and pets away from the area |
By following these steps, you can eliminate the risk of electric shock and safeguard the sprayer from potential electrical damage. Once the sprayer is safely disconnected, the next step is to release the remaining pressure in the sprayer.
Release remaining pressure in the sprayer
Before moving on, it’s crucial to ensure that all the pressure is safely released from the sprayer. This step is essential for both safety and the longevity of your airless paint sprayer.
To safely release pressure from an airless paint sprayer, follow these tips:
- Start by turning off the power switch and unplugging the sprayer from the power source.
- Next, locate the pressure relief valve on the sprayer and turn it counterclockwise to release the pressure slowly. Be cautious as the pressure can be high, so release it gradually to avoid any accidents.
- Once all the pressure is released, you can proceed with the next steps for cleaning your airless paint sprayer.
Removing and cleaning the spray tip and guard is the next important task to maintain the efficiency of your sprayer.
Remove and clean the spray tip and guard
Once you’ve successfully released all the pressure, it’s time to tackle the important task of removing and giving a thorough cleaning to both the spray tip and guard. Cleaning techniques for the spray tip and guard are crucial to maintain optimal performance and prevent clogging.
Start by carefully unscrewing the spray tip from the guard using a wrench or pliers, being cautious not to damage the delicate components. Once removed, soak the tip and guard in a cleaning solution specifically designed for paint sprayers. Use a soft brush to gently scrub away any dried paint or debris. If there are stubborn clogs, you can use a small pin to clear the blockage.
After cleaning, rinse the tip and guard with water and dry them thoroughly before reassembling. These cleaning techniques and troubleshooting tips will ensure your spray tip and guard are in top shape for your next painting project.
Now let’s move on to disassembling the sprayer components.
Disassemble the sprayer components
Now it’s time to break down the different parts of your sprayer to prepare for a thorough cleaning and maintenance. Disassembling the sprayer components is an important step in ensuring the longevity and proper functioning of your airless paint sprayer. By taking apart the various parts, such as the spray tip, guard, and nozzle, you can access hard-to-reach areas and remove any built-up paint or debris. To help you visualize the disassembly process, refer to the table below:
Component | Description |
---|---|
Spray Tip | The nozzle that controls the spray pattern |
Guard | Protects the spray tip and prevents clogs |
Nozzle | Controls the flow rate and pressure of the paint |
When it comes to cleaning the sprayer components, it’s important to consider the effectiveness of the cleaning solution you use. While there are alternative cleaning methods available, using a suitable cleaning solution is generally the most effective way to remove paint residue and ensure optimal performance. Once you have disassembled the components, the next step is to soak them in a cleaning solution.
Soak the components in a cleaning solution
To effectively remove any residue or debris, I immerse the disassembled components of the airless paint sprayer in a powerful cleaning solution. This step is crucial in ensuring the cleaning solution’s effectiveness in breaking down any paint or stubborn residue that may have accumulated on the components.
A good cleaning solution should be specifically designed for paint sprayers and have strong cleaning properties. Alternatively, some people use a mixture of dish soap and warm water as a cleaning solution, but it may not be as effective as a specialized cleaner.
Soaking the components allows the cleaning solution to penetrate and dissolve any dried paint, making it easier to remove later on. Once the components have soaked for the recommended amount of time, it is time to move on to the next step: scrubbing the components to remove any remaining paint residue.
Scrub the components to remove paint residue
Get ready to roll up your sleeves and give those components a good scrubbing! When it comes to removing paint residue from difficult-to-reach areas, it’s important to use effective techniques. Here are three tips to scrub away stubborn paint buildup:
-
Use a stiff-bristled brush: A brush with firm bristles will help you reach into corners and crevices, ensuring a thorough clean.
-
Choose the right cleaning solution: To tackle stubborn paint residue, opt for a cleaning solution specifically designed for removing paint. Look for solvents that are safe to use with your airless paint sprayer’s components.
-
Apply pressure and scrub: While scrubbing the components, apply enough pressure to remove the paint residue without damaging the surface. Be thorough and take your time to ensure all areas are properly cleaned.
Once you’ve scrubbed away the paint residue, it’s time to move on to the next step of the cleaning process: rinsing and drying the components thoroughly.
Rinse and dry the components thoroughly
After you’ve given those components a good scrubbing, it’s essential to thoroughly rinse and dry them to ensure a pristine finish. Start by using clean water to rinse off any remaining paint residue. Make sure to pay extra attention to hard-to-reach areas and crevices.
Once all the paint is removed, use a clean cloth or towel to dry the components completely. You can also use compressed air to blow out any excess water or moisture. When drying, be careful not to leave any lint or fibers behind that can get caught in the sprayer. Additionally, consider using drying techniques such as air drying or using a fan to speed up the process.
If you prefer not to use water, there are cleaning solution alternatives available specifically designed for airless paint sprayers. These alternatives can effectively remove paint residue while leaving the components clean and dry.
With the components thoroughly rinsed and dried, it’s time to move on to reassembling the sprayer, ensuring everything is properly in place.
Reassemble the sprayer
Now it’s time to put all the pieces back together and have your sprayer ready for action again! Reassembling the sprayer is crucial to ensure its proper functioning. Here are some reassembling techniques and troubleshooting tips to guide you through the process:
Reassembling Techniques | Troubleshooting Tips |
---|---|
Double-check all connections | Inspect for any loose parts |
Align the components | Ensure proper alignment |
Tighten all screws securely | Check for leaks |
By following these steps, you can avoid any potential issues and ensure a smooth reassembly. Once you have reassembled the sprayer, it’s time to move on to the next section about storing the sprayer properly for future use. It’s important to take good care of your equipment to ensure its longevity and reliability.
Store the sprayer properly for future use
To safeguard the sprayer’s potential for future adventures, it’s imperative to bestow upon it a resting place of utmost care and reverence. Proper storage techniques are crucial to ensure the longevity and optimal performance of your airless paint sprayer.
After each use, it is of utmost importance to thoroughly clean the sprayer to prevent any residual paint from drying and clogging the system. Start by flushing out any remaining paint with a suitable solvent or cleaning solution. Next, disassemble the sprayer and clean all the individual components, paying close attention to the nozzle and filter. Once cleaned, allow the parts to dry completely before reassembling the sprayer.
Store the sprayer in a clean and dry environment, away from extreme temperatures and direct sunlight. Always keep the sprayer in an upright position to prevent any leakage or damage.
By following these proper storage techniques and cleaning the sprayer after each use, you can ensure its continued functionality and be ready for your next painting project.
Frequently Asked Questions
Can I use any cleaning solution to soak the components of the sprayer?
I recommend using a compatible cleaning solution to soak the components of the sprayer. Avoid using any random cleaning solution as it may damage the sprayer. There are alternative cleaning methods available, but it’s best to stick to recommended solutions for optimal results.
How often should I clean my airless paint sprayer?
Regular cleaning of your airless paint sprayer is crucial for optimum performance. Did you know that a well-maintained sprayer can last up to 10 years? Cleaning it after each use prevents clogs and ensures a smooth paint application.
Is it necessary to remove and clean the spray tip and guard after every use?
Yes, it is necessary to remove and clean the spray tip and guard after every use. This ensures proper functioning and prevents clogs. Cleaning frequency and proper storage are crucial for maintaining the longevity of your airless paint sprayer.
What is the best way to store the sprayer to prevent clogging?
To prevent clogging, store your airless paint sprayer properly by following these tips: 1) Use a clean, dry storage area away from dust and debris. 2) Consider using a storage fluid or pump protector to prevent drying and clogging.
Can I use a pressure washer to clean the components of the sprayer?
Using a pressure washer to clean the components of an airless paint sprayer is not recommended due to the risk of damaging delicate parts. It’s important to prioritize pressure washer safety and consider alternative cleaning methods instead.
Conclusion
In conclusion, cleaning an airless paint sprayer is a necessary task to ensure it’s optimal performance and longevity. By following the steps outlined in this article, you can easily maintain your sprayer and avoid any clogs or malfunctions.
Remember, just like a well-maintained machine, a clean sprayer will work smoothly and efficiently, allowing you to tackle your painting projects with ease. So, take the time to clean your sprayer properly and store it away for future use, and you’ll be ready to paint like a pro!
Whether it’s a step-by-step tutorial on achieving flawless finishes or an in-depth analysis of the latest airless paint sprayer models, Joe’s ability to articulate complex ideas in a simple and engaging manner resonates with our diverse audience. His practical tips and techniques empower readers to tackle their projects with confidence.
Airless Paint Sprayer Maintenance and Troubleshooting
The Benefits of Regular Maintenance for Your Airless Paint Sprayer
Are you tired of spending hours painting walls and other surfaces, only to end up with uneven lines and inconsistent coverage? Say goodbye to the tedious job of manual brushing and say hello to the efficiency of using an airless paint sprayer! These powerful tools are made to lighten your load, save you time, and guarantee a flawless finish.
But like any equipment, regular maintenance is crucial for optimal performance. In this blog post, we’ll explore the benefits of regular maintenance for your airless paint sprayer.
Whether you’re a DIY enthusiast or a professional painter, taking care of your sprayer will ensure it delivers exceptional results every time! So let’s dive in and discover how proper upkeep can make all the difference when it comes to your painting projects!
What Is an Airless Paint Sprayer?
An airless paint sprayer is a versatile tool that uses high pressure to propel paint onto surfaces. Unlike traditional brushes or rollers, which rely on physical contact with the surface, an airless sprayer atomizes the paint into tiny droplets, creating a fine mist that evenly coats the area being painted. This method allows for faster application and smoother results.
The main components of an airless paint sprayer include a motor, pump, hose, and spray gun. The motor powers the pump to draw in paint from a container or bucket and pressurize it. The pressurized paint then travels through the hose and out of the spray gun’s nozzle in a controlled spray pattern.
One of the key advantages of using an airless sprayer is its ability to cover large areas quickly. Whether you’re painting walls, fences, or even furniture, this tool can save you significant time and effort compared to manual methods.
Additionally, because the paint is sprayed at high pressure without relying on compressed air, there are no brush marks or roller texture left behind. This means you can achieve a professional-looking finish with minimal effort.
Another benefit of using an airless sprayer is its versatility when it comes to different types of coatings. From latex paints to oil-based enamels and even stains or varnishes – these sprayers can handle them all!
Investing in an airless paint sprayer opens up new possibilities for your painting projects by providing speed, precision, and exceptional results. However,
regular maintenance plays a vital role in ensuring your equipment continues performing at its best over time.
How Does Regular Maintenance Help Your Airless Paint Sprayer Work Better?
Regular maintenance is essential to keep your airless paint sprayer in optimal working condition. By performing routine maintenance, you can ensure that your spray gun continues to function effectively and efficiently.
One of the primary ways that regular maintenance helps your airless paint sprayer work better is by preventing clogs. Over time, paint particles and debris can accumulate inside the sprayer’s nozzle and hose, leading to blockages. By cleaning these components regularly, you can prevent clogs from occurring and ensure a smooth flow of paint.
In addition to preventing clogs, regular maintenance also helps maintain consistent pressure. The pump on an airless paint sprayer relies on seals and valves to maintain pressure during operation. Without proper maintenance, these seals and valves can wear out or become damaged over time, resulting in inconsistent pressure output. Regularly inspecting and replacing worn-out parts ensures that your sprayer maintains a steady flow of paint at the desired pressure.
Furthermore, regular maintenance extends the lifespan of your airless paint sprayer. Like any mechanical device, an airless sprayer requires proper care to avoid premature breakdowns or malfunctions. By following manufacturer-recommended maintenance procedures such as lubricating moving parts or changing filters regularly, you can significantly increase the longevity of your equipment.
By dedicating some time for regular upkeep of your airless paint sprayer through cleaning components thoroughly, checking for worn-out parts regularly,and following recommended procedures,you will not only enhance its performance but also extend its lifespan considerably!
Three Benefits of Regular Maintenance for Your Airless Paint Sprayer
Regular maintenance for your airless paint sprayer is essential to ensure optimal performance and longevity. By taking the time to properly maintain your equipment, you can experience several benefits that will ultimately save you time, money, and frustration in the long run.
Regular maintenance helps prevent clogs and blockages in the spray nozzle. Over time, paint residue can build up inside the nozzle, leading to reduced flow or uneven spray patterns. By regularly cleaning and inspecting the nozzle, you can avoid these issues and achieve a smooth and even application of paint every time.
Proper maintenance ensures that all components of your airless paint sprayer are functioning correctly. This includes checking hoses for any signs of wear or damage and replacing them if necessary. It also involves lubricating moving parts to reduce friction and extend their lifespan. By keeping everything in good working order, you can minimize downtime due to equipment failure and maximize productivity on your painting projects.
Regular maintenance allows you to identify any potential issues before they become major problems. Through routine inspections, you may notice leaks or other signs of damage that could lead to more significant repairs if left unattended. Catching these issues early on not only saves money on costly repairs but also avoids unexpected breakdowns when you need your airless paint sprayer most.
In conclusion (without using those words), regular maintenance is crucial for maximizing the performance and lifespan of your airless paint sprayer. With benefits like preventing clogs, ensuring proper functionality of components, and identifying potential issues early on – it’s clear that investing a little time into maintaining your equipment pays off in numerous ways! So don’t neglect this important aspect of owning an airless paint sprayer; keep it well-maintained for optimal results every time!
How Often Should You Perform Regular Maintenance on Your Airless Paint Sprayer?
Regular maintenance is essential to keep your airless paint sprayer in top-notch condition. But how often should you perform this maintenance? Well, the frequency of maintenance depends on various factors such as usage, environment, and the type of paint being sprayed.
Generally, it is recommended to perform basic cleaning after each use. This involves flushing out any remaining paint from the system and cleaning the filters. It’s a quick and simple task that ensures your sprayer stays clog-free and ready for the next job.
In addition to regular cleaning, more thorough maintenance should be performed every 50-100 hours of operation or at least once a year if you use your sprayer less frequently. This includes inspecting and replacing worn or damaged parts like seals, valves, and hoses. Lubricating moving components also helps prolong their lifespan.
Furthermore, pay attention to any changes in performance or unusual noises during operation. These could indicate issues that require immediate attention even if scheduled maintenance hasn’t been reached yet.
By following these guidelines for regular maintenance intervals, you can ensure that your airless paint sprayer operates smoothly and efficiently for years to come without unexpected breakdowns or costly repairs. Remember, prevention is always better than cure!
Conclusion
Regular maintenance is crucial for keeping your airless paint sprayer in top condition and ensuring optimal performance. By taking the time to perform routine maintenance tasks, you can extend the lifespan of your equipment, improve its efficiency, and achieve better results with each painting project.
Remember, prevention is always better than cure when it comes to maintaining your airless paint sprayer. Don’t wait until something goes wrong or your equipment starts showing signs of wear and tear. Implement a regular maintenance schedule from the very beginning to enjoy all the benefits that come with it.
So, don’t neglect your airless paint sprayer—give it the care and attention it deserves. With proper maintenance, you’ll be able to tackle any painting job with confidence and keep your equipment running smoothly for years to come! Happy painting!
Whether it’s a step-by-step tutorial on achieving flawless finishes or an in-depth analysis of the latest airless paint sprayer models, Joe’s ability to articulate complex ideas in a simple and engaging manner resonates with our diverse audience. His practical tips and techniques empower readers to tackle their projects with confidence.
-
Airless Paint Sprayer Reviews and Comparisons2 months ago
VONFORN Paint Sprayer Review: 700W HVLP Spray Gun (2023)
-
Airless Paint Sprayers FAQs3 months ago
How To Clean Graco Airless Sprayer After Using Oil Based Paint
-
Airless Paint Sprayers FAQs2 months ago
How To Make A Homemade Airless Paint Sprayer
-
Airless Paint Sprayers FAQs3 months ago
How To Clean My Airless Paint Sprayer Once I Used Oil Based Paint
-
Airless Paint Sprayers FAQs3 months ago
What Paint Recommended To Use In Graco Airless Paint Sprayer
-
Airless Paint Sprayers FAQs3 months ago
How To Lubricate An Airless Paint Sprayer
-
Airless Paint Sprayer Reviews and Comparisons2 months ago
InoKraft MaXpray M1: High-Efficiency Paint Sprayer (2023)
-
Airless Paint Sprayers FAQs2 months ago
How To Clean Dried Paint From Airless Sprayer Hose