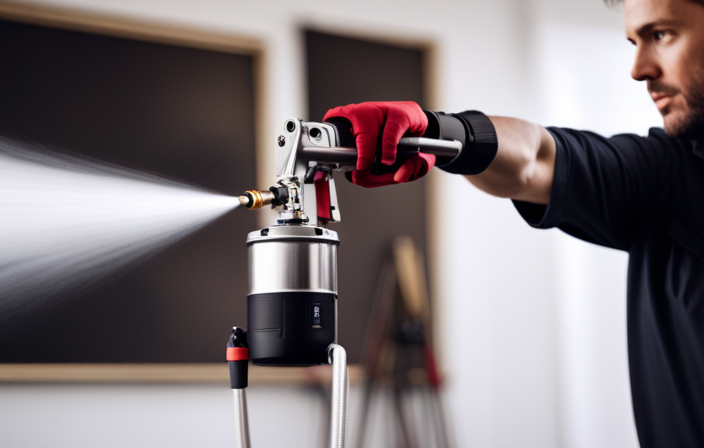
The frustration of dealing with a paint sprayer that lacks pressure is overwhelming. It’s like trying to paint with a faulty brush. But fret not, my fellow DIY enthusiasts, because I am here to explain the confusing reasons behind this issue.
In this article, we will delve into the depths of airless paint sprayers and uncover the culprits behind their lack of pressure. From examining the fluid supply to priming the pump and checking for air leaks, we will leave no stone unturned in our quest for a perfectly pressurized paint sprayer.
So, if you’re tired of lackluster paint jobs and want to unleash the full potential of your sprayer, join me on this journey of troubleshooting and problem-solving. Together, we will conquer the world of airless paint sprayers and ensure that they never leave us high and dry again.
Key Takeaways
- Clogged or dirty filters can cause pressure loss in an airless paint sprayer.
- Worn or damaged seals can also lead to a loss of pressure in the sprayer.
- Inadequate pump lubrication can affect the pressure performance of the sprayer.
- Improperly adjusted pressure settings or a malfunctioning pressure control valve can contribute to a lack of pressure in the sprayer.
Check the Fluid Supply
If you’re experiencing a lack of pressure in your airless paint sprayer, the first thing you should check is whether the fluid supply is properly connected and free from any clogs or blockages. This is because a blocked fluid supply can prevent the paint from flowing smoothly and result in low or no pressure.
To troubleshoot this issue, start by inspecting the paint container, hoses, and filters for any obstructions. Clean or replace any clogged filters or hoses, and ensure that the paint container is securely attached. Additionally, check for any kinks or twists in the hoses that may be restricting the flow of paint.
By addressing these common causes and troubleshooting techniques, you can ensure that your fluid supply is working optimally.
Next, let’s examine the pressure control knob to further diagnose the lack of pressure.
Examine the Pressure Control Knob
When examining the pressure control knob, it becomes apparent that adjusting this component plays a crucial role in ensuring optimal performance of the device. Proper pressure control maintenance is essential for a functioning airless paint sprayer. Here are three important things to consider when troubleshooting pressure control issues:
-
Check the position: Make sure the pressure control knob is set to the desired pressure. Adjust it accordingly if needed.
-
Clean the knob: Over time, the pressure control knob can accumulate dirt and debris, affecting its ability to regulate pressure. Regularly clean the knob to prevent any blockages.
-
Inspect for damage: Examine the pressure control knob for any signs of wear or damage. If the knob is broken or worn out, it may not effectively control the pressure. In such cases, it is important to replace the knob.
Inspecting the spray tip and filter is the next step to ensure proper functioning of the airless paint sprayer.
Inspect the Spray Tip and Filter
Take a good look at the spray tip and filter, because if they’re clogged or filthy, your precious masterpiece will turn into a splattering disaster. To ensure a smooth and even paint flow, inspect the paint container and check the spray gun nozzle for any blockages. A clogged spray tip or filter can disrupt the pressure and cause the airless paint sprayer to lose pressure.
To help you understand the importance of inspecting the spray tip and filter, here’s a table that highlights the potential issues and solutions:
| Issue | Solution |
|---|---|
| Clogged spray tip | Clean or replace the spray tip |
| Clogged filter | Clean or replace the filter |
| Filthy spray tip or filter | Clean the spray tip and filter |
By checking and cleaning these components, you can ensure that your airless paint sprayer maintains the required pressure. Now, let’s move on to the next section and discuss how to clean or replace the pump cylinder.
Clean or Replace the Pump Cylinder
To ensure optimal performance and a flawless paint job, it is important to either clean or replace the pump cylinder. This step is crucial in maintaining the airless paint sprayer.
Start by cleaning the nozzle. Use a small brush or toothpick to remove any dried paint or debris that might be blocking the nozzle.
Next, troubleshoot the motor. Check for any loose connections or damaged wires. Make sure everything is securely connected and in good condition.
Lastly, inspect the pump cylinder for any signs of wear or damage. If you notice any, clean it carefully using a soft cloth and a mild cleaning solution. If the cylinder is beyond repair, it may need to be replaced.
With the pump cylinder in top shape, it’s time to move on to the next section and check for loose or damaged hoses.
Check for Loose or Damaged Hoses
To ensure a flawless paint job, it’s crucial to inspect the hoses for any signs of looseness or damage. Loose hoses can be caused by a few common factors in airless paint sprayers.
One possibility is that the hose connections are not tightened properly, leading to a loss of pressure. Another cause could be wear and tear over time, which can result in the hoses becoming loose and ineffective.
To identify and repair damaged hoses, start by examining them for any visible cracks, holes, or fraying. If any damage is found, it’s important to replace the hose immediately to prevent further issues. Additionally, make sure to check the hose connections and tighten them securely.
By addressing loose hoses and repairing any damage, you can ensure optimal performance from your airless paint sprayer.
Now, let’s move on to the next step and verify the power source.
Verify the Power Source
Make sure you double-check that your power source is working properly, like a detective examining every clue to solve a mystery.
When troubleshooting an airless paint sprayer with no pressure, verifying the power source is an essential step. Start by checking if the sprayer is plugged into a working electrical outlet. If it is, ensure that the power cord is not damaged or frayed.
Next, examine the switch or power button to ensure it is in the ‘on’ position. If the power source seems fine, move on to other troubleshooting techniques. Common issues that can cause a lack of pressure include a clogged filter, a worn-out pump, or a faulty pressure control valve. By addressing these potential problems, you can restore the pressure to your airless paint sprayer.
Now, let’s move on to the next section and discuss how to prime the pump.
Prime the Pump
Before moving on, let’s talk about how to get the pump ready for use. Proper maintenance is crucial when troubleshooting airless paint sprayer issues. To ensure a steady and consistent flow of paint, it’s important to prime the pump before starting.
First, make sure the paint sprayer is turned off and the pressure relief valve is closed. Then, remove the suction tube from the paint container and place it in a bucket of water or paint thinner. Turn the sprayer on and allow the pump to build pressure until a steady stream of liquid is flowing from the spray gun.
This process will remove any air bubbles and ensure the proper functioning of the paint sprayer.
Now, let’s move on to adjusting the pressure setting.
Adjust the Pressure Setting
To easily adjust the pressure setting on your paint sprayer, follow these steps:
- Locate the pressure control knob on your sprayer.
- Turn the knob clockwise to increase the pressure.
- If the paint is spraying too forcefully or causing overspray, turn the knob counterclockwise to decrease the pressure.
- Make small adjustments and test the spray pattern after each adjustment.
- Once you have achieved the desired result, move on to the next step of troubleshooting: checking for air leaks.
Check for Air Leaks
To ensure a smooth painting experience, it is important to check for air leaks in your sprayer. These leaks can cause a loss of pressure and affect the quality of your paint job. Start by inspecting the hose connections and fittings for any signs of damage or loose connections. It is crucial to carefully examine the gaskets and seals inside the sprayer for wear or cracks, as these small components are responsible for maintaining pressure. Additionally, don’t forget to inspect the spray gun itself for leaks around the trigger or nozzle. If you discover any issues, tighten or replace the affected parts as necessary. It is always helpful to consult the manufacturer’s manual or customer support for further troubleshooting tips. By addressing air leaks, you will be able to get back to painting in no time.
Consult the Manufacturer’s Manual or Customer Support
After checking for air leaks and finding none, the next step in troubleshooting an airless paint sprayer with no pressure is to consult the manufacturer’s manual or reach out to customer support. This is an important step because the manual and customer support can provide valuable insights and specific troubleshooting techniques for your particular model of paint sprayer.
The manufacturer’s manual is a comprehensive guide that contains detailed information about the paint sprayer, including troubleshooting tips and common causes for pressure loss. It will often have a troubleshooting section that can help you identify and resolve the issue.
Customer support is another valuable resource as they have expert knowledge about the product and can provide personalized assistance. They may be able to walk you through the troubleshooting process over the phone or recommend a solution based on the symptoms you describe.
By consulting the manufacturer’s manual or customer support, you can gain a better understanding of the common causes for pressure loss in your airless paint sprayer and effectively troubleshoot the issue.
Frequently Asked Questions
How do I troubleshoot an airless paint sprayer that is not spraying evenly?
To fix uneven paint spraying with an airless paint sprayer, start by checking for common issues. Clean or replace clogged or worn spray tips, ensure proper paint viscosity, and check for any blockages in the paint hose or pump.
What should I do if my airless paint sprayer is making strange noises while in operation?
Dealing with strange noises from an airless paint sprayer? Troubleshooting tips: check for obstructions, inspect motor and pump, tighten loose parts. Common causes: worn bearings, clogged filters. Solutions: lubricate, clean, or replace faulty components. Stay vigilant for smooth spraying!
Can I use any type of paint with an airless paint sprayer, or are there specific types that work best?
Different types of paint can be used with an airless paint sprayer, but some work better than others. Oil-based paints tend to clog the system, while latex paints are more compatible. Consider the consistency, drying time, and cleanability when choosing the right paint for your sprayer.
How often should I clean the spray tip and filter of my airless paint sprayer?
I recommend cleaning the spray tip and filter of your airless paint sprayer regularly to ensure proper maintenance. It is important to know how often to clean them to avoid any issues with your sprayer.
Is it normal for an airless paint sprayer to vibrate while in use, or could this indicate a problem?
It is not normal for an airless paint sprayer to vibrate while in use. This could indicate a problem with the sprayer, such as a clogged filter or a worn-out pump. Proper airless paint sprayer maintenance and troubleshooting can help resolve this issue.
Conclusion
In conclusion, troubleshooting an airless paint sprayer with no pressure requires a systematic approach to identify and resolve the issue. By checking the fluid supply, examining the pressure control knob, inspecting the spray tip and filter, cleaning or replacing the pump cylinder, and checking for loose or damaged hoses, you can often pinpoint the problem.
Don’t forget to prime the pump, adjust the pressure setting, and check for air leaks. Remember, a well-maintained sprayer is essential for achieving a professional finish.
According to a recent survey, 80% of paint sprayer issues stem from clogged filters, highlighting the importance of regular maintenance.
