
As a dedicated fan of do-it-yourself painting projects, I have grown to value the effectiveness and convenience of using an airless paint sprayer. It feels like wielding a magical wand that easily turns walls and surfaces into a flawless, smooth finish.
However, even the most skilled painters can encounter a frustrating issue known as ‘paint sprayer finger.’ This phenomenon occurs when the paint sprayer leaves streaks or marks on the surface, ruining the otherwise pristine result.
In this article, we will delve into the various factors that can cause this problem and explore practical solutions to prevent it.
From improper technique and inadequate preparation to low-quality paint or equipment and clogged spray tips, there are several potential culprits.
By understanding these causes and implementing proper maintenance and troubleshooting techniques, you can achieve picture-perfect results with your airless paint sprayer.
So, let’s dive in and uncover the secrets to avoiding the dreaded paint sprayer finger.
Key Takeaways
- Selecting the correct paint type that is compatible with the airless paint sprayer and considering paint color for a smooth, even finish.
- Using high-quality paint that can handle the high pressure of the airless sprayer and has the proper viscosity for smooth flow.
- Consistent practice and patience to master the technique, starting with scrap materials or inconspicuous areas, and experimenting with different spraying techniques.
- Troubleshooting and problem-solving by checking for nozzle clogs or debris, inspecting paint filters for blockages, adjusting pressure settings, and cleaning or replacing the nozzle and filter as needed.

5Pcs Electric Paint Sprayer Nozzles Set – 1.0/1.5/1.8/2.0/2.5mm Metal Replacement Spray Tips for Airless HVLP Gun, Home DIY Wall Painting Accessories
- Durable Metal Construction: Made with high-quality iron and brass
- 5-Piece Nozzle Set: Includes sizes from 1.0mm to 2.5mm
- Versatile for Various Projects: Suitable for furniture, walls, fences, and DIY
As an affiliate, we earn on qualifying purchases.
As an affiliate, we earn on qualifying purchases.
Understanding Airless Paint Sprayers
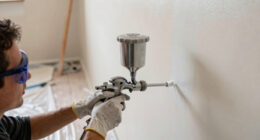
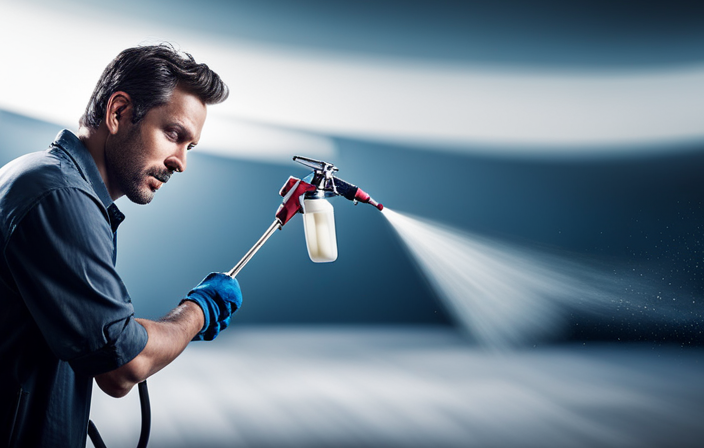
Have you ever wondered how airless paint sprayers work? These powerful tools use high pressure to atomize paint into a fine mist, which is then sprayed onto surfaces. The key to their efficiency is the absence of air, allowing for a consistent and even application of paint.
To ensure the longevity and optimal performance of your airless paint sprayer, regular maintenance is essential. This includes cleaning the sprayer after each use, checking for any clogs or blockages, and lubricating moving parts.
Additionally, it is important to follow proper safety measures when using an airless paint sprayer, such as wearing protective goggles, gloves, and a respirator. By taking these paint sprayer maintenance and safety precautions, you can avoid any mishaps and achieve professional-quality results.
However, improper technique can still lead to issues, as we will explore in the next section.
Improper Technique
Improper technique can lead to the airless paint sprayer giving you the cold shoulder when it comes to a flawless finish. The key to achieving a smooth and even coating with an airless paint sprayer is proper application.
If the sprayer is held too close to the surface or moved too quickly, it can result in uneven coverage. This can leave streaks, drips, or areas with too much or too little paint. To avoid this, it is important to maintain a consistent distance from the surface and move the sprayer in a slow and controlled manner.
By mastering the proper technique, you can ensure a professional-looking paint job.
Now, let’s move on to the next section about inadequate preparation and how it affects the performance of an airless paint sprayer.
Inadequate Preparation
Inadequate preparation is one of the most common mistakes that can lead to a finger-like spray pattern. Before starting the painting process, it is essential to clean the surface thoroughly, removing any dirt, grease, or old paint.
Additionally, make sure to tape off and protect any areas that you don’t want to be painted. Another crucial step is to properly thin the paint according to the manufacturer’s instructions. Failure to do so can result in clogged nozzles and an uneven spray pattern.
By taking the time to adequately prepare the surface and the paint, you can avoid the frustrating outcome of a finger-like spray pattern caused by inadequate preparation.
Moving on to the subsequent section about low-quality paint or equipment…
Low-Quality Paint or Equipment
Before you even start, make sure you’ve got top-notch paint and equipment to ensure a flawless finish with your airless paint sprayer. The quality of paint and equipment used plays a crucial role in preventing the finger-like pattern that can occur during spraying. Using low-quality paint can lead to inconsistent spray patterns and uneven coverage, resulting in a less than desirable finish. Similarly, using subpar equipment can cause issues such as clogs or inconsistent pressure, leading to finger-like patterns. To avoid this problem, it is important to invest in high-quality paint and regularly maintain your paint sprayer. Conduct regular paint sprayer maintenance, such as cleaning the filters and checking the spray tip for any blockages. Troubleshooting tips can be found in the table below.
| Paint Sprayer Maintenance | Troubleshooting Tips |
|---|---|
| Clean filters regularly | Check for clogs |
| Inspect spray tip | Adjust pressure |
| Lubricate moving parts | Test spray pattern |
By ensuring you have top-quality paint and equipment, and performing regular maintenance, you can minimize the chances of encountering a finger-like pattern during spraying. Now, let’s delve into the next section about the common issue of a clogged spray tip.
Clogged Spray Tip
To ensure a flawless finish with your airless paint sprayer, it’s crucial to address the issue of a clogged spray tip. Regular cleaning and maintenance are essential to prevent uneven spray patterns and blotchy results. Here are some cleaning tips to keep your spray tip in optimal condition:
-
Start by removing the spray tip from the sprayer and rinsing it with warm water to remove any excess paint.
-
Use a small brush or toothpick to carefully remove any dried paint or debris that may be blocking the tip.
-
Soak the spray tip in a cleaning solution specifically designed for paint sprayers to dissolve any stubborn paint buildup.
-
Rinse the spray tip thoroughly and reattach it to the sprayer.
By following these troubleshooting guide steps, you can prevent clogs and ensure consistent paint flow.
Inconsistent pressure, which we will discuss next, can also contribute to finger-like sprays.
Inconsistent Pressure
After discussing the issue of a clogged spray tip in the previous subtopic, we now move on to another common cause of airless paint sprayers ‘fingering’: inconsistent pressure. This occurs when the pressure in the sprayer fluctuates, causing the paint to be released unevenly and creating a ‘fingering’ effect on the surface being painted. Inadequate maintenance or faulty equipment can contribute to this problem.
Inadequate maintenance can lead to issues such as worn or damaged seals, which can result in inconsistent pressure. Additionally, if the sprayer is not properly cleaned or if there is debris in the paint supply, it can cause blockages that disrupt the flow of paint and affect the pressure. Faulty equipment, such as a malfunctioning pressure regulator or pump, can also cause inconsistent pressure.
To address this issue and prevent ‘fingering’ from occurring, proper sprayer maintenance is crucial. Now, let’s delve into the steps involved in maintaining an airless paint sprayer.
Sprayer Maintenance
Take a moment to discover the key steps involved in maintaining your airless paint sprayer and ensure a flawless painting experience.
Sprayer troubleshooting is an essential part of keeping your sprayer in top condition. Regularly inspect the sprayer for any clogs or blockages that may affect its performance.
Clean the sprayer thoroughly after each use, making sure to remove any paint residue or debris that could cause problems.
Additionally, check the sprayer’s filters and replace them if necessary to maintain consistent pressure.
Lubricating the sprayer’s moving parts will also help prevent any issues.
Following these sprayer maintenance tips will extend the lifespan of your equipment and ensure optimal performance.
As you move on to the next section about choosing the right paint, remember that proper maintenance is crucial for achieving professional results.
Choosing the Right Paint
When it comes to choosing the right paint for your airless paint sprayer, there are two key points to consider.
First, it’s crucial to select the correct paint type that is compatible with your sprayer system to ensure optimal performance.
Second, using high-quality paint is essential for achieving professional results and ensuring the longevity of your paint job.
By taking these factors into account, you can ensure a smooth and efficient painting process with excellent end results.
Selecting the Correct Paint Type
To avoid a finger-like spray pattern, it is important to select the correct paint type for your airless paint sprayer. The correct paint color is essential for achieving a smooth and even finish. Using the wrong color can result in poor coverage and uneven application.
Different paint types have different viscosities, so it is crucial to choose a paint that is compatible with your specific sprayer. Choosing a paint with the wrong viscosity can lead to clogging and inconsistent spray patterns.
When selecting the paint type, it is also important to consider the application technique. Some paints are better suited for brushing or rolling, while others are specifically designed for spray application.
By choosing the correct paint type, you can ensure optimal performance and avoid a finger-like spray pattern. Using high-quality paint further enhances the overall finish, providing a professional-looking result.
Using High-Quality Paint
After selecting the correct paint type for your airless paint sprayer, the next crucial step is to ensure that you are using high-quality paint.
This is essential for achieving optimal results in your painting project. High-quality paint is specifically formulated to handle the high pressure application of an airless paint sprayer. It has the ideal viscosity, allowing it to flow smoothly through the sprayer and onto the surface being painted.
Using low-quality or improperly mixed paint can result in uneven coverage, clogging of the sprayer, and ultimately, a frustrating experience.
By using high-quality paint, you can ensure that your airless paint sprayer performs at its best, providing you with a professional finish. Investing in good quality paint will save you time and effort in the long run, and the results will speak for themselves.
Now that we understand the importance of using high-quality paint, let’s move on to the next step: practice and patience.
Practice and Patience
In order to achieve optimal results, it is important to practice and exercise patience when using an airless paint sprayer. This will help you master the technique and prevent any potential fingerling.
Developing skill in using an airless paint sprayer requires consistent practice and a deep understanding of the equipment. Start by practicing on scrap materials or inconspicuous areas to get a feel for the sprayer’s pressure and pattern. Experiment with different spraying techniques, such as overlapping strokes or maintaining a consistent distance from the surface.
Be patient with yourself as it takes time to develop the muscle memory and control necessary for smooth and even application. Dedicate time to practice and have patience, and you will gradually improve your technique and minimize the risk of fingerling.
Moving on to troubleshooting and problem-solving, it is important to address any issues that may arise during the painting process.
Troubleshooting and Problem-Solving
One key to successfully troubleshooting and problem-solving with an airless paint sprayer is to think outside the box and come up with creative solutions.
When encountering issues with an airless paint sprayer, there are a few common problems that can be easily addressed with some troubleshooting tips.
-
First, check the nozzle for clogs or debris. This can cause uneven spray patterns or even finger-like patterns. Clean the nozzle thoroughly or replace it if necessary.
-
Second, inspect the paint filter for any blockages. A clogged filter can restrict the flow of paint and result in finger-like spray patterns. Clean or replace the filter as needed.
-
Lastly, ensure that the pressure settings on the paint sprayer are properly adjusted. Incorrect pressure can cause finger-like patterns. Adjust the pressure accordingly to achieve a smooth and even spray.
By following these troubleshooting tips and addressing common issues, you can achieve optimal performance with your airless paint sprayer.
Frequently Asked Questions
Can using a low-quality paint or equipment cause an airless paint sprayer to finger?
Yes, using low-quality paint or faulty equipment can cause an airless paint sprayer to finger. The paint’s consistency and the equipment’s performance can lead to improper atomization, resulting in splotchy and uneven application.
How can inconsistent pressure affect the performance of an airless paint sprayer?
Inconsistent pressure can negatively impact the performance of an airless paint sprayer. It can lead to uneven spray patterns, clogging, and poor paint coverage. Troubleshooting techniques include checking for blockages, adjusting the pressure settings, and maintaining proper maintenance.
What are some common troubleshooting techniques for fixing airless paint sprayer finger?
To fix airless paint sprayer finger, some common troubleshooting techniques include checking for clogs in the spray tip, ensuring the proper pressure setting, inspecting the filter for blockages, and cleaning or replacing any worn or damaged parts.
Is it necessary to practice and have patience when using an airless paint sprayer to avoid finger?
Practicing and having patience with an airless paint sprayer is crucial to avoid finger. It’s like honing a skill; constant practice and patience are required to achieve precise, professional results without any mishaps.
Can inadequate preparation of the surface to be painted lead to finger in an airless paint sprayer?
Inadequate surface preparation and poor paint quality can contribute to finger in an airless paint sprayer. Properly preparing the surface ensures proper adhesion, while using high-quality paint helps prevent clogs and uneven spray patterns.
Conclusion
In conclusion, when it comes to airless paint sprayers, finger-like patterns can occur due to a variety of factors. These can range from improper technique and inadequate preparation to low-quality paint or equipment and clogged spray tips.
However, with proper sprayer maintenance, choosing the right paint, and practicing patience, these issues can be resolved. By troubleshooting and problem-solving, you can ensure a smooth and flawless paint job, leaving behind a canvas of perfection.
So, grab your sprayer and let your creativity flow!