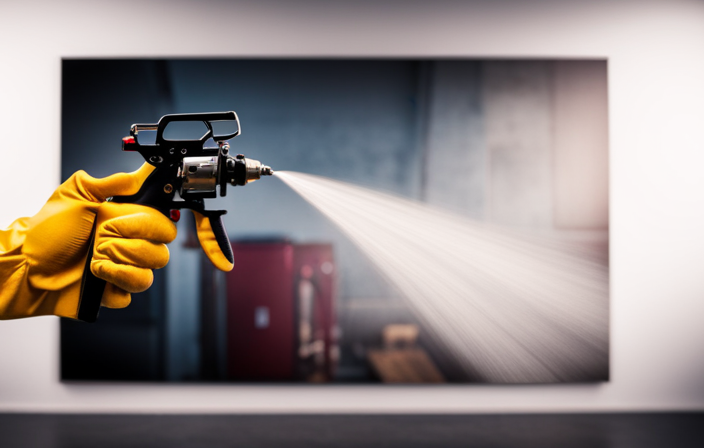
You’ve just gotten your hands on an airless sprayer and a fresh can of paint, all set to start your next project. But wait – before diving in, you’re met with a crucial decision: which tip should you choose?
Choosing the right tip for your airless sprayer can make all the difference in achieving a professional-looking finish.
In this article, I’ll guide you through the basics of airless sprayers and the different types of spray tips available. I’ll show you how to select the perfect tip for your specific project, whether you’re painting a small room or a large exterior surface.
We’ll also discuss some tips and techniques for achieving a smooth and even finish, troubleshooting common issues with spray tips, and how to properly clean and maintain your tips for long-lasting performance.
So, let’s dive in and uncover the secrets to using the right tip for paint on an airless sprayer.
Key Takeaways
- Experiment with different tip sizes to find the best one for your project
- Choose the correct tip size to reduce overspray and splatter
- Clean and maintain spray tips regularly for optimal performance
- Properly storing tips extends their lifespan and maintains sprayer efficiency

VEVOR 750W Stand Airless Paint Sprayer, 3000PSI High Efficiency Electric Airless Sprayer, Fine and Even Painting Effect, Handheld Paint Sprayers for Home Interior and Exterior Furniture and Fences
Efficient Painting: Our stand airless paint sprayer is equipped with a powerful 750W motor, capable of delivering up...
As an affiliate, we earn on qualifying purchases.
Understanding the Basics of Airless Sprayers
You’ll quickly become a pro at using airless sprayers once you understand the basics. Airless sprayers are powerful tools that can make your painting projects much easier and more efficient. They work by pumping paint at high pressure through a small opening, creating a fine mist that evenly coats surfaces.
One of the main benefits of using airless sprayers is their ability to cover large areas quickly. They can also be used with a variety of materials, including latex, oil-based paints, and stains. When it comes to choosing the right airless sprayer for your needs, there are two main types: electric and gas-powered.
Electric sprayers are more lightweight and portable, while gas-powered sprayers offer more power and are better suited for larger projects. Understanding the different types of airless sprayers and their applications will help you choose the right one for your specific painting needs.
Now, let’s move on to the next section about types of spray tips and their applications.

HomeRight Super Finish Max HVLP Paint Sprayer - 450 Watts, Model# C800971.M
PAINT SPRAYER FOR COUNTLESS DIY PROJECTS: The HomeRight Super Finish Max paint sprayer offers the ultimate DIYing experience....
As an affiliate, we earn on qualifying purchases.
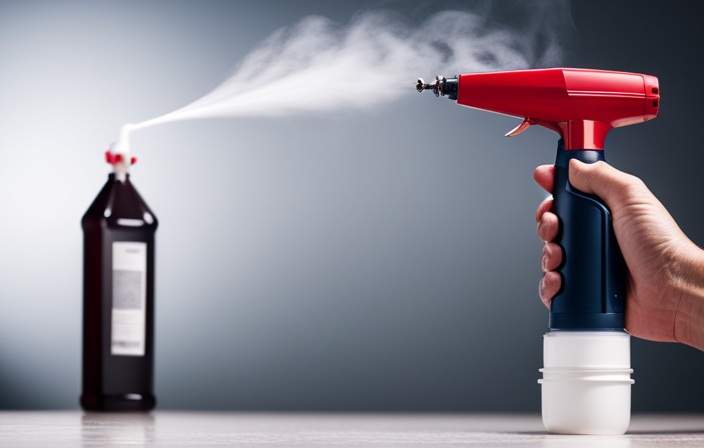
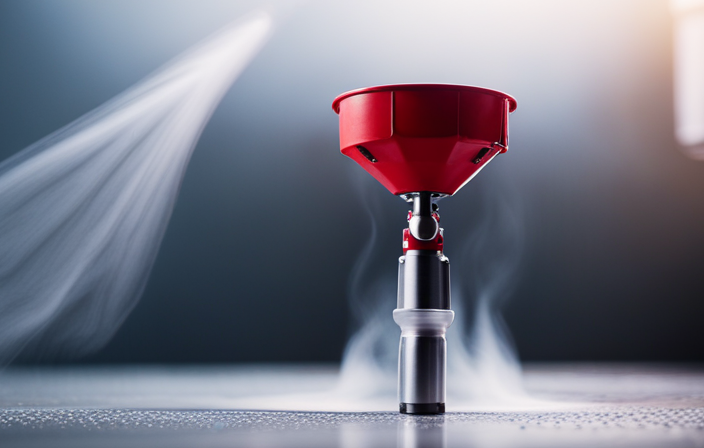
Types of Spray Tips and Their Applications
One interesting fact about spray tips and their applications is that they can greatly impact the efficiency and coverage of your painting projects. Spray tip selection is crucial for achieving the desired results.
Different spray tips are designed for specific applications, such as fine finishing, high-pressure coatings, and large surface coverage. The size of the tip determines the width of the spray pattern, while the orifice size controls the amount of paint being sprayed.
It’s important to choose the right spray tip for your project to ensure proper spray technique and maximize efficiency. By selecting the appropriate tip, you can achieve better control over the spray pattern, reduce overspray, and achieve a consistent finish.
Transitioning into the next section, let’s now explore the process of choosing the right tip for your project.

Graco Magnum 257025 Project Painter Plus Paint Sprayer
Ideal for projects up to 5 gallons in size, allowing you to tackle a range of projects every...
As an affiliate, we earn on qualifying purchases.
Choosing the Right Tip for Your Project
Finding the perfect spray tip for your project will make all the difference in achieving a flawless and professional finish. When it comes to spray tip selection, it’s important to consider the size of the tip, the material you’re spraying, and the desired coverage. Using the wrong tip can lead to common mistakes such as uneven coverage, overspray, or clogging. To help you choose the right tip, here is a table outlining the recommended tip sizes for different materials:
| Material | Recommended Tip Size |
|---|---|
| Latex Paint | 0.015 – 0.019 inches |
| Oil-based Paint | 0.013 – 0.017 inches |
| Stain or Varnish | 0.009 – 0.013 inches |
By selecting the appropriate tip size, you can ensure a smooth and even finish. Now, let’s move on to some tips for achieving a flawless result without any additional steps.

Graco Magnum 262800 X5 Stand Airless Paint Sprayer, Blue
Just right for DIY Homeowners and Remodelers looking for more power and mobility when tackling larger projects
As an affiliate, we earn on qualifying purchases.
Tips for Achieving a Smooth and Even Finish
When it comes to achieving a smooth and even finish with an airless sprayer, there are a few key points to keep in mind.
First, proper technique and spraying distance are crucial for ensuring an even application of paint. It’s important to maintain a consistent distance from the surface and use smooth, sweeping motions to avoid uneven coverage.
Second, overlapping strokes can help to blend the paint and prevent any noticeable lines or streaks.
Lastly, maintaining consistent pressure and speed throughout the project will help to prevent drips and ensure a professional-looking finish.
Proper Technique and Spraying Distance
To achieve a flawless finish with your airless sprayer, you need to master the proper technique and maintain the optimal spraying distance. Here are four key tips for proper technique and spraying distance:
-
Hold the spray gun perpendicular to the surface being painted, about 12 to 18 inches away. This allows for an even distribution of paint and minimizes overspray.
-
Move your arm smoothly in a consistent motion, keeping the gun parallel to the surface. Avoid stopping or hesitating in one spot, as this can result in uneven coverage.
-
Regularly clean and maintain your spray gun to ensure it operates smoothly. This includes checking the filters, unclogging the nozzle, and lubricating any moving parts.
-
Adjust the pressure on your sprayer to find the right balance. Too much pressure can cause the paint to atomize and create a rough finish, while too little pressure may result in a thin application.
By mastering these techniques and maintaining your spray gun, you can achieve a professional-looking paint job. Now, let’s move on to the next section about overlapping strokes and avoiding drips.
Overlapping Strokes and Avoiding Drips
To achieve a flawless finish, make sure your strokes overlap smoothly and avoid any drips that could mar your paint job, giving your project a polished and professional look.
When using an airless sprayer, overlapping your strokes is crucial to prevent uneven coverage and streaks. By adjusting the spray pattern and maintaining a consistent distance from the surface, you can achieve smooth and even layers of paint.
Avoiding paint buildup is important as it can lead to drips and an uneven finish. To prevent this, keep the sprayer moving at a steady pace and avoid lingering in one spot.
By following these techniques, you can achieve a flawless paint job with no drips or streaks. Maintaining consistent pressure and speed is the next key step to ensure an even application of paint.
Maintaining Consistent Pressure and Speed
Now that we’ve covered the importance of overlapping strokes and avoiding drips, let’s move on to maintaining consistent pressure and speed when using an airless sprayer. This is crucial for achieving a smooth and even coat of paint.
One key factor in maintaining consistency is maintaining the paint viscosity. Depending on the type of paint you’re using, you may need to adjust the pressure settings on your sprayer. This will ensure that the paint flows smoothly through the tip without splattering or clogging.
It’s important to regularly check the viscosity of your paint and make any necessary adjustments to the pressure settings to maintain an optimal spray pattern. By maintaining consistent pressure and speed, you’ll achieve professional-looking results.
Now, let’s move on to troubleshooting common issues with spray tips.
Troubleshooting Common Issues with Spray Tips
When it comes to using an airless sprayer, it’s important to be aware of common issues that can arise with spray tips.
One common problem is clogs and blockages, which can occur if the paint is too thick or if there is debris in the spray tip.
Another issue to watch out for is an uneven spray pattern, which can result from a damaged or worn-out spray tip.
Lastly, excessive overspray or paint splatter can be caused by using a spray tip that is too large for the job or by holding the sprayer too far away from the surface being painted.
Clogs and Blockages
Sometimes, even the tiniest speck of paint can cause clogs and blockages in your airless sprayer, making it feel like the sprayer has a mind of its own. To prevent clogs, it’s important to properly maintain and clean your spray tip regularly.
One effective technique is to use a tip cleaner or a small brush to remove any dried paint or debris that may be blocking the orifice.
Another troubleshooting technique is to check the paint viscosity and make sure it is within the recommended range for your sprayer. If the paint is too thick, it can lead to clogs and blockages.
By following these preventive measures and troubleshooting techniques, you can ensure a smooth and efficient painting process.
Now, let’s move on to the next section about dealing with uneven spray patterns.
Uneven Spray Pattern
To achieve a flawless finish, make sure your spray pattern is even and consistent. An uneven spray pattern can result in blotchy and streaky paint application, leading to poor coverage and an unprofessional look.
To improve coverage and achieve an even spray pattern, there are a few adjustments you can make. First, check the pressure settings on your airless sprayer and adjust accordingly. Lower pressure may result in a narrower spray pattern, while higher pressure can widen it.
Additionally, you can experiment with different tip sizes to find the one that works best for your specific project. Remember to test the spray pattern on a scrap piece of material before starting your actual painting.
By adjusting the spray pattern, you can prevent excessive overspray or paint splatter, which will be discussed in the next section.
Excessive Overspray or Paint Splatter
Achieve a flawless finish and avoid a messy, unprofessional look by minimizing excessive overspray or paint splatter. To minimize paint waste and prevent clogging issues, it’s crucial to choose the correct tip size for your airless sprayer. A tip with a smaller orifice will create a finer spray pattern, reducing overspray and splatter.
Additionally, adjusting the pressure on your sprayer can help control the amount of paint being released, further minimizing overspray. It’s also important to hold the sprayer at the correct distance from the surface being painted, typically around 12 inches. This ensures that the paint is evenly distributed without excessive splatter.
By following these tips, you can achieve a cleaner and more professional finish. Now, let’s move on to the next section about cleaning and maintaining your spray tips.
Cleaning and Maintaining Your Spray Tips
When it comes to cleaning and maintaining spray tips, there are a few key points to keep in mind. First, it’s essential to remove and soak the tips in a cleaning solution to remove any dried paint or debris. Secondly, using cleaning solutions and brushes can help thoroughly clean the tips and ensure they’re free from any clogs or blockages. Lastly, storing the tips properly after cleaning is important for their longevity, ensuring they’re protected from damage and ready for future use.
Removing and Soaking Tips
Experience the satisfaction of easily removing and soaking tips for a flawless paint job with your airless sprayer. When it comes to removing tips, it’s important to ensure that the sprayer is turned off and depressurized before starting.
Simply twist the tip counterclockwise to remove it from the spray gun. Once removed, soak the tips in a cleaning solution to remove any dried paint or debris. This will help maintain the performance and lifespan of your tips.
After soaking, use a brush to gently scrub the tips and remove any remaining residue. Now that you’ve mastered the art of removing and soaking tips, it’s time to move on to the next step of using cleaning solutions and brushes to thoroughly clean your airless sprayer.
Using Cleaning Solutions and Brushes
To effectively clean your equipment, it’s time to explore the benefits of using cleaning solutions and brushes.
Cleaning solutions are an essential part of maintaining your airless sprayer. They’re specifically designed to break down paint residue and prevent clogs in the system. When using a cleaning solution, make sure to follow the manufacturer’s instructions for the correct ratio and application method.
Additionally, brush maintenance is crucial for keeping your tips in optimal condition. Regularly clean your brushes with warm water and mild soap to remove any paint build-up. Be sure to rinse them thoroughly and allow them to dry completely before storing.
By incorporating cleaning solutions and maintaining your brushes, you can prolong the lifespan of your airless sprayer and ensure its peak performance.
Now, let’s move on to storing tips properly for longevity.
Storing Tips Properly for Longevity
Properly storing tips is essential for maximizing their lifespan and ensuring optimal performance of your equipment. When it comes to airless sprayers, proper storage can make a significant difference in the longevity of your tips.
To extend the tip lifespan, it’s crucial to clean them thoroughly after each use. Once cleaned, make sure the tips are completely dry before storing them. Moisture can lead to corrosion and damage over time.
Additionally, it’s important to store tips in a clean and dry environment, away from any potential contaminants or harsh chemicals. Keep them in a designated container or case to protect them from any accidental damage.
By following these proper storage practices, you can significantly extend the lifespan of your tips and maintain the efficiency of your airless sprayer.
Frequently Asked Questions
Can I use any type of paint with an airless sprayer?
Yes, you can use any type of paint with an airless sprayer. However, it’s important to consider airless sprayer maintenance and choose the best paint brands for optimal results.
How do I know if I need a small or large tip for my project?
To determine if you need a small or large tip for your project, consider the type of paint you’re using and the surface you’re painting. Thin or fine paints generally require a small tip, while thicker paints may need a larger tip for better coverage.
What is the recommended distance between the sprayer and the surface being painted?
The recommended distance between the sprayer and the surface being painted depends on the spray pattern. It is typically around 12 inches for a fine spray pattern and 18 inches for a wider spray pattern.
Can I use different tips for different areas of my project, such as corners or edges?
Different types of tips can be used for different areas of a project, such as corners or edges. This allows for precise application and better coverage. Alternative techniques like using a smaller tip can help reach tight spaces.
How often should I clean and replace my spray tip?
I recommend cleaning and replacing the spray tip on an airless sprayer regularly to ensure optimal performance. Cleaning frequency depends on usage, but a general guideline is to clean after every use. As for replacement, it’s advisable to do so when the tip starts showing signs of wear or clogging, which typically occurs after 200-300 gallons of paint.
Conclusion
So there you have it, folks! Choosing the right tip for your airless sprayer can make all the difference in achieving a flawless paint job.
With the wide array of tips available, it’s important to understand their applications and select the one that suits your project best.
By following the tips and techniques mentioned in this article, you’ll be well on your way to achieving a smooth and even finish that will leave your friends and neighbors in awe.
Remember to always clean and maintain your spray tips for optimal performance.
Now go forth and transform your space with the power of airless sprayers!