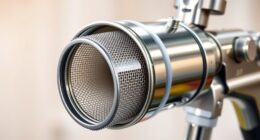
Yes, have you ever encountered the frustration of dealing with an ineffective airless paint sprayer? Trust me, I have been in the same situation.
As someone who has spent countless hours working with paint sprayers, I understand the importance of a smooth and consistent spray. That’s why I’m here to share my knowledge and experience with you.
In this article, we will explore the various reasons why your airless paint sprayer might not be spraying hard and provide you with practical solutions to fix the issue.
From checking the paint viscosity to inspecting the pump and fluid section, we will cover all the necessary steps to ensure your paint sprayer is working at its best.
So grab your tool belt and let’s dive into the world of troubleshooting airless paint sprayers together.
Key Takeaways
- Low spraying power can be caused by various factors such as clogged spray tips, insufficient pressure, worn-out pump parts, and inadequate paint thinning.
- Common issues with airless paint sprayers include uneven coverage, streaky finishes, inconsistent spray patterns, paint splattering, and excessive overspray.
- Troubleshooting the spray tip involves cleaning it thoroughly, removing any obstructions, checking for wear and tear, and replacing it if necessary.
- Pump-related problems can be addressed by checking for leaks, maintaining proper pressure, lubricating moving parts, replacing worn-out components, and following the manufacturer’s guidelines.
Check the Paint Viscosity
To troubleshoot your airless paint sprayer’s weak spray, start by checking the paint viscosity. It’s crucial to ensure that the paint consistency is suitable for the equipment. If the paint is too thick, it won’t flow properly through the sprayer, resulting in a weak spray pattern.
To check the paint consistency, use a viscosity cup or refer to the paint manufacturer’s guidelines. If the paint is too thick, adjust the paint flow by adding a small amount of thinner or water. This will improve the spray performance and ensure a smooth and even finish.
Once you’ve checked the paint viscosity, you can move on to the next step of cleaning or replacing the spray tip, which will be discussed in the following section.
Clean or Replace the Spray Tip
To improve your results, try cleaning or replacing the nozzle of your paint sprayer. A clean nozzle is essential for optimal performance. Paint sprayers may not spray effectively due to a clogged or worn-out spray tip. Over time, paint can accumulate and harden on the tip, obstructing the paint flow. Cleaning the spray tip can eliminate any clogs or debris causing the issue.
If cleaning doesn’t resolve the problem, consider replacing the spray tip. This ensures a properly functioning nozzle that delivers a consistent and powerful spray. Now, let’s move on to the next step and check for clogs in the spray gun or hose.
Check for Clogs in the Spray Gun or Hose
Inspect the spray gun or hose for any potential obstructions or blockages that may be impeding the flow of paint. When troubleshooting equipment issues with airless paint sprayers, it is crucial to check for blockages that can disrupt the painting process.
Start by examining the spray gun nozzle and hose for any debris or dried paint. Use a small brush or a toothpick to gently remove any clogs that you find. If the blockage persists, disconnect the hose from the gun and check for obstructions within the hose itself. Sometimes, small particles or paint chunks can accumulate and cause a decrease in paint flow.
Once you have ensured that there are no blockages, you can proceed to adjust the pressure settings to optimize the spray pattern and achieve the desired results.
Adjust the Pressure Settings
After checking for clogs, it’s time to fine-tune the pressure settings to achieve that perfect spray pattern.
Adjusting the pressure settings is a crucial step in troubleshooting your paint sprayer. It allows you to control the flow of paint and ensure an even application.
To begin, locate the pressure control knob on your sprayer. Turn it clockwise to increase the pressure and counterclockwise to decrease it. Start with a lower pressure setting and gradually increase it until you achieve the desired spray pattern.
Keep in mind that different paints may require different pressure settings, so it’s important to experiment and find the right balance.
Once you have adjusted the pressure settings, it’s time to inspect the pump and fluid section to ensure everything is functioning properly.
Inspect the Pump and Fluid Section
Inspect the pump and fluid section to ensure smooth operation. Pump maintenance is crucial for optimal performance.
- Check for clogs or obstructions in the pump and clean out debris.
- Inspect seals and gaskets for wear or damage, replacing if necessary.
- Use troubleshooting techniques to identify and address any pump issues.
- Regularly inspect and maintain the pump and fluid section for optimal performance.
Transitioning into the next section, it’s important to prime the pump properly to enhance functionality.
Prime the Pump Properly
To get the pump working smoothly, make sure to prime it properly, just like how a car needs gas to run smoothly. When troubleshooting airless paint sprayers, one common mistake is not priming the pump correctly.
Priming the pump is essential because it removes any air from the system, ensuring a consistent and even flow of paint. To prime the pump, start by filling the paint container with the desired paint and then attach it to the sprayer.
Next, turn the sprayer on and hold the spray gun against a waste area. Slowly increase the pressure until a steady stream of paint is seen coming out of the gun. This process will ensure that the pump is properly primed and ready to spray smoothly.
Now, let’s move on to the next section and discuss how to make sure the paint is mixed well.
Make Sure the Paint is Mixed Well
Ensure that you’ve thoroughly mixed the paint before moving forward, as it’s crucial for achieving a flawless finish. Properly mixing the paint ensures that all the pigments are evenly distributed, preventing any streaks or color variations on your surface. To troubleshoot your paint sprayer, follow these steps:
| Common Issues | Possible Solutions |
|---|---|
| Paint is not spraying properly | Check the viscosity of the paint and adjust if necessary. Clean the nozzle and ensure it’s not clogged. |
| Uneven spray pattern | Double-check that the paint is mixed well and not too thick. Adjust the pressure settings on your sprayer. |
| Paint is splattering or spitting | Make sure the paint is properly strained to remove any debris. Adjust the air pressure to a suitable level. |
| Paint is coming out in droplets | Check if the paint is too thick or if the nozzle is clogged. Clean or adjust accordingly. |
By following these guidelines, you can troubleshoot your paint sprayer and achieve optimal results. Next, we will discuss how to check for air leaks in the system.
Check for Air Leaks in the System
To check for air leaks in your system and achieve a flawless finish, follow these steps:
- Inspect all connections and fittings, ensuring they are tightly secured and undamaged.
- Examine the paint hose for any cracks or holes that could be causing air leakage.
- If any issues are found, replace the hose immediately.
By maintaining a tight and secure system, you will be able to achieve a smooth and consistent spray pattern. Now, let’s move on to the next section and discuss the importance of using the correct size spray tip.
Use the Correct Size Spray Tip
Using the correct size spray tip is crucial for achieving optimal results and reducing overspray by up to 50%.
When it comes to airless paint sprayers, the spray tip plays a vital role in determining the spray pattern and the amount of paint being applied.
It is important to select the correct spray tip size based on the type of coating and the surface being painted. Using a tip that is too small can cause the paint to come out in a narrow stream, resulting in uneven coverage and poor penetration. On the other hand, using a tip that is too large can lead to excessive overspray and wasted paint.
To ensure the correct spray technique and troubleshoot common issues, it is essential to choose the right spray tip size. Refer to the manufacturer’s guidelines or consult with a paint professional to determine the appropriate tip size for your specific project.
By using the correct size spray tip, you can achieve a smooth, even finish and minimize any potential problems. However, if you encounter difficulties or are unsure about the correct spray tip to use, it is always recommended to seek professional assistance.
Seek Professional Assistance if Needed
If you’re feeling unsure or overwhelmed, don’t hesitate to reach out to a professional for help with your painting project. Sometimes, despite our best efforts, an airless paint sprayer may not spray as hard as we’d like. This can be frustrating and may lead to uneven coverage or streaky finishes.
In such cases, seeking professional assistance is a wise choice. Professionals have the knowledge and experience to troubleshoot common paint sprayer issues and can provide valuable insights and solutions. They can help identify if the problem lies with the spray tip, the pump, or any other component of the sprayer.
They can also guide you in choosing the correct size spray tip for your specific project, ensuring optimal performance. Taking a professional approach can save time, effort, and ensure a successful paint job.
Frequently Asked Questions
How do I check the paint viscosity when using an airless paint sprayer?
When using an airless paint sprayer, I can check the paint viscosity by using a viscosity cup or a flow cup. These tools allow me to measure the thickness of the paint and troubleshoot any issues with paint spraying.
What should I do if the spray tip is clean but the paint is still not spraying hard?
If the paint is not spraying hard even though the spray tip is clean, I would recommend troubleshooting the airless paint sprayer. Check for clogs in the system, ensure proper pressure and flow, and inspect the pump and filters for any issues. Regular spray tip maintenance is also important.
How can I adjust the pressure settings on my airless paint sprayer?
To adjust the pressure settings on your airless paint sprayer, locate the pressure control knob and turn it clockwise to increase pressure or counterclockwise to decrease pressure. This troubleshooting technique can help resolve spray issues.
What are some signs of air leaks in the system and how can I check for them?
Some common causes of air leaks in an airless paint sprayer system include loose fittings, worn seals, and damaged hoses. To troubleshoot, visually inspect the components for any signs of damage or looseness. Tighten fittings and replace any worn seals or damaged hoses.
When should I seek professional assistance for issues with my airless paint sprayer?
If troubleshooting tips don’t solve the issue, seeking professional assistance for problems with an airless paint sprayer is necessary. For example, I once had a clogged nozzle that I couldn’t fix myself.
Conclusion
In conclusion, troubleshooting an airless paint sprayer that won’t spray hard can be a complex task. By following the steps outlined in this article, you can effectively diagnose and resolve the issue.
- Remember to check the paint viscosity.
- Clean or replace the spray tip.
- Inspect the pump and fluid section.
One example of a potential problem could be a clog in the spray gun or hose, which can easily be resolved by thoroughly cleaning or replacing the affected component.
If you are unsure or unable to fix the problem yourself, it’s always wise to seek professional assistance to ensure the best results.
