
Tutorial: Painting the Exterior of a Stucco House Using an Airless Sprayer.
-
Preparing the Surface:
- Clean the stucco surface thoroughly to remove dirt, debris, and loose paint.
- Repair any cracks or damaged areas with stucco patching compound.
- Allow the surface to dry completely before proceeding.
-
Selecting the Right Paint and Equipment:
- Choose a high-quality acrylic or elastomeric paint specifically designed for stucco.
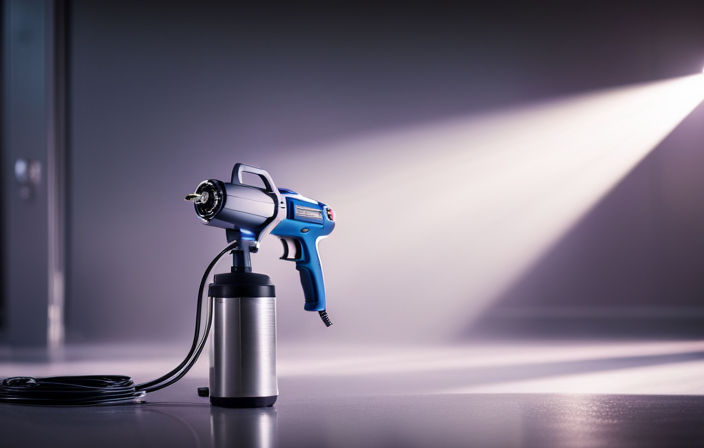
- Ensure that your airless sprayer is suitable for spraying thick coatings.
- Use a spray tip with a fan width that matches the texture of your stucco.
-
Priming the Stucco:
- Apply a coat of primer to the stucco surface to promote adhesion and improve paint durability.
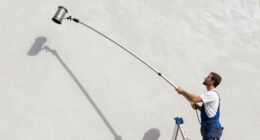
- Use a roller or brush to prime hard-to-reach areas and ensure thorough coverage.
-
Masking Off Areas:
- Protect windows, doors, and other surfaces from overspray by using plastic sheeting and painter’s tape.
- Take your time to mask off areas carefully, ensuring clean lines and a professional finish.
-
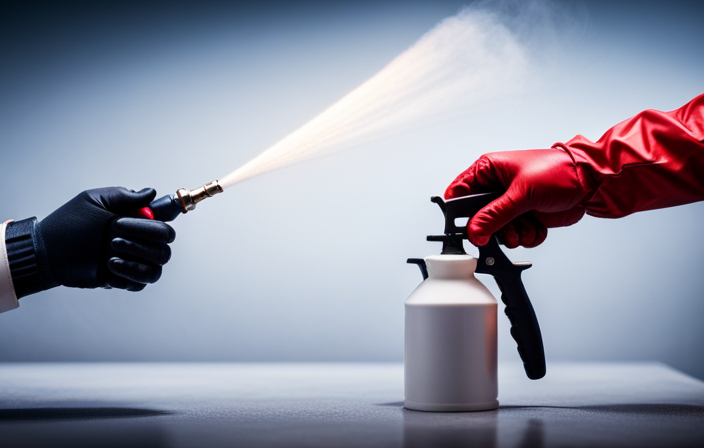
Painting with an Airless Sprayer:
- Start at the top of the house and work your way down, applying the paint in even, overlapping strokes.
- Pay attention to detail, ensuring that all surfaces are covered and there are no missed spots.
- Maintain a consistent distance between the sprayer and the stucco surface for even coverage.
-
Cleaning and Maintenance:
- After each use, clean your airless sprayer thoroughly according to the manufacturer’s instructions.
- Remove any leftover paint from the sprayer and ensure all components are free of clogs or blockages.
-
Allowing Sufficient Drying Time and Evaluating the Results:
- Follow the paint manufacturer’s instructions for drying time before applying additional coats or removing masking.
- Step back and evaluate the results, making any necessary touch-ups or corrections.
By following these step-by-step instructions, you can achieve a flawless paint job on the exterior of your stucco house using an airless sprayer. Remember to take your time, pay attention to detail, and enjoy the process of transforming your home into a work of art.
Key Takeaways
- Proper preparation and attention to detail are essential for a successful paint job on a stucco house.
- Maintaining consistent speed and distance while spraying is crucial for a smooth finish.
- Applying multiple coats and allowing sufficient drying time between coats ensures complete coverage and a long-lasting finish.
- Regularly cleaning and maintaining the sprayer, as well as inspecting and touch up the paint job as needed, will help maintain a professional and flawless appearance.

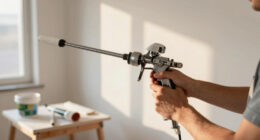
VEVOR 750W Stand Airless Paint Sprayer, 3000PSI High Efficiency Electric Airless Sprayer, Fine and Even Painting Effect, Handheld Paint Sprayers for Home Interior and Exterior Furniture and Fences
Efficient Painting: Our stand airless paint sprayer is equipped with a powerful 750W motor, capable of delivering up…
As an affiliate, we earn on qualifying purchases.
As an affiliate, we earn on qualifying purchases.
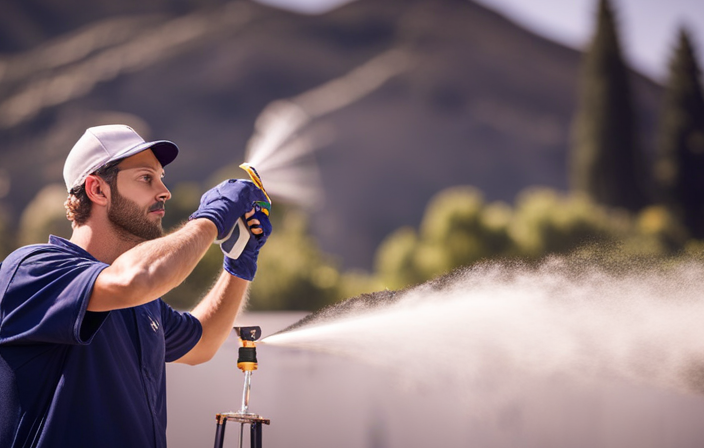
Prepare the Exterior Surface
Now it’s time to get your stucco house looking fresh and vibrant! Surface preparation is key to achieving a smooth and long-lasting paint job.
Start by thoroughly cleaning the exterior surface using a pressure washer or a scrub brush and detergent. This will remove dirt, grime, and any loose paint.
Next, inspect the stucco for any cracks or damage. Repair these areas by filling them with a high-quality stucco patching compound. Smooth the patched areas with a trowel and allow them to dry completely.
Once the surface is clean and repaired, it’s time to choose the right paint and equipment for the job.
Transitioning into the next section, selecting the appropriate paint and equipment will ensure a professional finish.
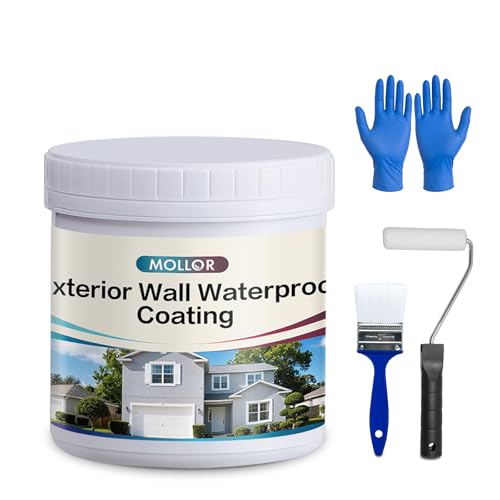
Mollor Waterproof Exterior Paint and Primer In One, Outdoor White Paint for Wall, Stucco and Brick Paint, Exterior, Flat, 32 Oz
HIGH-QUALITY ADHESION: This high-quality, outdoor white paint for wall offers excellent hiding properties with great adhesion on textured…
As an affiliate, we earn on qualifying purchases.
As an affiliate, we earn on qualifying purchases.
Choose the Right Paint and Equipment
When it comes to painting the exterior of a stucco house with an airless sprayer, selecting the appropriate paint type is crucial. It’s important to choose a paint that is specifically designed for stucco surfaces to ensure proper adhesion and durability.
Additionally, gathering the necessary tools and supplies is essential for a successful paint job. This includes an airless sprayer, paint brushes, rollers, drop cloths, and masking tape.
Select the Appropriate Paint Type
To make your stucco house shine, you can easily choose the perfect paint type. When selecting the appropriate paint for your exterior, there are two key factors to consider: choosing the right paint color and understanding different paint finishes. The color you choose can greatly impact the overall look and feel of your home. It’s important to consider the style of your house, the surrounding environment, and your personal preferences when deciding on a color. Additionally, understanding different paint finishes, such as flat, satin, or gloss, can help you achieve the desired effect. For example, a flat finish can hide imperfections, while a gloss finish can provide a sleek and modern look. By carefully considering these factors, you can select a paint type that will enhance the beauty of your stucco house. Now, let’s move on to gathering the necessary tools and supplies for the painting process.
Gather the Necessary Tools and Supplies
Get ready to gather all the essential tools and supplies you’ll need to transform your stucco house into a work of art! Start by choosing the right paint color that will complement your house and enhance its curb appeal. Consider the architectural style of your home and the surrounding environment to make an informed decision.
Once you have selected the perfect color, it’s time to gather the necessary tools and supplies. Here’s a list to get you started:
- Airless sprayer: This will ensure a smooth and even application of paint.
- Paint roller: Use this to reach areas that the sprayer may not be able to cover.
- Paint brushes: Perfect for cutting in and touching up small areas.
- Drop cloths: Protect your surfaces from paint splatters.
- Masking tape: Use it to cover windows, doors, and other areas you don’t want to paint.
Follow these tips for achieving a smooth finish: clean the stucco surface thoroughly, repair any cracks or damage, and apply a coat of primer before painting.
With all your tools and supplies ready, you’re now prepared to prime the stucco surface and create a flawless canvas for your paint.

Acrylux Elastomeric Patch for Stucco and Concrete – Textured & Smooth Patching Compounds – Fills Cracks, Holes, and Imperfections in Masonry, Stucco, Wood (Textured Brush Grade)
Premium Quality: High-performance elastomeric textured patch for professional-grade results.
As an affiliate, we earn on qualifying purchases.
As an affiliate, we earn on qualifying purchases.
Prime the Stucco Surface
Before starting to paint the stucco surface, I always make sure to apply a stucco primer. This helps to create a smooth and even base for the paint to adhere to.
Additionally, I allow sufficient drying time for the primer to fully dry before moving on to the next step.
By following these key points, I ensure that the paint job on my stucco house will be long-lasting and flawless.
Apply a Stucco Primer
Start by preparing the stucco surface, ensuring it is clean, smooth, and free from any loose debris or dust particles. Proper surface preparation is crucial for a successful painting project. It helps the primer adhere better and ensures a smooth and even application. Here are some tips to achieve a flawless primer coat:
-
Clean the surface: Use a pressure washer or a stiff bristle brush to remove dirt, mold, and mildew. Allow the stucco to dry completely before proceeding.
-
Repair any damage: Fill in any cracks or holes with a quality stucco patch. Smooth it out with a trowel and let it dry according to the manufacturer’s instructions.
-
Apply the primer: Choose a stucco primer specifically designed for exterior surfaces. Use an airless sprayer for an even coat. Start from the top and work your way down, overlapping each pass by 50%.
After applying the primer, allow sufficient drying time before moving on to the next step of the painting process.
Allow Sufficient Drying Time
Make sure to give the primer enough time to dry completely before moving on to the next step of your painting project. This is crucial because if the primer isn’t completely dry, it can affect the paint’s adhesion and result in a less durable finish.
Importance of proper ventilation:
- Proper ventilation is essential for quick and even drying of the primer.
- It helps prevent fume buildup, making the painting process safer for you and the environment.
- Good airflow reduces drying time, allowing you to move on to the next step sooner.
Tips for painting in hot weather:
- Choose a cooler time of day, like early morning or late afternoon, to minimize the impact of high temperatures.
- Consider using a fan or opening windows to improve airflow and aid in drying.
- Stay hydrated and take regular breaks to avoid overheating.
Once the primer is completely dry, you can proceed to mask off areas you don’t want to paint, such as windows or trim.

Scotch Rough Surface Extra Strength Painters Tape, 1.5 Inch Wide (1.41 in. X 60 Yds) 1 Roll, Green Tape Protects Surfaces and Removes Easily, Painting Tapes for Indoor and Outdoor Use (2060-36AP)
TACKLE INDOORS AND OUTDOORS: Resists UV rays, sunlight and moisture so you can use it as an indoor…
As an affiliate, we earn on qualifying purchases.
As an affiliate, we earn on qualifying purchases.
Mask Off Areas
To ensure clean lines and prevent overspray, I carefully tape off any windows, doors, or other areas that I don’t want to be painted. This creates a visual barrier between the stucco and those surfaces. It’s important to take these protective measures to avoid any unwanted paint on the surrounding areas.
Additionally, if you’re not confident in your ability to mask off these areas properly, it may be wise to seek professional assistance. They have the experience and expertise to ensure a clean and precise paint job.
Once all the necessary areas are masked off, it’s time to start painting. Transitioning into the next section, it’s important to follow the proper steps to achieve the best results.
Start Painting
Now that the necessary areas are properly masked off, it’s time to start painting the exterior of the stucco house.
As I pick up the airless sprayer, I can’t help but feel excited about the transformation that is about to take place.
To achieve a smooth finish, it’s important to keep a consistent speed and distance while spraying. I find that overlapping each pass by about 50% helps to ensure even coverage.
If any common painting problems arise, such as drips or uneven texture, I make sure to address them immediately by adjusting the sprayer settings or using a brush to even out the paint.
With these tips in mind, I’m confident that the end result will be nothing short of stunning.
Now, let’s move on to the next step and apply additional coats for a flawless finish.
Apply Additional Coats
As you continue, remember to maintain a consistent speed and distance while applying additional coats for a flawless finish. When applying the second coat of paint to your stucco house, it is crucial to ensure that the first coat has dried completely. This will prevent any smudging or streaking that could occur if the paint is still wet. Allow sufficient drying time between coats as recommended by the manufacturer, typically around 24 hours. Applying the second coat will help to even out the color and coverage, providing a more uniform appearance. Remember to overlap each stroke slightly to ensure complete coverage. As we move into the next section about paying attention to detail, it is important to keep in mind that a well-executed paint job requires careful attention and precision.
Pay Attention to Detail
Take the time to carefully inspect every nook and cranny, ensuring that every intricate detail is given the attention it deserves. When painting the exterior of a stucco house with an airless sprayer, paying attention to detail is crucial.
A thorough surface preparation is vital for a successful paint job. Check for any cracks, chips, or imperfections in the stucco and fix them before starting to paint. Make sure to clean the surface thoroughly, removing any dirt, debris, or loose paint. Pay special attention to areas around windows, doors, and corners, as these tend to accumulate more dirt and require extra care.
Properly preparing the surface will ensure a smooth and long-lasting finish.
Now, let’s move on to the next section about how to clean and maintain the sprayer.
Clean and Maintain the Sprayer
Make sure you give that trusty sprayer a little TLC by cleaning and maintaining it regularly. After all, who needs a clogged nozzle or a malfunctioning pump when you’re trying to achieve that flawless finish?
Cleaning equipment after each use is crucial to keep it in good working condition. Start by flushing the sprayer with water to remove any paint residue. Then, disassemble the nozzle and soak it in a cleaning solution to remove any stubborn paint buildup. Don’t forget to clean the filters and screens as well.
Additionally, inspect the sprayer for any worn or damaged parts and replace them as needed. Troubleshooting tips include checking the pressure settings and ensuring proper lubrication of moving parts.
By taking the time to clean and maintain your sprayer, you’ll ensure optimal performance and prevent any unexpected issues that could delay your project.
Now, onto the next step – allow sufficient drying time for the paint to set.
Allow Sufficient Drying Time
To ensure a successful paint job on a stucco house, it is crucial to allow sufficient drying time. Good airflow is an important factor to consider, as it helps the paint dry faster and more evenly. Open windows and doors or use fans to create a breeze and promote proper ventilation. Several factors can affect drying time, including temperature, humidity, and the type of paint used. Generally, warmer temperatures and lower humidity levels result in faster drying times. It is also important to note that oil-based paints typically take longer to dry than latex paints. By giving the paint enough time to dry completely, you can achieve a smooth and durable finish. Once the paint has fully dried, you can evaluate and enjoy the results of your hard work.
Evaluate and Enjoy the Results
Wow, you won’t believe how amazing your stucco house looks now that the paint has dried! It’s important to take the time to evaluate the effectiveness of your painting job and ensure you achieve a professional finish.
One tip is to stand back and assess the overall appearance of the house. Look for any areas that may need touch-ups or additional coats of paint.
It’s also a good idea to inspect the stucco surface for any imperfections or unevenness. If you notice any, consider using a roller or brush to correct them.
Another helpful tip is to check for any paint drips or splatters on windows, doors, or other surfaces. Use a damp cloth or sponge to remove them before they dry.
By following these tips, you can achieve a flawless, professional-looking finish on your stucco house.
Frequently Asked Questions
How long does the paint typically last on the exterior of a stucco house when applied with an airless sprayer?
The paint on the exterior of a stucco house, when applied with an airless sprayer, typically lasts for several years. To maintain the paint, regular cleaning and inspections are recommended. When choosing paint, opt for high-quality products that are specifically formulated for stucco surfaces.
Can I use an airless sprayer to paint a stucco house if it has previously been painted with a different type of paint?
Yes, you can use an airless sprayer to paint a stucco house that has been previously painted with a different type of paint. The airless sprayer’s maintenance and the benefits of using it make this possible.
Are there any special considerations or techniques for painting stucco that has a textured surface?
When painting textured stucco, it’s important to use the right techniques and the best paint for textured surfaces. The surface can be compared to a rugged mountain, requiring careful application and attention to detail.
What safety precautions should I take when using an airless sprayer to paint the exterior of a stucco house?
When using an airless sprayer to paint a stucco house, I take safety precautions seriously. I always wear protective gear, secure the area, and maintain my equipment to ensure safe and efficient work.
Can I use an airless sprayer to apply a waterproof coating or sealant on my stucco house after painting it?
Yes, you can use an airless sprayer to apply a waterproof coating or sealant on your stucco house after painting it. It provides added protection against water damage, unlike alternative sealing methods.
Conclusion
In conclusion, painting the exterior of a stucco house with an airless sprayer can be a time-saving and efficient method. By following the proper steps of preparation, choosing the right paint and equipment, and paying attention to detail, you can achieve professional-looking results.
One interesting statistic to note is that using an airless sprayer can save up to 50% of the time compared to using a brush or roller.
So, if you’re looking to transform your stucco house, consider using an airless sprayer for a quicker and more effective painting process.