As someone who owns a home, I understand how overwhelming it can be to tackle a big painting project. However, I have to say, using an airless sprayer truly changes the game. It’s like having the expertise of a professional painter right in your hands.
In this article, I’m going to show you step by step how to paint your house with an airless sprayer, making the process easier, faster, and more efficient.
We’ll start by preparing your house for painting, ensuring a smooth and clean surface. Then, I’ll guide you in choosing the right paint and equipment, so you can achieve the perfect finish. Safety is crucial, so I’ll share some important measures to keep in mind throughout the project.
Once you’re all set, we’ll dive into priming the surfaces and then get into the fun part – painting with the airless sprayer. I’ll provide tips on how to take breaks and evaluate your progress to ensure a flawless result. And of course, I’ll walk you through cleaning and maintaining your equipment for future use.
By the end of this article, you’ll have all the knowledge and confidence to transform your house with your own two hands.
Let’s get started!
Key Takeaways
- Invest in a quality airless sprayer for professional results.
- Prepare surfaces thoroughly before painting, including cleaning and repairing as necessary.
- Follow safety measures such as wearing protective gear and ventilating the area.
- Use high-quality primer and apply multiple coats for a vibrant and flawless finish.

VEVOR 750W Stand Airless Paint Sprayer, 3000PSI High Efficiency Electric Airless Sprayer, Fine and Even Painting Effect, Handheld Paint Sprayers for Home Interior and Exterior Furniture and Fences
- Powerful Motor: 750W motor with 3000 PSI pressure
- Fast Coverage: Up to 5x faster than rolling
- Smooth Painting: Flow rate of 1.2 LPM for continuous work
As an affiliate, we earn on qualifying purchases.
As an affiliate, we earn on qualifying purchases.
Prepare Your House for Painting
Now that you’ve gathered all your supplies, it’s time to roll up your sleeves and get your house ready for a fresh coat of paint.
Preparation is key to achieving a professional finish that will last. Start by thoroughly cleaning the surfaces you plan to paint. Remove any dirt, dust, or grime using a mild detergent and water.
If there are any loose or peeling paint, scrape it off and sand the area smooth. Don’t forget to fill any cracks or holes with a suitable filler.
Once the surfaces are clean and smooth, be sure to protect any areas you don’t want to paint, such as windows and trim, with painter’s tape or plastic sheeting.
With your surfaces prepped and protected, it’s time to move on to choosing the right paint and equipment to achieve the best results.
Choose the Right Paint and Equipment
When it comes to choosing the right paint and equipment for painting my house with an airless sprayer, there are a few key points I need to consider.
First, I need to select the appropriate paint type that’s suitable for my specific project and desired finish.
Second, I must gather all the necessary supplies, including brushes, rollers, drop cloths, and masking tape, to ensure a smooth and efficient painting process.
Lastly, investing in a quality airless sprayer is essential for achieving professional-looking results and saving time and effort in the long run.
Select the Appropriate Paint Type
Choosing the right paint type for your house is like finding the perfect shade to bring out its true character. When choosing paint colors, consider the overall aesthetic you want to achieve and the color scheme of your surroundings. Proper surface preparation is crucial to ensure the paint adheres properly and lasts longer. This includes cleaning the surface, repairing any damages, and priming if necessary.
It’s important to select a paint type that’s suitable for the surface you’re painting, whether it’s interior or exterior walls, wood, or metal. For example, latex paint is ideal for interior walls as it dries quickly and is easy to clean.
Transitioning into the next section, gather the necessary supplies to ensure a smooth painting process.
Gather the Necessary Supplies
Get ready to embark on your painting journey by making sure you have all the essential supplies at hand. Here are some tips for choosing the right paint color and how to properly mask and protect areas from overspray:
-
Start by selecting a paint color that complements your home’s exterior or interior design. Consider factors like lighting, surrounding colors, and personal preference.
-
Next, gather masking tape, plastic sheets, and drop cloths to protect surfaces like windows, doors, and furniture from overspray. Cover them securely to prevent any paint from getting on them.
-
Additionally, you’ll need a quality paint sprayer, paint brushes, rollers, and a paint tray. These tools will help you achieve smooth and even coverage.
By following these tips and gathering the necessary supplies, you’ll be well-prepared to start your painting project.
Now, let’s move on to the next section and discuss why it’s important to invest in a quality airless sprayer.
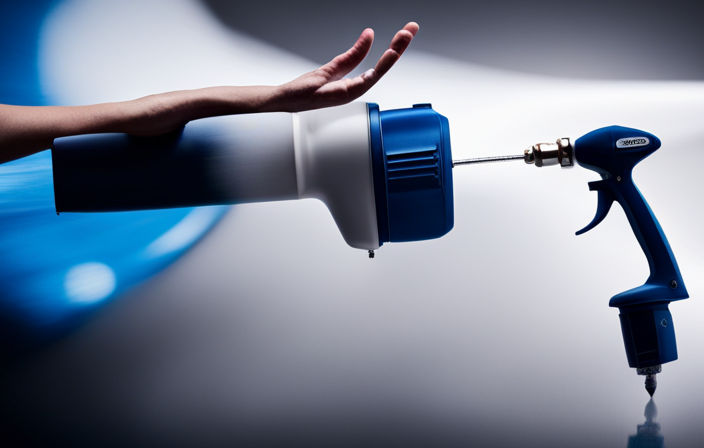
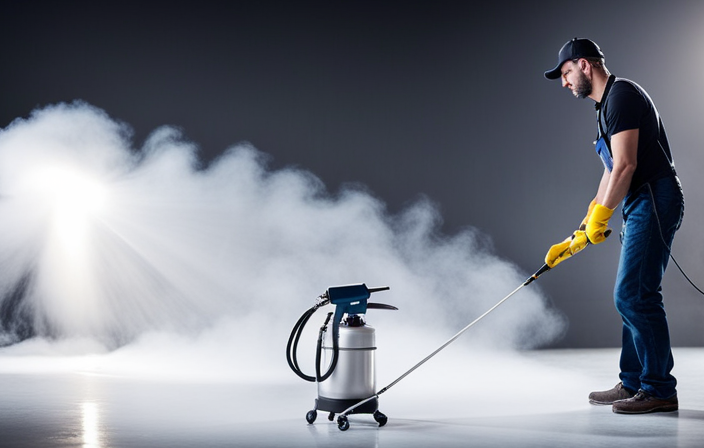
Invest in a Quality Airless Sprayer
Equip yourself with the ultimate tool of precision and power: an airless sprayer. Investing in a quality airless sprayer is essential for achieving professional results and saving time. Unlike traditional painting methods, airless sprayers offer numerous benefits.
Firstly, they allow for faster paint application, as they can cover larger areas in less time. Additionally, airless sprayers provide a more even and consistent coat of paint, eliminating streaks and brush marks. Moreover, these sprayers are versatile and can be used for various projects, including walls, ceilings, and even furniture.
To ensure optimal performance, regular airless sprayer maintenance is crucial. This includes cleaning the filters and checking for any clogs. Practice proper safety measures when using the airless sprayer to avoid any accidents or injuries.
Transitioning into the next section, let’s now discuss how to practice proper safety measures while using the sprayer.
Practice Proper Safety Measures
Ensure your safety by taking the necessary precautions when using an airless sprayer to paint your house. Safety should always be your top priority, so make sure to follow these safety precautions.
Firstly, wear protective gear such as safety goggles, a respirator mask, and gloves to protect yourself from any paint splatters or fumes. It’s also important to cover nearby furniture, plants, and windows with drop cloths or plastic sheets to prevent any accidental damage.
Additionally, ensure that the area you are working in is well-ventilated to minimize the inhalation of paint fumes. By taking these safety measures, you can protect yourself and create a safe environment for painting.
Now, let’s move on to the next step and prime the surfaces.
Prime the Surfaces
To properly prepare for painting, it’s essential to prime the surfaces to create a smooth and long-lasting finish. Did you know that priming can increase the lifespan of your paint job by up to 50%?
Surface preparation is crucial before applying the primer. Make sure to clean the surfaces thoroughly and remove any loose paint or debris. This will ensure proper adhesion and a flawless result.
Once the surfaces are clean, apply a high-quality primer using an airless sprayer. The primer acts as a base coat that seals the surface and provides a smooth foundation for the paint. It also enhances the paint’s durability and helps it adhere better.
After priming, you’ll be ready to start painting with the airless sprayer, which we’ll discuss in the next section.
Start Painting with the Airless Sprayer
To start painting with the airless sprayer, I’ll need to adjust the spray settings first. This’ll ensure that the paint is applied evenly and at the desired pressure.
Once the settings are adjusted, I’ll begin with an even coat, making sure to cover the entire surface with a smooth and consistent layer of paint. If necessary, I’ll apply multiple coats to achieve the desired finish.
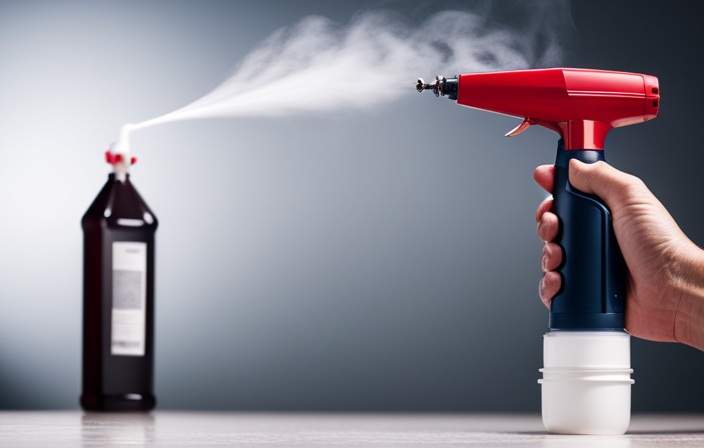
Adjust the Spray Settings
Don’t miss out on the perfect spray settings that’ll transform your house into a masterpiece! Adjusting the pressure on your airless sprayer is crucial to achieving a flawless finish.
Start by testing different pressure levels on a scrap piece of material to find the sweet spot for your specific paint and surface. Higher pressure will give you a finer mist, while lower pressure will provide a heavier coverage.
Additionally, you need to handle overspray effectively to avoid wasting paint and creating a messy work area. Position drop cloths and masking tape to protect surrounding surfaces.
Now that you have the ideal spray settings, you can confidently begin with an even coat, ensuring that every corner and crevice is covered in a smooth and professional manner.
Begin with an Even Coat
Start with an even coat to effortlessly achieve a flawless finish on any surface. An even application is crucial to avoid streaks and ensure a professional result. To achieve this, set the sprayer nozzle to a medium width spray pattern and hold it approximately 12 inches away from the surface. Move the sprayer in a steady back-and-forth motion, overlapping each pass by about 50%. This will ensure that the paint is evenly distributed and covers the surface thoroughly. To help you visualize the process, refer to the table below:
| Step | Action |
|---|---|
| 1 | Set spray nozzle to medium width |
| 2 | Hold nozzle 12 inches away from surface |
| 3 | Move sprayer in steady back-and-forth motion |
| 4 | Overlap each pass by 50% |
By following these steps, you’ll achieve an even coat with no streaks. Once the first coat is dry, you can then proceed to apply multiple coats if necessary to achieve the desired coverage and color intensity.
Apply Multiple Coats if Necessary
If you want a truly vibrant and flawless finish, go ahead and add a few more coats. Applying multiple coats is especially important when using an airless sprayer because it ensures that the paint is evenly distributed and covers any missed spots.
Additionally, adding additional layers helps to build up the color and depth of the paint, resulting in a more professional-looking finish. However, it’s crucial to allow each coat to dry properly before applying the next one. Check the manufacturer’s instructions for the optimal drying time, as this can vary depending on the type of paint being used.
By applying multiple coats and allowing them to dry properly, you’ll achieve a beautiful and long-lasting paint job.
Now, let’s move on to the next section about how to maintain a consistent technique.
Maintain a Consistent Technique
When maintaining a consistent technique with an airless sprayer, it’s crucial to keep the sprayer at a consistent distance from the surface being painted. This ensures an even application and prevents uneven coverage.
Moving in smooth, overlapping strokes helps to achieve a professional finish, avoiding streaks or patchy areas.
It’s also important to avoid overspraying or overlapping areas, as this can lead to drips and an uneven appearance.
Keep the Sprayer at a Consistent Distance
Maintain a steady grip on the airless sprayer as you effortlessly glide it across the surface, ensuring a consistent distance between the sprayer and your house for a flawless paint job. To achieve this, it’s important to maintain the spray pressure and adjust the spray pattern as needed. By doing so, you can ensure an even coat of paint without any drips or streaks.
To help you enjoy this process, here are some tips:
- Keep your arm relaxed and move the sprayer smoothly.
- Maintain a distance of around 12 inches between the sprayer and the surface.
- Keep your movements steady and avoid jerky motions.
By following these guidelines, you can achieve a professional-looking finish for your house.
Now, let’s move on to the next step: move in smooth, overlapping strokes.
Move in Smooth, Overlapping Strokes
Glide the sprayer across the surface with effortless strokes, creating a symphony of smooth, overlapping movements that dance like brushstrokes on a canvas.
Moving in a consistent, steady manner is essential to achieve a professional finish and reduce paint waste. By maintaining a constant distance from the surface, you ensure an even application and prevent excessive paint buildup. This not only improves efficiency but also minimizes the need for touch-ups later on.
Additionally, overlapping each stroke ensures full coverage and eliminates any potential streaking or unevenness. The key is to maintain a fluid motion, smoothly transitioning from one stroke to the next. This technique allows the paint to blend seamlessly and creates a flawless, uniform appearance.
As we move on to the next section about avoiding overspraying or overlapping, it’s important to remember the importance of maintaining a consistent distance and smooth motion throughout the painting process.
Avoid Overspraying or Overlapping
To achieve a flawless finish, it’s crucial to ensure that you don’t overspray or overlap too much. Overspraying can lead to uneven coverage and drips, while excessive overlapping can create a thick and uneven coat of paint.
To avoid overspraying, start by adjusting the spray nozzle to a narrower pattern and hold the sprayer at a consistent distance from the surface. Move the sprayer smoothly and steadily in straight lines, keeping a steady pace to achieve even coverage. Take care to avoid going over the same area multiple times, as this can cause the paint to build up and create an uneven finish.
By avoiding overspraying and excessive overlapping, you’ll be able to achieve a professional-looking paint job. As you work, remember to take breaks and evaluate your progress to ensure a smooth and consistent application.
Take Breaks and Evaluate Your Progress
Sometimes, it’s important to step back and assess how far you’ve come in your painting project. Evaluating your progress is crucial for effective time management.
Taking breaks throughout the process allows you to rest and recharge, as painting can be physically demanding. During these breaks, take a moment to evaluate the quality of your work. Look for any areas that might need touch-ups or adjustments. This will ensure that you achieve a smooth and even finish.
Additionally, assessing your progress periodically helps you stay on track and make any necessary adjustments to your painting technique. Once you’re satisfied with your progress, it’s time to move on to the next step: cleaning and maintaining your equipment.
Clean and Maintain Your Equipment
When it comes to cleaning and maintaining your equipment for painting your house with an airless sprayer, there are three key points to keep in mind.
First, it’s important to flush the sprayer with a cleaning solution after each use to prevent clogs and ensure optimal performance.
Secondly, removing and cleaning the nozzles and filters regularly will help maintain a consistent spray pattern and prevent any debris from affecting the paint application.
Lastly, storing the sprayer properly, in a clean and dry place, will extend its lifespan and make it ready for future use.
Flush the Sprayer with Cleaning Solution
First things first, grab some cleaning solution and flush that sprayer like a pro! When it comes to cleaning your airless sprayer, using the right cleaning solution is key. There are various alternatives you can use, such as a mixture of warm water and mild dish soap or a specialized sprayer cleaner. Avoid using harsh chemicals that can damage the equipment.
One common mistake to avoid is letting the cleaning solution sit in the sprayer for too long, as it can cause clogs or damage the pump. Instead, flush the sprayer immediately after each use. Make sure to run the cleaning solution through all the parts of the sprayer, including the hoses and gun. This will ensure that any paint residue or debris is thoroughly removed.
Now, let’s move on to the next step and learn how to remove and clean the nozzles and filters.
Remove and Clean Nozzles and Filters
To ensure optimal performance, it’s crucial to regularly clean and maintain the nozzles and filters of your cleaning equipment. Cleaning techniques and maintenance tips for your airless sprayer’s nozzles and filters are essential for a smooth painting process. Start by removing the nozzles and filters from the sprayer according to the manufacturer’s instructions. Then, soak them in a cleaning solution for a recommended amount of time. Use a small brush or toothbrush to gently scrub away any paint residue or debris. Rinse the nozzles and filters thoroughly with clean water and allow them to dry completely before reassembling. Regularly inspect and replace worn or damaged nozzles and filters to ensure proper functioning. By following these cleaning techniques and maintenance tips, you can prolong the lifespan of your airless sprayer and achieve professional-quality paint jobs. Now, let’s move on to how to store the sprayer properly.
Store the Sprayer Properly
Make sure to store your sprayer properly to keep it in good condition and ready for your next painting project. Here are some proper storage and maintenance tips:
- Clean the sprayer thoroughly after each use to prevent clogs and buildup.
- Store the sprayer in a cool, dry place to avoid rust or corrosion.
- Remove the paint from the hose and gun to prevent drying and clogging.
- Store the sprayer in an upright position to prevent leaks and damage.
By following these proper storage and maintenance tips, you can ensure that your sprayer will be in optimal condition for your next painting project.
Now that you’ve learned how to properly store your sprayer, let’s move on to the next section and enjoy your newly painted house.
Enjoy Your Newly Painted House
Imagine stepping back and taking in the stunning transformation of your house. The vibrant colors create a sense of joy and pride in your heart. After evaluating progress and ensuring that every corner of your house is beautifully painted, it’s time to enjoy the fruits of your labor.
Take a moment to admire the smooth finish and even coverage that an airless sprayer provides. Now that your house looks brand new, it’s important to store your supplies properly. Clean the sprayer thoroughly and store it in a dry and secure place to prevent any damage.
Additionally, organize your paint cans and brushes neatly to keep them in good condition for future touch-ups. With your newly painted house ready to impress, let’s move on to troubleshooting and FAQs to address any concerns that may arise.
Troubleshooting and FAQs
Now that you’ve finished painting your house with an airless sprayer and you’re enjoying the fresh new look, it’s important to address any potential issues that may arise during the process. Troubleshooting an airless sprayer can be a bit tricky, but with a little knowledge and patience, you’ll be able to tackle common paint application issues like a pro.
One common problem is uneven paint coverage, which can be caused by a clogged nozzle or improper spray technique.
Another issue to watch out for is overspray, which can result in wasted paint and a messy surrounding area.
By understanding these troubleshooting techniques and being prepared for common paint application issues, you’ll be able to achieve a flawless finish and maintain the beauty of your newly painted house.
Frequently Asked Questions
How long does it take for the paint to dry after using an airless sprayer?
After using an airless sprayer, the paint typically takes around 2-6 hours to dry. To speed up the drying process, ensure proper ventilation, use thin coats, and avoid applying paint in humid conditions.
Can I use an airless sprayer to paint the exterior of my house?
Yes, you can use an airless sprayer to paint the exterior of your house. It’s a cost-effective DIY option compared to hiring a professional. Pros include faster application, even coverage, and less paint waste. Cons include potential overspray and the need for proper equipment and technique.
Do I need to thin the paint before using it in an airless sprayer?
No, you don’t need to thin the paint before using it in an airless sprayer. Many top paint brands offer paints that are specifically formulated for airless sprayers, making the process easier and more efficient.
How do I prevent overspray when using an airless sprayer?
To prevent overspray when using an airless sprayer, I use proper masking techniques and adjust the spray pressure. This helps contain the paint and ensures a more precise and controlled application.
Can I use an airless sprayer to paint textured surfaces?
Yes, you can use a brush instead of an airless sprayer on textured surfaces, but using an airless sprayer has benefits. It provides faster and more even coverage, saving time and effort.
Conclusion
After following these steps, you’ll be able to proudly stand back and admire your beautifully painted house.
With the right paint and equipment, proper safety measures, and a little practice, you can achieve professional-looking results with an airless sprayer.
Remember to take breaks and evaluate your progress, clean and maintain your equipment, and enjoy the transformation of your home.
Now, sit back, relax, and revel in your remarkable, radiant, and resplendent residence.