Connect with us

Airless Paint Sprayers

Airless Paint Sprayer Vs. Brush and Roller: a Comprehensive Comparison

Unlock the secrets of airless paint sprayers versus brushes and rollers, and discover which method will transform your painting project into a masterpiece.

Published

on

sprayer vs brush comparison

When you're weighing airless paint sprayers against brushes and rollers, consider efficiency, finish quality, and skill level. Airless sprayers are perfect for large surfaces and can cover up to 2,000 square feet per hour, giving you a smooth finish without brush marks. However, they might require practice and can waste more paint. Rollers, on the other hand, offer better control for detailed work and are easier for beginners but take longer for larger areas. Your choice will depend on your project's scale and desired look. Want to explore their pros and cons in more detail?

Key Takeaways

  • Airless paint sprayers cover large areas quickly, achieving 1,000-2,000 square feet per hour, while rollers typically cover around 400 square feet per gallon.
  • Sprayers provide a smooth, even finish, while rollers offer better control for detailed work and may leave a textured surface.
  • Airless sprayers have a higher initial cost but can be more cost-effective for large projects, despite consuming about 33% more paint due to overspray.
  • Rollers are easier for beginners to use, as they have a gentler learning curve and less risk of overspray compared to sprayers.
  • Safety precautions include wearing PPE, ensuring proper ventilation, and following manufacturer guidelines for safe operation of sprayers.

Overview of Painting Methods

When you're deciding how to tackle a painting project, understanding the different methods can make a big difference in your results.

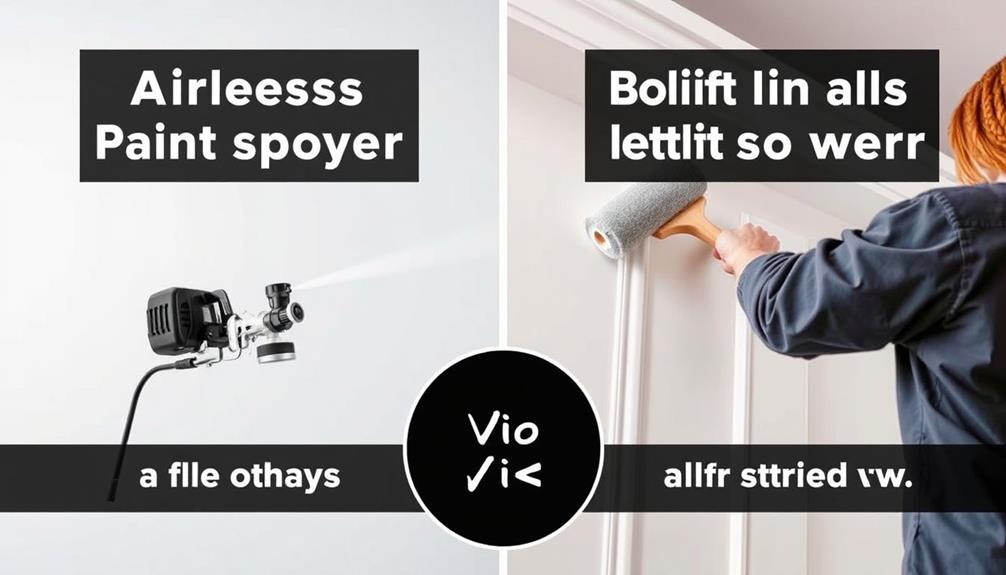
You've got two primary options: paint sprayers and rollers. Each method has its unique strengths tailored for different tasks. Airless paint sprayers, for instance, use high pressure to atomize paint, allowing for an even finish and making them suitable for large surfaces like walls and ceilings.

Best Airless Paint Sprayer excel in covering large areas quickly, achieving application rates of 1,000 to 2,000 square feet per hour. This makes them ideal for big projects, especially on textured surfaces. However, they can create significant overspray, leading to a potential increase in paint usage by up to 33% compared to rollers.

On the other hand, rollers offer better control and precision, particularly in tight spaces. They require less preparation and generate minimal overspray, which can save you both time and material.

While rollers might leave a slight texture based on the nap size used, they're perfect for smaller, intricate areas where detail is essential.

Advertisement

Ultimately, your choice between sprayers and rollers should depend on your project's size and the type of surface you're working with. Understanding these methods will help you achieve the best results for your specific needs.

Efficiency and Time Comparison

efficiency versus time analysis

Choosing the right painting method can greatly impact the efficiency and time required for your project. When you opt for an airless paint sprayer, you can cover large areas at a rate of 1,000-2,000 square feet per hour. This greatly reduces the time spent on painting compared to rollers, which typically cover about 400 square feet per gallon on prepared surfaces.

In fact, the time required for painting with a sprayer is often half that of using a roller, especially in larger spaces. Additionally, if you're considering a home improvement project, it's worth looking into essential items for a home cleaning kit to guarantee your workspace remains tidy during the painting process.

Even though you might need extra time for prep work, like masking and protecting surrounding areas, the overall time savings are impressive. For instance, a 900 square foot loft can be painted in just two long days with a sprayer, while traditional rolling methods could stretch that to several days.

Keep in mind, though, that using a sprayer may lead to using up to 33% more paint due to overspray. However, the time saved in application often offsets this increased material usage.

Ultimately, the efficiency of your chosen method will depend on your skill level and comfort with the tools at hand.

Advertisement

Learning Curve for Beginners

beginner s learning journey tips

Mastering the art of painting can be challenging, especially for beginners. If you're just starting out, you'll likely find that using rollers is more intuitive than paint sprayers. The learning curve for rollers is quicker, allowing you to achieve satisfactory results with less risk of overspray and mess. In contrast, paint sprayers require practice to master the correct distance and spray intensity, which can lead to initial drips and uneven applications if not done properly.

Here's a quick comparison of the two methods:

Method Learning Curve Initial Results
Paint Sprayers Steeper May have drips/unevenness
Rollers Gentle Generally satisfactory

Both methods require specific techniques to minimize paint wastage and achieve ideal coverage. Rollers often need two coats for the best finish, but they allow for easier adjustments and corrections during the painting process. While experience with paint sprayers can enhance proficiency over time, beginners usually find rollers to be a more forgiving option for their first projects. Choosing the right tool can make your painting experience much smoother!

Cost Analysis of Each Method

method cost evaluation overview

In comparing the cost of airless paint sprayers and traditional rollers, you'll find significant differences that can affect your budget. Airless paint sprayers require a higher initial investment, typically ranging from $200 to $1,000, while basic roller setups often costs less than $30. This makes paint rollers a more budget-friendly option for casual DIY projects.

Additionally, the use of Graco FFLP Fine Finish Low Pressure Reversible Tip can enhance the efficiency of airless sprayers, providing a more refined finish which may justify the upfront cost for detailed work.

However, consider long-term expenses. Although rollers are cheaper upfront, you'll need to replace covers and brushes frequently, adding to your costs over time. In contrast, if you maintain your spray equipment, it can be reused for multiple projects.

Regarding paint usage, sprayers tend to consume about 33% more paint due to overspray. For example, one gallon of paint sprayed covers around 150-200 square feet, while rollers can efficiently cover about 400 square feet per gallon on prepared surfaces. This difference means paint rollers are often more economical regarding material costs.

Advertisement

Ultimately, the cost-effectiveness of your choice depends on project scale. While a paint sprayer may save time on larger jobs, paint rollers can be more cost-efficient for smaller projects where precision is essential.

Quality of Finish and Versatility

finish quality and versatility

When it comes to quality of finish, airless paint sprayers give you a smooth, even look without brush marks or roller texture.

They're particularly effective for larger surfaces, allowing for quicker application and less labor.

However, if you're aiming for specific textures or need to navigate intricate details, brushes and rollers offer the control you need.

Plus, some paint types just aren't compatible with sprayers, making traditional methods more versatile for various surfaces, such as using well-draining soil for specific plant growth.

Smoothness of Finish

For achieving a smooth and professional finish, airless paint sprayers have a distinct advantage over brushes and rollers. They produce a finer mist that covers surfaces evenly, effectively eliminating brush strokes and roller marks. This technique guarantees a superior smoothness of finish, making airless paint sprayers the go-to choice for many projects.

Advertisement

Additionally, the versatility of airless paint sprayers allows you to tackle textured surfaces, like stucco or rough concrete, that can be difficult for brushes and rollers to cover uniformly. Their ability to reach intricate areas and tight corners without requiring extra tools means you can achieve seamless results in detailed work. For those looking to elevate their home aesthetics, living room transformation projects can greatly benefit from these tools.

While rollers might leave a slight texture depending on the nap size, airless paint sprayers deliver a glossy finish that aligns perfectly with modern aesthetic preferences. However, it's crucial to reflect on the type of paint you're using; not all coatings are suitable for spray applications. Some may yield better results with brushes or rollers.

Texture Application Differences

Choosing the right method for texture application can greatly impact the quality of your finish and the versatility of your project. When it comes to achieving a smooth, even finish, airless paint sprayers shine. They produce a flawless look, especially on flat surfaces, making them ideal for intricate areas and complex textures like stucco or rough concrete. Rollers, on the other hand, can create a slight texture, which might enhance certain aesthetics, but they struggle with intricate details.

Here's a quick comparison of the texture application differences between sprayers and rollers:

Feature Sprayers Rollers
Finish Quality Smooth, even finish Slight texture possible
Versatility Great for complex surfaces Limited to flat surfaces
Texture Control No texture variation Varying nap sizes available
Paint Compatibility Not suitable for high-viscosity paints Works well with all types

Ultimately, if you need a seamless finish and versatility, sprayers are your go-to tool. However, for specific textures and flat surfaces, rollers provide flexibility that can't be overlooked.

Advertisement

Surface Compatibility Factors

Understanding surface compatibility is essential, as it directly influences both the quality of your finish and the versatility of your application method.

When deciding between a sprayer or a roller, reflect on these factors:

1. Surface Type: Sprayers excel on large, flat surfaces, providing a smooth, flawless finish. They also handle textured surfaces like stucco and rough concrete well.

Rollers, however, are better for flat surfaces and give you more control in tight spaces. For projects involving outdoor installations, it's important to take into account local zoning laws that may affect your options.

2. Finish Quality: While sprayers deliver an even application, rollers can leave a lightly textured finish. This mightn't be ideal for every project, especially if you're aiming for a sleek look.

Advertisement

3. Coating Versatility: Sprayers can apply a variety of coatings, including stains and sealants, making them quite adaptable.

Yet, certain paints may perform better with brushes or rollers, so knowing your materials is imperative.

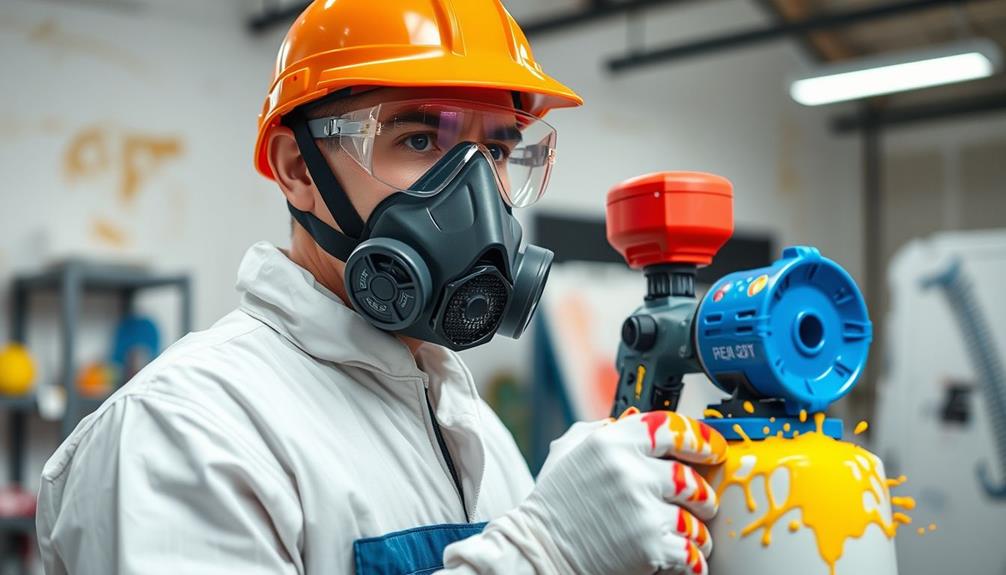
Safety Precautions to Consider

essential safety guidelines overview

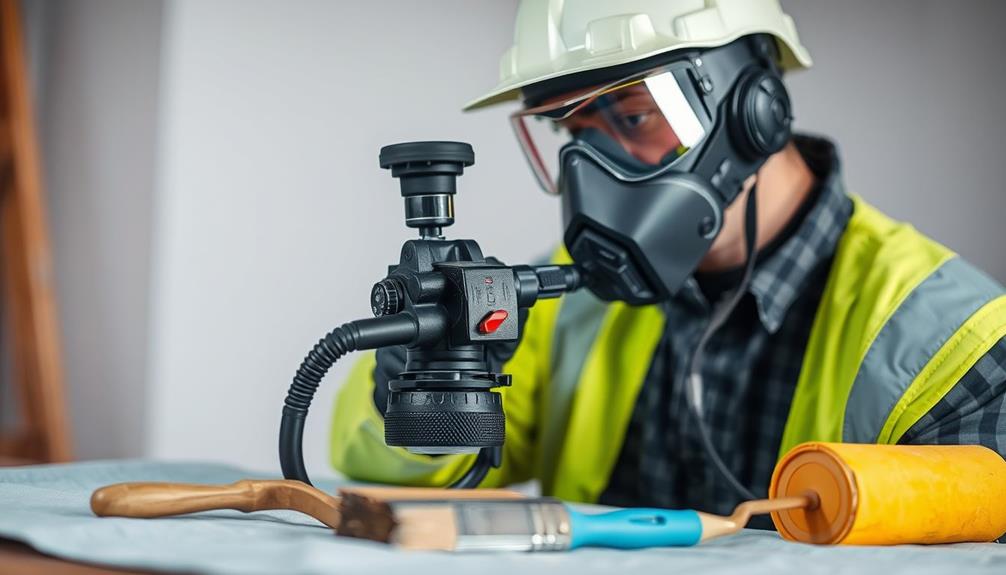
Using an airless paint sprayer can dramatically speed up your painting project, but safety precautions are vital to protect yourself and your surroundings.

First and foremost, always wear personal protective equipment (PPE) like goggles, respirators, gloves, and coveralls. This gear shields you from harmful fumes and potential skin contact with chemicals.

To enhance the air quality in your workspace, consider using ozone air purifiers to eliminate any lingering odors and allergens that may arise during painting.

If you're indoors, guarantee proper ventilation by aiming for at least 3-4 air changes per hour. This reduces the risk of inhaling fumes, keeping your workspace safe.

Advertisement

Additionally, take time to carefully mask and cover adjacent areas to prevent overspray damage—airless sprayers create a fine mist that can easily drift onto unintended surfaces.

It's also important to follow the manufacturer's guidelines for selecting the right pressure and spray tip size. This guarantees safe operation while achieving ideal results.

Finally, prioritize fire safety; keep open flames away from paint fumes and have fire extinguishers readily available during your painting process.

Best Use Cases for Each Method

optimal method applications guide

When choosing between an airless paint sprayer and traditional brushes or rollers, consider your project's specifics.

Sprayers are perfect for large, open areas and textured surfaces, while rollers excel in smaller, detailed spaces.

Additionally, for projects that require a smooth finish, airless sprayers can offer efficiency and speed, similar to the top 15 models in garage door openers that enhance home security.

Advertisement

Knowing the ideal scenarios and surface types for each method can help you achieve the best results.

Ideal Project Scenarios

What's the best method for your painting project? Choosing between a paint sprayer and rollers depends on the specifics of your task. Here are three ideal scenarios for each:

1. Large Areas: If you're tackling expansive spaces, like exterior walls or ceilings in new builds, a paint sprayer shines. It can cover 1,000-2,000 sq ft/hr, making it perfect for large projects.

Additionally, just as budget-friendly vacuum cleaners offer efficiency without high costs, a paint sprayer can save you time and effort on extensive surfaces.

2. Detailed Work: For smaller, intricate applications, rollers are your best friend. They allow for precision around corners and edges, especially in occupied interiors where control is vital.

Advertisement

3. Textured Surfaces: When working with rough textures, like stucco or concrete, a paint sprayer excels. It fills in crevices effortlessly, ensuring an even finish that's tough to achieve with rollers.

Surface Types and Conditions

Choosing the right painting method for different surface types and conditions can make a significant difference in your project's outcome. When it comes to uneven surfaces like stucco or rough concrete, a paint sprayer is your best bet, as it covers these areas quickly and evenly. Rollers, on the other hand, shine on flat surfaces like drywall and ceilings, providing better control and minimizing overspray.

Here's a quick comparison of surfaces and the best painting methods:

Surface Type Best Method
Textured Surfaces Paint Sprayer
Large Open Spaces Paint Sprayer
Flat Surfaces Rollers
Precise Edges Rollers/Brush

For large, open areas, paint sprayers can cover up to 2,000 square feet per hour, making them incredibly efficient. However, when you need precision around edges and corners, rollers or brushes offer the control you need, although they require more time. Understanding these nuances will help you select the right method for your specific project.

Additional Resources for Painters

painter s resource guide

For painters looking to enhance their skills and outcomes, a wealth of additional resources is available to guide you. Whether you're using a paint sprayer or a paint roller, these tools can be complemented by the right knowledge.

Exploring AI in music creation can inspire innovative approaches to your projects, just as it reshapes traditional processes in music. Here are three valuable resources to contemplate:

Advertisement
  1. Durability Guides: Articles on painted stairs can help you maintain both aesthetic appeal and functionality over time, ensuring your hard work lasts.
  2. Efficient Techniques: Guides on room painting techniques can optimize your process, reducing time and labor while achieving a professional finish, making it easier for DIY enthusiasts to tackle larger projects.
  3. Creative Tutorials: Step-by-step tutorials for creating ombre walls will inspire you to experiment with color gradients, adding a unique touch to your spaces.

Additionally, don't overlook tips on selecting the perfect paint colors and instructions for long-lasting cabinet finishes.

These resources won't only enhance your design choices but also make your cabinetry a stunning focal point in your home. With the right information at your fingertips, you're well on your way to achieving impressive results in your painting projects.

Frequently Asked Questions

Is Airless Paint Sprayer Better Than Roller?

It depends on your project needs. If you want speed and a smooth finish, an airless sprayer's great. For tight spaces and detailed work, you'll likely prefer a roller. Consider both for best results.

What Are the Disadvantages of an Airless Paint Sprayer?

Using an airless paint sprayer can feel like racing a sports car—thrilling but tricky. You'll face overspray, higher costs, and a steep learning curve. Plus, maintenance can be a real chore if you're not diligent.

Do Professional Painters Use Sprayers or Rollers?

Professional painters often use both sprayers and rollers, depending on the project. You'll find them using sprayers for large areas to save time, while opting for rollers in tight spaces or for precision work.

What Are the Benefits of Airless Paint Sprayer Over Brushing and Rolling?

Imagine a swift wind brushing against a canvas. You'll enjoy airless sprayers for their speed, smooth finishes, and versatility. With them, you'll conquer large spaces and intricate details, transforming your projects effortlessly while saving time.

Advertisement

Conclusion

In the end, choosing between an airless paint sprayer and traditional brushes or rollers depends on your needs. If you prioritize speed and efficiency, the sprayer's your best bet. If you value control and detail, stick with brushes and rollers. Both methods have their perks, so consider your project's size, your skill level, and your budget. Whichever you choose, you'll find a way to achieve that perfect finish and enjoy the satisfaction of a job well done.

Whether it’s a step-by-step tutorial on achieving flawless finishes or an in-depth analysis of the latest airless paint sprayer models, Joe’s ability to articulate complex ideas in a simple and engaging manner resonates with our diverse audience. His practical tips and techniques empower readers to tackle their projects with confidence.

Continue Reading
Advertisement

Airless Paint Sprayers

How to Use an Airless Paint Sprayer for Painting Siding

Keep your siding looking fresh and new with expert tips on using an airless paint sprayer—discover the essential techniques for a flawless finish!

Published

on

By

airless paint sprayer guide

Using an airless paint sprayer for siding is straightforward. Start by preparing your surface: wash it clean and scrape off loose paint. Choose high-quality acrylic latex paint and set your sprayer's pressure between 2000-2500 PSI. Keep a 12-inch distance from the siding while spraying. Begin moving the gun before pulling the trigger to prevent splatters and overlap each pass by 50% for full coverage. Once you're done, flush the sprayer thoroughly to maintain it. With these tips, you'll achieve a great finish, and there's more important information that can help you perfect the process.

Key Takeaways

  • Properly prepare the siding by cleaning, scraping, and sanding to ensure optimal paint adhesion and a smooth finish.
  • Set the airless sprayer pressure between 2000-2500 PSI and select the appropriate spray tip size of 0.015 to 0.019 inches for siding.
  • Maintain a 12-inch distance from the surface while spraying, and overlap each pass by 50% for even coverage.
  • Flush the sprayer immediately after use and clean all components to maintain equipment performance and longevity.
  • Inspect the painted areas for touch-ups, and allow adequate drying time before exposing the paint to moisture.

Project Overview and Objectives

When it comes to enhancing your home's curb appeal, taking on a DIY painting project can be both rewarding and cost-effective. Your main objective is to paint the exterior siding, giving your home a fresh look while saving on professional labor costs.

By using rough cut boards sourced from your property, you've already taken a big step toward a personalized and unique appearance. To guarantee an even finish and efficient application, consider using an airless paint sprayer for your project.

Before applying the finish coat, you primed all sides with KILZ 3 primer, guaranteeing decent paint coverage for longevity. Instead of aiming for professional-grade results, focus on practicality, allowing you to enjoy the process without the pressure of perfection.

The airless paint sprayer you've chosen for this project will make your application quicker and more efficient than traditional brushes and rollers.

Equipment and Materials Needed

essential tools and supplies

To achieve a successful painting project, having the right equipment and materials is key. Start with an airless paint sprayer, like the AEROPRO 470, which provides excellent efficiency and can reach pressures between 2000-2500 PSI. This pressure is essential for ideal results on your siding, especially when applying high-quality acrylic latex paint designed for durability.

For those concerned about clogging remedies, it's important to guarantee that your painting area is free of debris to avoid any unnecessary clean-up. For detailed edge work, keep polyester brushes on hand, as they'll help you achieve a smooth finish in those tricky areas.

Advertisement

Next, select the appropriate spray tip based on your paint type and surface. A smaller tip works well for finer finishes, while a larger tip is perfect for thicker paints. You'll also need high-quality acrylic latex paint, specifically formulated for vinyl siding, to guarantee durability and adhesion.

Don't forget exterior caulk or a patching compound for any necessary surface repairs before you start painting.

Lastly, you'll want to clean the exterior with a pressure washer and allow it to dry adequately. This step is essential to guarantee your paint adheres well to the siding.

With the right airless spray equipment and materials, you're set for a successful painting project!

Surface Preparation Steps

essential surface preparation steps

Proper surface preparation is vital for achieving a flawless paint job on your vinyl siding. Start by washing the siding with a garden hose. This helps remove dirt and debris, creating a clean surface for painting. If you notice any loose paint, scrape it off with a plastic putty knife. This step is important for establishing a smooth, stable foundation for your new paint.

Additionally, using a vacuum designed for specific flooring types can help in removing dust and debris from the surface before painting.

Advertisement

Next, sand any rough edges to guarantee a uniform surface. This not only improves adhesion but also contributes to a professional finish. Pay attention to cracks and holes, filling them with exterior caulk or patching compound. Allow these areas to dry completely before moving forward.

After washing and preparing your siding, always allow adequate drying time. This is key for maximum adhesion and finish quality. If you're using a high-pressure washer, be cautious not to damage the siding. Verify the surface is thoroughly dried and free from any moisture before you get started with the painting process.

Following these surface preparation steps will set you up for success when you use your airless paint sprayer.

Selecting the Right Paint

choosing appropriate paint selection

When selecting the right paint for your project, you'll want to choose acrylic latex paint for its flexibility and durability, especially if you're working with vinyl siding.

Additionally, using quality paint can greatly enhance the finishing touch of your project, much like how butter enhances flavor in cooking.

Avoid oil-based paints, as they can cause peeling and other issues.

Advertisement

Also, consider lighter colors to minimize heat absorption and enhance the longevity of your paint job.

Recommended Paint Types

Choosing the right paint for your vinyl siding is essential for achieving a long-lasting and attractive finish. The best option is acrylic latex paint, which offers flexibility to prevent peeling and cracking. Avoid oil-based or alkyd paints, as they can negatively react with vinyl materials, leading to frustrating issues down the line.

Consider using specialty vinyl paints designed specifically for this material. They flex with the siding, providing a durable finish that can handle temperature changes. Lighter color tones are recommended as they help reduce heat absorption, minimizing the risk of warping.

Here's a quick reference table for recommended paint types:

Paint Type Benefits
Acrylic Latex Paint Flexible, prevents peeling
Specialty Vinyl Paint Designed to flex with siding
Oil-Based Paint Avoid; can react negatively
Alkyd Paint Avoid; can damage vinyl

When selecting paint, stick to matching the original siding color or pick a new shade that maintains a cohesive look for your home's exterior. This guarantees a beautiful and sturdy finish that lasts for years.

Advertisement

Color Selection Tips

Your home's exterior can greatly benefit from a thoughtful color selection for vinyl siding. When choosing paint, opt for acrylic latex, as it adheres well and resists peeling and cracking. Avoid oil-based or alkyd paints, since they can react negatively with vinyl, causing damage or poor adhesion.

Additionally, consider how the color may affect your home's maintenance; lighter colors are often easier to keep clean and can hide dirt better, making them a practical choice for busy households with pets, where pet hair vacuum options are vital.

For vinyl siding, lighter color tones are often the best choice. They reduce heat absorption, helping to prevent warping or distortion over time. If you want to go the extra mile, consider specialty vinyl paints that offer flexibility, allowing the paint to expand and contract with the siding. This further minimizes the risk of peeling.

Additionally, matching the original siding color or selecting a new shade that complements your home's design is essential. This approach enhances curb appeal and guarantees a cohesive look that ties everything together.

Take your time with color selection, as it can greatly affect your home's overall appearance. By carefully choosing the right paint for your vinyl siding, you'll not only improve aesthetics but also prolong the life of your siding, making your investment well worth it.

Advertisement

Setting Up the Airless Sprayer

airless sprayer setup instructions

Before you start painting, make certain to prepare your airless sprayer properly.

Adjust the pressure settings and choose the right hose and tip to guarantee smooth operation and quality results.

For peak performance, consider using a Graco FFLP Fine Finish Low Pressure Reversible Tip to achieve a flawless finish.

Let's go through these essential setup steps to get you ready for a successful painting job.

Equipment Preparation Steps

Properly setting up your airless paint sprayer is essential for achieving a smooth and professional finish on your siding. Start by thoroughly reading the AEROPRO instruction manual to familiarize yourself with the setup and safety precautions. Next, select an appropriate hose length that allows you to maneuver easily and reach all areas of the siding comfortably.

Make sure the sprayer is equipped with the correct spray tip that matches your paint type for even coverage. A spray tip that's too wide or narrow can lead to uneven application.

Advertisement

Here's a quick reference table to help you with the setup:

Step Action Notes
1. Read the manual Familiarize yourself with the sprayer Safety first!
2. Choose hose length Opt for a length that guarantees maneuverability Avoid tangling and extension issues
3. Select spray tip Match it to your paint for even coverage Check compatibility
4. Set pressure Adjust between 2000-2500 PSI Ideal paint flow for clean finish

Adjusting Pressure Settings

Once you've set up your airless paint sprayer and selected the appropriate hose and spray tip, the next step is adjusting the pressure settings. For ideal paint flow and coverage when painting siding, you should set the pressure between 2000-2500 PSI.

It's essential to start by testing these pressure settings on an inconspicuous area. This helps confirm your desired finish and prevents excessive overspray. When choosing your equipment, consider the importance of flexible scheduling options for your projects, as this can affect how and when you paint.

Keep in mind that the surface texture of your siding plays a significant role in how you adjust the pressure. If you're dealing with rough surfaces, you might need to tweak the pressure settings for a smoother application.

Additionally, make sure that the hose length is suitable for maneuverability; longer hoses may require different pressure settings to maintain consistent spray quality.

Advertisement

As you spray, maintain a distance of about 12 inches from the siding. This helps achieve clean lines and prevents drips, which might also necessitate fine-tuning your pressure settings. Adjust as needed based on the type of paint you're using to guarantee a flawless finish.

Hose and Tip Selection

Selecting the right hose and spray tip is essential for achieving the best results with your airless paint sprayer. Start by choosing a hose length that allows easy maneuverability without excess drag. A common recommendation for exterior siding is a tip size between 0.015 to 0.019 inches, which provides ideal coverage.

Make certain the hose connects securely to both the sprayer and the spray gun to prevent leaks and maintain consistent pressure. For vinyl siding, set your pressure between 2000-2500 PSI to guarantee even application. Always check your hose for kinks or damage before use, as this can impact performance and paint quality.

Here's a quick reference table to help you with hose and tip selection:

Hose Length Tip Size
25 feet 0.015 – 0.017 in
50 feet 0.017 – 0.019 in
75 feet 0.019 in
100 feet Use tip extension
150 feet Use tip extension

Painting Techniques to Follow

essential painting techniques guide

When using an airless paint sprayer, mastering the right techniques is essential for achieving a flawless finish. Start by maintaining a 12-inch distance from the siding while using the spray gun. This distance guarantees even coverage and helps prevent drips.

Begin your gun motion before pulling the trigger; this avoids initial paint splatters and creates a smooth start. Additionally, keeping your workspace free of potential hazards—much like being aware of ten household dangers identified for dogs—can contribute to a safer environment while you paint.

Advertisement

As you spray, make sure to overlap each pass by 50%. This secures full coverage without visible lines or inconsistencies. It's also wise to practice on inconspicuous areas first. This allows you to refine your technique before moving on to the main surfaces.

If you're dealing with textured siding, consider using a back-rolling technique after spraying. This step helps evenly distribute the paint, getting into all those hard-to-reach crevices.

Once you've completed your first coat, assess the coverage and decide if a second coat is necessary for that perfect finish. By following these techniques, you'll achieve a professional look and maximize the efficiency of your airless paint sprayer.

Clean-Up Procedures

waste management and disposal

After finishing your painting project, a thorough clean-up is vital to maintain the quality of your work and guarantee your airless paint sprayer remains in good condition.

Begin by waiting for the paint to dry completely before removing any tape. This guarantees clean edges and prevents smudging. Next, carefully remove coverings from plants and trim, taking care not to damage them during the process.

It's also important to confirm that your workspace has good air quality, as poor indoor air can affect your health and comfort while working.

Advertisement

Now, it's time to tackle the clean-up procedures for your sprayer. Immediately after use, follow the user manual instructions to flush out the paint. This step is essential to prevent clogs and preserve the sprayer's functionality.

Pay close attention to the filter inside the sprayer; regularly inspecting and cleaning it will further enhance performance for future projects. For ideal air quality during your painting process, consider using air purifiers to minimize dust and allergens in the environment.

Once the sprayer is clean, replace any hardware you removed before painting.

Maintenance of Equipment

equipment care and upkeep

Maintaining your airless paint sprayer is just as important as cleaning it after use. Proper maintenance of equipment guarantees peak performance and extends the lifespan of your sprayer.

Additionally, making sure that your workspace is secure can prevent theft or damage to your equipment, which is vital for protecting your investment in tools and supplies (importance of home security systems).

Here are some key maintenance steps to follow:

Advertisement
  1. Release Pressure: Always release pressure from the sprayer before cleaning or inspecting it to prevent injury.
  2. Flush with Water: After each use, flush the paint from the hoses and sprayer with clean water. This prevents clogs and keeps the spray pattern consistent.
  3. Clean Tips and Filters: Thoroughly clean the sprayer tip and filter using soapy water and brushes. Accumulated paint can lead to poor spray patterns and lower finish quality.
  4. Inspect Components: Regularly check seals, hoses, and other components for wear and tear. This helps reduce leaks and guarantees everything operates smoothly.

Storing your sprayer in a dry, dust-free environment is essential, too.

Make sure all parts are clean and free from paint residue to avoid damage during idle periods.

Final Touches and Improvements

polishing and enhancing details

Achieving a flawless finish requires attention to detail in the final stages of your painting project. After applying the final coat, carefully remove tape and coverings to guarantee clean edges and prevent peeling. Inspect the painted areas for missed spots or imperfections, and perform touch-ups as needed for uniformity.

Consider back-brushing nooks and crannies after spraying; this guarantees the paint penetrates all areas and enhances durability. Allow adequate drying time between coats and before exposing the paint to moisture to avoid streaking or bubbling.

To track your progress and improve future projects, document your process. Here's a simple table to help you remember essential steps:

Step Action Purpose
Remove tape Carefully peel away Guarantees clean edges
Inspect for touch-ups Look for imperfections Achieves a uniform appearance
Back-brush Apply paint to corners Enhances durability

Frequently Asked Questions

How to Use an Airless Paint Sprayer Exterior?

To use an airless paint sprayer for exterior surfaces, read the manual, set pressure correctly, maintain a 12-inch distance, choose the right tip, practice on hidden areas, and clean thoroughly afterward to avoid clogs.

How to Paint Siding With a Sprayer?

You might think painting siding's easy, but it requires precision. Start by prepping the surface, then use a sprayer at 2000-2500 PSI. Maintain a 12-inch distance, overlapping passes for a flawless finish.

Advertisement

How Do You Thin Exterior Paint for an Airless Sprayer?

To thin exterior paint for your airless sprayer, check the manufacturer's instructions. Generally, you'll want to add 10-20% water or specific thinner, ensuring to mix thoroughly and strain it before pouring into the sprayer.

Do You Dilute Paint When Using an Airless Sprayer?

No, you typically shouldn't dilute paint when using an airless sprayer. These sprayers handle thicker paints well. If necessary, follow the manufacturer's guidelines for thinning, but always test the spray pattern first for consistency.

Conclusion

Using an airless paint sprayer for your siding can transform your home as swiftly as a brushstroke on canvas. By following the steps outlined, you'll achieve a smooth, professional finish that enhances your home's curb appeal. Remember, preparation is key, and don't rush the clean-up or maintenance of your equipment—it's just as important as the painting itself. Embrace the process, and soon your home will shine like new, reflecting the care you put into it.

Continue Reading

Airless Paint Sprayers

Airless Paint Sprayer Safety: Protecting Yourself From Paint Fumes

Airless paint sprayer safety is crucial for protecting against toxic fumes; discover essential tips that could change how you approach your next project.

Published

on

By

paint fume safety guidelines

Using an airless paint sprayer safely is essential to protect yourself from harmful paint fumes. Always guarantee your workspace is well-ventilated to reduce the accumulation of volatile organic compounds (VOCs). Wear safety goggles and a respirator to shield against splashes and inhalation of fumes. Use grounded hoses to minimize static electricity hazards and regularly inspect your equipment for safety compliance. Before you start painting, familiarize yourself with the owner's manual and these vital precautions. By following proper safety protocols, you can greatly lower your exposure to toxins and create a safer environment for your project. Discover more best practices to guarantee your safety.

Key Takeaways

  • Ensure proper ventilation in the workspace to reduce harmful paint fume accumulation during airless paint sprayer use.
  • Wear safety glasses and a respirator to protect against paint splashes and inhalation of harmful chemicals.
  • Regularly review safety procedures and keep the owner's manual accessible for emergency instructions.
  • Use tip guards and engage trigger safety to prevent injection injuries from high-pressure fluid streams.
  • Maintain grounding techniques to minimize static electricity risks and avoid ignition hazards from flammable vapors.

Importance of Safety Procedures

Safety is paramount when using airless paint sprayers, as it directly impacts your well-being and the safety of those around you. Following established safety procedures is essential to minimize risks during spray painting activities.

Start by carefully reading the owner's manual for your specific spray equipment. This document contains vital safety procedures and the manufacturer's guidelines that you need to understand for safe operation. Additionally, making sure your workspace is properly ventilated is important to reducing the accumulation of harmful fumes, which can be found in key factors for choosing a service.

You'll find that familiarizing yourself with these guidelines greatly reduces the risk of injuries, especially when dealing with flammable materials commonly associated with paint sprayers. Always wear safety glasses to protect your eyes from overspray and potential chemical exposure.

To reinforce your safety practices, remember the motto "Spray It Safe." Regularly reviewing the safety procedures outlined in the owner's manual helps maintain a secure working environment.

If you don't have the manual, many can be downloaded online to guarantee you have access to vital safety information, regardless of your equipment's brand or model.

Advertisement

Identifying Safety Hazards

recognizing potential safety risks

When using airless paint sprayers, you need to be aware of two major safety hazards: fire and explosion risks, and injection injuries.

Flammable vapors can ignite, especially in poorly ventilated areas, making it essential to guarantee proper air circulation and air quality. Utilizing tools like ozone air purifiers can help mitigate air quality issues while you work.

High-pressure fluid streams can also cause serious injuries if you're not careful. By identifying these risks, you can take the necessary precautions to protect yourself and others.

Fire and Explosion Risks

Using an airless paint sprayer can expose you to serious fire and explosion risks if you're not careful. The fluids you're using are often flammable, and when sprayed in poorly ventilated areas, they can accumulate ignitable vapors. These vapors pose a significant threat, especially if there are open flames, sparks, or static electricity present.

Even ungrounded spray systems can create static that ignites those vapors, leading to a fire or explosion that could result in serious injury. Additionally, maintenance and cleaning tips are vital to guarantee your sprayer operates safely and effectively, reducing the likelihood of clogs that might lead to dangerous situations.

To minimize these risks, proper ventilation is vital. Make sure to use non-sparking fans to enhance air circulation, which helps dissipate harmful vapors and reduce ignition risks.

Advertisement

It's also vital to regularly remove potential ignition sources, like cigarettes or electrical appliances, from your spray area. High concentrations of ignitable particles in confined spaces can create explosive conditions, making precautions even more important.

Injection Injury Awareness

Injection injuries can happen suddenly and with little warning, making it essential for you to understand the associated risks. These injuries typically occur when high-pressure fluid pierces your skin through small openings, often near spray tips or from leaking hoses. Even minor cuts can lead to severe consequences if they come into contact with high-speed streams of atomized fluid.

To help you stay aware of potential hazards, here's a quick reference:

Safety Tip Importance
Always use tip guards Prevents proximity injuries
Engage trigger safety Reduces accidental spraying
Relieve pressure before cleaning Essential for preventing injection injuries

Fire and Explosion Prevention

safety measures against hazards

Guaranteeing safety during airless paint spraying is essential to prevent fire and explosion hazards. Always spray in well-ventilated areas to minimize the accumulation of flammable vapors, reducing fire risks considerably.

Additionally, having a clean workspace improves not only safety but also efficiency, similar to how budget-friendly vacuum cleaners maintain cleanliness without financial strain. Remove all potential ignition sources, like cigarettes and pilot lights, from your spraying environment to avoid accidental ignition.

If you're using a gas-powered sprayer, make sure to operate it outdoors and verify it's properly grounded. This helps prevent static electricity buildup that could ignite flammable vapors.

Advertisement

Regularly check hoses and electrical components for grounding continuity and any signs of damage; a failure in these systems can lead to severe fire hazards.

Keep your workspace clean and free from debris and flammable materials. Clutter can easily catch fire, especially when working with spray paint, which can release flammable vapors.

Injection Injury Prevention

preventing injection related injuries

To prevent injection injuries, always use tip guards on your airless spray gun; they keep you at a safer distance from the spray tip.

Additionally, consider using a Graco FFLP Fine Finish Low Pressure Reversible Tip for more control and reduced overspray.

Make sure to relieve fluid pressure before cleaning or servicing your equipment to avoid high-pressure fluid accidents.

Staying alert and following these precautions can greatly reduce your risk of serious injury.

Advertisement

Tip Guard Usage

Safety is paramount when operating airless paint sprayers, and using a tip guard is essential to protect against the serious risk of high-pressure fluid injuries. The tip guard acts as a key safety feature, greatly reducing the likelihood of injection injuries from the spray gun. By directing the spray pattern safely away from you and bystanders, it helps maintain a safer working environment.

Additionally, understanding cat health and nutrition can aid in creating a safer workspace for pets nearby, as certain fumes may affect their health.

To enhance operator safety, always engage the trigger safety on the spray gun when it's not in use. This prevents accidental activation, which can lead to severe injection injuries. Remember, high-pressure fluid can pierce the skin even with minor contact, making it essential to maintain a safe distance from the spray tip during operation.

Proper training on the use of tip guards is fundamental for all operators handling airless spray equipment. Understanding the importance of this safety feature not only protects you but also promotes a culture of safety on the job site.

Always prioritize your safety and the safety of those around you by using a tip guard consistently during your painting projects.

Advertisement

Pressure Relief Procedures

Understanding the importance of tip guard usage naturally leads to recognizing the fundamental role of pressure relief procedures in preventing injection injuries. Proper home security systems are essential not only for protecting your belongings but also for guaranteeing a safe working environment.

Before you perform any maintenance or cleaning on your airless paint sprayer, always relieve the fluid pressure. This step is imperative to prevent accidental injuries that can occur from pressurized fluid escaping unexpectedly.

To relieve pressure, first engage the spray gun trigger safety and verify the gun is pointed away from yourself and others. After turning off the sprayer, trigger the gun into a waste container, allowing the fluid to safely escape. Additionally, utilize dump valves or other safety features specifically designed for pressure relief before attempting to clear clogs or make any adjustments to the equipment.

Regularly inspecting and maintaining the sprayer's components is essential for guaranteeing the proper functioning of safety mechanisms. By doing this, you greatly reduce the risk of pressure-related accidents.

Additional Safety Considerations

enhanced safety precautions required

When using an airless paint sprayer, it's important to stay mindful of additional safety considerations that can enhance your protection. Keeping these points in mind will help guarantee a safer painting experience:

1. Wear Personal Protective Equipment (PPE): Always use safety glasses to shield your eyes from harmful paint splashes and particles. A respirator is essential when dealing with toxic substances, as it prevents inhalation of harmful paint fumes and VOCs.

Advertisement

Additionally, adopting a holistic lifestyle approach can help improve overall well-being and resilience during tasks that involve exposure to potentially harmful substances.

2. Guarantee Proper Ventilation: Make sure the area is well-ventilated. Open windows and doors to allow fresh air to circulate, which helps dissipate harmful fumes and keeps the air quality safe.

3. Refer to Instruction Manuals: Always have your airless sprayer's instruction manual accessible. It contains critical safety information, including specific precautions and emergency procedures that can help prevent accidents.

Static Electricity Concerns

electrostatic discharge precautions needed

When using an airless paint sprayer, you need to be aware of static charge generation, especially in dry conditions.

The right grounding techniques and awareness of environmental factors like humidity can markedly reduce the risk of ignition.

Additionally, understanding how to maintain your equipment can enhance operational safety and efficiency, much like how heat pump maintenance is essential for peak performance.

Advertisement

Static Charge Generation

Static charge generation poses considerable safety concerns during the use of airless paint sprayers, especially during material transfer. When working with flammable fluids, any static electricity can become an ignition source, putting you at risk in poorly ventilated areas with poor air circulation.

Additionally, confirming that your workspace is equipped with high-quality materials, such as headphone extension cables, can help minimize interference and maintain a safer environment.

Here are three key points to reflect on:

  1. Environmental Factors: Low humidity and high temperatures increase static charge retention, heightening the potential for dangerous sparks.
  2. Material Handling: Using plastic containers can exacerbate static build-up due to their insulating properties, while metal containers facilitate grounding.
  3. Proper Practices: Maintaining dry hands and feet during the spraying process can greatly reduce the likelihood of static charge accumulation.

To mitigate these risks, you should utilize grounded suction tubes and bonding catch buckets to pumps.

Being proactive about these safety measures will help minimize static charge generation and protect you from the hazards associated with static electricity during your paint spraying tasks.

Stay aware of your environment and handle materials carefully to guarantee a safer working experience.

Advertisement

Grounding Techniques

To minimize the risks associated with static electricity during airless paint spraying, effective grounding techniques are a must. Static charges can ignite flammable vapors in poorly ventilated areas, so guaranteeing all equipment is properly grounded is vital for safety.

Grounding Technique Purpose
Grounded Hoses Prevents static charge buildup during spraying
Bonding Catch Buckets Enhances safety during material transfer
Regular Inspections Maintains electrical continuity and safety

Use grounded hoses and bond catch buckets to your pumps to greatly reduce static electricity risks. Additionally, employing alligator clips for grounding can further enhance safety during operations. It's also necessary to keep the humidity level above 30% to mitigate static charge retention, as dry air amplifies static electricity concerns.

Always inspect and maintain your grounding systems regularly to guarantee electrical continuity. By implementing these grounding techniques, you can create a safer working environment while using airless sprayers and protect yourself from the dangers of static electricity and flammable vapors. Remember, safety is always a priority in any spraying operation!

Environmental Factors

Environmental conditions greatly impact the risk of static electricity during airless paint spraying. Understanding these environmental factors can help you mitigate hazards. Here are three key elements to take into account:

  1. Humidity: Higher humidity levels can reduce static charge retention, while dry air conditions increase the risk of static electricity buildup.
  2. Temperature: Fluctuating temperatures can also affect static charge; warmer air can hold more moisture, potentially lowering static risks.
  3. Material Type: The construction material of your sprayer matters. Metal containers support effective grounding systems, reducing static electricity risks, while plastic containers can attract and retain charges.

It's essential to regularly check grounding systems and equipment to prevent static charge accumulation.

Remember, static electricity can ignite flammable environments, leading to dangerous electrical discharges.

Advertisement

To further minimize risks, keep your hands and feet dry during spraying operations. This simple practice reduces static charge buildup, helping you maintain a safer workspace.

Safety Equipment Recommendations

recommended safety equipment list

When operating an airless paint sprayer, wearing the right safety equipment is essential for protecting yourself from hazards. Start with safety goggles to shield your eyes from paint splashes and harmful chemicals.

A proper respirator, like a 3M 6001 organic vapor cartridge mask, is vital for filtering out flammable vapors and volatile organic compounds (VOCs), especially in enclosed spaces.

Dress in full-coverage protective clothing, including long sleeves and pants, to minimize skin exposure to paint. Combine this with rubber or vinyl gloves for additional hand protection against paint splashes.

It's important to regularly inspect and replace your respirator cartridges according to the Material Safety Data Sheet (MSDS) recommendations for the specific paint you're using, ensuring you're protected from inhalation hazards.

Lastly, don't overlook your footwear. Opt for non-conductive, slip-resistant footwear to reduce the risk of slips and falls in potentially hazardous environments while spraying.

Advertisement

Material Handling and Storage

efficient storage and management

Handling and storing materials safely is just as important as wearing the right safety equipment. To minimize risks while working with flammable materials, keep these key practices in mind:

  1. Review the Material Safety Data Sheet (MSDS): Always check for specific chemical hazards to guarantee compliance and safe handling.
  2. Use proper storage containers: Avoid plastic for volatile substances. Use grounded metal containers to reduce static charge and prevent sparks.
  3. Maintain an organized workspace: Don't place buckets directly on the floor. This prevents spills and keeps the area safe.

When transferring flammable materials, use grounded suction tubes to minimize static charge buildup.

During clean-up, opt for aluminum trays to enhance conductivity and reduce the risk of electrical sparks.

Keep in mind that cardboard or paper can help isolate containers from surfaces that may create a spark.

User Responsibility and Best Practices

user accountability and guidelines

Safety in using airless paint sprayers largely falls on the user. You must take user responsibility seriously by understanding and managing your work conditions. Regular inspections of your equipment are vital to guarantee everything's functioning correctly and safely. Always follow the safety guidelines outlined in the owner's manual.

Be aware of potential hazards, especially when working with flammable materials or solvents. Sparks or hot surfaces can lead to accidents, so stay vigilant. Proper ventilation is essential; secure adequate airflow by using exhaust fans or working outdoors whenever possible to minimize inhalation of harmful fumes.

Consulting Material Safety Data Sheets (MSDS) is another key practice. These documents provide valuable information on the specific chemical hazards associated with the materials you're using, aiding in informed handling and storage.

Lastly, regularly update your safety protocols. Sharing insights from past incidents can enhance user awareness and foster a culture of safety.

Advertisement

Incident Analysis and Improvement

enhancing incident response strategies

It's crucial to analyze incidents involving airless paint sprayers to enhance safety and prevent future occurrences.

By focusing on past incidents, you can identify common static-related issues and improve your safety measures. Here are three key steps you should take:

1. Review Environmental Conditions: Analyze the conditions during incidents to understand how static electricity and paint fumes interact.

This insight helps mitigate risks in the future.

2. Document Findings: Keep a record of recommendations for enhanced safety measures.

Sharing these findings with your team increases awareness of potential hazards and reinforces the importance of safety protocols.

Advertisement

3. Conduct Training Sessions: Regularly organize training sessions on equipment safety and emergency procedures.

This prepares your team for potential incidents, ensuring everyone knows how to respond effectively.

Frequently Asked Questions

How to Protect Yourself From Spray Paint Fumes?

To protect yourself from spray paint fumes, wear a proper respirator with an organic vapor cartridge, guarantee good ventilation, avoid heat sources, and maintain distance from the spray gun's tip while working.

Do You Need a Mask When Using an Airless Paint Sprayer?

Did you know that 90% of paint fumes are harmful? Yes, you definitely need a mask when using an airless paint sprayer. It protects you from inhaling dangerous chemicals, ensuring your safety during the job.

What Are the Hazards of Airless Paint Sprayer?

When using an airless paint sprayer, you face hazards like injection injuries from high-pressure fluid, flammable vapors in poorly ventilated spaces, and toxic fumes that can cause serious respiratory issues without proper protection. Stay vigilant!

Advertisement

Do You Need to Wear a Mask When Using Spray Paint?

Yes, you need to wear a mask when using spray paint. This protects you from harmful fumes and VOCs that can lead to respiratory issues. Always choose the right mask for the specific paint you're using.

Conclusion

In the world of airless paint sprayers, safety's not just a guideline; it's a necessity. Just like you wouldn't plunge into a pool without checking the depth, you shouldn't start spraying without proper precautions. By staying aware of hazards and using the right equipment, you're not only protecting yourself but also ensuring a smoother painting experience. So, gear up and paint on—because a safe project is a successful one, and who doesn't love a job well done?

Continue Reading

Airless Paint Sprayers

How to Properly Clean and Store Your Airless Paint Sprayer

Optimize the lifespan of your airless paint sprayer with proper cleaning and storage techniques; discover essential tips to keep it running smoothly.

Published

on

By

clean and store sprayer

To properly clean and store your airless paint sprayer, start by expelling any remaining paint until it shows a milky consistency. Wipe down the exterior, then remove the spray tip for thorough cleaning. Rinse the hose and gun with water, ensuring no moisture is left to prevent rust. Introduce a storage fluid to protect internal components. Before storing, clean and dry the sprayer completely and keep it in a heated area to avoid freezing. Regular maintenance checks will enhance performance and longevity. Discover more tips for prolonging your sprayer's life and ensuring ideal operation.

Key Takeaways

  • Regularly clean the sprayer post-use to prevent paint residue buildup and clogs, ensuring optimal performance.
  • Expel remaining paint, adjusting pressure to full, and check for a milky consistency to indicate effective cleaning.
  • Remove the spray tip and rinse the gun thoroughly, avoiding water retention to prevent rust and freezing issues.
  • Introduce storage fluid into the system and verify its circulation to protect internal components during storage.
  • Store the sprayer in a heated, dry environment, keeping it upright and covered to prevent moisture and dust accumulation.

Importance of Cleaning and Maintenance

Cleaning and maintaining your airless paint sprayer is vital for guaranteeing it performs at its best. Regular cleaning prevents paint residue buildup, which can damage important components and lead to costly repairs. By prioritizing maintenance, you not only extend your sprayer's lifespan but also keep it functioning efficiently. Understanding airless paint sprayer basics can help you make informed decisions about your equipment care.

Consistent cleaning helps maintain a uniform spray pattern and guarantees high application quality. This directly impacts the overall results of your painting projects. When you develop a routine for post-use cleaning, you manage your equipment effectively and reduce the risk of issues like freezing in colder environments.

Don't forget to regularly check and clean all sprayer components, including filters and spray tips. This practice is essential for maintaining your sprayer's functionality and efficiency.

By investing time in proper cleaning and maintenance, you're safeguarding your equipment and enhancing your painting experience. So, make it a habit to clean your airless paint sprayer after each use; you'll appreciate the difference it makes in performance and reliability.

Taking these steps now will save you time, money, and hassle in the long run, guaranteeing your sprayer is always ready for your next project.

Advertisement

Initial Cleanup Steps

begin cleaning process now

To kick off your cleanup, start by pushing all the remaining paint out of the sprayer to reduce mess and waste.

This initial step is essential for maintaining the performance of your sprayer and ensuring longevity, much like how a modern farmhouse bedroom emphasizes comfort and functionality.

Adjust the pressure to full and open the trigger until the expelled paint shows a milky consistency, indicating minimal residue left.

Don't forget to wipe down the exterior surfaces to keep everything tidy and prevent any paint from drying on the sprayer.

Expelling Remaining Paint

Before diving into the cleanup process, it's vital to expel any remaining paint from your airless paint sprayer. Start by adjusting the machine to low pressure to prevent splattering.

Then, set the sprayer to full pressure and open the trigger. Spray until all the paint is expelled, making sure the remaining paint has a milky consistency. This step minimizes mess and guarantees you have a clean start for the cleaning process. Proper dilution of your paint can also enhance sprayability and make this process smoother, allowing for more effective cleaning after use optimal results.

Advertisement

Next, return any unused paint back into its container to avoid waste and guarantee efficient use of materials. It's important to handle this carefully to prevent spills.

Once you've expelled the paint, take a moment to wipe down the exterior of the sprayer. This helps prevent paint from drying on the surfaces, making the overall cleanup process easier.

Exterior Wipe Down

One essential step in maintaining your airless paint sprayer is the exterior wipe down, which should be done right after you've expelled all remaining paint.

Start by grabbing a damp cloth to remove any paint splatters that may have landed on the sprayer's surfaces during use. This prevents the paint from drying and potentially causing damage. Regular maintenance, akin to essential items for a home cleaning kit, can help guarantee that your equipment remains in peak condition.

Before you begin, make certain all paint has been expelled from the sprayer to minimize any mess and keep the exterior clean. Choose a cleaning solution that's compatible with the paint type you used; for latex paints, water works best, while mineral spirits are ideal for oil-based paints.

Advertisement

Pay special attention to areas where paint may accumulate, like the trigger, handle, and connections. These spots are critical for maintaining peak performance and preventing clogs.

Pressure Adjustment Tips

How can you guarantee a smooth initial cleanup process for your airless paint sprayer? Start by setting the sprayer to full pressure. This allows you to effectively push the paint out before diving into the cleanup.

Once you've expelled as much paint as possible, lower the pressure to avoid any unwanted splattering during the initial steps. It's also a good idea to protect your workspace by covering surfaces that may be splattered with paint, similar to how proper safety features are essential for using tools safely.

While the sprayer is still under pressure, wipe down its exterior. This quick action prevents any paint from drying on the surfaces, making the final cleanup easier. As you clean, keep an eye on the remaining paint; it should reach a milky consistency, signaling it's ready for the next phase of rinsing with water.

Next, remove the spray tip, which is an important last step. Engage the machine at low pressure and open the trigger to expel any remaining paint more efficiently.

Advertisement

This technique guarantees you've cleared out the system, leaving your sprayer clean and ready to go for your next project. Following these pressure adjustment tips will make your cleanup process swift and effective.

Cleaning the Hose and Gun

hose and gun maintenance

Cleaning the hose and gun of your airless paint sprayer is vital for maintaining its performance and longevity. Start by removing the spray tip from the gun. This step helps facilitate a more efficient cleaning process and prevents clogging.

Air purifiers, for instance, can also help maintain a clean environment by reducing allergens and dust in the air, which is especially important when working with paints and solvents improve indoor air quality.

Next, engage the sprayer at low pressure while opening the trigger to expel any remaining paint from the hose and gun. Once you've cleared the excess paint, switch to full pressure and run the machine for 20-30 seconds. This helps to effectively clear any debris lodged within the pump walls and hoses.

Now, submerge the gun's intake into a bucket of water. Activate the trigger to rinse thoroughly, making sure all paint is expelled. This step is vital to prevent future clogs and maintain the functionality of your paint sprayer.

After rinsing, be sure to avoid leaving any water in the system. Doing so can lead to rust buildup and potential freezing issues, which can damage components.

Advertisement

Finalizing the Cleanup

completing the cleanup process

After thoroughly rinsing the gun and hose, it's time to finalize the cleanup to guarantee your airless paint sprayer is ready for storage.

First, you'll want to protect the internal components by introducing a storage fluid, like pump armor or mineral spirits, into the system. This step is essential to prevent any damage during storage, similar to how hair treatments for damage can restore and protect your hair.

Next, verify that the storage fluid circulates completely through the system. You can check this by looking for a distinct color, such as blue, at the output. This indicates that the fluid has covered all necessary parts.

Finally, remember to clean all filters because they can impact your sprayer's performance.

Here's a quick checklist to help you finalize the cleanup:

  1. Introduce storage fluid: Use pump armor or mineral spirits.
  2. Check fluid circulation: Look for distinct color at the output.
  3. Clean filters daily: Guarantee peak performance and check for wear.

Storage Tips

maximize space efficiently

To guarantee your airless paint sprayer remains in top condition, store it in a heated environment, especially during colder months. This prevents freezing damage that can lead to costly repairs. Before you tuck your sprayer away, verify it's completely cleaned and dried to avoid paint residue buildup and potential clogs.

Using a protective cover or bag is vital when storing the sprayer. This shields it from dust, debris, and moisture that could cause corrosion. Always keep the sprayer in an upright position during storage to prevent any oil or fluid leaks that could damage the equipment.

Advertisement

Lastly, schedule routine maintenance checks while your sprayer is in storage. This verifies all components are functioning correctly and ready for use when you need them.

Storage Tip Importance Action Required
Heated Environment Prevents freezing damage Store indoors or heated area
Clean and Dry Avoids clogs and paint buildup Clean thoroughly before storage
Protective Cover Shields from dust and moisture Use a cover or bag
Upright Position Prevents leaks Store upright

Long-term Maintenance Practices

sustained care and upkeep

To keep your airless paint sprayer in top shape, you need to set up a routine maintenance schedule and pay attention to its storage environment.

Regular maintenance not only enhances performance but can also be compared to the importance of home security systems in protecting your investments.

Make sure to store it in a heated area to avoid freezing damage, and check its components every few months for wear and tear.

This proactive approach will help extend your sprayer's lifespan and improve its performance.

Routine Maintenance Schedule

Establishing a routine maintenance schedule is crucial for keeping your airless paint sprayer in prime condition and extending its lifespan. By following these simple steps, you'll guarantee peak performance and avoid costly repairs.

Advertisement

Additionally, just as diversifying your retirement portfolio helps mitigate risk, maintaining your sprayer can prevent unexpected breakdowns and costly repairs associated with proper upkeep.

  1. Daily Checks: After each use, inspect the filters and components. This quick check helps you catch any issues early, assuring your sprayer runs smoothly.
  2. In-Depth Cleaning: Schedule a thorough cleaning after every use. Focus on the spray gun, hose, and pump to eliminate paint residue and prevent clogs that can damage your sprayer.
  3. Seasonal Maintenance: Plan for maintenance before and after winter. Expel all water to prevent freezing damage and use appropriate storage fluid for protection.

Additionally, conduct a monthly inspection to look for signs of wear, especially on seals, hoses, and the spray tip. This helps maintain consistent spray patterns.

Storage Environment Considerations

After maintaining your airless paint sprayer with a solid routine, the next step is ensuring it's stored properly for long-term use. To prolong its life and performance, consider the following storage environment factors:

Storage Consideration Details
Temperature Store in a heated area; avoid freezing (below 32°F).
Humidity Keep the area dry and well-ventilated to prevent moisture buildup.
Elevation Place the sprayer elevated off the ground to prevent water damage.
Regular Inspections Periodically check for wear, damage, or leaks during storage.
Protection Use a cover or bag to shield from dust and debris.

Frequently Asked Questions

How Do You Store an Airless Spray Gun?

To store your airless spray gun, clean it thoroughly, add storage fluid, and keep it in a heated, protective case. Regularly check for wear or damage to guarantee it's ready for your next project.

How to Keep an Airless Sprayer Clean?

To keep your airless sprayer clean, always expel remaining paint, rinse thoroughly with water, and clear the hose. Regularly check filters and maintain the system to guarantee peak performance and prevent paint residue buildup.

Can I Leave Water in My Airless Sprayer?

Leaving water in your airless sprayer is like inviting rust to a party. You can't risk clogs or damage. Always expel all water and consider storage fluids to keep your sprayer in top shape.

Advertisement

How Do You Store Graco Paint Sprayer Between Coats?

To store your Graco paint sprayer between coats, clear all paint, set it to low pressure, rinse with water, add storage fluid, and keep it in a heated space to prevent freezing damage.

Conclusion

So, you've finally cleaned that airless paint sprayer, huh? Bravo! You didn't just avoid a paint catastrophe; you're practically an artist now. Just remember, a sprayer left dirty is like a painter without a brush—utterly useless. Storing it properly is key, unless you enjoy the surprise of clogged nozzles and dried paint. Who wouldn't want that thrill? Keep it clean, stash it right, and let your next masterpiece flow without a hitch!

Continue Reading
Advertisement

Affiliate disclaimer

As an affiliate, we may earn a commission from qualifying purchases. We get commissions for purchases made through links on this website from Amazon and other third parties.

Advertisement

Trending