Connect with us

Airless Paint Sprayers FAQs

Diy How To Use Chalk Paint Iwth An Airless Paint Sprayer

Published

on

An image showcasing a step-by-step guide on using chalk paint with an airless paint sprayer

For those of us who are passionate about refreshing furniture to give it a new look, I have found that using chalk paint with an airless paint sprayer is a game-changer. It is a rejuvenating experience for DIY enthusiasts like myself. The seamless and consistent finish achieved by an airless paint sprayer, combined with the versatility and charm of chalk paint, offers endless possibilities.

In this article, I will guide you through the process of using chalk paint with an airless paint sprayer, from preparing your surface to achieving a flawless finish. I will share tips and techniques to help you add texture and distress your piece for a unique, vintage look. We will also explore different ways to seal and protect your chalk-painted surface, ensuring its longevity.

Whether you’re a seasoned DIYer or just starting out, this article will equip you with the knowledge and inspiration to create stunning pieces using chalk paint and an airless paint sprayer. Let’s dive in and bring your furniture dreams to life!

Key Takeaways

  • Achieving a smooth and even application by lightly sanding edges and experimenting with colors and layering
  • Troubleshooting common issues such as clogging, uneven coverage, dripping or running paint, and paint splattering
  • Benefits of using an airless paint sprayer, including achieving professional-looking results, saving time, evenly applying paint, and providing a smooth finish
  • Techniques for creating different effects, such as a distressed vintage look, experimenting with colors and layering, adding intricate designs with stencils, and trying color-blocking or ombre effects.

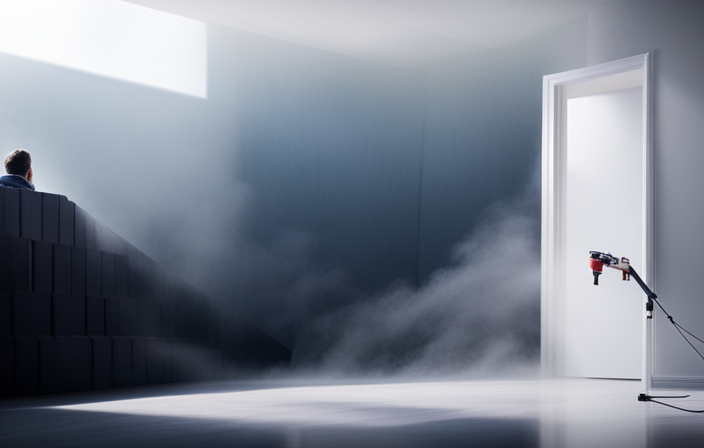
Introduction to Chalk Paint and Airless Paint Sprayers

Are you ready to learn how to create beautiful, vintage-inspired furniture using chalk paint and an airless paint sprayer?

Advertisement

Chalk paint is a versatile and popular choice for DIY projects because of its unique matte finish and the ease with which it can be distressed.

When combined with an airless paint sprayer, the advantages of using chalk paint are even more pronounced. Unlike other types of paint for airless paint sprayers, chalk paint requires little to no prep work.

It adheres well to a variety of surfaces, including wood, metal, and even plastic. Additionally, the airless paint sprayer provides a smooth and even application, ensuring a professional-looking finish every time.

Now that you understand the benefits of using chalk paint with an airless paint sprayer, let’s move on to preparing your surface for its application.

Preparing Your Surface for Chalk Paint

Before starting your project, it’s important to prepare the surface properly for chalk paint. Begin by cleaning the surface to remove any dirt or debris. Once it’s clean, use sandpaper with a medium grit to gently roughen up the surface. This will help the paint adhere better. Focus on any rough or uneven areas that may require more sanding. After sanding, wipe down the surface with a damp cloth to remove any dust or residue. Taking the time to prepare your surface will ensure a flawless finish for your chalk paint project.

Advertisement

Now, let’s move on to choosing the right chalk paint and airless paint sprayer.

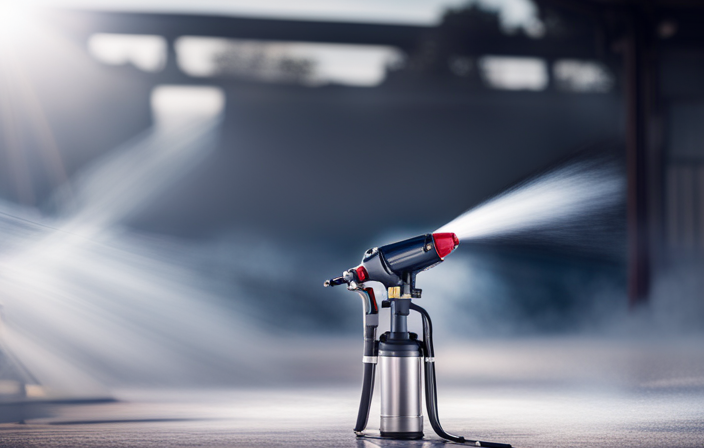
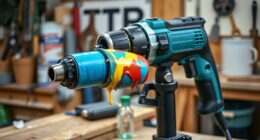
Choosing the Right Chalk Paint and Airless Paint Sprayer

To achieve a professional and polished result, it’s essential to select the right chalk paint and airless paint sprayer for your project. When choosing paint colors, consider the overall aesthetic and style of your space. Chalk paint offers a variety of shades, allowing for customization.

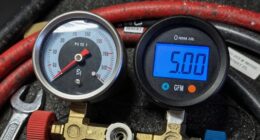
In addition to paint color, it’s important to choose an airless paint sprayer that is compatible with chalk paint. Look for a sprayer with a wide spray pattern for even coverage and minimal overspray.

Advertisement

Troubleshooting paint sprayer issues can be frustrating, but with proper research and understanding, you can troubleshoot common problems like clogs or uneven spray.

Now, let’s move on to the next section about mixing and applying chalk paint.

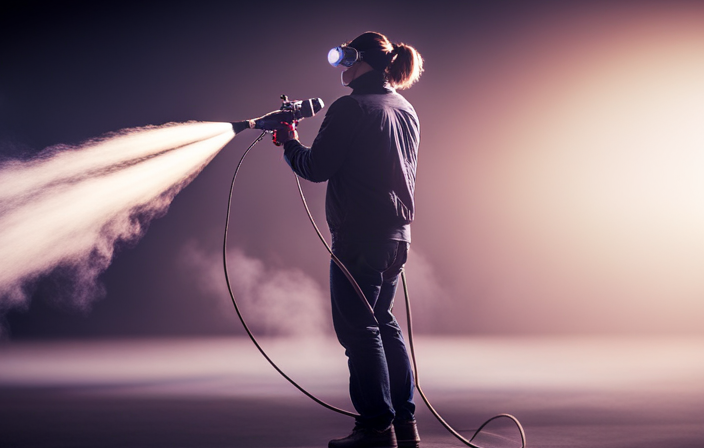
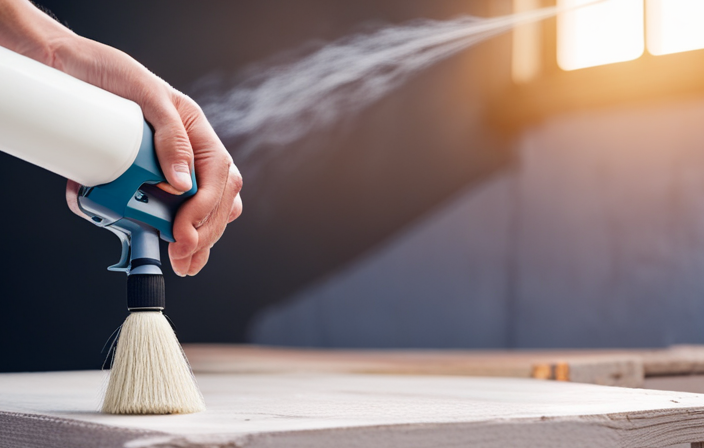
Mixing and Applying Chalk Paint

Once you’ve selected the perfect color and spray pattern for your project, it’s time to mix and apply the chalk paint using your airless paint sprayer. Here are some key steps to follow for a successful application:

  • Start by thoroughly stirring the chalk paint to ensure it’s well mixed.

  • Adjust the nozzle of your airless paint sprayer to achieve the desired spray pattern.

  • Apply a thin and even coat of chalk paint to the surface, holding the sprayer about 12 inches away.

  • Let the first coat dry completely before applying multiple coats to achieve a more opaque finish.

Applying multiple coats will help you achieve a vintage look as the paint builds up and creates depth.

Once you’ve mastered the technique of applying chalk paint with an airless paint sprayer, you can move on to the next section about tips for achieving a smooth and even finish.

Advertisement

Tips for Achieving a Smooth and Even Finish

Achieving a smooth and even finish requires mastering the art of applying multiple coats with precision and finesse. Here are some tips to help you achieve a flawless result:

  • Start by ensuring that your chalk paint is well mixed and free of any lumps or clumps. This will help prevent any uneven application.

  • Choose the right nozzle size for your airless paint sprayer. A smaller nozzle size will provide more control and help you achieve a smoother result.

  • When applying the paint, use even and consistent strokes. Overlap each pass slightly to avoid any visible lines or streaks.

  • Maintain a consistent distance between the sprayer and the surface to ensure an even application.

  • Allow each coat to dry completely before applying the next. Rushing the drying process can lead to imperfections.

By following these tips, you’ll be able to create a flawless finish.

Cleaning and Maintaining Your Airless Paint Sprayer

Keeping your airless paint sprayer clean and well-maintained is essential for ensuring its longevity and optimal performance. Here are some cleaning tips and a troubleshooting guide to help you maintain your sprayer:

Advertisement
  1. Regularly clean the sprayer after each use by flushing it with water or a cleaning solution to remove any leftover paint residue.
  2. Pay attention to the filters and screens and clean or replace them as needed to avoid clogs and ensure proper paint flow.
  3. Check the spray tip regularly for any obstructions or buildup and clean it thoroughly to maintain a consistent spray pattern.
  4. Lubricate the pump regularly to keep it running smoothly and prevent any damage.

By following these cleaning tips and troubleshooting guide, you can ensure that your airless paint sprayer remains in excellent condition.

Now, let’s move on to adding texture and distressing techniques with chalk paint.

Adding Texture and Distressing Techniques with Chalk Paint

To give your furniture a unique and aged look, you can easily create texture and distressing effects using chalky paint. Adding texture to your piece enhances its visual interest and depth. Simply apply the chalk paint with a brush in a crosshatch or stippling motion to create a textured surface that adds character. For distressing techniques, use sandpaper or a damp cloth to gently rub away some of the paint, revealing the underlying layers and giving it a worn appearance. These techniques allow you to customize your furniture to your desired level of distress and texture.

When sealing and protecting your chalk painted surface, it’s important to…

Sealing and Protecting Your Chalk Painted Surface

When sealing and protecting your chalk painted surface, there are a few things to consider for durability and longevity. Studies have shown that furniture with a protective sealant can last up to 50% longer.

There are various sealing techniques you can use. One popular option is applying a clear wax topcoat. This not only protects the surface but also adds a subtle sheen and smoothness to the finish.

Advertisement

Another option is using a polyurethane topcoat, which provides a more durable and water-resistant finish. You can choose between a matte or satin finish depending on your desired look.

With these topcoat options, you can ensure the longevity and protection of your chalk painted surface.

Moving forward, let’s explore some creative ideas and inspirations for using chalk paint with an airless paint sprayer.

Creative Ideas and Inspirations for Using Chalk Paint with an Airless Paint Sprayer

Get ready to unleash your creativity and transform any surface into a work of art with the magical combination of chalk paint and an airless paint sprayer. Chalk paint techniques offer endless possibilities for unique furniture makeovers. With an airless paint sprayer, you can achieve a smooth and even application, allowing the texture and character of the piece to shine through.

Here are some ideas to inspire you:

Advertisement
  • Create a distressed vintage look by lightly sanding the edges after painting.
  • Experiment with different colors and layering techniques to achieve a shabby chic style.
  • Use stencils to add intricate designs and patterns to your furniture.
  • Try color-blocking or ombre effects for a modern and trendy look.

By using an airless paint sprayer, you can easily achieve professional-looking results and save time compared to traditional brush painting.

Now, let’s dive into troubleshooting common issues and FAQs to ensure a smooth painting process.

Troubleshooting Common Issues and FAQs

Ironically, encountering common issues and frequently asked questions can be a delightful part of the chalk paint and airless paint sprayer journey. When using chalk paint with an airless paint sprayer, it’s important to be prepared for any challenges that may arise. Here are some troubleshooting tips and common FAQs to help you navigate through any problems:

Common Issue Troubleshooting Tip
Clogging Use a larger nozzle size or strain the paint before pouring it into the sprayer.
Uneven Coverage Make sure you are applying the paint in thin, even coats and avoid overspraying. Sanding between coats can also help achieve a smoother finish.
Dripping or Running Paint Adjust the pressure settings on your sprayer and practice using a consistent motion while spraying.
Paint Splattering Check the viscosity of your paint and adjust the pressure accordingly. Also, ensure that the sprayer is clean and free from any clogs or blockages.

By following these troubleshooting tips and referring to the common FAQs, you can confidently use chalk paint with an airless paint sprayer and achieve beautiful results.

Frequently Asked Questions

Can I use regular paint with an airless paint sprayer instead of chalk paint?

Yes, regular paint can be used with an airless paint sprayer instead of chalk paint. The pros of using chalk paint are its matte finish and ease of distressing. However, regular paint offers a wider range of color options and may require a primer for better adhesion.

Is it necessary to sand my surface before applying chalk paint with an airless paint sprayer?

It is generally recommended to sand the surface before applying chalk paint, as it helps the paint adhere better and creates a smoother finish. However, using an airless paint sprayer can help achieve a more even and professional-looking result, saving time and effort.

Advertisement

Can I use an airless paint sprayer for small projects, or is it better suited for larger surfaces?

An airless paint sprayer can be used for both small and large projects. It is versatile and efficient, making it a great choice for any size surface. Compared to traditional sprayers, it offers a quicker and smoother application.

How long does chalk paint take to dry when applied with an airless paint sprayer?

To speed up drying time of chalk paint applied with an airless paint sprayer, try thinning the paint with water and applying thin coats. To achieve a smooth finish, make sure to sand between coats and use a high-quality brush or roller.

Can I use chalk paint with an airless paint sprayer on outdoor surfaces?

Yes, you can use chalk paint with an airless paint sprayer on outdoor surfaces. Chalk paint provides a matte finish and is durable for outdoor use. Using an airless sprayer ensures a smooth and even application, saving time and effort.

Conclusion

After going through the process of using chalk paint with an airless paint sprayer, I can confidently say that it is a game-changer.

The smooth and even finish it provides is like a breath of fresh air for any DIY enthusiast.

Advertisement

It’s like painting with a magic wand, transforming ordinary surfaces into works of art.

The possibilities are endless with chalk paint and an airless paint sprayer, allowing you to unleash your creativity and bring your visions to life.

So go ahead, grab that sprayer and let your imagination run wild!

Whether it’s a step-by-step tutorial on achieving flawless finishes or an in-depth analysis of the latest airless paint sprayer models, Joe’s ability to articulate complex ideas in a simple and engaging manner resonates with our diverse audience. His practical tips and techniques empower readers to tackle their projects with confidence.

Continue Reading
Advertisement

Airless Paint Sprayers FAQs

How To Clean A Dirty Airless Paint Sprayer

Published

on

By

An image that visually depicts the step-by-step process of cleaning a grimy airless paint sprayer

Just finished a big painting project and now you have a dirty airless paint sprayer? Don’t worry, I’m here to assist.

In this article, I will show you how to clean a dirty airless paint sprayer with ease.

Cleaning an airless paint sprayer might seem like a daunting task, but with the right tools and techniques, it can be a breeze. By following a few simple steps, you can ensure that your sprayer stays in top condition, ready for future use.

First, gather all the necessary cleaning supplies.

Then, disconnect the sprayer from the power source and release any remaining pressure.

Advertisement

Remove the spray tip and filter, and flush the sprayer with water or a cleaning solution.

Use a brush or toothpick to remove any stubborn paint residue.

Rinse the sprayer thoroughly, dry it, and reassemble it.

Finally, store it in a clean and dry area.

So let’s get started and get that dirty airless paint sprayer looking brand new again.

Advertisement

Key Takeaways

  • Pay attention to hard-to-reach areas to prevent moisture buildup
  • Thoroughly dry and reassemble the sprayer to prevent damage or malfunction
  • Carefully reassemble the sprayer after drying, ensuring snug fit of all parts
  • Regularly clean filters and nozzles to prevent clogging

Gather the necessary cleaning supplies

Now, you’re gonna wanna gather all the necessary cleaning supplies to get that airless paint sprayer sparkling clean. Cleaning techniques are important, but before you can even begin, you need to make sure you have the right tools.

Start by grabbing a bucket or container that can hold the cleaning solution. You’ll also need a clean cloth or sponge for wiping down the sprayer. Don’t forget to grab some gloves to protect your hands from the cleaning solution.

As for choosing the right cleaning solution, you want to make sure it’s compatible with the paint you were using. Look for a mild detergent or a specific cleaning solution made for airless paint sprayers.

Once you have everything you need, you can move on to the next step of disconnecting the sprayer from the power source.

Advertisement

Disconnect the sprayer from the power source

First, make sure you’ve unplugged the machine from the power source. This is an essential step in ensuring your safety while cleaning the airless paint sprayer. Cleaning precautions should always be taken to avoid any accidents or injuries.

Once the sprayer is disconnected, you can proceed with the cleaning process. It’s important to follow the manufacturer’s maintenance tips to ensure the longevity of your sprayer. Regular cleaning and maintenance will also guarantee optimal performance.

Now that the sprayer is safely disconnected, the next step is to release any remaining pressure in the sprayer. This will prevent any unexpected spray or splatter when disassembling and cleaning the different parts of the sprayer.

Release any remaining pressure in the sprayer

Advertisement

Before you proceed, make sure all pressure has been released from the sprayer to prevent any unexpected spray or splatter. To safely release pressure in an airless paint sprayer, follow these precautions:

  • Wear protective gloves and goggles to shield yourself from any accidental paint spray.
  • Position the sprayer outlet away from yourself and others to avoid any potential harm.
  • Slowly turn the pressure relief valve counterclockwise to release the pressure gradually.
  • Allow any remaining paint or fluid to drain from the sprayer before proceeding.

Double-check that the pressure gauge reads zero before continuing.

Taking these precautions will help prevent any accidents or mishaps while releasing pressure in an airless paint sprayer.

Once all the pressure has been safely released, you can move on to the next step of removing the spray tip and filter.

Remove the spray tip and filter

To safely continue, it’s time to take off the spray tip and filter. This step is crucial in the cleaning process of your airless paint sprayer.

Start by unscrewing the spray tip counterclockwise using a wrench or pliers. Be careful not to damage the tip or the threads.

Advertisement

Once the spray tip is removed, you’ll find the filter located inside the gun handle. Gently pull out the filter and inspect it for any clogs or debris. If necessary, clean the filter using water or a cleaning solution. Cleaning techniques may vary depending on the type of filter, so refer to the manufacturer’s instructions for specific maintenance tips.

With the spray tip and filter removed, we can now move on to flushing the sprayer with water or a cleaning solution.

Flush the sprayer with water or cleaning solution

Once you’ve removed the spray tip and filter, it’s time to give your sprayer a refreshing cleanse by flushing it with water or a cleaning solution. It’s just like giving your car a much-needed wash to remove all the dust and grime. Cleaning a paint sprayer can be done using either water or a cleaning solution. Using water is a more cost-effective option, as it’s readily available and easy to use. However, a cleaning solution specifically designed for paint sprayers can provide a more thorough and effective clean, removing any stubborn residue or paint buildup. The choice between water and cleaning solution ultimately depends on the level of dirt and paint on your sprayer.

Advertisement

After flushing the sprayer, it’s important to clean the filter and spray tip separately to ensure optimal performance.

Clean the filter and spray tip separately

Now, let me show you how you can give your filter and spray tip the attention they deserve to ensure flawless performance.

Cleaning the filter and spray tip is crucial for maintaining the efficiency of your airless paint sprayer. Start by removing the filter and rinsing it with water to remove any loose paint particles. For stubborn residue, you can use a cleaning solution specifically designed for airless paint sprayers. Scrub the filter gently with a brush to remove any clogs or build-up.

Next, move on to the spray tip. Unscrew it from the sprayer and soak it in a cleaning solution for a few minutes. Use a small brush to remove any paint residue that might be blocking the openings.

Rinse both the filter and spray tip thoroughly with water before reassembling them back onto the sprayer.

Advertisement

Now, let’s move on to the next section about using a brush or toothpick to remove any stubborn paint residue.

Use a brush or toothpick to remove any stubborn paint residue

Take a brush or toothpick and give those stubborn paint residues a good scrub to ensure a flawless finish. Using alternative cleaning methods can help remove any paint buildup on the sprayer.

Here are two effective techniques to try:

  1. Dampen a brush with warm water and gently scrub the spray tip. Be sure to remove any paint that may be clogging the small openings. This will help maintain a consistent spray pattern and prevent blockages during future use.

  2. Use a toothpick to carefully scrape off any dried paint from the filter. Be gentle to avoid damaging the filter mesh. Removing paint residue from the filter will improve the sprayer’s performance and extend its lifespan.

After successfully cleaning the filter and spray tip separately, it’s time to move on to the next step: rinsing the sprayer thoroughly. This will ensure all remaining paint particles are removed and the sprayer is ready for its next use.

Rinse the sprayer thoroughly

Make sure you thoroughly flush out the sprayer with water to remove any remaining particles. This step is crucial for deep cleaning your airless paint sprayer and maintaining its optimal performance.

Advertisement

Start by detaching the spray tip and guard, as well as the filter, if applicable. Then, using a hose or faucet, run water through the sprayer for several minutes. Make sure to rotate and move the sprayer in different positions to ensure all areas are thoroughly rinsed. Pay close attention to the hose, as paint residue can often accumulate there.

Once you’re confident that the sprayer is clean, you can move on to the next step of drying and reassembling the sprayer, which we’ll discuss in the following section.

Dry and reassemble the sprayer

After thoroughly rinsing the sprayer, it’s essential to ensure it’s completely dry and reassembled before moving on to the next step of the cleaning process. Start by using a clean cloth or towel to dry all the components, including the nozzle, hose, and gun.

Pay attention to any hard-to-reach areas to prevent moisture buildup. Once dry, carefully reassemble the sprayer, making sure all parts fit snugly and securely. This is also a good time to inspect the sprayer for any worn-out parts that may need replacing. Troubleshoot common issues such as leaks or clogs before proceeding.

By taking the time to thoroughly dry and reassemble the sprayer, you can prevent any potential damage or malfunction.

Advertisement

Now, let’s move on to the next step and store the sprayer in a clean and dry area for future use.

Store the sprayer in a clean and dry area for future use

Once you’ve ensured everything is dry and reassembled, find a nice, cozy spot to store your trusty sprayer for future projects. Storing your airless paint sprayer properly is essential to maintain its longevity and performance. Here are some important storing precautions and maintenance tips to keep in mind:

Storing Precautions Maintenance Tips
Store in a clean and dry area away from direct sunlight or extreme temperatures. Regularly clean the sprayer’s filters and nozzles to prevent clogging.
Protect the sprayer from dust and debris by covering it with a clean cloth or plastic bag. Lubricate the sprayer’s moving parts with a suitable lubricant to prevent rusting.
Keep the sprayer upright to prevent any leaking or damage to the internal components. Check the sprayer’s hoses and connections for any signs of wear or damage. Replace if necessary.
Avoid storing the sprayer near any flammable materials to reduce the risk of fire hazards. Always follow the manufacturer’s instructions for proper maintenance and storage.

By following these storing precautions and maintenance tips, you can ensure that your airless paint sprayer will be in optimal condition for your future painting projects.

Frequently Asked Questions

Can I use any type of cleaning solution to flush the sprayer?

Sure, any cleaning solution can be used to flush the sprayer, but it’s essential to choose the right one. While vinegar and water work well for water-based paints, mineral spirits are perfect for oil-based paints.

How often should I clean the filter and spray tip?

I recommend cleaning the filter and spray tip of your airless paint sprayer regularly to ensure optimal performance. It is important to clean them after every use to prevent clogs and maintain a consistent spray pattern.

Advertisement

Can I use a regular brush or toothpick to remove paint residue or is there a specific type of tool I should use?

To effectively remove paint residue from an airless paint sprayer, it’s important to use the right tools. While a regular brush or toothpick might work for small areas, it’s recommended to use specialized cleaning tools for better results and to prevent damage to the sprayer.

Is it necessary to dry the sprayer completely before reassembling it?

Yes, it is necessary to completely dry the sprayer before reassembling it. This ensures that there is no moisture left inside the sprayer, which can lead to clogs or damage during the reassembly process.

How often should I clean and store the sprayer if I use it frequently?

If I use the airless paint sprayer frequently, I should clean it after every use. Proper cleaning frequency ensures optimal performance. Additionally, storing the sprayer in a clean and dry place helps maintain its functionality.

Conclusion

In conclusion, cleaning a dirty airless paint sprayer is a meticulous task that requires the right tools and techniques. By following the steps outlined above, you can ensure that your sprayer is thoroughly cleaned and ready for future use.

Remember, a clean sprayer is a happy sprayer, so don’t neglect this important maintenance task. As the saying goes, "A stitch in time saves nine," taking the time to clean your sprayer now will prevent bigger issues down the road.

Advertisement

So go ahead and give your sprayer the TLC it deserves.

Continue Reading

Airless Paint Sprayers FAQs

How To Clean An Airless Paint Sprayer With Water

Published

on

By

An image of a hand holding a disassembled airless paint sprayer under a running faucet, with water flowing through the nozzle, cleansing the paint residue

Are you interested in learning the most effective method for cleaning your airless paint sprayer using only water? Look no further! This guide will provide you with a thorough, step-by-step process for cleaning your airless paint sprayer with water, ensuring that it is in top condition and ready for your next painting project.

Cleaning your airless paint sprayer is crucial to maintain its performance and prolong its lifespan. By following these instructions, you can avoid clogs, reduce paint buildup, and prevent any potential damage to your equipment.

From gathering the necessary materials to properly storing the sprayer, each step is explained in a technical and precise manner. By the end of this article, you will have a clear understanding of how to clean your airless paint sprayer, leaving it in optimal condition for your future painting endeavors.

So, let’s get started and make sure your airless paint sprayer stays in top shape!

Key Takeaways

  • Fill sprayer with water before cleaning
  • Flush sprayer with water to remove paint or debris
  • Run water and pump preservative mixture through sprayer to protect components
  • Thoroughly clean and store sprayer after use

Gather Your Materials

Advertisement

Now it’s time to gather all the materials you’ll need to clean your airless paint sprayer with just water! Before we get started, let’s talk about some cleaning solution alternatives.

If you don’t have a specific airless paint sprayer cleaner, you can use warm soapy water or a mixture of vinegar and water. These options work well in removing any leftover paint or debris from the sprayer.

Additionally, it’s essential to have some maintenance tips in mind. Make sure to wear protective gloves and goggles to avoid any accidents. You’ll also need a clean bucket or container, a soft brush or cloth, and a wrench for removing any nozzle or tip.

With all these materials in hand, let’s move on to preparing the sprayer for cleaning, ensuring it’s ready for the next painting project.

Prepare the Sprayer for Cleaning

Before you begin preparing the sprayer for maintenance, it’s important to know that 90% of paint sprayer failures are caused by improper cleaning techniques. To avoid any mishaps, there are certain precautions to take while cleaning an airless paint sprayer.

Advertisement

Firstly, make sure to wear protective gloves and goggles to prevent any contact with the cleaning solution or paint residues. Disconnect the sprayer from the power source and relieve any pressure in the system by triggering the gun into a waste container.

Next, remove the spray tip, guard, and filter, and soak them in a cleaning solution. Avoid using harsh chemicals or solvents as they can damage the sprayer components. Additionally, it’s crucial to avoid common mistakes such as neglecting to clean the intake tube or leaving any paint residues in the system.

Once the sprayer is properly prepared, it’s time to move on to the next section and flush the system with water to complete the cleaning process.

Flush the System with Water

Advertisement

Make sure you’re fully prepared to maintain your sprayer by thoroughly flushing the system with water, ensuring optimal performance and longevity. The importance of using clean water for flushing the airless paint sprayer can’t be overstated. It helps remove any leftover paint residue or debris, preventing clogs and blockages in the system. To avoid common mistakes during the water flushing process, always use fresh, clean water without any additives or chemicals.

Avoid using dirty or contaminated water, as it can cause damage to the sprayer. Additionally, be careful not to apply too much pressure when flushing the system, as it may lead to leaks or other issues.

Once the system is flushed, you can proceed to the next section to clean the spray gun and nozzles, ensuring a thorough cleaning process.

Clean the Spray Gun and Nozzles

To achieve optimal performance and longevity, it’s essential to give the spray gun and nozzles a thorough scrubbing, like giving your car a sparkling wash and wax.

Start by disassembling the spray gun and removing any remaining paint or debris. Use a cleaning solution alternative, such as warm soapy water or a mixture of water and vinegar, to soak the parts for a few minutes. Then, scrub the inside and outside of the gun with a soft brush, making sure to clean the trigger, needle, and air cap.

Advertisement

Rinse everything with clean water and dry with a lint-free cloth.

Next, check for common spray gun issues like clogs or uneven spray patterns. Troubleshoot these problems by adjusting the nozzle or cleaning the air passages.

Finally, transition into the next section about removing and cleaning the filters for a complete maintenance process.

Remove and Clean the Filters

Advertisement

Once you’ve given your spray gun a good scrub, it’s time to tackle the next step: getting those filters removed and cleaned. Properly maintaining and cleaning the filters is essential for the optimal performance of your airless paint sprayer. By regularly cleaning the filters, you can prevent clogs and ensure a smooth paint application.

To clean the filters, follow these simple steps:

  1. Start by turning off the sprayer and relieving any pressure.
  2. Locate the filters, which are usually located near the pump or at the end of the spray gun.
  3. Carefully remove the filters using a wrench or pliers, making sure not to damage them.
  4. Rinse the filters thoroughly with clean water to remove any paint residue or debris.
  5. Once the filters are clean, reassemble them back into the sprayer.

By following these cleaning techniques and maintenance tips, you can keep your airless paint sprayer in top condition. Now, let’s move on to the next section and discuss how to scrub the paint reservoir.

Scrub the Paint Reservoir

After properly maintaining and cleaning the filters, it’s time to delicately cleanse the container that holds the paint. The paint reservoir is a crucial component of an airless paint sprayer, and regular maintenance is essential to prevent paint buildup and ensure optimal performance.

To scrub the paint reservoir, start by emptying any remaining paint and wiping it clean with a damp cloth. Next, fill the reservoir with warm water and a mild detergent solution. Use a soft-bristle brush to scrub the inside of the reservoir, paying special attention to any areas with dried paint. Rinse the reservoir thoroughly with clean water to remove any residue. This step is important to ensure that the paint sprayer operates at its best.

Now that the paint reservoir is clean, it’s time to move on to the next section about rinsing and drying all components.

Advertisement

Rinse and Dry all Components

After scrubbing the paint reservoir, it’s crucial to thoroughly rinse and dry all components of the airless paint sprayer. This step ensures that no paint residue or cleaning solution is left behind, which could potentially clog the sprayer or affect the quality of future paint jobs.

To rinse the components, I recommend using clean water and a soft brush or cloth to remove any remaining debris. Pay special attention to the nooks and crannies of the sprayer, as paint can often accumulate in these hard-to-reach areas.

After rinsing, be sure to dry all components completely before reassembling the sprayer. Proper drying techniques, such as air drying or using a clean cloth, are essential to prevent any moisture from causing rust or damage to the sprayer.

Once all components are thoroughly rinsed and dried, we can proceed to the next step of reassembling the sprayer and preparing it for future use.

Reassemble the Sprayer

Now that all the components have been thoroughly rinsed and dried, it’s time to put the sprayer back together and get it ready for future use.

Advertisement

Reassembling the sprayer is a crucial step in ensuring its proper functioning. Start by carefully aligning the spray gun with the hose and securely attaching them together. Make sure all the fittings are tightened to prevent any leaks.

Next, reattach the intake valve and the pressure control knob, ensuring they’re properly aligned and securely fastened. Double-check all the connections and fittings to ensure they’re tight and secure.

If you encounter any issues during reassembly, refer to the user manual for troubleshooting tips.

Once the sprayer is reassembled, you can proceed to the next step of testing the sprayer’s performance and functionality.

Test the Sprayer

To ensure proper functionality, how can the sprayer be tested? Testing the sprayer is an important step to identify any potential issues and ensure that it is working at the desired pressure. To do this, follow these steps:

Advertisement
  1. Connect the sprayer to a power source and turn it on.
  2. Adjust the pressure settings according to the manufacturer’s instructions.
  3. Fill the sprayer with water and attach the spray gun.
  4. Hold the spray gun at a safe distance from a test surface and pull the trigger.
  5. Observe the spray pattern and check for any irregularities in pressure or clogging.

By testing the sprayer, you can troubleshoot any issues such as low pressure or uneven spray patterns. This will help you make any necessary adjustments or repairs before proceeding to properly store the sprayer.

Properly Store the Sprayer

Make sure you store the sprayer correctly to maintain its functionality and prevent any damage. Proper maintenance is essential for keeping your airless paint sprayer in good working condition.

After using the sprayer, clean it thoroughly as mentioned in the previous subtopic. Once the sprayer is clean, you need to store it properly. Start by disconnecting the sprayer from the power source and relieving any pressure in the system. Remove the spray tip and filter, and clean them separately. Store them in a clean, dry place to prevent clogs.

Next, flush the sprayer with water to remove any remaining paint or debris. After flushing, run a mixture of water and a pump preservative through the sprayer to protect its internal components.

Finally, cover the sprayer with a clean cloth or a plastic bag to keep it dust-free. By following these steps, you can ensure the longevity of your airless paint sprayer.

Frequently Asked Questions

How often should I clean my airless paint sprayer with water?

I should clean my airless paint sprayer with water after each use to ensure proper functioning and prevent clogs. This is essential for maintaining the sprayer’s performance and prolonging its lifespan.

Advertisement

Can I use any type of water to clean my airless paint sprayer?

I can use tap water or distilled water to clean my airless paint sprayer. Using improper water, such as saltwater or dirty water, can lead to clogs and damage the sprayer’s components.

Is it necessary to remove the filters for cleaning or can I clean them in place?

It is necessary to remove the filters for cleaning. Regularly replacing filters is recommended to maintain optimal performance. Water is the recommended cleaning agent for an airless paint sprayer.

What should I do if the spray gun or nozzles are clogged after cleaning?

If the spray gun or nozzles are clogged after cleaning, I recommend troubleshooting the issue by checking for any debris or residues in the nozzle or gun. Clear any obstructions and ensure proper spray gun maintenance to prevent further clogging.

How can I ensure that all components are completely dry before reassembling the sprayer?

To ensure all components are completely dry before reassembling the sprayer, use drying methods such as air-drying or using a clean cloth to remove any moisture. Additionally, follow reassembly tips provided by the manufacturer for optimal results.

Conclusion

In conclusion, cleaning an airless paint sprayer with water is a crucial step to maintaining its efficiency and longevity. By following the step-by-step process outlined in this article, you can ensure that your sprayer continues to deliver flawless results with every use.

Advertisement

Remember, regular cleaning not only extends the life of your equipment but also prevents clogs and blockages that can hinder its performance. So, don’t neglect this important maintenance task and keep your sprayer in top-notch condition. Happy painting!

Continue Reading

Airless Paint Sprayers FAQs

How To Clean Dried Paint From Airless Sprayer

Published

on

By

An image showcasing a person wearing protective gloves, using a paint scraper to delicately remove dried paint residue from the nozzle of an airless sprayer

It is commonly believed that keeping your airless sprayer properly maintained leads to a happy airless sprayer, a sentiment that I completely agree with. If you have ever experienced the frustration of dried paint clogging your sprayer, you understand the importance of keeping it in top condition. Luckily, I have some valuable tips on how to remove dried paint from your airless sprayer, and I am excited to share this information with you.

In this article, we’ll walk through the step-by-step process of restoring your sprayer to its former glory. We’ll start by gathering the necessary supplies and disconnecting the sprayer from the power source.

Then, we’ll tackle the task of removing any remaining paint, soaking the spray gun and nozzle in a cleaning solution, and scrubbing away the dried paint. We’ll also cover how to clean the filters and screens, reassemble the sprayer, and test for proper functionality.

Finally, we’ll discuss the importance of regular maintenance and provide tips for preventing future paint buildup.

So, grab your cleaning gloves and let’s get started on giving your airless sprayer the cleaning it deserves.

Advertisement

Key Takeaways

  • Thoroughly clean the airless sprayer before storing it.
  • Disassemble all components and ensure they are completely dry before storing.
  • Use protective covers to shield the sprayer from dust and debris during storage.
  • Store the airless sprayer in a controlled environment that is clean and free from moisture.

Gather the necessary supplies

First, gather all the supplies you’ll need to clean the dried paint from your airless sprayer. Start by getting cleaning solutions that are specifically designed to remove dried paint. Look for products that are safe to use on the materials of your sprayer and follow the instructions on the label.

Additionally, make sure to have proper disposal methods in place for any paint residue or cleaning solutions. This may include using a paint disposal bag or taking the waste to a local recycling center.

Once you have all the necessary supplies, you can move on to the next step of disconnecting the sprayer from the power source.

Disconnect the sprayer from the power source

Once you’ve unplugged it, you can safely move on to the next step in disconnecting your trusty painting tool from its power source.

Advertisement

Disconnecting safety measures are crucial to avoid any accidents or electrical mishaps. Make sure to switch off any switches or buttons on the sprayer itself before proceeding. Additionally, ensure that the power cord is completely detached from the outlet. This will prevent any power surges or accidental starts while you’re working on cleaning the sprayer.

Now that you’ve disconnected the sprayer from the power source, you can focus on removing any remaining paint from the sprayer.

Remove any remaining paint from the sprayer

To effectively prepare your sprayer for storage, it’s essential to ensure that all traces of paint have been thoroughly eliminated. Cleaning techniques for removing dried paint from an airless sprayer can vary, but there are a few common methods that can be effective. One option is to use a cleaning solution specifically designed for paint removal. These solutions are typically available at hardware stores and can help break down the dried paint. Alternatively, you can try using household items like vinegar or rubbing alcohol as alternative cleaning solutions. These can be effective at loosening the paint and making it easier to remove. Once all the paint has been cleaned off, it’s important to soak the spray gun and nozzle in a cleaning solution to ensure thorough cleaning. This will be discussed in the subsequent section about ‘soak the spray gun and nozzle in a cleaning solution.’

Advertisement

Soak the spray gun and nozzle in a cleaning solution

Now, it’s time to give your spray gun and nozzle a refreshing dip in a cleansing solution, like a rejuvenating soak for tired muscles after a long day. Cleaning techniques are crucial to ensure the longevity of your airless sprayer.

Here are four alternative cleaning solutions that can effectively remove dried paint:

  1. Vinegar solution: Mix equal parts of vinegar and warm water to create a natural and affordable cleaning solution.

  2. Paint thinner: Use a paint thinner specifically formulated for cleaning airless sprayers. Follow the manufacturer’s instructions for proper usage.

  3. Commercial cleaning solutions: There are various commercial cleaning solutions available in the market that are specifically designed to clean dried paint from airless sprayers.

  4. Hot soapy water: Soak the spray gun and nozzle in hot soapy water to loosen the dried paint before scrubbing.

After giving your spray gun and nozzle a good soak, it’s time to move on to the next step: using a brush or cloth to scrub away the dried paint.

Use a brush or cloth to scrub away the dried paint

Advertisement

Grab a sturdy brush or cloth and vigorously scrub away the stubborn remnants of color that cling to your trusty tool. Using solvents for removing dried paint is an effective method to tackle tough stains. Apply a suitable solvent, such as paint thinner or mineral spirits, to the brush or cloth and work it into the dried paint. Be sure to wear protective gloves and work in a well-ventilated area. The solvents will help break down the paint and make it easier to remove. As you scrub, focus on areas where paint buildup is most prominent, such as the nozzle and spray gun. By regularly cleaning your airless sprayer and preventing paint buildup, you can ensure optimal performance and extend the lifespan of your equipment. Once you’ve thoroughly scrubbed away the dried paint, it’s time to move on to the next step: rinsing the spray gun and nozzle with clean water.

Rinse the spray gun and nozzle with clean water

After vigorously scrubbing away the stubborn remnants of color, it’s time to give the spray gun and nozzle a good rinse with clear water. This step is crucial to ensure that all traces of dried paint are completely removed from the airless sprayer.

Using a pressure washer can provide a more thorough cleaning, as it effectively blasts away any remaining paint particles that may be stuck in the nozzle or gun. Additionally, using a cleaning solution specifically designed for paint removal can offer great benefits. These solutions are formulated to break down and dissolve dried paint, making it easier to rinse away.

Once the spray gun and nozzle have been thoroughly rinsed, it’s time to move on to the next step of cleaning the filters and screens, ensuring optimal performance of the airless sprayer.

Clean the filters and screens

After rinsing the spray gun and nozzle with clean water, it’s important to clean the filters and screens to ensure the airless sprayer’s proper functionality. Cleaning these components will prevent any clogs or blockages that can hinder the paint flow and affect the quality of your work. Here are some steps to follow:

Advertisement
  • Remove the filters and screens from the sprayer.
  • Rinse them thoroughly with clean water to remove any paint residue.
  • Soak them in a cleaning solution specifically designed for removing dried paint.
  • Use a soft brush or cloth to gently scrub away any remaining paint.
  • Once clean, rinse them again with water and allow them to dry completely before reassembling the sprayer.

By properly cleaning the filters and screens, you’ll ensure the sprayer operates at its best.

Now, let’s move on to reassembling the sprayer and testing for proper functionality.

Reassemble the sprayer and test for proper functionality

To ensure the proper functionality of your sprayer, you should carefully reassemble all the components and conduct a thorough test to ensure everything is working as expected. Here are some troubleshooting tips for testing the functionality of your airless sprayer:

Test Description
Pressure Test Check if the sprayer maintains the appropriate pressure.
Trigger Test Verify that the trigger is working smoothly and effectively.
Spray Pattern Test Ensure that the spray pattern is even and consistent.
Nozzle Test Confirm that the nozzle is not clogged and spraying properly.
Suction Tube Test Test the suction tube to make sure it is properly drawing paint from the container.

Once you have reassembled the sprayer and completed these tests, you can proceed to the next step of storing the sprayer in a clean and dry area.

Store the sprayer in a clean and dry area

Make sure you store your sprayer in a spot that’s both neat and free from moisture. Here are four key tips for proper storage to prevent paint clogs and ensure the longevity of your airless sprayer:

  1. Clean the sprayer thoroughly: Before storing, remove any excess paint and clean all parts of the sprayer according to the manufacturer’s instructions. This’ll prevent dried paint from building up and causing clogs.

  2. Disassemble and dry: Take apart the sprayer and allow all components to dry completely. Moisture can lead to paint clogs and damage the sprayer over time.

  3. Use protective covers: Cover the sprayer and its accessories with protective materials, like plastic bags or cloth covers, to shield them from dust, debris, and potential damage.

  4. Store in a controlled environment: Find a clean and dry area to store the sprayer. Avoid extreme temperatures and humidity, as they can affect the performance and lifespan of the sprayer.

By following these storage guidelines, you can prevent paint clogs and ensure your airless sprayer stays in excellent condition. Regularly maintain and clean your airless sprayer to prevent future paint buildup, ensuring optimal functionality.

Advertisement

Regularly maintain and clean your airless sprayer to prevent future paint buildup

Regularly maintaining and cleaning my sprayer ensures that paint buildup is prevented in the future, keeping my equipment in top-notch condition. Regular maintenance is crucial to prevent paint clogs and ensure optimal performance.

After each use, I make sure to thoroughly clean the sprayer by flushing it with water or a suitable cleaning solution. I pay special attention to the nozzle, filters, and hoses, removing any dried paint or debris that could lead to clogs.

It’s also important to inspect the sprayer for any worn or damaged parts and replace them as needed. By taking these preventative measures, I can avoid costly repairs and downtime caused by paint buildup, allowing me to efficiently complete my painting projects.

Frequently Asked Questions

How long should the spray gun and nozzle be soaked in the cleaning solution?

For best results, soak the spray gun and nozzle in a cleaning solution for at least 30 minutes. This will help loosen and remove dried paint, making it easier to clean and maintain your airless sprayer.

What type of cleaning solution is recommended for removing dried paint from the spray gun and nozzle?

I recommend using a strong solvent, like mineral spirits or paint thinner, to remove dried paint from the spray gun and nozzle. Alternatively, you can try using a commercial paint remover or warm soapy water.

Advertisement

Should I wear any protective gear while cleaning the airless sprayer?

Yes, wearing protective gear is essential when cleaning the airless sprayer. It includes gloves, goggles, and a mask. Using a suitable cleaning solution will help remove dried paint effectively while ensuring your safety.

How often should the filters and screens be cleaned?

Filters and screens should be cleaned regularly to maintain the airless sprayer’s performance. It is recommended to clean them after every use to prevent clogs and ensure optimal paint flow. Regular maintenance is essential for efficient operation.

Are there any specific maintenance steps I should follow to prevent paint buildup in the airless sprayer?

To prevent paint buildup in the airless sprayer, I recommend regularly cleaning the filters and screens and using cleaning techniques like flushing the sprayer with water or solvent. This will ensure smooth operation and prolong the sprayer’s lifespan.

Conclusion

In conclusion, cleaning a dried paint from an airless sprayer is like restoring a masterpiece. You can restore your sprayer to its former glory with the right supplies and a little elbow grease. Here are the crucial steps in this artistic endeavor:

  1. Disconnect the power source.
  2. Remove any remaining paint.
  3. Soak the gun and nozzle in a cleaning solution.
  4. Scrub away the dried paint.
  5. Don’t forget to clean the filters and screens.
  6. Reassemble the sprayer.
  7. Test it for proper functionality.

Lastly, store your sprayer in a clean and dry space to prevent future paint buildup. Remember, maintaining and cleaning your airless sprayer is the key to keeping your artistic visions flowing smoothly.

Advertisement
Continue Reading
Advertisement

Affiliate disclaimer

As an affiliate, we may earn a commission from qualifying purchases. We get commissions for purchases made through links on this website from Amazon and other third parties.

Advertisement

Trending