
To spray corners without heavy build-up, keep your spray gun at a consistent 6 to 12 inches distance and use smooth, overlapping passes with light coats. Approach corners carefully by starting just outside and slowing down slightly as you reach them, ensuring even coverage. Layer thin coats instead of one heavy layer, and focus on gradual coverage. If you keep these tips in mind, you’ll master flawless corners—continue to explore the details for best results.
Key Takeaways
- Use smooth, overlapping sweeping motions, maintaining a consistent distance of 6-12 inches from the surface.
- Start spraying just outside the corner and slow down slightly as you approach for even coverage.
- Apply multiple light coats instead of one heavy pass, allowing each to dry slightly.
- Keep the spray gun perpendicular or slightly angled and focus on controlled, fluid strokes.
- Practice on scrap material to refine technique and ensure a smooth, buildup-free finish.

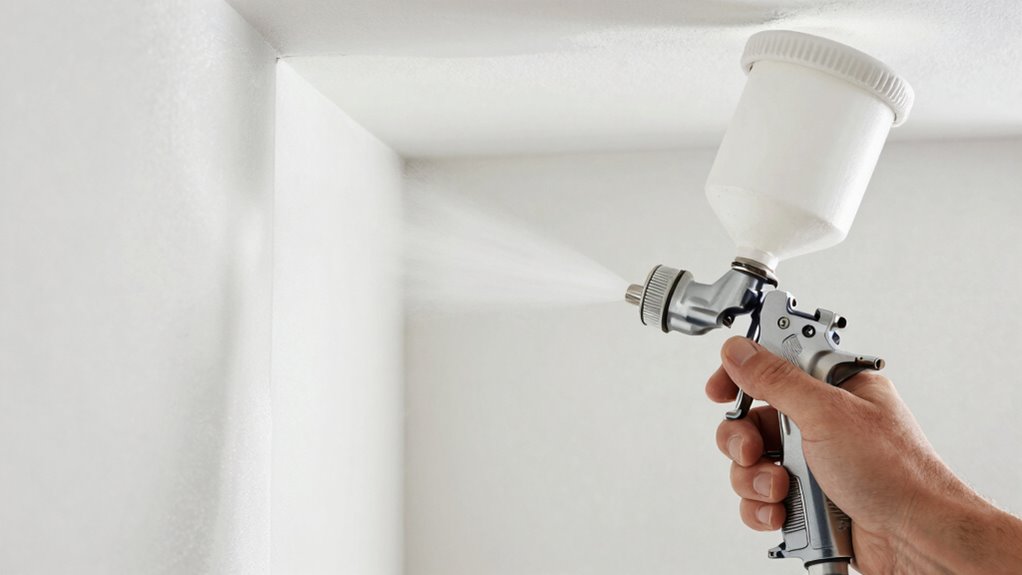
Spraying corners can be tricky, but with the right techniques, you can achieve a smooth, even finish. When it comes to corners finishing, the key is controlling your spray technique to prevent heavy buildup. Instead of approaching corners with the same intensity as flat surfaces, you need to adjust your distance and motion. Hold the spray gun at a consistent distance—usually about 6 to 12 inches—keeping it steady as you move. Start spraying just outside the corner area, then sweep across it with a smooth, overlapping motion. This helps distribute the coating evenly and avoids pooling or thick spots that can mar the finish.
Control spray distance and motion for smooth, even corners without heavy buildup.
Your spray technique should focus on light, controlled passes when working near corners. Instead of concentrating too much paint in one spot, keep your strokes light and fluid, making multiple passes if necessary. It’s better to build up coverage gradually rather than trying to get full coverage in one heavy pass. This prevents heavy build-up, which can cause drips and an uneven surface. When spraying corners, it’s also helpful to angle the spray gun slightly, so the paint hits the corner at a slight angle rather than straight on. This technique helps fill in the corner smoothly without excess paint buildup.
Another trick is to maintain a consistent speed and distance as you spray. Moving too slowly can cause too much paint to gather in the corners, leading to thick, uneven finishes. Conversely, moving too fast might leave gaps or thin spots. Find a comfortable pace that allows the paint to evenly coat the surface while maintaining control over the spray pattern. As you approach the corner, reduce your speed slightly and overlap your passes to ensure complete coverage without heavy spots.
It’s also important to keep the spray gun perpendicular to the surface as much as possible, but don’t be afraid to tilt it slightly depending on the angle of the corner. Practice on scrap material if needed to perfect your spray technique before tackling the actual project. Properly executed corners finishing involves patience and attention to detail, which ultimately results in a professional-looking, smooth paint job. Additionally, understanding the importance of proper spray technique can make the difference in preventing heavy build-up and achieving a flawless finish. Remember, the goal is to layer thin coats with each pass, allowing each one to dry slightly before applying the next. With consistent spray technique and mindful corners finishing, you’ll achieve a flawless, even surface free of heavy build-up.

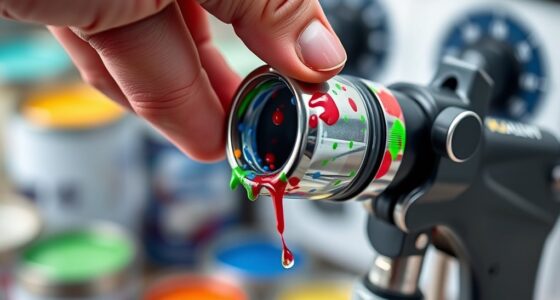
VEVOR 750W Stand Airless Paint Sprayer, 3000PSI High Efficiency Electric Airless Sprayer, Fine and Even Painting Effect, Handheld Paint Sprayers for Home Interior and Exterior Furniture and Fences
Efficient Painting: Our stand airless paint sprayer is equipped with a powerful 750W motor, capable of delivering up...
As an affiliate, we earn on qualifying purchases.
Frequently Asked Questions
What Types of Spray Guns Are Best for Corners?
You should choose a detail spray gun or a smaller HVLP spray gun for corners, as these types offer better control and precision. Using the right corner painting techniques, like keeping the gun at a consistent distance and using light, even coats, helps prevent heavy build-up. These spray gun types allow you to navigate tight spaces easily, ensuring smooth, clean edges without excess paint, making your corner work flawless.
How Do I Prevent Paint Drips When Spraying Corners?
Picture a waterfall flowing smoothly without splashing everywhere—that’s how your spray should be in corners. To prevent drips, start with perfect corner preparation and guarantee your paint consistency is just right—thick enough to cover but thin enough to flow. Keep your spray gun at the right distance, use light, even strokes, and avoid lingering in one spot. This way, you’ll achieve flawless corners without heavy build-up or drips.
Is There a Recommended Drying Time Between Coats?
You should wait at least 2-4 hours for a proper drying time between coats, but it depends on your paint and coat thickness. Thicker coats need more drying time, so don’t rush the process. Check the paint’s instructions for specific drying times, and make certain each coat is dry to the touch before applying the next. This helps prevent drips and ensures a smooth, even finish.
Can I Use a Brush for Detailed Corner Work?
You can definitely use a brush for detailed corner work, even if you’re comfortable with spray techniques. A small, high-quality brush allows you to apply paint precisely, especially in tight spaces. While spray tools are efficient, detailed brushes give you control over tricky areas, preventing heavy build-up. Just choose the right brush size and type, and use steady, controlled strokes to achieve a smooth, professional finish.
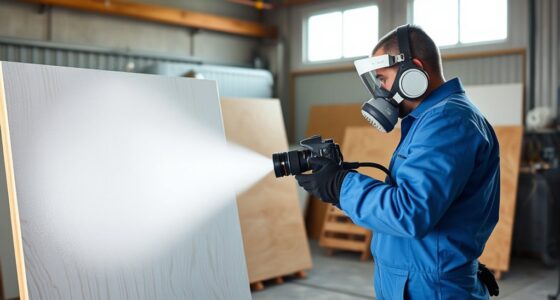
What Safety Precautions Should I Take While Spraying?
You should always wear protective gear like masks, goggles, and gloves to shield yourself from fumes and overspray. Make certain your workspace has good ventilation setup—open windows, use fans, or exhaust systems—to avoid inhaling harmful particles. Keep the area well-ventilated during and after spraying, and follow manufacturer safety instructions. Taking these precautions helps protect your health and ensures a safer, more effective spraying process.

Graco Airless Paint Sprayer | DIY Designed for Interior or Exterior Projects | TrueCoat One TrueAirless Electric Sprayer 26DTC1
ALWAYS-ON DESIGN – Continuous operation keeps the sprayer primed and ready to spray at all times, so you...
As an affiliate, we earn on qualifying purchases.
Conclusion
Now that you know how to spray corners without heavy build-up, you’re all set to achieve a flawless finish every time. With patience and the right technique, you’ll master the art of corner spraying faster than you can imagine—almost like waving a magic wand! Remember, practice makes perfect, and soon your corners will look so smooth and professional, they’ll make everyone wonder if you hired a pro. Keep at it, and enjoy your beautifully finished space!

InoKraft NEO Airless Paint Sprayer Kit for House Painting, DIY Beginners' Choice with Accessories Storage Space, Lightweight Design, Quick Clean for Home Interior and Exterior Furniture and Fences
【Your DIY Partner】Upgrade your DIY projects with the NEO airless paint sprayer-significantly faster than handheld electric HVLP paint...
As an affiliate, we earn on qualifying purchases.

WORKPRO 700W Airless Paint Sprayer, 2900PSI High Efficiency Thinning-Free Electric Paint Sprayer with Extension Rod, Paint Sprayer for Home Interior, Exterior, Furniture, Fence & Ceilings
EFFICIENT SPRAY, LESS WORK: Powered by a 700W motor, this airless paint sprayer delivers up to 2900 PSI...
As an affiliate, we earn on qualifying purchases.