If your pump won’t prime, start by checking all connections, hoses, and fittings for leaks or looseness and tighten or replace as needed. Next, make certain the fluid source is properly positioned, filled, and free of air pockets. Finally, use the priming port or vent screw to manually introduce fluid or loosen fittings to release trapped air. For detailed steps on fixing this common issue, continue exploring more simple solutions.
Key Takeaways
- Check all fittings, hoses, and connections for leaks or looseness, tightening or replacing as needed.
- Use the priming port or vent screw to manually introduce fluid and eliminate air pockets.
- Ensure the fluid source is filled, properly positioned, and free of air, with the reservoir at the correct height.
- Inspect and replace worn impellers, seals, or check valves that may cause internal priming issues.
- Follow the manufacturer’s priming instructions and verify valve positions for unobstructed fluid flow.
If you’ve ever tried to run a prime number test and found it repeatedly fails on certain inputs, you’re not alone. Many people encounter similar frustrations when dealing with pump priming issues, especially when their equipment refuses to start or maintain a steady flow. The “won’t prime” problem can be stubborn, but with a straightforward approach, you can troubleshoot and resolve it efficiently. The key lies in understanding primer troubleshooting basics and applying simple steps to get your pump working smoothly again.
First, assess your pump’s initial setup. Often, the problem stems from air trapped inside the system, preventing proper priming. Check all connections, fittings, and hoses for leaks or loose fittings. Tighten or replace any damaged parts, because even small leaks can hinder the priming process. Next, ensure that the fluid source is adequate and properly positioned. If the inlet is too high or the source is empty, the pump won’t draw fluid effectively. Sometimes, simply lowering the fluid container or filling the reservoir completely can make the difference. Also, verify the valve positions—if a valve is closed or partially closed, it can obstruct flow and cause priming failure. Correcting these basic setup issues is often enough to fix the problem without further troubleshooting.
Check connections, ensure proper fluid level, and verify valve positions to prevent priming issues.
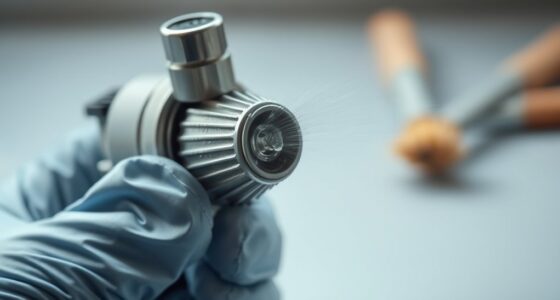
If these initial steps don’t solve the issue, it’s time to focus on pump priming itself. Many pumps have a dedicated priming port or a manual priming procedure. Use this feature to manually introduce fluid into the pump. For example, some models have a priming plug or a vent screw. Loosen these slightly while filling the pump with fluid, then tighten once fluid starts to flow. This creates a better seal and helps eliminate air pockets that can prevent priming. If your pump lacks a manual priming feature, you may need to use a siphon or a small pump to manually fill the system. Always ensure you’re using the correct fluid, as incompatible liquids can damage internal components or cause improper priming. Additionally, understanding the contrast ratio and its impact on image quality can help you identify if your projector’s performance issues are related to light and dark levels, which may influence troubleshooting steps for your equipment.
Finally, if the problem persists after checking connections and performing manual priming, consider inspecting the pump’s internal components. Worn or damaged impellers, seals, or check valves can cause air leaks or reduce flow, making priming difficult or impossible. Replacing faulty parts or consulting the manufacturer’s troubleshooting guide can often resolve persistent issues. Remember, regular maintenance and cleaning go a long way in preventing prime failures.
Frequently Asked Questions
Can This Method Fix All Types of Priming Issues?
This method can fix many priming issues, but it doesn’t address all priming myths or troubleshooting myths. Some problems stem from hardware faults or complex system flaws that require professional help. While it’s effective for common priming problems, you might still encounter stubborn issues. Always consider other factors and consult expert advice if these steps don’t resolve your priming troubles completely.
Are There Safety Precautions to Consider During Priming?
Imagine you’re about to prime your equipment, but safety should be your first priority. Always wear protective gear, like gloves and goggles, to prevent contact with hazardous fluids. Follow safety guidelines for priming to avoid equipment hazards, such as leaks or pressure buildup. Make sure the area is well-ventilated and shut off power if necessary. Staying cautious guarantees a safe, smooth priming process without risking injury or damage.
How Long Does the Priming Process Typically Take?
The priming process usually takes about 5 to 10 minutes, depending on your equipment and fluid type. You’ll want to monitor the process timing closely, guaranteeing the fluid flows smoothly without air pockets. Keep an eye on any bubbles or irregular flow, as these indicate when priming is complete. Staying attentive during the priming duration helps prevent issues and ensures your system operates efficiently once the process is finished.
Will This Solution Work on Older or Damaged Equipment?
Yes, this solution can work on older or damaged equipment, but its effectiveness depends on equipment durability. If your equipment is substantially damaged, priming longevity might be affected, and you may need additional repairs or adjustments. For best results, make certain your equipment is in reasonable condition before applying the solution. Regular maintenance also helps improve priming success and extends overall priming longevity.
Is Professional Help Needed for Complex Priming Problems?
Sure, expert intervention isn’t always necessary for complex priming problems—said no one ever. Priming myths persist, but when equipment is stubborn or damaged, professional help often becomes essential. Don’t fall for the idea that DIY fixes can handle everything; complex priming issues usually require a seasoned eye. You’ll save time and avoid frustration by trusting experts, especially when your equipment refuses to cooperate despite your best efforts.
Conclusion
Now that you’ve mastered these three simple steps, you’re no longer stuck in the “won’t prime” trap. Think of your system as a well-oiled machine, ready to run smoothly every time. With just a little effort, you’ve turned a stubborn problem into a thing of the past. So go ahead—prime with confidence, knowing you’ve got the tools to keep everything flowing seamlessly. Your setup’s new chapter starts now, and it’s brighter than ever.