Hello there! Have you ever encountered problems with your Milwaukee airless paint sprayer? Well, I’ve got some great news for you – I’ve put together a thorough guide to assist you in cleaning the inlet and outlet valves. There’s no need to worry, as it’s actually simpler than you might imagine. With just a few basic tools and a little elbow grease, your sprayer will be operating at its best in no time.
In this article, I’ll walk you through the process of gathering the necessary supplies and preparing the sprayer for cleaning. Then, I’ll show you how to remove and clean both the inlet and outlet valves. Don’t worry if you’re not the most handy person, I’ll explain everything in a technical and detailed manner.
By the end of this article, you’ll be equipped with the knowledge to keep your Milwaukee airless paint sprayer in top-notch condition. So, let’s get started and get that sprayer back in action!
Key Takeaways
- Regular maintenance is important for optimal performance and to prevent costly repairs.
- Cleaning the inlet and outlet valves is necessary to prevent paint buildup.
- Harsh cleaning agents should be avoided as they can damage sprayer components.
- Leaving paint residue in the sprayer can lead to clogs, so thorough cleaning is essential.
Gather the Necessary Supplies
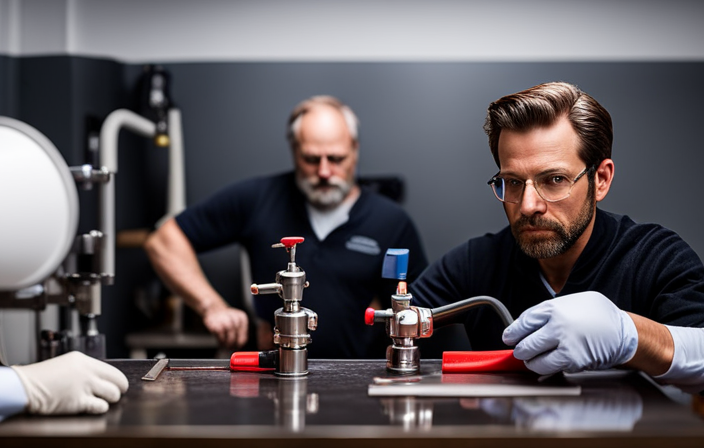
Before you begin, make sure you’ve got all the supplies you need to clean the inlet and outlet valve in your Milwaukee airless paint sprayer.
The first step is to gather the recommended cleaning solutions, such as mineral spirits or a mixture of warm water and mild detergent. These solutions will effectively remove any built-up paint or debris from the valves.
Additionally, you will need a soft brush or toothbrush, a clean cloth or towel, and a small container to hold the cleaning solution.
To ensure proper cleaning techniques, it’s important to follow the manufacturer’s instructions for your specific paint sprayer model.
Once you have all the necessary supplies, you can proceed to the next section where we’ll prepare the sprayer for cleaning.
Prepare the Sprayer for Cleaning
To get started, make sure you’re ready to prepare your sprayer for a thorough maintenance session. Properly cleaning the inlet and outlet valves is crucial to preventing valve clogs and ensuring optimal performance from your Milwaukee airless paint sprayer.
Begin by removing the spray tip and guard from the gun. Next, detach the suction tube from the inlet valve and remove any paint residue or debris. Use a clean cloth or brush to wipe away any remaining paint on the suction tube and inlet valve. It’s important to be thorough in this step to prevent any leftover paint from causing clogs in the valves.
Once the inlet valve is clean, you can move on to removing the outlet valve. This will be discussed in the next section.
Remove the Inlet Valve
Removing the spray tip and guard is a quick and essential step in preparing your sprayer for cleaning, guaranteeing optimal performance, and preventing valve clogs.
Did you know that regular cleaning of the inlet and outlet valves can increase the lifespan of your sprayer by up to 50%? Cleaning the inlet valve is particularly important as it’s responsible for drawing paint into the sprayer. A dirty or clogged inlet valve can lead to decreased paint flow, uneven spray patterns, and even complete blockage.
Some common signs of a dirty or clogged inlet valve include reduced pressure, pulsating spray, and spitting paint. To ensure a clean and efficient inlet valve, it’s crucial to follow the proper cleaning procedure.
Next, I’ll guide you through the steps to remove and clean the inlet valve.
Clean the Inlet Valve
As you carefully detach the inlet valve, you’ll discover the intricate components that ensure a seamless flow of paint throughout your sprayer, allowing for flawless and consistent coverage.
To clean the inlet valve effectively, follow these cleaning techniques and troubleshooting tips:
-
Begin by removing any excess paint or debris from the valve using a clean cloth or brush.
-
Submerge the inlet valve in a container filled with warm water and a mild detergent solution.
-
Gently scrub the valve with a soft brush to dislodge any trapped paint or dirt particles.
-
Rinse the valve thoroughly with clean water and ensure all detergent residue is removed.
By following these cleaning techniques, you can maintain the optimal performance of your Milwaukee airless paint sprayer.
Now, let’s move on to the subsequent section about removing the outlet valve.
Remove the Outlet Valve
Once you’ve successfully tackled the cleaning of the inlet valve, it’s time to move on to the next step: taking out the outlet valve.
To begin, make sure the sprayer is turned off and unplugged. Locate the outlet valve on the bottom of the sprayer and identify the two screws holding it in place. Using a screwdriver, carefully remove these screws and set them aside.
Gently pull the outlet valve out of its housing, being cautious not to damage any surrounding components.
If you’re dealing with a clogged outlet valve, you can try cleaning it by soaking it in a mixture of warm water and mild detergent. Use a small brush to scrub away any debris or paint buildup. However, if the valve is damaged or beyond repair, it’s time to consider replacing it.
In the subsequent section, we will discuss how to clean the outlet valve thoroughly.
Clean the Outlet Valve
Now that you’ve successfully tackled the previous step, it’s time to discover the secret to effortlessly revitalizing your sprayer. Cleaning the outlet valve is crucial for maintaining its optimum performance. Here’s a step-by-step guide to help you get it done with ease:
-
Removing debris: Start by disconnecting the sprayer from the power source and the paint container. Carefully unscrew the outlet valve from the sprayer body. Check for any debris or clogs inside the valve. Use a small brush or toothbrush to gently remove any dirt or paint buildup.
-
Troubleshooting leaks: Inspect the valve for any signs of wear or damage, such as cracks or worn-out seals. Replace any faulty parts if necessary. Additionally, check the valve seat for any irregularities that may cause leaks. Smooth out any rough edges using fine-grit sandpaper.
-
Reassemble the valves: Once the outlet valve is thoroughly cleaned and inspected, securely screw it back into the sprayer body. Ensure it’s tightly sealed to prevent any leaks during operation.
By following these steps, you can effectively clean the outlet valve, remove debris, and troubleshoot leaks. Now, let’s move on to the next section and learn how to reassemble the valves for optimal functionality.
Reassemble the Valves
To ensure optimal functionality, it’s important to securely reassemble the valves after cleaning and troubleshooting any issues. Proper valve maintenance is crucial for the efficient operation of your Milwaukee airless paint sprayer.
Now that you’ve thoroughly cleaned the outlet valve, it’s time to reassemble it. Start by placing the valve housing back onto the sprayer body and aligning the screw holes. Insert and tighten the screws to secure the housing in place.
Next, carefully insert the valve stem into the housing, making sure it fits snugly. Finally, reattach the valve cover, ensuring it’s securely fastened.
Once you’ve reassembled the valves, it’s time to move on to testing the sprayer to ensure it’s working properly.
Test the Sprayer
After reassembling the valves, it’s time to put the sprayer to the test and see if it unleashes a vibrant and smooth stream of paint.
To begin the testing process, ensure that the sprayer is connected to a power source and that the paint container is filled with the desired paint. Next, turn on the sprayer and adjust the pressure settings according to the manufacturer’s instructions.
Once the sprayer is fully operational, aim it towards a test surface and pull the trigger to release the paint. Observe the spray pattern and the consistency of the paint stream. If the sprayer isn’t performing as expected, refer to the troubleshooting section in the user manual for further guidance.
Now that the sprayer’s been tested, let’s move on to some regular maintenance tips to keep it in optimal condition.
Regular Maintenance Tips
Make sure you give your trusty sprayer some tender loving care by regularly maintaining it with these helpful tips.
-
Importance of cleaning airless paint sprayer regularly: Regularly cleaning your airless paint sprayer is crucial to keep it in optimal working condition. It prevents clogs, reduces downtime, and ensures consistent paint flow and coverage. Neglecting regular maintenance can result in poor performance and costly repairs.
-
Common mistakes to avoid while cleaning airless paint sprayer: Avoid these common mistakes to ensure effective cleaning. First, don’t skip cleaning the inlet and outlet valves as they’re prone to paint buildup. Second, don’t use harsh cleaning agents that can damage the sprayer components. Third, avoid leaving paint residue in the sprayer after each use, as it can lead to clogs. Lastly, always follow the manufacturer’s instructions for proper cleaning techniques.
To troubleshoot common valve issues, you need to understand the signs and symptoms that indicate a problem.
Troubleshooting Common Valve Issues
One common issue with the sprayer is when the paint flow becomes inconsistent, indicating a problem with the valves. To troubleshoot common valve problems, follow these steps:
-
Start by turning off the sprayer and disconnecting it from the power source.
-
Remove the inlet and outlet valves from the sprayer using a wrench or pliers.
-
Inspect the valves for any clogs or debris. Use a brush or compressed air to clean them thoroughly.
-
Check the valve seats for any signs of damage or wear. If necessary, replace them with new ones.
-
Reinstall the valves securely back into the sprayer, making sure they’re tightened properly.
-
Turn on the sprayer and test the paint flow. If the issue persists, repeat the cleaning process or contact a professional for further assistance.
By following these troubleshooting techniques, you can address common valve problems and ensure smooth and consistent paint flow in your Milwaukee airless paint sprayer.
Frequently Asked Questions
Can I use any type of cleaning solution to clean the inlet and outlet valves of a Milwaukee airless paint sprayer?
Sure, you can use any type of cleaning solution to clean the inlet and outlet valves of a Milwaukee airless paint sprayer. Just be sure to ignore the manufacturer’s recommendations for proper cleaning technique. Happy cleaning!
How often should I clean the inlet and outlet valves of my Milwaukee airless paint sprayer?
I should replace the valves in my Milwaukee airless paint sprayer if I notice signs of clogging, reduced performance, or leaks. Regular cleaning is recommended to prevent these issues and should be done every 25-50 hours of use.
Can I clean the inlet and outlet valves without disassembling them?
To clean the inlet and outlet valves without disassembling them, try using alternative cleaning methods. Cleaning tips include using a soft brush, compressed air, or a cleaning solution. Follow these step-by-step instructions to ensure thorough cleaning.
Is it necessary to wear protective gloves and eyewear while cleaning the inlet and outlet valves?
Yes, it is necessary to wear protective gloves and eyewear when cleaning the inlet and outlet valves. Safety precautions are important to prevent any potential harm or injury to oneself while performing this task.
What should I do if my Milwaukee airless paint sprayer is not working properly even after cleaning the inlet and outlet valves?
If my Milwaukee airless paint sprayer isn’t working properly even after cleaning the inlet and outlet valves, I would try troubleshooting tips. There are common paint sprayer problems that can affect performance, but with the right steps, you can get it working like new again.
Conclusion
In conclusion, cleaning the inlet and outlet valves in a Milwaukee airless paint sprayer is a crucial maintenance task. It ensures optimal performance and prolongs the lifespan of the equipment. By following the step-by-step process outlined in this article, you can easily remove, clean, and reassemble the valves. This ensures a smooth and efficient paint spraying experience.
Remember, a well-maintained sprayer is like a well-oiled machine, ready to unleash a torrent of creativity onto your canvas. So don’t neglect your valves, give them the TLC they deserve!
