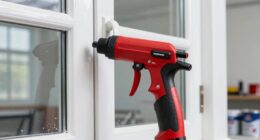
So, you’ve decided to tackle the task of painting the interior of your home. You’ve chosen your paint colors, and your brushes and rollers are ready for use. But have you considered using an airless sprayer? Trust me, it will completely change the way you paint.
Hi, I’m here to show you how to paint your house interior using an airless sprayer, and let me tell you, it’s going to make your life so much easier. With this powerful tool in hand, you’ll achieve smooth, professional-looking results in no time. No more tedious brush strokes or back-breaking roller work.
In this article, I’ll guide you through the process step-by-step, from gathering the necessary materials to cleaning up afterwards. So, put down the brushes and rollers, and get ready to take your painting skills to the next level with an airless sprayer.
Let’s get started!
Key Takeaways
- Applying multiple coats ensures a smooth finish
- Regularly cleaning and maintaining the airless sprayer extends its lifespan
- Properly removing protective coverings and cleaning up after painting is important
- Inspecting and touching up any imperfections ensures a professional result
Gather the Necessary Materials and Equipment
Now that you’ve decided to tackle the task of painting your house interior with an airless sprayer, it’s time to gather all the materials and equipment you’ll need.
Start by choosing the right paint colors that will complement your home decor and personal style. Consider the lighting in each room and the mood you want to create.
Once you have your paint colors selected, it’s important to gather the necessary equipment. This includes an airless sprayer, paint trays, brushes, rollers, drop cloths, and painter’s tape. Additionally, having a mask, goggles, and gloves for protection is essential.
To achieve a smooth finish, make sure to clean the sprayer thoroughly before use and practice on a test surface.
Now, let’s move on to preparing the surface for painting.
Prepare the Surface for Painting
Before painting a house interior with an airless sprayer, it’s crucial to properly prepare the surface. This involves cleaning and repairing the walls to ensure a smooth and even paint application.
To start, thoroughly clean the walls to remove any dirt, dust, or grease. This can be done using a mild detergent and water solution, or a specialized wall cleaner. Be sure to rinse the walls well and allow them to dry completely before moving on to the next step.
Next, inspect the walls for any cracks, holes, or other imperfections. Use a putty knife to fill in any small holes or cracks with spackling compound. For larger holes or damaged areas, you may need to use a patching compound. Smooth out the repaired areas with sandpaper, and wipe away any dust with a damp cloth.
Once the walls are clean and repaired, it’s important to protect the floors and furniture from any potential paint drips or spills. Cover the floors with drop cloths or plastic sheets, and use masking tape to protect baseboards and trim. Remove any furniture from the room or cover it with plastic sheets.
By following these steps, you can achieve professional-looking results while minimizing any damage or mess.
Clean and Repair the Walls
After removing any dust or debris, start by patching up any holes or cracks in the walls with spackling compound. Make sure to smooth out the compound with a putty knife and let it dry completely before moving on.
For larger cracks, you may need to use joint compound and apply it in thin layers, sanding between each layer for a smooth finish.
Once the walls are repaired, wipe them down with a damp cloth to remove any remaining dust or dirt. This will ensure that the paint adheres properly to the surface.
Now that the walls are clean and repaired, it’s time to protect the floors and furniture.
Transitioning into the next section, remember to cover all surfaces with drop cloths or plastic sheets to prevent any paint splatters or spills.
Protect the Floors and Furniture
To protect your floors and furniture during the painting process, follow these steps:
-
Cover your floors with drop cloths or plastic sheets. Choose heavy-duty, leak-proof options that can be easily secured in place.
-
Use painter’s tape to secure the edges of the drop cloths and ensure a tight seal.
-
If possible, move your furniture out of the room. This will provide the best protection.
-
If moving the furniture is not an option, cover it with plastic sheets or old blankets to shield it from any paint overspray.
By taking these precautions, you can safeguard your floors and furniture from accidental spills or splatters. Now, let’s move on to setting up and adjusting the airless sprayer.
Set Up and Adjust the Airless Sprayer
First, make sure you’ve got your airless sprayer set up like a pro, ready to unleash a torrent of paint onto those bare walls.
Start by adjusting the pressure on your sprayer to ensure a smooth and even flow of paint. Too much pressure can cause overspray, while too little can result in an uneven coat.
Troubleshoot common spray issues, such as clogs or inconsistent spray patterns, by checking the nozzle for debris or adjusting the spray tip size.
Once your sprayer is properly set up, it’s time to start painting from the top down. This technique helps prevent drips and ensures even coverage.
So, grab your sprayer and get ready to transform those walls into a masterpiece.
Start Painting from the Top Down
To achieve professional-looking results, follow these painting techniques:
- Begin your masterpiece by starting at the top and working your way down, ensuring an even and drip-free paint job.
- Use long, smooth strokes to apply the paint, overlapping each stroke slightly for consistent coverage.
- Hold the sprayer about 12-18 inches away from the surface to avoid overspray and achieve better control.
- Take your time and apply multiple thin coats rather than one thick coat to prevent drips and runs.
- Consider the lighting in the room when choosing the right paint color, as it can affect how the color appears.
- Test the paint color on a small section of the wall before committing to the entire room to ensure it’s the desired shade.
By starting at the top and working your way down, you’ll be able to create a seamless finish and avoid any potential mishaps.
Work in Sections
As you progress through your artistic journey, it’s crucial to divide your task into manageable sections. This allows you to focus on each area and unleash your creativity.
When painting a house interior with an airless sprayer, working in sections is key to working efficiently and avoiding streaks. Start by selecting a section of the wall or ceiling that you can comfortably reach. Paint from top to bottom using smooth, overlapping strokes to ensure even coverage.
Once you have completed one section, move on to the next. Work your way around the room, painting in sections. Remember to apply multiple coats if needed to ensure a consistent and professional finish.
By working in sections, you can maintain control over your painting process and achieve stunning results.
Apply Multiple Coats if Needed
When applying multiple coats of paint, it’s important to allow sufficient drying time between each coat. This ensures that the previous coat is completely dry and won’t mix with or disturb the new coat.
Additionally, it’s crucial to check for uniform coverage after each coat. This helps ensure that the paint is evenly applied and there are no missed spots or streaks.
By following these steps, you can achieve a professional-looking finish with your airless sprayer.
Allow Sufficient Drying Time Between Coats
Make sure you give each coat enough time to dry completely before applying the next one, so you can achieve a smooth and flawless finish on your walls. Proper drying time management is crucial in preventing paint drips and ensuring a professional-looking result. The drying time will vary depending on factors such as humidity and temperature, so it’s essential to follow the manufacturer’s instructions on the paint can. Typically, water-based paints require around 2-4 hours to dry between coats, while oil-based paints may need 24-48 hours. During the drying process, avoid touching or leaning anything against the painted surface to prevent smudges or marks. Once the paint is completely dry, you can move on to the next step and check for uniform coverage.
Check for Uniform Coverage
To ensure a flawless finish, it’s important to give each coat enough time to dry. After applying the first coat of paint with an airless sprayer, allow it to dry completely before moving on to the next coat. This is crucial for achieving a smooth and even finish.
Once the paint is dry, it’s time to check for consistent coverage on the walls. Carefully inspect the walls for any areas that may require additional touch-ups or a second coat. Check for any unevenness or spots where the paint may have missed.
By checking for even application and ensuring a smooth finish, you can guarantee a professional-looking result. Now, let’s move on to the next step where we will learn how to clean and maintain the airless sprayer.
Clean and Maintain the Airless Sprayer
After using the airless sprayer to paint your house interior, don’t forget to regularly clean and maintain it to ensure optimal performance and extend its lifespan. Regular cleaning and maintenance can increase the lifespan of an airless sprayer by up to 50%. To keep your airless sprayer in top condition, there are a few cleaning techniques and troubleshooting tips to keep in mind.
First, make sure to clean the sprayer thoroughly after each use by flushing it with water or a recommended cleaning solution. Pay attention to the nozzle, filters, and hoses, ensuring they are free from any paint residue or debris.
Additionally, regularly inspect the sprayer for any worn or damaged parts and replace them as needed. By maintaining your airless sprayer, you can ensure it continues to perform at its best.
Now, let’s move on to the next step: removing the protective coverings and cleaning up.
Remove the Protective Coverings and Clean Up
Now that the painting is done, it’s time to remove the tape and plastic coverings. I carefully peel off the tape, making sure not to damage the freshly painted walls or trim.
Once the tape is removed, I gather up the plastic and dispose of it properly.
Next, I inspect the area for any overspray or spills and clean them up using a damp cloth or sponge.
It’s important to leave the room clean and tidy after painting to fully appreciate the newly painted space.
Carefully Remove the Tape and Plastic
Upon completing the painting process, it is crucial to delicately remove the tape and plastic to reveal the perfectly painted interior of the house. Removing tape and plastic effectively is important to avoid any paint drips and streaks. To ensure a smooth and clean removal, follow these steps:
| Step | Instructions |
|---|---|
| 1 | Start by peeling off the tape at a 45-degree angle. This will help prevent any paint from being pulled off the walls. |
| 2 | Slowly remove the plastic sheeting, being careful not to let it touch any wet paint. Fold it as you go to minimize mess. |
| 3 | Use a utility knife to carefully cut any stubborn tape edges or corners. Take your time to avoid damaging the freshly painted surface. |
| 4 | Dispose of the tape and plastic properly, ensuring no paint or debris is left behind. |
| 5 | Finally, inspect the painted area for any touch-ups needed before moving on to cleaning any overspray or spills. |
With the tape and plastic removed, it’s time to clean any overspray or spills from the painted surfaces.
Clean any Overspray or Spills
To ensure a flawless finish, it is important to address any overspray or spills on newly painted surfaces. On average, 25% of painting projects experience some overspray or spills. To prevent overspray when using an airless sprayer, there are precautionary measures you can take. First, properly mask off areas that should not be painted using plastic and tape. Adjusting the pressure on your sprayer can also help minimize the risk of overspray.
If overspray or spills do occur, there is no need to worry. Cleaning them up is a relatively simple process. Immediately wipe away any excess paint with a damp cloth or sponge. For stubborn spots, a mild soap and water mixture can be used. Remember to inspect the surfaces and touch up as necessary to achieve a flawless result.
Inspect and Touch Up as Necessary
First, take a step back and examine the painted walls for any imperfections that may need to be touched up. Inspecting for imperfections is an important step to ensure a flawless finish. Look for any missed spots, streaks, or drips that may have occurred during the painting process. If you notice any areas that require touch-ups, grab a brush or roller and apply a small amount of paint to blend it seamlessly with the rest of the wall. Pay attention to corners, edges, and areas where the paint may have pooled or collected. By taking the time to inspect and touch up as necessary, you can achieve a professional-looking result. Now, with your newly painted interior looking pristine, it’s time to sit back and enjoy the transformation.
Enjoy Your Newly Painted Interior
Now that you’ve inspected and touched up any areas that needed attention, it’s time to step back and admire your newly painted interior. As you stand here, you can’t help but feel a sense of satisfaction and accomplishment.
But before we wrap up this project, let me share a couple more tips with you.
When it comes to choosing the right paint colors, it’s essential to consider the overall mood and style you want to achieve. Take into account factors such as lighting, furniture, and personal preferences. Don’t be afraid to experiment and get creative!
Before diving into the painting process, make sure to properly prepare the walls. This involves cleaning them thoroughly, filling any cracks or holes, and applying a primer. By doing so, you’ll ensure that the paint adheres smoothly and lasts longer.
Remember, painting a house interior with an airless sprayer can be a rewarding experience. So take your time, follow these tips, and enjoy the transformative power of a fresh coat of paint.
Frequently Asked Questions
Can I use an airless sprayer to paint the exterior of my house?
Yes, you can use an airless sprayer to paint the exterior of your house. It offers advantages like faster application and even coverage. To achieve a smooth finish, use the correct spray tip size and apply multiple thin coats.
How long does it take for the paint to dry after using an airless sprayer?
Oh, the joy of waiting for paint to dry after using an airless sprayer! To speed up the drying process, consider factors like temperature, humidity, and ventilation. Opening windows or using fans can work wonders.
Can I use different types of paint with an airless sprayer?
Yes, you can use different types of paint with an airless sprayer. To choose the right paint, consider factors like viscosity, texture, and recommended application method for the specific type of airless sprayer you have.
Is it necessary to wear protective clothing and gear while using an airless sprayer?
It is crucial to wear protective clothing and gear when using an airless sprayer. This includes goggles, gloves, a respirator, and coveralls. These safety precautions are necessary to prevent injuries and ensure personal safety.
How do I clean the nozzles and filters of an airless sprayer?
To clean the nozzles and filters of an airless sprayer, I use cleaning techniques like soaking them in a cleaning solution, using a brush to remove any clogs, and rinsing them thoroughly. This helps troubleshoot common issues and ensures optimal performance.
Conclusion
In conclusion, painting a house interior with an airless sprayer is an efficient and effective way to achieve a professional finish. By following the steps outlined in this article, you can transform your space with ease.
Remember to gather all the necessary materials, prepare the surface properly, and work in sections for best results.
Cleaning and maintaining the airless sprayer is crucial for its longevity.
Just like a skilled artist, with each stroke of the sprayer, you’ll be able to bring your walls to life, creating a masterpiece within your home.

