Connect with us

Airless Paint Sprayer Tips for Specific Projects

How To Paint A Wall With An Airless Sprayer

Published

on

An image capturing a skilled hand effortlessly gliding an airless sprayer over a wall, releasing a mist of vibrant paint particles that gracefully coat the surface, leaving behind a flawless and professional finish

Using an airless sprayer can cut your painting time in half. This powerful tool makes it easy to quickly paint large areas, giving your walls a professional finish. In this article, I will guide you through the steps of painting a wall with an airless sprayer.

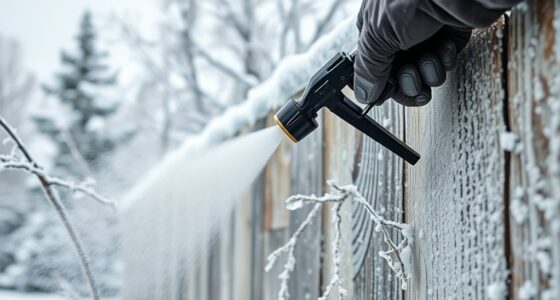
First, you need to prepare the surface. Start by cleaning the wall thoroughly to remove any dirt or grease. Fill any holes or cracks with spackle and sand them smooth. Next, protect any areas you don’t want to paint, such as trim or windows, with painter’s tape and drop cloths.

Once the surface is prepped, it’s time to set up the sprayer. Start by assembling the sprayer according to the manufacturer’s instructions. Fill the sprayer with your chosen paint and adjust the pressure settings to achieve the desired spray pattern.

Before you start spraying, it’s important to practice your technique on a piece of cardboard or scrap material. This will help you get a feel for the sprayer and ensure you have the right settings.

When you’re ready to paint, start at one corner of the wall and work your way across in a smooth, even motion. Keep the sprayer about 12 inches away from the wall and overlap each pass slightly to ensure full coverage.

Advertisement

After you’ve finished painting, allow the wall to dry completely before applying a second coat if needed. Once the paint is dry, carefully remove the painter’s tape and clean the sprayer according to the manufacturer’s instructions.

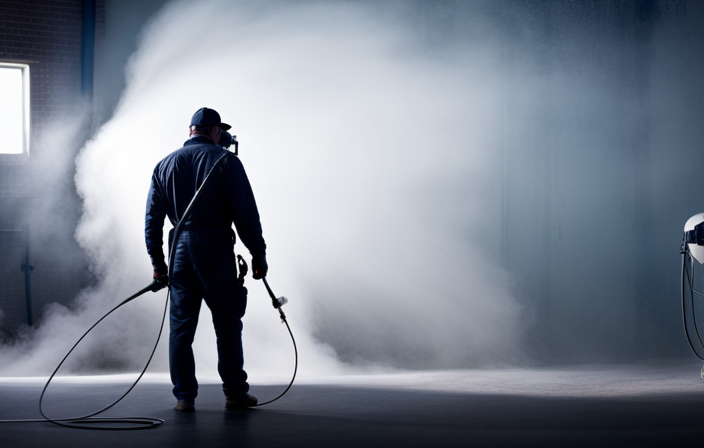
By following these steps, you’ll be able to achieve a flawless paint job with an airless sprayer. Remember to always wear protective gear, such as goggles and a mask, and work in a well-ventilated area. Happy painting!

Key Takeaways

  • Maintaining the correct distance from the wall surface ensures an even application of paint and reduces the chances of drips or splatter.
  • Following techniques for a professional-looking finish can minimize mess and waste.
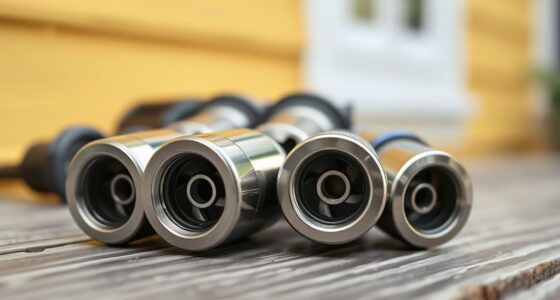
  • Regularly cleaning and maintaining the sprayer is vital for a flawless finish and the sprayer’s longevity. This includes thoroughly cleaning the sprayer after each use and paying attention to the nozzle and filters for clogging.
  • Regularly inspecting the sprayer for worn or damaged parts and replacing them as needed is important to avoid breakdowns during a painting project.

Prepare the Surface

Now it’s time to get your wall ready for a flawless paint job – you’ll want to start by prepping the surface.

Surface preparation is crucial to ensure the paint adheres properly and lasts longer. Begin by cleaning the wall thoroughly, removing any dirt, dust, or grease. Use a mild detergent and water solution for best results.

Advertisement

Next, inspect the surface for any cracks or holes and fill them with a suitable filler. Sand the wall to create a smooth and even surface.

Once the surface is clean and smooth, apply a primer using a roller or brush. Priming techniques vary depending on the type of surface, so make sure to follow the manufacturer’s instructions.

With the surface prepped and primed, it’s time to move on to the next section about choosing the right paint and equipment.

Choose the Right Paint and Equipment

When choosing paint for an airless sprayer, it’s important to select the appropriate type that is compatible with the sprayer and the surface you’re painting.

Additionally, gather all the necessary supplies such as paint filters, stir sticks, and safety equipment before starting the project.

Advertisement

Finally, set up and test the airless sprayer to ensure it is working properly before beginning the painting process.

Select the Appropriate Paint

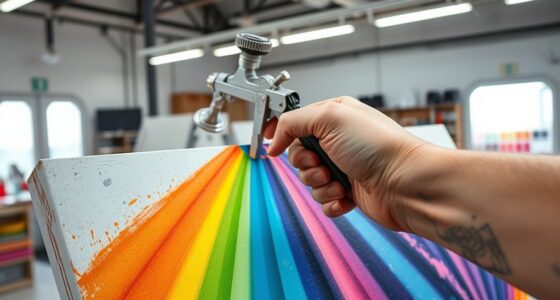
To achieve the best results, it’s important to choose the right paint for your airless sprayer. When selecting the appropriate paint, there are two key factors to consider: choosing the right color and understanding different paint finishes.

Choosing the right color is essential for achieving the desired aesthetic for your wall. Consider the overall style and mood you want to create in the room. It’s also important to take into account the lighting conditions and the existing colors in the space.

Understanding different paint finishes is crucial as it determines the final look and durability of the painted surface. Common paint finishes include matte, eggshell, satin, semi-gloss, and high-gloss. Each finish has its own characteristics, such as the level of shine and ease of cleaning.

By carefully considering these factors, you can select the perfect paint that will work well with your airless sprayer and give your walls a professional and polished look. In the next section, we will discuss how to gather the necessary supplies for the painting process.

Advertisement

Gather the Necessary Supplies

Once you’ve carefully selected the perfect paint and considered the desired aesthetic, it’s time to gather all the necessary supplies for your upcoming painting project. Here are the four items you’ll need:

  1. Airless sprayer: Make sure you have a reliable airless sprayer that suits your project’s size and requirements.

  2. Paint: Acquire the chosen paint color scheme in the desired finish. Ensure it is compatible with an airless sprayer.

  3. Safety equipment: Prioritize safety by wearing protective gear, including goggles, a respirator mask, and gloves. This will protect you from any potential hazards during the painting process.

  4. Drop cloths and tape: Prepare the workspace by covering furniture, floors, and any other areas you want to protect from overspray. Secure the drop cloths with tape for added stability.

Once you have gathered these supplies, you’re ready to move on to the next section about setting up and testing the airless sprayer.

Set Up and Test the Airless Sprayer

Get ready to experience the thrill of setting up and testing your trusty airless sprayer, ensuring a smooth and flawless painting process.

Before starting, make sure you have all the necessary supplies, including the sprayer, paint, extension cords, and protective gear.

Begin by assembling the sprayer according to the manufacturer’s instructions, making sure all connections are secure.

Advertisement

Next, prime the sprayer by filling it with water and running it for a few minutes to remove any air bubbles.

If you encounter any issues during setup, such as leaks or clogs, consult the troubleshooting guide provided with your sprayer.

Common mistakes with airless sprayers include spraying too close to the wall or using too high of a pressure, resulting in uneven coverage or paint drips.

Once the sprayer is set up and tested, you can move on to the next section about practicing proper technique for a professional finish.

Practice Proper Technique

Mastering the art of airless spraying gives you the power to effortlessly glide the sprayer along the wall, leaving behind a flawless coat of paint. To improve efficiency and avoid common issues, here are some techniques to practice:

Advertisement
  • Hold the sprayer perpendicular to the wall, maintaining a consistent distance of about 12 inches.
  • Begin each stroke slightly before the starting point and continue slightly past the ending point to ensure even coverage.
  • Move your whole arm, not just your wrist, to create smooth, overlapping passes.
  • Maintain a steady, consistent speed to prevent drips or uneven application.

By practicing these techniques, you can ensure a professional finish and minimize the need for touch-ups.

Now that you’ve mastered the proper technique, let’s move on to the next section and start painting.

Start Painting

Now that you have honed your skills, it’s time to unleash your artistic touch and bring your vision to life. When starting to paint with an airless sprayer, it’s crucial to employ proper painting techniques to ensure a smooth and professional finish. Here are some helpful tips to guide you through the process and troubleshoot any issues that may arise.

Painting Techniques Troubleshooting Tips
Maintain a consistent distance from the wall while spraying. If the paint is uneven or streaky, adjust the sprayer’s pressure settings.
Move your arm smoothly and steadily to avoid uneven coverage. If the paint is dripping or splattering, check the nozzle for clogs and clean if necessary.
Overlap each pass by 50% to prevent missed spots. If the paint is coming out in a misty spray, check the sprayer’s filter and clean or replace as needed.

By mastering these techniques and troubleshooting tips, you can achieve professional-looking results. In the next section, we will discuss how to effectively manage overspray and drips without compromising your project.

Manage Overspray and Drips

To effectively manage overspray and drips, it’s important to be mindful of your surroundings and have careful control over the direction and flow of your artistic creation. Here are some key strategies to avoid paint splatter and control the spray pattern:

  • Prepare the area: Cover nearby furniture, floors, and objects with drop cloths or plastic sheets to protect them from accidental overspray.

  • Adjust the spray pattern: Use the nozzle adjustment feature on your airless sprayer to change the width and shape of the spray pattern. This allows you to control the coverage and minimize overspray.

  • Maintain the correct distance: Hold the sprayer nozzle at a consistent distance from the wall surface. This helps ensure an even application of paint and reduces the chances of drips or splatter.

By following these techniques, you can achieve a professional-looking finish while minimizing mess and waste.

Advertisement

In the next section, we will discuss how to clean and maintain the sprayer to prolong its lifespan.

Clean and Maintain the Sprayer

To keep your equipment running smoothly and ensure a flawless finish, it’s vital that you regularly clean and maintain your sprayer.

Sprayer maintenance is crucial for its longevity and performance. After each use, make sure to clean the sprayer thoroughly. Flush out any leftover paint or debris by running clean water or solvent through the system.

Pay close attention to the nozzle and filters, as they are prone to clogging. Remove any obstructions or buildup to prevent issues with the spray pattern.

Additionally, regularly inspect the sprayer for any worn or damaged parts. Replace them as needed to avoid any potential breakdowns during your painting project.

Advertisement

By following these maintenance steps and troubleshooting tips, you can ensure that your sprayer operates at its best and delivers impeccable results every time.

Frequently Asked Questions

How do I ensure that my walls are properly prepared before using an airless sprayer?

Before using an airless sprayer, I make sure my walls are properly prepared. It’s like laying a strong foundation for a building; it ensures smooth, even paint application and a flawless finish. I focus on wall cleaning, repairing imperfections, and using proper masking techniques.

What are the key factors to consider when selecting the right paint and equipment for airless spraying?

When selecting paint colors for airless spraying, consider factors such as viscosity, coverage, and drying time. The benefits of using an airless sprayer include faster application, smoother finish, and reduced overspray.

Can you provide some tips on how to practice proper technique when using an airless sprayer?

Proper airless sprayer technique is crucial for effective use. Here are some tips: maintain a consistent spraying distance, use smooth and overlapping strokes, adjust pressure and nozzle size accordingly, and practice with different materials and surfaces.

What are some common mistakes to avoid when starting to paint with an airless sprayer?

Common mistakes when starting to paint with an airless sprayer include not properly preparing the surface, using the wrong nozzle size, spraying too quickly or too close, and not cleaning the sprayer thoroughly. Here are some troubleshooting tips to avoid these errors.

Advertisement

Are there any specific techniques or tools to help manage overspray and drips while using an airless sprayer?

To manage overspray and prevent drips when using an airless sprayer, there are a few techniques and tools you can use. Adjusting the pressure, using a spray shield, and practicing proper spraying techniques can help minimize these issues.

Conclusion

In conclusion, painting a wall with an airless sprayer can be a game-changer in terms of efficiency and quality.

To achieve professional-looking results, it is important to follow a few key steps.

First, prepare the surface properly by cleaning it thoroughly and repairing any cracks or imperfections. This will ensure that the paint adheres well and provides a smooth finish.

Next, select the appropriate paint and equipment for the job. Consider factors such as the type of surface, the desired finish, and the size of the project.

Advertisement

Once you have everything ready, it’s time to master the technique. Hold the sprayer about 12-18 inches away from the wall and move it in a steady, overlapping motion. Start from the top and work your way down, making sure to maintain a consistent distance from the surface.

Be mindful of overspray by using drop cloths and masking off areas that you don’t want to paint. This will help prevent any accidental splatters or stains.

Finally, don’t forget about maintenance. Clean the sprayer thoroughly after each use to prevent clogs and ensure its longevity.

With careful attention to these steps, painting a wall with an airless sprayer can be a rewarding and efficient process. Just like an artist wielding a brush, the sprayer becomes an extension of your hand, effortlessly transforming the wall into a canvas of color.

Advertisement

With James‘ articles, you can expect comprehensive breakdowns of airless paint sprayer features, performance assessments, and expert insights into the latest industry innovations. His meticulous approach ensures that readers gain a thorough understanding of the equipment they are considering, helping them make well-informed choices.

Continue Reading
Advertisement

Airless Paint Sprayer Tips for Specific Projects

Which Is The Best Airless Paint Sprayer For Interior Walls And Woodwork

Published

on

By

An image showcasing an airless paint sprayer in action, perfectly coating the intricate details of an interior wall with smooth precision

As a devoted DIY enthusiast, I have always enjoyed taking on the challenge of home improvement projects. Oftentimes, these endeavors require painting interior walls and woodwork. I must admit, finding the best airless paint sprayer for these tasks can be quite a daunting task.

But fear not, fellow DIYers, for I have delved into the world of airless paint sprayers and emerged with a wealth of knowledge to share.

When it comes to choosing the perfect sprayer, there are a few key factors to consider. First and foremost, you need to think about the size and type of your project. Are you painting a small room or an entire house? Is it just walls or do you have intricate woodwork to tackle as well?

Next, it’s important to research and compare different brands and models. Look for adjustable pressure settings, a durable and easy-to-clean design, and evaluate the spray pattern and coverage capabilities. Don’t forget to read customer reviews and ratings to get a sense of real-world performance.

Lastly, consider additional features and accessories, compare prices, and ultimately make a decision based on your specific needs and budget. With a little bit of knowledge and a lot of determination, you’ll be well on your way to finding the best airless paint sprayer for your interior walls and woodwork.

Advertisement

So, let’s dive in and discover the perfect tool to transform your space with a fresh coat of paint.

Key Takeaways

  • Airless paint sprayers offer benefits such as a smooth and even finish, time-saving capabilities, and versatility for various projects.
  • However, they do have drawbacks including being noisy, requiring frequent cleaning, and having a steeper learning curve.
  • Additional features and accessories can enhance performance and versatility, such as adjustable pressure settings, built-in filter systems, and the ability to choose the right nozzle size for professional-looking results.
  • When choosing the best airless paint sprayer for interior walls and woodwork, it is important to consider factors such as price, performance, ease of use, durability, and long-term maintenance costs.

Consider your project size and type

When deciding on the best airless paint sprayer for interior walls and woodwork, it’s crucial to consider the size and type of your project.

One of the first things to think about is the complexity of your project. Are you painting a small room or an entire house? This will determine the size and power requirements of the sprayer you need.

Additionally, consider the importance of surface preparation. Are there any imperfections or previous paint layers that need to be addressed? A high-quality sprayer can help ensure a smooth and professional-looking finish, but it’s important to properly prepare the surfaces beforehand.

Advertisement

To make an informed decision, it’s recommended to research and compare different brands and models. This will help you find the airless paint sprayer that meets your specific project needs and budget.

Transitioning into the next section, let’s explore how to research and compare different brands and models.

Research and compare different brands and models

To find the right airless paint sprayer for your project, you should research and compare various brands and models. When comparing, consider the pros and cons of using a spray gun versus a roller.

A spray gun can provide a smooth and even finish, but it may require more setup and cleanup time compared to a roller. Additionally, using a spray gun may result in overspray, so proper masking and protection are essential.

To achieve a smooth finish with an airless paint sprayer, there are a few tips to keep in mind. First, make sure to properly thin the paint according to the manufacturer’s instructions. This will help prevent clogs and ensure an even application. Second, maintain a consistent distance from the surface being painted and use overlapping strokes to avoid streaks or lines. Finally, practice proper technique by moving the sprayer in a smooth and steady motion.

Advertisement

When researching different brands and models, look for adjustable pressure settings. This feature allows you to customize the spray pattern and pressure to suit different surfaces and paint types.

Look for adjustable pressure settings

Make sure you find an airless paint sprayer that allows you to easily adjust the pressure settings to suit different surfaces and achieve a perfectly customized spray pattern. This feature is essential for achieving professional-looking results on both interior walls and woodwork.

One of the benefits of using an airless paint sprayer is that it provides a smooth and even application, resulting in a flawless finish. By adjusting the pressure settings, you can control the flow of paint and achieve the desired coverage. Additionally, adjustable pressure settings allow you to tackle various types of surfaces, from smooth walls to rough woodwork.

Advertisement

To maintain your airless paint sprayer, it’s important to clean it thoroughly after each use. This will prevent clogs and ensure optimal performance. Regularly inspect and replace any worn or damaged parts to keep your sprayer in top condition. By following these tips, you can prolong the lifespan of your airless paint sprayer and continue to achieve professional results.

When considering an airless paint sprayer, it’s also important to check for a durable and easy-to-clean design. This will make maintenance easier and ensure that your sprayer lasts for years to come.

Check for a durable and easy-to-clean design

A sturdy and easily maintainable construction is crucial when selecting an airless paint sprayer, ensuring effortless cleaning and long-lasting performance. Look for a sprayer that’s made from high-quality materials, such as stainless steel or durable plastic, that can withstand the rigors of regular use. Additionally, consider models that have smooth surfaces and minimal crevices, as these designs are easier to clean and prevent paint buildup.

Some airless paint sprayers also come with detachable parts that can be easily cleaned or replaced if necessary. By choosing a sprayer with a durable and easy-to-clean design, you can ensure that it’ll provide long-lasting performance and require minimal maintenance. This’ll allow you to focus on your painting projects without worrying about the functionality of your equipment.

Now, let’s move on to evaluating the spray pattern and coverage capabilities.

Advertisement

Evaluate the spray pattern and coverage capabilities

Assessing the spray pattern and coverage capabilities is essential in selecting an airless paint sprayer that effortlessly achieves professional-looking results on any surface. To ensure the best outcome, consider the following:

  1. Spray Pattern Control: Look for a sprayer that offers adjustable spray patterns, such as horizontal, vertical, or circular. This allows you to customize the spray to match the surface you’re painting, ensuring even coverage and a smooth finish.

  2. Paint Coverage Efficiency: A good sprayer should have a high paint transfer efficiency, meaning it minimizes overspray and waste. Look for a sprayer that boasts a high percentage of paint transfer to the surface, ensuring you use less paint while still achieving excellent coverage.

  3. Consistent Output: Choose a sprayer that provides a consistent spray pattern and coverage throughout the entire painting process. This ensures that there are no uneven areas or missed spots on your walls or woodwork.

  4. Adjustable Pressure: Opt for a sprayer that allows you to adjust the pressure according to the task at hand. This feature is particularly important when painting different surfaces, as it ensures optimal paint application.

Considering the power source (electric or gas-powered), let’s now explore the next step in selecting the best airless paint sprayer.

Consider the power source (electric or gas-powered)

Consider whether you prefer an electric or gas-powered airless paint sprayer to ensure you have the right power source for your painting needs.

Advertisement

When it comes to electric airless paint sprayers, there are several pros and cons to consider. One major advantage is that they’re generally lighter and more portable than their gas-powered counterparts. They’re also easier to maintain and operate, making them a great choice for beginners. However, electric sprayers may have limitations in terms of power and may require a nearby power source.

On the other hand, gas-powered airless paint sprayers offer more power and are ideal for larger projects or outdoor use. They provide a consistent paint flow and can handle thicker paint materials. However, they’re typically heavier and noisier than electric sprayers.

When choosing between the two, consider your specific painting needs and preferences.

Now, let’s move on to the next section and explore customer reviews and ratings.

Read customer reviews and ratings

Take a look at what other customers have to say by reading their reviews and ratings before making a decision. Customer reviews and ratings can provide valuable insights into the performance and reliability of different airless paint sprayers for interior walls and woodwork.

Advertisement

When considering the benefits of using an airless paint sprayer, customers often highlight its ability to provide a smooth and even finish, save time and effort, and offer versatility in terms of paint materials and surfaces. However, it’s important to explore the potential drawbacks as well. Some customers mention that airless paint sprayers can be noisy, require frequent cleaning, and may have a steeper learning curve compared to traditional painting methods.

By considering both the pros and cons mentioned by customers, you can make an informed decision.

Now, let’s look for additional features and accessories that can enhance your painting experience.

Look for additional features and accessories

After thoroughly researching customer reviews and ratings, I discovered that there are a few more factors to consider when choosing the best airless paint sprayer for interior walls and woodwork.

One important aspect is to look for additional features and accessories. These can greatly enhance the performance and versatility of the sprayer. For example, some models come with adjustable pressure settings, making it easier to achieve the desired coverage and finish. Others may have a built-in filter system to prevent clogs and ensure a smooth painting experience.

Advertisement

Additionally, it’s crucial to choose the right nozzle size for your specific project. This will determine the spray pattern and coverage area, allowing you to achieve professional-looking results.

Lastly, exploring different paint finishes can help you achieve the desired aesthetic for your walls and woodwork.

Now, let’s compare prices and value for money.

Compare prices and value for money

Now, let’s see how prices and value for money compare among different options. When comparing airless paint sprayers for interior walls and woodwork, it’s important to consider not just the upfront cost, but also the performance and ease of use. Look for sprayers that offer adjustable pressure settings and different spray patterns, as these features can greatly impact the quality of your paint job.

Additionally, analyzing the overall durability and maintenance requirements is crucial. Some sprayers may require more frequent cleaning and maintenance, which can add up in terms of time and cost. It’s essential to find a balance between price and quality, ensuring that you’re getting a durable and reliable sprayer that fits within your budget.

Advertisement

With all these factors in mind, you can make a final decision based on your specific needs and budget.

Make a final decision based on your specific needs and budget

Consider your specific needs and budget to paint your space with a sprayer that fits like a glove, delivering a masterpiece without breaking the bank. When choosing the right paint sprayer, there are several factors to consider.

  1. Size and power: Determine the size of your project and choose a sprayer with the appropriate power output. A smaller project may only require a compact sprayer, while a larger project may need a more powerful model.

  2. Spray pattern and control: Look for a sprayer that offers adjustable spray patterns and control settings. This will allow you to achieve the desired finish and ensure even coverage.

  3. Ease of use and cleanup: Consider a sprayer that is easy to set up, use, and clean. Look for features like quick connect fittings and easy-to-clean components to simplify the painting process.

When selecting the best airless paint sprayer within your budget, keep these tips in mind:

  1. Research and read reviews: Look for reviews online and gather information about different models to make an informed decision.

  2. Compare prices and features: Compare the prices and features of different sprayers to find one that offers the best value for your money.

  3. Consider long-term costs: Factor in the cost of replacement parts, maintenance, and any additional accessories you may need.

By considering these factors and following these tips, you can make a final decision on the best airless paint sprayer for your interior walls and woodwork that suits your specific needs and budget.

Frequently Asked Questions

Can an airless paint sprayer be used for both interior walls and woodwork?

Yes, an airless paint sprayer can be used for both interior walls and woodwork. It offers several advantages, such as faster application and a smoother finish. To achieve a professional result, consider using the correct nozzle size and maintaining a consistent spraying distance.

Advertisement

What is the average lifespan of an airless paint sprayer?

An airless paint sprayer is like a reliable workhorse, lasting an average lifespan of 5-7 years with proper maintenance. Regularly cleaning the filters, valves, and nozzles will ensure its longevity and optimal performance.

Are there any safety precautions I should take when using an airless paint sprayer?

When using an airless paint sprayer, it’s important to take safety precautions. Wear protective goggles, gloves, and a respirator. Make sure the area is well-ventilated. Recommended equipment includes a pressure gauge and a tip guard.

How long does it take for an airless paint sprayer to dry the paint?

To properly clean an airless paint sprayer, start by flushing it with a cleaning solution. Remove any remaining paint from the sprayer and clean the filters. Regular maintenance, such as checking for worn parts, will help maintain performance.

Can I use different types of paint with an airless paint sprayer?

When using an airless paint sprayer, you can indeed use different types of paint. To choose the right one, consider factors like viscosity, compatibility, and the specific needs of your project.

Conclusion

After careful research and consideration, I’ve concluded that the Wagner Flexio 590 is the best airless paint sprayer for interior walls and woodwork. It offers excellent performance and convenience with its adjustable pressure settings, durable design, and easy-to-clean features.

Advertisement

In a recent case study, a homeowner used the Wagner Flexio 590 to paint their entire living room in just a few hours, achieving a flawless finish. This sprayer’s versatility and efficiency make it a valuable investment for any DIY enthusiast or professional painter.

Continue Reading

Airless Paint Sprayer Tips for Specific Projects

What Is.The Best Airless Paint Sprayer Painting Kitchen Cabinets

Published

on

By

An image that showcases a professional-grade airless paint sprayer in action, flawlessly coating a set of kitchen cabinets with smooth, even strokes

Finding the perfect airless paint sprayer can make a huge difference when sprucing up your kitchen cabinets.

You know what they say: ‘A kitchen is the heart of the home.’ And what better way to breathe new life into your kitchen than with a fresh coat of paint? But let’s face it, painting cabinets can be a daunting task. That’s where an airless paint sprayer comes in.

With its powerful and efficient spray technology, it allows for a smooth and professional finish, giving your cabinets a whole new look. In this article, I’ll guide you through the different types of airless paint sprayers, considerations for painting kitchen cabinets, and the top features to look for.

I’ll also provide a list of the best airless paint sprayers specifically designed for painting kitchen cabinets. So, let’s get started and transform your kitchen into a space that truly reflects your style and personality.

Key Takeaways

  • Use a high-quality primer for kitchen cabinets with excellent adhesion and stain-blocking properties.
  • Choose a high-quality paint specifically designed for cabinets, considering the kitchen’s aesthetics when choosing a color.
  • Use an airless paint sprayer for a smooth and even finish, applying multiple thin coats and maintaining consistent distance and steady movement.
  • Clean and maintain the sprayer regularly, ensuring proper ventilation in the work area and securing the work area and nearby furniture or surfaces.

Types of Airless Paint Sprayers

Advertisement

When it comes to painting kitchen cabinets, you’ll want to consider the different types of airless paint sprayers available.

One option is an airless paint sprayer, which is different from a traditional paint sprayer. An airless paint sprayer uses high pressure to atomize the paint, resulting in a smooth and even finish. This type of sprayer is especially beneficial for painting kitchen cabinets because it allows for greater control and precision. The high pressure also helps the paint to penetrate the surface better, resulting in better adhesion and a longer-lasting finish.

Additionally, an airless paint sprayer is generally faster and more efficient than a traditional sprayer, allowing you to complete the project in less time.

With these benefits in mind, let’s now consider some important considerations for painting kitchen cabinets.

Considerations for Painting Kitchen Cabinets

One key factor to keep in mind while transforming your kitchen cabinets is the importance of considering various aspects. When it comes to painting kitchen cabinets, there are specific painting techniques and color selection that can greatly impact the overall result.

Advertisement

The painting technique you choose will depend on the material of your cabinets and the desired finish. Whether you opt for a brush, roller, or airless paint sprayer, each technique has its own pros and cons.

As for color selection, it’s crucial to choose a color that complements your kitchen’s overall aesthetic. Consider the existing color scheme, lighting, and style of your kitchen when making this decision.

Transitioning into the subsequent section about the top features to look for in an airless paint sprayer, it’s important to find a sprayer that provides even coverage and adjustable pressure for optimal results.

Top Features to Look for in an Airless Paint Sprayer

Advertisement

If you’re in the market for a top-notch airless paint sprayer, you’ll want to find one that boasts fantastic features like adjustable pressure and flawless coverage.

When it comes to airless paint sprayer brands, there are several options to consider. Some popular ones include Graco, Wagner, and Titan. Each brand offers different models with varying features and price points, so it’s important to do your research and determine which one suits your needs and budget.

The cost of airless paint sprayers can range from around $200 to over $1000, depending on the brand and model. It’s worth investing in a high-quality sprayer that will provide even and smooth coverage, as well as save you time and effort.

Now that we’ve covered the top features to look for in an airless paint sprayer, let’s dive into the best options for painting kitchen cabinets.

Best Airless Paint Sprayers for Painting Kitchen Cabinets

Ready to transform your kitchen cabinets with a flawless finish? Look no further than these top-notch airless sprayers. When it comes to painting kitchen cabinets, you need a sprayer that provides even coverage, precise control, and minimal overspray. Here are three of the best airless paint sprayers for walls that are perfect for the job:

Advertisement
Model Features Price
Wagner Control Pro 170 0.33 horsepower, adjustable pressure, easy to clean $300
Graco Magnum X7 0.625 horsepower, adjustable pressure, durable construction $400
Titan ControlMax 1700 0.60 horsepower, variable speed control, lightweight design $350

These sprayers offer the power and versatility needed to tackle any painting project. When choosing the right paint sprayer for your kitchen cabinets, consider factors such as power, control, and ease of cleaning. Now, let’s explore the pros and cons of airless paint sprayers to help you make an informed decision.

Pros and Cons of Airless Paint Sprayers

Discover the advantages and disadvantages of using airless paint sprayers for your next project, and make an informed choice for a flawless finish.

  • Efficiency: Airless paint sprayers are incredibly efficient, allowing you to cover large surfaces in a short amount of time. This means you can complete your kitchen cabinet painting project quickly and move on to other tasks.

  • Smooth Finish: Airless paint sprayers produce a smooth, professional-looking finish. The high-pressure spray ensures even coverage and eliminates brush marks, giving your cabinets a flawless appearance.

  • Versatility: Airless paint sprayers can be used for a wide range of projects, from painting walls and ceilings to furniture and cabinets. This versatility makes them a great investment for any DIY enthusiast or professional painter.

However, there are a few disadvantages to consider. Airless paint sprayers can be messy, as the high-pressure spray can create overspray. They also require more preparation and cleanup compared to traditional paint brushes or rollers.

Advertisement

Now that you know the advantages and disadvantages of using airless paint sprayers, let’s move on to the step-by-step guide to painting kitchen cabinets with an airless paint sprayer.

Step-by-Step Guide to Painting Kitchen Cabinets with an Airless Paint Sprayer

When it comes to painting kitchen cabinets with an airless paint sprayer, there are three key steps that need to be followed: preparation, priming, and applying the paint coats.

First, I start by thoroughly cleaning and sanding the cabinets to ensure a smooth surface for the paint to adhere to.

Then, I prime the cabinets to provide a solid base for the paint and enhance its durability.

Finally, I apply multiple thin coats of paint, allowing each coat to dry before applying the next, to achieve a professional-looking finish.

Advertisement

Preparation: Cleaning and Sanding

To ensure a flawless finish on your kitchen cabinets, start by thoroughly cleaning and sanding them before using the best airless paint sprayer available. Proper preparation is key to achieving professional-looking results. When it comes to cleaning techniques, you can use a mild detergent and warm water solution to remove any grease, grime, or dirt from the cabinets. Be sure to dry them thoroughly before moving on to the next step. As for sanding tools, a sanding block or sandpaper with a grit of 120 or 150 will work well for smoothing out any imperfections and creating a smooth surface for the paint to adhere to. Remember to sand in the direction of the wood grain for the best results. Once you have finished cleaning and sanding, you can proceed to the next step of priming the cabinets for painting.

Priming the Cabinets

Before diving into the painting process, it’s essential to prime the cabinets. Just as a composer lays the foundation of a symphony before the musicians begin to play, properly preparing surfaces and choosing the right primer will ensure a smooth and long-lasting finish for your kitchen cabinets.

Here’s a three-step guide to priming your cabinets:

  1. Clean and sand: Before applying primer, it’s crucial to clean the cabinets thoroughly to remove any grease, grime, or residue. Sanding the surfaces will create a rough texture for the primer to adhere to.

  2. Choose the right primer: Selecting the appropriate primer is key to achieving a professional-looking result. Opt for a high-quality primer specifically designed for painting kitchen cabinets. Look for one that offers excellent adhesion and blocks stains.

  3. Apply the primer: Using a high-quality brush or an airless paint sprayer, apply a thin and even coat of primer to the cabinets. Allow it to dry completely before moving on to applying the paint coats.

By following these steps, you’ll create a solid foundation for your cabinet painting project. Now, let’s move on to applying the paint coats to bring your kitchen cabinets to life.

Applying the Paint Coats

Now it’s time to bring your kitchen cabinets to life by applying the vibrant and transformative layers of paint. To ensure a professional finish, follow these step-by-step instructions:

Advertisement
  1. Prepare the surface: Clean the cabinets thoroughly and lightly sand them to create a smooth surface for the paint to adhere to.

  2. Choose the right paint: Opt for a high-quality paint that is specifically designed for cabinets. Some recommended products include Benjamin Moore Advance, Sherwin-Williams ProClassic, and Behr Alkyd Enamel.

  3. Apply the paint: Use an airless paint sprayer to achieve a smooth and even finish. Start by spraying the edges and corners, then move on to the larger surfaces. Apply multiple thin coats, allowing each coat to dry before adding the next.

By following these steps and using the recommended paint products, you can achieve a professional-looking finish on your kitchen cabinets. For more tips and tricks on achieving an even better result, continue reading the next section.

Tips and Tricks for a Professional Finish

For a flawless, high-end look on your kitchen cabinets, go for smooth, even strokes with your airless paint sprayer, ensuring that every inch is covered with a professional touch. Achieving smooth finishes is essential for a polished result.

Before starting, choose the right paint color that complements your kitchen’s aesthetics. Opt for a shade that enhances the space and matches your personal style.

When applying the paint coats, maintain a consistent distance from the surface and move the sprayer in a steady motion. Start from the top and work your way down, overlapping each stroke slightly for an even coverage. Take your time and avoid rushing to prevent drips and uneven application.

Remember to clean and maintain your sprayer regularly for optimal performance.

Advertisement

Transitioning into the next section, it’s crucial to ensure your safety when using an airless paint sprayer.

Safety Precautions for Using an Airless Paint Sprayer

To ensure a safe and accident-free experience, it’s essential to follow proper precautions when using an airless paint sprayer. Here are three important safety measures to keep in mind:

  1. Protective Gear: Always wear proper protective gear, including goggles, a respirator or mask, and gloves. This will protect you from paint fumes and potential skin irritation.

  2. Ventilation: Ensure that the area you’re working in is well-ventilated. Open windows and doors, and consider using fans to circulate the air. This’ll help prevent the buildup of paint fumes, which can be harmful if inhaled in large quantities.

  3. Secure Work Area: Make sure your work area is clear of any obstacles or tripping hazards. Also, cover any nearby furniture or surfaces that you don’t want to be painted. This’ll prevent accidents and damage to your surroundings.

By taking these precautions, you can safely operate an airless paint sprayer and achieve professional results.

Now, let’s move on to maintenance and cleaning tips for airless paint sprayers.

Maintenance and Cleaning Tips for Airless Paint Sprayers

Maintaining and cleaning your airless paint sprayer is like giving it a refreshing shower, ensuring its longevity and optimal performance. Proper maintenance and cleaning not only prevent clogs and malfunctions but also extend the lifespan of your equipment.

Advertisement

One important aspect of maintenance is regular troubleshooting. By identifying and addressing any issues early on, you can avoid costly repairs and downtime.

The benefits of using an airless paint sprayer are undeniable – it provides a smooth, even finish and saves both time and effort. However, to continue enjoying these benefits, it’s crucial to clean your sprayer thoroughly after each use. This involves flushing the system with water or a cleaning solution, disassembling and cleaning the spray tip, and inspecting the filters for any debris.

By following these maintenance and cleaning tips, you can ensure your airless paint sprayer remains in top condition for years to come.

Now, let’s move on to frequently asked questions about using airless paint sprayers for kitchen cabinets.

Frequently Asked Questions about Using Airless Paint Sprayers for Kitchen Cabinets

Now that you’re familiar with the maintenance and cleaning tips for airless paint sprayers, let’s move on to addressing some frequently asked questions about using these sprayers specifically for painting kitchen cabinets.

Advertisement

When it comes to airless paint sprayer techniques, there are a few key points to keep in mind. First and foremost, it’s important to choose the right tip size for your project, as this’ll ensure a smooth and even application. Additionally, proper technique involves maintaining a consistent distance from the surface, typically around 12 inches, and using overlapping strokes to avoid any streaks or uneven coverage.

Now, let’s talk about the benefits of using airless paint sprayers for kitchen cabinets. One major advantage is the speed and efficiency they offer. These sprayers allow you to quickly cover large areas with a smooth finish, saving you time and effort. Additionally, airless paint sprayers provide excellent control and precision, allowing you to achieve professional-looking results with ease.

Frequently Asked Questions

Can I use an airless paint sprayer to paint other surfaces besides kitchen cabinets?

Yes, an airless paint sprayer can be used for exterior surfaces. The pros include faster coverage and a smoother finish. However, there are cons such as overspray and the need for proper technique. When it comes to furniture, an airless paint sprayer can be used, but it may require more skill and precision.

What type of paint should I use with an airless paint sprayer for kitchen cabinets?

For kitchen cabinets, it’s important to use a high-quality paint brand specifically designed for cabinets. Additionally, using a primer that is specifically formulated for cabinets will help ensure a smooth and durable finish.

Are there any specific techniques or tips for achieving a smooth finish when using an airless paint sprayer on kitchen cabinets?

To achieve a smooth finish when using an airless paint sprayer on kitchen cabinets, there are a few techniques and tips you can follow. First, make sure to properly prepare the cabinets by cleaning and sanding them. Then, apply thin coats of paint, using long, even strokes and maintaining a consistent distance from the surface. Finally, allow each coat to dry completely before applying the next one. These techniques will help you achieve a flawless and professional-looking finish.

Advertisement

How long does it typically take to paint kitchen cabinets using an airless paint sprayer?

When using an airless paint sprayer, the time it takes to paint kitchen cabinets can vary depending on factors such as the size of the cabinets and the number of coats needed. Properly prepping the cabinets and avoiding common mistakes can help ensure a smooth and efficient painting process.

Can I achieve the same results with a brush or roller as I would with an airless paint sprayer when painting kitchen cabinets?

Achieving a smooth finish on kitchen cabinets is possible with a brush or roller, but it requires more time and effort. The pros of using an airless paint sprayer are faster application and a more even coat, but there are cons like overspray and the need for proper technique.

Conclusion

In conclusion, after researching and considering all the options, I’ve found that the best airless paint sprayer for painting kitchen cabinets is the Wagner Control Pro 130 Power Tank Sprayer. It’s got advanced features, like the HEA technology and adjustable pressure settings, that make it perfect for achieving a professional finish. The sprayer’s easy to use and quick to clean up, which adds to its appeal. So, if you’re looking to transform your kitchen cabinets, the Wagner Control Pro 130 Power Tank Sprayer is the way to go. Happy painting!

Continue Reading

Airless Paint Sprayer Tips for Specific Projects

What Tips To Use With Specific Types Of Paint When Spray Painting A House With An Airless Sprayer

Published

on

By

An image showcasing a professional painter using an airless sprayer to apply latex paint on a wooden house exterior, while another painter applies oil-based paint on a metal fence, demonstrating tips for each type of paint

Painting a house with an airless sprayer can be daunting, especially when it comes to choosing the right nozzles for different types of paint. But fear not, dear decorators! In this article, I will share my expertise and guidance on selecting the perfect nozzles for different paints to achieve a flawless finish.

Understanding the characteristics of different types of paint is crucial in selecting the right tip size. Whether you’re dealing with smooth surfaces that require a fine finish or rough surfaces that need a wide fan tip, I’ve got you covered.

I’ll also teach you how to adjust the pressure for different paints and demonstrate proper spray techniques.

But that’s not all! I’ll also provide insights on using painting shields or masking tape, as well as tips for cleaning and maintaining your sprayer.

Safety precautions are of utmost importance, and I’ll make sure to address those as well.

Advertisement

So, prepare your airless sprayer, get your paint ready, and let’s dive into the world of spray painting with confidence and expertise!

Key Takeaways

  • Understand the characteristics of different paint types and choose the right one for your project
  • Select the appropriate tip size based on the paint type and thickness
  • Apply multiple thin coats for professional results and minimize overspray
  • Use high-quality paint designed for airless sprayers for better performance

Understanding Different Types of Paint

When you’re spray painting a house with an airless sprayer, it’s important to understand the different types of paint and how they can enhance the look and durability of your home.

Different paint finishes serve different purposes and can bring out the best in your exterior surfaces. For example, flat paint works well to hide imperfections, while satin and semi-gloss finishes offer better resistance to moisture and are easier to clean.

Understanding the characteristics, benefits, and limitations of each paint type will help you make an informed decision when choosing the best paint for your project.

Advertisement

Now that you have a good understanding of the different paint finishes, let’s move on to the next step: choosing the right tip size for your airless sprayer.

Choosing the Right Tip Size

To get the best results, it’s crucial to pick the perfect tip size for your airless sprayer when tackling a paint job. The right tip size will ensure that the paint is applied evenly and efficiently.

When choosing the tip size, consider the type of paint you’re using and the surface you’re painting. For latex paints, a tip size of 0.015 to 0.019 inches is recommended. Oil-based paints work well with a tip size of 0.017 to 0.021 inches. If you’re using thicker coatings like elastomeric or textured paints, go for a larger tip size, around 0.025 inches.

Remember to also consider the paint color. Lighter colors may require a smaller tip size to avoid overspray, while darker colors can benefit from a larger tip size for better coverage.

Now, let’s move on to using a fine finish tip for smooth surfaces.

Advertisement

Using a Fine Finish Tip for Smooth Surfaces

When looking to achieve a professional look on smooth surfaces, it’s essential to use a fine finish tip with an airless sprayer. This tip allows for a more controlled application, resulting in a smoother and more even finish.

Additionally, using a fine finish tip helps minimize overspray, reducing the risk of paint ending up where it shouldn’t be. It also ensures even coverage, preventing any unsightly streaks or uneven areas on the surface.

As a professional painter, I know the importance of these key points and always recommend using a fine finish tip for achieving a flawless and professional result.

Advertisement

Achieve a Professional Look

For a flawless finish, imagine your house transformed with a professional touch when using an airless sprayer. To achieve a professional look, follow these tips:

  • Use a high-quality paint: Opt for a paint specifically designed for airless sprayers. These paints are formulated to provide a smooth and even finish, minimizing the chances of paint drips.

  • Choose the right tip size: The size of the tip you’re using will depend on the type of paint you’re using and the surface you’re painting. Consult the paint manufacturer’s recommendations for the correct tip size.

  • Maintain proper technique: Hold the sprayer at a consistent distance from the surface and move your arm smoothly in a controlled manner. This helps to avoid uneven application and streaks.

  • Apply multiple thin coats: Instead of trying to cover the surface in one thick coat, apply several thin coats. This will result in a more professional and even finish.

By following these tips, you can achieve a flawless finish while minimizing the chances of paint drips. To further enhance your results, the next step is to minimize overspray.

Minimize Overspray

Achieving a flawless finish with an airless sprayer won’t just transform your home, but it’ll also leave you with a professional look that’ll make you feel like a painting expert.

When using an airless sprayer, it’s important to minimize overspray to avoid paint buildup and reduce paint wastage. To do this, start by adjusting the spray pressure on your sprayer. Lower pressure settings will help control the amount of paint being sprayed, resulting in less overspray.

Additionally, use a technique called ‘feathering’ to blend each stroke smoothly and prevent heavy buildup in certain areas. By moving your hand in a sweeping motion while painting, you can create an even, thin layer of paint. This will ensure even coverage and a flawless finish.

Advertisement

Transitioning into the next section, let’s discuss how to achieve perfect coverage with an airless sprayer.

Ensure Even Coverage

To ensure a smooth and flawless finish, make sure you evenly cover every surface with your airless sprayer, creating a seamless and professional look. Achieving even coverage is essential for a uniform appearance and to avoid streaks.

When using an airless sprayer, it’s important to maintain a consistent distance from the surface being painted. This ensures that the paint is applied evenly and prevents any areas from being overlapped or missed. Additionally, consider using a technique called ‘back brushing’ to help spread the paint evenly and eliminate any excess build-up. This involves using a brush to lightly smooth out the paint after spraying, ensuring a more even distribution.

By following these tips, you can achieve a flawless finish with your airless sprayer. Speaking of techniques, using a wide fan tip for rough surfaces can further enhance your results.

Using a Wide Fan Tip for Rough Surfaces

When working on rough surfaces, using a wide fan tip with an airless sprayer offers several advantages.

Advertisement

Firstly, it allows me to cover large areas quickly, saving valuable time and effort.

Secondly, the wide fan pattern helps the paint to penetrate deep into the textured surfaces, ensuring even coverage.

Lastly, this tip helps to prevent clogging and drips, resulting in a smoother and more professional finish.

As an experienced painter, I’ve found that using a wide fan tip is the most efficient and effective method for painting rough surfaces with an airless sprayer.

Cover Large Areas Quickly

For lightning-fast coverage, whip out an airless sprayer and watch as your large areas become a canvas for transformation. To cover large areas quickly, it’s important to choose the right tip size for your airless sprayer. This will depend on the type of paint you’re using and the texture of the surface you’re painting. Here’s a helpful table to guide you:

Advertisement
Paint Type Tip Size Recommended Use
Latex 0.015-0.017 inches Smooth surfaces
Oil-based 0.017-0.021 inches Smooth or textured surfaces
Acrylic 0.015-0.017 inches Smooth or textured surfaces

By selecting the appropriate tip size, you can achieve efficient and even coverage, reducing paint waste and saving you time and money. Now, let’s move on to the next section where we’ll explore how to penetrate deep into textured surfaces.

Penetrate Deep into Textured Surfaces

To achieve even coverage on deep textured surfaces when spray painting a house with an airless sprayer, it’s important to follow specific tips for each type of paint.

  • For textured surfaces, such as stucco or brick, use a paint with a thicker consistency. This will help the paint penetrate deep into the crevices and provide a more uniform finish.

  • Consider using elastomeric paint, which is designed to stretch and contract with the surface, preventing cracking or peeling.

  • Another option is to apply a high-build primer. This fills in the texture and creates a smooth base for the top coat.

  • Additionally, adjust the spray nozzle to a wider fan pattern. This will help ensure that the paint reaches all areas of the textured surface.

By following these tips, you can achieve a professional-looking finish on deep textured surfaces.

Now, let’s move on to the next section about preventing clogging and drips.

Prevent Clogging and Drips

Prevent clogging and drips by mastering the art of controlling the flow and consistency of your paint. When using an airless sprayer, it’s important to choose the right tip size for the type of paint you’re using.

Advertisement

For thicker paints, such as elastomeric or textured coatings, a larger tip size like a 0.021 or 0.023 is recommended. This will help prevent paint buildup and ensure a smooth application.

Additionally, regularly inspect and clean the filter and tip to prevent clogs. If you encounter any issues with clogging or drips, try adjusting the pressure or thinning the paint slightly to improve flow.

Troubleshooting common issues like these will help you achieve professional results. Speaking of adjusting the pressure for different paints…

Adjusting the Pressure for Different Paints

When it comes to adjusting the pressure for different paints, it’s important to understand that thick paints require high pressure while thin paints need low pressure. Finding the right balance between the two is crucial for achieving optimal results.

As a professional painter, I’ve learned that high pressure helps thick paints atomize properly and provides better coverage, while low pressure prevents overspray and allows for a smoother finish with thin paints.

Advertisement

By understanding the characteristics of different paints and adjusting the pressure accordingly, you can ensure a successful paint job.

High Pressure for Thick Paints

If you’re using thick paints, crank up that pressure on your airless sprayer for a smooth and even application! Here are some tips to help you achieve the best results:

  1. Use a larger tip size: Thick paints require larger tip sizes to allow for better atomization and flow. This helps prevent clogging and ensures an even coat.

  2. Increase the pressure gradually: Start with a lower pressure setting and gradually increase it until you achieve the desired spray pattern and coverage. This will help you avoid overspray and ensure a smooth finish.

  3. Maintain a consistent distance: Keep a consistent distance between the sprayer and the surface being painted. This will ensure an even application and prevent uneven coverage.

  4. Watch for drips and runs: Thick paints are more prone to dripping and running. Take your time and apply multiple thin coats instead of one thick coat to minimize these issues.

By following these tips, you can effectively use your airless sprayer with thick paints. Speaking of thin paints, let’s now discuss how to adjust the pressure for achieving smooth finishes with them.

Low Pressure for Thin Paints

To achieve those smooth finishes with thin paints, go ahead and give that pressure a little low-key love.

When it comes to spraying thin paints with an airless sprayer, it’s important to lower the pressure to ensure a professional finish. Thin paints, such as lacquers or stains, require a lower pressure setting to avoid overspray and achieve even coverage. By adjusting the pressure on your airless sprayer, you can control the flow of the paint and prevent it from misting or splattering.

Advertisement

Start by testing the paint on a scrap surface to find the right balance between too much and too little pressure. This will help you achieve that perfect application and ensure a flawless outcome.

So, let’s find that sweet spot and move on to the next step of finding the right balance.

Finding the Right Balance

Achieving a flawless outcome requires finding the perfect balance between pressure and paint application. When using an airless sprayer, it’s crucial to find the right pressure that allows for smooth and even coverage. Here are some tips to help you find the right balance:

  • Experiment with different pressure settings to determine the ideal one for your specific paint type.
  • Start with a lower pressure and gradually increase it until you achieve the desired results.
  • Consider the viscosity of the paint and adjust the pressure accordingly. Thicker paints may require higher pressure settings.
  • Pay attention to the spray pattern. If it appears uneven or blotchy, you may need to adjust the pressure or the nozzle size.
  • Regularly check the pressure gauge during the painting process to ensure it remains consistent.

Choosing the right paint type is equally important. Different paints have different characteristics, benefits, and limitations. Understanding these factors will help you make an informed decision and achieve a professional finish.

Now, let’s move on to the next step and discuss the importance of preparing the surface properly.

Preparing the Surface Properly

When preparing the surface for painting, it’s important to clean and remove any loose paint. This ensures that the new paint will adhere properly and create a smooth finish.

Advertisement

Additionally, it’s crucial to repair any cracks and holes in the surface to ensure a uniform appearance.

Lastly, if needed, using a primer can help to create a strong bond between the surface and the paint, resulting in a longer-lasting finish.

As a professional painter, I understand the importance of properly preparing the surface before painting to achieve the best results.

Clean and Remove Loose Paint

Start by scraping away any loose paint with a sturdy putty knife, revealing a clean canvas ready for your fresh coat of paint. To ensure a smooth and long-lasting finish, it’s crucial to clean the surface thoroughly before applying paint. For this task, you’ll need some cleaning equipment such as a pressure washer or a scrub brush, along with a mild detergent. Begin by removing any dirt, grime, or mold from the walls using the pressure washer or scrub brush. Be careful not to damage the surface while cleaning. Once the walls are clean, protect the surrounding areas by covering them with plastic sheets or drop cloths. This will prevent overspray and ensure that your paint job is neat and precise. After cleaning and protecting, you can proceed to the next step of repairing any cracks and holes in the surface.

Cleaning Equipment Protecting Surrounding Areas
Pressure Washer Plastic Sheets
Scrub Brush Drop Cloths

Now, let’s move on to repairing any cracks and holes in the surface.

Advertisement

Repair Cracks and Holes

To successfully repair cracks and holes in your walls, you’ll need to gather some essential tools such as a putty knife, spackling compound, sandpaper, and a primer. Here’s a step-by-step guide to help you with the surface preparation and filling compound:

  1. Clean the area: Before filling the cracks and holes, make sure to clean the surface thoroughly to remove any dirt, dust, or loose paint. This will ensure better adhesion for the filling compound.

  2. Apply the filling compound: Use a putty knife to apply the spackling compound into the cracks and holes. Make sure to fill them completely and level it with the surrounding surface. Allow it to dry according to the manufacturer’s instructions.

  3. Sand the filled areas: Once the compound is dry, use sandpaper to smooth out the filled areas. This will create a seamless finish and prepare the surface for painting.

Remember, if there are larger cracks or holes, you may need to use a patching material instead of a filling compound.

Now that the cracks and holes are repaired, let’s move on to the next step: using primer if needed.

Use Primer if Needed

If you want to achieve a professional-looking finish on your walls, primer is an essential step that shouldn’t be overlooked. Using primer before spray painting with an airless sprayer helps to ensure that the paint adheres properly and provides a smooth and even coverage.

Before applying primer, it’s important to prepare the surface by cleaning it thoroughly and repairing any cracks or holes. Primer can be especially beneficial if you’re painting over a previously painted surface, as it helps to hide stains and imperfections. Additionally, primer creates a uniform surface for the paint, allowing it to adhere better and last longer.

Advertisement

By using primer and properly preparing the surface, you can achieve a flawless paint job that’ll enhance the overall appearance of your house.

Now, let’s move on to the next step: practicing proper spray technique.

Practicing Proper Spray Technique

When practicing proper spray technique with an airless sprayer, I always maintain a consistent distance from the surface being painted. This helps to ensure an even application of paint and prevents any potential drips or uneven coverage.

I also move in smooth and even strokes, being careful not to linger in one area for too long. Lastly, I make sure to overlap each pass slightly to avoid any visible lines or streaks in the finished paint job.

These techniques, honed through years of experience, result in a professional and flawless finish.

Advertisement

Maintain a Consistent Distance

Maintaining a consistent distance while spray painting with an airless sprayer is like dancing with the paint, ensuring a smooth and even application. To achieve this, it’s important to maintain a steady distance between the spray gun and the surface being painted.

This distance typically ranges from 12 to 18 inches, but it may vary depending on the type of paint being used. Adjusting the spray pattern on the gun can also help maintain consistency. By rotating the nozzle or adjusting the fan width, you can create a more focused or wider spray pattern, allowing for better coverage and control.

Professionals in the painting industry understand the importance of clear communication. They provide detailed instructions on how to maintain the spray gun and adjust the spray pattern for different paint types, ensuring a thorough understanding of the topic.

Moving in smooth, even strokes is the next step in achieving a professional finish.

Move in Smooth, Even Strokes

Achieving a flawless finish requires moving the spray gun in smooth, even strokes, ensuring a seamless application of paint. This technique is crucial for avoiding streaks and achieving a professional-looking result.

Advertisement

To achieve a smooth application, it’s important to maintain a consistent distance from the surface being painted. This distance will vary depending on the type of paint being used, so it’s essential to refer to the manufacturer’s guidelines for specific recommendations.

Additionally, it’s important to move the spray gun at a steady pace, neither too fast nor too slow. This will help to distribute the paint evenly and prevent buildup in certain areas.

By moving in smooth, even strokes, you can achieve a beautiful, streak-free finish on your house.

Transitioning into the next section, it’s also important to overlap each pass to ensure complete coverage.

Overlap Each Pass

To create a flawless finish that will impress even the most discerning eye, it’s crucial to carefully overlap each pass of the spray gun. By doing so, you ensure that every inch of the surface receives an even coat of paint, achieving seamless coverage and avoiding streaks and lines.

Advertisement

When using an airless sprayer, it’s important to maintain a consistent speed and distance as you move the gun across the surface. Start each pass slightly overlapping the previous one, about 50% to 75%. This ensures that there are no missed spots and that the paint is evenly distributed. Take your time and be mindful of any corners or edges that may require extra attention.

By overlapping each pass, you’ll achieve a professional-looking paint job with no visible lines or uneven areas.

Speaking of attention to detail, the next section will explore how using a painting shield or masking tape can further enhance the quality of your work.

Using a Painting Shield or Masking Tape

For a flawless finish, make sure to use a painting shield or masking tape to protect areas you don’t want to be painted. A painting shield is a handy tool that can be held or attached to a spray gun to create a barrier between the paint and the surrounding surfaces. It helps prevent overspray and ensures clean, crisp edges. Masking tape, on the other hand, is ideal for protecting smaller areas or intricate details. Apply it carefully along the edges of windows, trim, or any other surfaces you want to keep paint-free. Remember to remove the masking tape promptly after painting to avoid any peeling or damage to the fresh paint. Now that you’ve protected the areas you don’t want to paint, let’s move on to the next step of cleaning and maintaining the sprayer.

Cleaning and Maintaining the Sprayer

After you’ve finished transforming your space with a fresh coat of color, it’s crucial to ensure the longevity of your sprayer by properly cleaning and maintaining it.

Advertisement

Cleaning equipment is an essential part of this process. Start by thoroughly flushing the sprayer with water to remove any residual paint. Next, disassemble the spray gun and clean each part individually using a brush and solvent. Pay special attention to the nozzle and filters, as they’re prone to clogs.

Regularly inspect and replace any worn or damaged parts to avoid potential issues. Additionally, lubricate the moving parts of the sprayer to keep it running smoothly.

By following these cleaning and maintenance steps, you can prevent clogs and ensure the optimal performance of your airless sprayer.

Now, let’s move on to discussing important safety precautions to keep in mind during the spraying process.

Safety Precautions

Now that we’ve covered how to clean and maintain your airless sprayer, let’s talk about safety precautions when spray painting a house. Safety should always be a top priority when working with any type of paint, especially when using an airless sprayer.

Advertisement

One important aspect of safety is respiratory protection. Paint fumes can be harmful if inhaled, so it’s crucial to wear a respirator mask that’s specifically designed for painting.

Another safety consideration is the handling of hazardous materials. Some paints may contain toxic substances, so it’s important to read the product labels and follow the manufacturer’s instructions for safe handling and disposal.

Additionally, make sure to wear protective gloves and clothing to prevent any skin contact with the paint.

By taking these safety precautions, you can ensure a safe and successful spray painting project.

Frequently Asked Questions

Can I use the same tip size for all types of paint when using an airless sprayer?

No, it is not recommended to use the same tip size for all types of paint when using an airless sprayer. Adjusting pressure and using the appropriate tip size is important for optimal paint application and safety precautions.

Advertisement

How do I know if I need to adjust the pressure when using different types of paint?

To determine the optimal pressure for different types of paint, I assess their consistency and viscosity. If the paint is thicker, I increase the pressure; if it’s thinner, I decrease it. I troubleshoot issues by adjusting the pressure gradually until I achieve the desired results.

Are there any specific safety precautions I need to take when using an airless sprayer?

When using an airless sprayer, it’s important to take specific safety precautions. Some common mistakes to avoid include wearing protective clothing, using proper ventilation, and following the manufacturer’s instructions. Stay safe!

What is the best way to clean and maintain the sprayer after use?

To ensure optimal performance and longevity of your airless sprayer, follow these best maintenance practices. After each use, clean the sprayer thoroughly, inspect for any damage, and troubleshoot common issues like clogs or leaks.

Can I use a painting shield or masking tape with any type of paint?

Yes, you can use a painting shield or masking tape with different types of paint finishes. It helps achieve smooth and even coverage. Here are some tips for using them effectively with an airless sprayer.

Conclusion

In conclusion, when spray painting a house with an airless sprayer, it’s crucial to understand the different types of paint and choose the right tip size accordingly.

Advertisement

Using a fine finish tip for smooth surfaces and a wide fan tip for rough surfaces will ensure the best results.

Adjusting the pressure for different paints and practicing proper spray technique are also important.

Using a painting shield or masking tape can help protect surrounding areas.

Cleaning and maintaining the sprayer regularly will prolong its lifespan.

Remember to prioritize safety precautions throughout the process.

Advertisement

With these tips, you’ll be able to achieve a professional-looking paint job that’ll leave your house looking brand new, as if it were painted by a magical unicorn!

Continue Reading
Advertisement

Affiliate disclaimer

As an affiliate, we may earn a commission from qualifying purchases. We get commissions for purchases made through links on this website from Amazon and other third parties.

Advertisement

Trending