
Standing in front of my house, holding a paintbrush, I was overwhelmed by the huge job that lay ahead. The thought of having to manually paint every inch of the walls was daunting. But then I discovered something that changed everything: the airless paint sprayer. With its powerful spray and efficient coverage, what seemed like a difficult task became surprisingly easy to handle.
In this article, I will guide you through the process of painting your house using an airless paint sprayer. From preparing the surfaces and gathering the necessary equipment to practicing proper technique and achieving a flawless finish, I will provide you with the knowledge and step-by-step instructions you need to tackle this project with confidence.
So, grab your sprayer and let’s get started on transforming your home into a beautifully painted masterpiece.
Key Takeaways
- Proper surface preparation is essential for achieving a flawless finish.
- Use the airless paint sprayer with the correct technique, maintaining a consistent distance from the surface and overlapping passes for even coverage.
- Divide the walls into manageable sections and apply paint in even coats for a smooth and uniform result.
- Clean the sprayer thoroughly after each use and follow proper cleanup and maintenance procedures for longevity.
Prepare the Surfaces for Painting
Get ready to transform your house into a work of art as we delve into the essential steps for prepping surfaces before painting with an airless paint sprayer. Surface preparation is key to achieving a flawless finish, and here are some tips to ensure success.
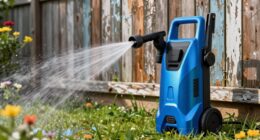
Firstly, thoroughly clean the surfaces to remove any dirt, grease, or loose paint. Use a pressure washer or a scrub brush with a mild detergent solution.
Next, inspect the surfaces for any cracks, holes, or imperfections. Fill them in with an appropriate filler and sand them smooth.
Once the surfaces are clean and smooth, it’s important to choose the right primer for your project. Consider the type of surface you’re painting and select a primer that’ll adhere well and provide good coverage.
With the surfaces prepped and primed, you’re now ready to gather the necessary equipment for the next step.
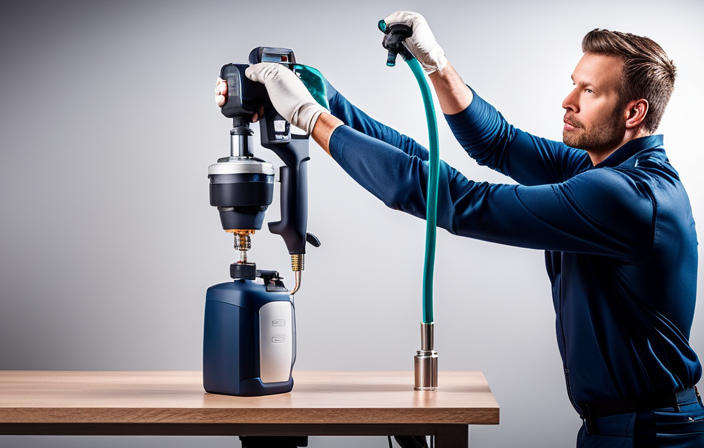
Gather the Necessary Equipment
Equip yourself with all the essential gear, ensuring you’re fully equipped to embark on this epic painting adventure. Here are three items you’ll need to gather before you start:
-
Airless paint sprayer: Choose a reliable sprayer that can handle the job efficiently. Look for features like adjustable pressure settings and a wide spray pattern for maximum coverage.
-
Paint color samples: Choosing the right paint color is crucial for achieving the desired look. Get a few samples and test them on the walls to see how they complement the space and lighting.
-
Extension pole: Painting hard-to-reach areas can be challenging. An extension pole will help you reach high ceilings and corners without the need for ladders or scaffolding.
When you have all the necessary equipment ready, it’s time to practice proper technique to achieve professional-looking results.
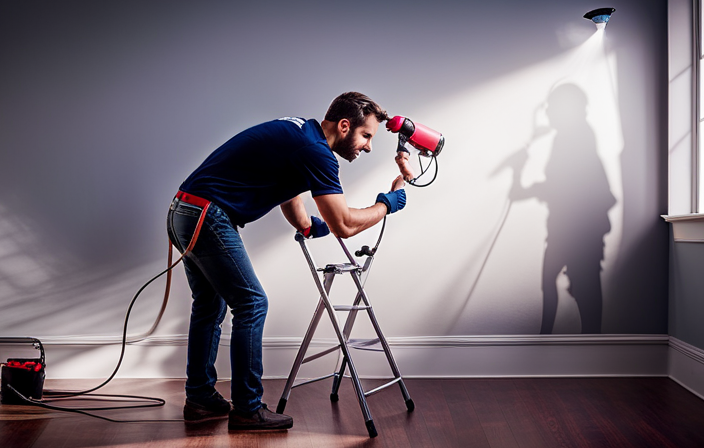
Practice Proper Technique
When using an airless paint sprayer, it’s crucial to hold the sprayer at the correct distance from the surface being painted. This ensures that the paint is evenly distributed and prevents any streaks or uneven coverage.
Additionally, using smooth and even strokes is essential for achieving a professional finish. By overlapping each pass, you can ensure consistent coverage and eliminate any missed spots.
Remember, practice makes perfect, so take the time to master these techniques before tackling your painting project.
Hold the sprayer at the correct distance
To achieve a smooth and even coat, remember to keep the sprayer at the correct distance from the surface while painting with an airless paint sprayer. Maintaining a consistent distance is crucial in order to prevent the paint from being applied too heavily or too lightly. Here are three important things to remember when holding the sprayer:
- Hold the sprayer about 12 inches away from the surface you’re painting.
- Keep the sprayer parallel to the surface, maintaining a consistent distance throughout.
- Move the sprayer in a slow and steady motion, overlapping each pass by about 50%.
By following these correct spraying techniques and maintaining a consistent distance, you’ll ensure that the paint is applied evenly and smoothly.
Now, let’s move on to the next section about using smooth and even strokes to further enhance the painting process.
Use smooth and even strokes
Master the art of painting by gliding your tool gracefully, like a dancer on a stage, using smooth and even strokes. Achieving a flawless finish is all about technique, and the key lies in the way you handle the airless paint sprayer. To ensure smooth strokes, maintain a consistent distance from the surface, typically around 12 inches. This allows for even coverage and prevents any pooling or streaking. Think of your strokes as brushstrokes on a canvas, each one contributing to the overall masterpiece. To help you visualize, refer to the table below:
| Stroke 1 | Stroke 2 | Stroke 3 |
|---|---|---|
| Start at the top | Move in a horizontal motion | End at the bottom |
Remember, the goal is to achieve a uniform finish, so take your time and be deliberate with each stroke. With smooth and even strokes, you’ll have a solid foundation to build upon. Now, let’s talk about how to overlap each pass for consistent coverage.
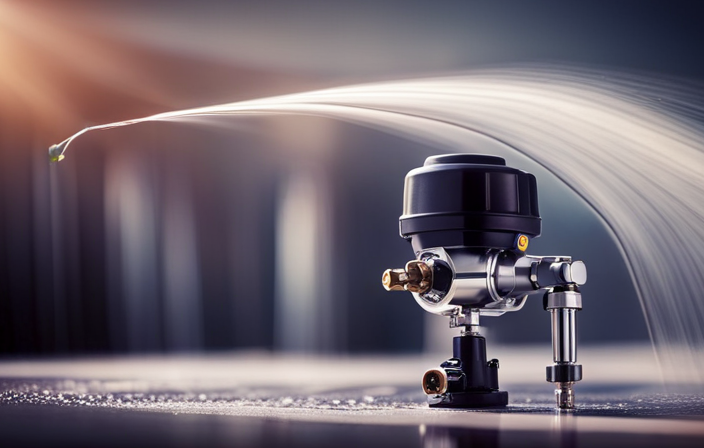
Overlap each pass for consistent coverage
Achieve a seamless and professional finish by ensuring that each pass overlaps with the previous one, creating a consistent layer of coverage. To achieve a consistent application and avoid streaks, follow these tips:
- Maintain a steady pace: Move the airless paint sprayer at a consistent speed to ensure even coverage.
- Control the spray pattern: Adjust the nozzle to achieve a wide, fan-shaped spray pattern, which allows for better overlap.
- Watch for drips and runs: Keep an eye out for any excess paint that may accumulate on surfaces. Wipe them away immediately to maintain an even finish.
By overlapping each pass, you’ll create a smooth and uniform coat of paint. This technique helps eliminate visible brush strokes or roller marks, resulting in a professional-looking finish.
Now, let’s move on to the next step: starting with the trim and edges.
Start with the Trim and Edges
Start by carefully applying the paint along the trim and edges, ensuring a smooth and seamless finish. When painting with an airless paint sprayer, it is important to pay special attention to the trim and edges as they require precise techniques for a professional look. To make this process easier, I have created a table below with three columns and five rows that summarize some helpful trim techniques and edge painting tips:
| Technique | Tip |
|---|---|
| Brush technique | Use a high-quality angled brush for clean lines. |
| Masking tape | Apply masking tape to protect adjacent surfaces. |
| Feathering | Feather the paint out along the edges for a seamless blend. |
| Wet edge | Always maintain a wet edge to avoid visible brush marks. |
| Clean as you go | Clean any drips or smudges immediately for a neat finish. |
After carefully painting the trim and edges, you can move on to the larger surfaces.
Move on to the Larger Surfaces
When moving on to the larger surfaces of the walls, it’s important to divide them into manageable sections to ensure efficient and thorough coverage. I find it helpful to start at one corner and work my way across, applying the paint in even coats using the airless paint sprayer. It’s crucial to maintain a steady pace throughout to achieve a uniform finish.
Divide the walls into manageable sections
To efficiently complete the task, it’s advisable to divide the walls into easily manageable sections when using an airless paint sprayer.
This strategy helps in managing time and minimizing mistakes. By dividing the walls into sections, you can focus on one area at a time, ensuring thorough coverage and a professional finish.
Start by identifying natural breaks in the wall, such as corners or architectural features. Use masking tape to mark off each section, creating boundaries for your painting. This method allows you to work systematically, preventing overlap or missed spots.
Additionally, it helps to maintain a consistent pace and rhythm while painting. Once you have divided the walls into manageable sections, you can move on to the next step of applying the paint in even coats, ensuring a smooth and flawless result.
Apply the paint in even coats
By layering the color smoothly and evenly onto the walls, you can create a masterpiece that flows effortlessly like a river. Achieving a smooth application is essential for a consistent finish when using an airless paint sprayer. Here are some tips to ensure a flawless result:
- Hold the sprayer nozzle at a 12 to 18-inch distance from the wall.
- Move the sprayer in a steady, horizontal motion for each coat.
- Overlap each pass by about 50% to avoid streaks or missed spots.
- Keep the sprayer at a consistent speed throughout the application.
- Apply multiple thin coats rather than one thick coat for optimal coverage.
By following these guidelines, you’ll achieve a smooth and consistent finish on your walls.
Now, let’s move on to the next step and maintain a steady pace for uniform coverage.
Maintain a steady pace for uniform coverage
Maintaining a consistent speed throughout will ensure that your walls receive a smooth and even coat of color, resulting in a beautifully uniform finish. To achieve this, it is important to maintain a steady pace while operating the airless paint sprayer. This will help in achieving uniformity of paint color and avoid drips and runs. To assist you further, here is a table that outlines the recommended speed for different surfaces:
| Surface Type | Speed (feet per minute) |
|---|---|
| Smooth Walls | 2-3 |
| Textured Walls | 1-2 |
| Ceilings | 1-2 |
| Trim | 1-2 |
| Exterior Walls | 2-4 |
By following these guidelines, you can ensure that the paint is applied evenly and without any streaks or uneven spots. Once the paint is applied, it is important to pay attention to drying time to prevent any smudging or damage.
Pay Attention to Drying Time
Make sure to give ample time for the paint to set and dry, as this will ensure a flawless and professional-looking finish. Proper drying time management is crucial when using an airless paint sprayer to paint your house.
It’s important to follow the instructions on the paint can regarding drying time, as different paints may have different drying times. Rushing the drying process may result in paint drips and an uneven finish.
Allow each coat of paint to dry completely before applying the next one. This will help prevent any smudging or smearing of the paint.
Once the paint is dry, you can proceed to clean and maintain the sprayer to ensure its longevity and optimal performance.
Clean and Maintain the Sprayer
When it comes to cleaning and maintaining the sprayer, there are a few key points to keep in mind. First and foremost, it’s important to flush out the paint after each use to prevent any clogs or buildup.
Additionally, storing the sprayer properly will help to extend its lifespan and ensure it’s ready to use when needed.
Lastly, regularly inspecting and maintaining the equipment will help to identify any potential issues early on and prevent any major breakdowns.
By following these steps, you can ensure that your sprayer stays in optimal condition and continues to provide you with excellent results.
Flush out the paint after each use
Flushing out the paint after each use is crucial to ensure the longevity and optimal performance of your airless paint sprayer. Proper cleaning techniques are essential for maintaining the sprayer and preventing clogs or damage.
To flush out the paint, start by removing the paint container and emptying any remaining paint. Next, fill the container with clean water or a cleaning solution recommended by the manufacturer. Attach the container back onto the sprayer and turn it on. Spray the water or solution through the sprayer until it runs clear. This will remove any leftover paint residue and prevent it from drying and clogging the system.
Once the paint is flushed out, you can move on to the next step of properly storing the sprayer to ensure its longevity and readiness for future use.
Store the sprayer properly
To ensure your sprayer stays in top shape, treat it like a delicate flower and store it properly. Proper storage and maintenance tips are essential for prolonging the lifespan of your airless paint sprayer. Here are some key recommendations to keep in mind:
| Proper Storage Tips | Maintenance Tips | Safety Tips |
|---|---|---|
| Clean the sprayer thoroughly after each use | Check the spray tip for clogs or damage | Always wear protective gear |
| Store the sprayer in a clean and dry area | Lubricate the pump regularly | Keep the sprayer away from children |
| Protect the sprayer from extreme temperatures | Inspect and tighten all connections | Turn off and unplug the sprayer when not in use |
| Hang the hose to prevent kinks or damage | Use recommended cleaning solutions | Regularly inspect and maintain the equipment |
By following these proper storage and maintenance practices, you can ensure your airless paint sprayer remains in excellent condition. Now, let’s move on to the next section and discuss how to regularly inspect and maintain the equipment.
Regularly inspect and maintain the equipment
Regularly inspecting and maintaining your equipment is crucial for ensuring its longevity and optimal performance. To keep your airless paint sprayer in top shape, it’s important to follow an inspection checklist and perform routine maintenance.
Start by checking the sprayer for any signs of wear or damage, such as leaks or broken parts. Inspect the filters, hoses, and nozzles for clogs or blockages, and clean or replace them as needed. Additionally, make sure to lubricate any moving parts and tighten loose connections.
As part of regular maintenance, flush the system with water or cleaning solution after each use to prevent buildup and ensure smooth operation. By regularly inspecting and maintaining your equipment, you can avoid costly repairs and keep your sprayer working efficiently.
Moving on to touch up and finishing, it’s important to…
Touch Up and Finishing
When you’re almost finished with your house painting project, don’t forget to give it a final touch-up using an airless paint sprayer to ensure a smooth and seamless finish.
Touch up techniques with an airless paint sprayer involve applying the final coat of paint to areas that may have been missed or need additional coverage. Start by inspecting the entire painted surface for any imperfections or inconsistencies. Use a small brush or roller to carefully apply the paint to these areas, blending it with the surrounding surface. Pay close attention to corners, edges, and trim where a sprayer may not have reached.
This final touch-up will give your house a professional and polished look.
Once you’ve completed the touch-up and finishing, it’s time to move on to cleaning up the work area, ensuring a tidy and spotless space for your next project.
Clean Up the Work Area
When it comes to cleaning up the work area after painting, there are a few key points to keep in mind. First and foremost, it’s important to dispose of any paint waste responsibly, following local regulations and guidelines.
Next, make sure to thoroughly clean brushes, rollers, and any other tools used during the painting process to ensure their longevity and effectiveness.
Lastly, remove any protective coverings that were used to protect surfaces and furniture during the painting process, leaving the area clean and ready for use.
Dispose of paint waste responsibly
To truly show your commitment to the environment, it’s key to dispose of paint waste responsibly. When using an airless paint sprayer to paint your house, it’s important to consider eco-friendly disposal options for the paint waste.
One option is to recycle the paint cans and containers. Many recycling centers accept empty paint cans as long as they’re completely dry and free of any residual paint.
Another option is to donate any leftover paint to local community organizations or schools that may have a use for it. By properly disposing of paint waste, you can minimize the impact on the environment and ensure that it’s handled in a responsible manner.
Once the paint waste has been taken care of, it’s time to move on to cleaning your brushes, rollers, and other tools.
Clean brushes, rollers, and other tools
After you’ve finished painting, it’s time to tackle the task of cleaning your brushes, rollers, and other tools. Cleaning your tools properly is essential for maintaining their longevity and ensuring optimal performance for future projects.
Here are three essential cleaning techniques to help you get the job done effectively:
-
Thoroughly rinse the brushes and rollers with warm water to remove excess paint. Use a brush comb or your fingers to remove any remaining paint from the bristles or nap.
-
For stubborn paint residue, soak the brushes and rollers in a mixture of warm water and mild soap for a few minutes. Gently agitate the tools to loosen the paint, then rinse again until the water runs clear.
-
Proper storage is crucial to keep your tools in good condition. Hang brushes upside down or store them horizontally to maintain their shape. Place rollers in a plastic bag to prevent them from drying out.
Once your tools are clean and dry, you can move on to the next step: removing any protective coverings.
Remove any protective coverings
Now it’s time to strip away any protective coverings and reveal the true beauty of your freshly painted masterpiece! Start by carefully removing the tarps that were used to shield the surrounding area from paint splatters and drips. Fold them up neatly and store them away for future use.
Next, gently uncover any furniture or fixtures that were covered to prevent them from getting painted. Take your time to ensure that no paint smudges or drips are transferred onto these items as you uncover them. It’s important to be meticulous during this process to avoid any potential damage or mess.
Once everything is uncovered and your surroundings are back to their original state, take a step back and admire your newly painted house, now ready to be enjoyed by all.
Admire Your Newly Painted House
After putting in all the hard work to paint my house with an airless paint sprayer, it’s finally time to step back and admire the finished result.
Seeing the transformation of my home is incredibly satisfying and I feel a great sense of accomplishment.
I can’t wait to share my achievement with others and bask in the compliments.
Step back and appreciate your hard work
Take a moment to marvel at the fruits of your labor and let the adage ‘patience is a virtue’ sink in as you admire your beautifully painted house. Appreciating the process is key to finding inspiration in your work.
As you step back and take it all in, here are a few things to appreciate:
- The smooth and even finish achieved with the airless paint sprayer.
- The vibrant and fresh colors that bring life to your home.
- The time and effort saved by using the efficient spraying technique.
- The professional-looking results that rival those of a hired painter.
- The satisfaction of completing a challenging task and seeing the transformation unfold.
Now, as you bask in the accomplishment of a job well done, it’s time to share your achievement with others.
Share your accomplishment with others
Share your amazing achievement with others and let them marvel at the incredible results you’ve achieved. Celebrate your accomplishment by sharing your tips and techniques with friends, family, and neighbors. They’ll be impressed by the professional-looking finish you achieved using the airless paint sprayer.
Explain how the sprayer allowed you to evenly coat surfaces, resulting in a flawless and smooth appearance. Share any tricks you’ve learned along the way, such as the best angle to hold the sprayer or how to avoid overspray. By sharing your knowledge, you can help others achieve the same outstanding results.
Now, take a moment to step back and enjoy the transformed appearance of your home, as we move into the next section.
Enjoy the transformed appearance of your home
After sharing my accomplishment of painting my house with an airless paint sprayer, I couldn’t help but marvel at the transformed appearance of my home.
The results were beyond my expectations, and I couldn’t be happier with the outcome. The fresh coat of paint has breathed new life into the exterior, enhancing its curb appeal and making it the envy of the neighborhood.
The vibrant colors and smooth finish have given my home a modern and polished look. It’s amazing how a simple home improvement project can make such a significant difference.
Every time I pull into my driveway, I can’t help but feel a sense of pride and satisfaction. The transformed appearance of my home is a constant reminder of the hard work and attention to detail that went into the project.
Frequently Asked Questions
Can I use an airless paint sprayer on all types of surfaces?
Yes, an airless paint sprayer can be used on a variety of surfaces. However, caution should be taken when using it on delicate surfaces as it can cause damage. It is also effective for textured surfaces, providing an even coating.
What safety precautions should I take when using an airless paint sprayer?
To ensure safety while using an airless paint sprayer, it’s crucial to take certain precautions. First and foremost, preventing paint overspray is essential, so covering nearby objects and surfaces is a must. Additionally, proper ventilation is crucial to avoid inhaling fumes.
How long does it typically take for the paint to dry when using an airless paint sprayer?
Typically, paint dries within a few hours when using an airless paint sprayer. To speed up drying time, ensure proper ventilation, apply thin coats, and use a paint with a fast-drying formula.
Are there any special maintenance steps I should follow to keep my airless paint sprayer in good condition?
To keep your airless paint sprayer in good condition, it is important to follow special maintenance steps. This includes a thorough cleaning process after each use to remove any leftover paint and prevent clogs or damage to the sprayer.
Can I use different types of paint (such as oil-based or latex) with an airless paint sprayer?
Yes, you can use different types of paint with an airless paint sprayer. Oil-based paints provide a durable finish but require more cleanup, while latex paints are easier to clean up but may not be as durable.
Conclusion
In conclusion, painting your house with an airless paint sprayer is a game-changer. It allows for a smooth and even application, saving you time and effort.
Like a magic wand, the sprayer effortlessly transforms your home, giving it a fresh and vibrant look.
With proper preparation, technique, and maintenance, you can achieve professional-quality results.
So go ahead, grab your sprayer, and embark on this transformative journey. Your house will thank you with a newly painted beauty that will make your neighbors green with envy.