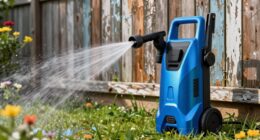
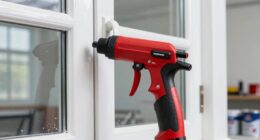
It’s often said that a new layer of paint can completely revitalize a room, and this extends to your cabinet interiors as well. If you’re looking to change things up and are eager for a simple yet effective makeover for your kitchen, applying a fresh coat of paint inside your cabinets using an airless sprayer is an excellent option.
In this article, I’ll guide you through the process of preparing your cabinets, choosing the right paint and equipment, and practicing proper technique to achieve professional-looking results.
I’ll also provide tips on drying time, reattaching cabinet doors and hardware, and maintaining your airless sprayer.
By the end, you’ll have beautifully painted cabinets that will breathe new life into your kitchen.
So grab your sprayer and let’s get started!
Key Takeaways
- Properly prepare the cabinets by cleaning, sanding, and removing hardware before painting
- Choose the right paint and equipment, including a high-quality paint formulated for cabinets and an airless sprayer
- Practice proper technique, such as maintaining a consistent distance and using smooth, sweeping motions while painting
- Allow sufficient drying time for the paint to set properly and achieve a professional finish
Prepare the Cabinets for Painting
Before you can start painting, you’ll need to clean and sand the cabinets to ensure a smooth, even surface.
Start by removing any hardware, such as knobs or handles, from the cabinet doors and drawers. This will make it easier to sand and paint the surfaces.
Next, use a sanding block or sandpaper to gently sand the cabinet surfaces. This will help remove any roughness or imperfections and create a better surface for the paint to adhere to.
After sanding, use a damp cloth to wipe away any dust or debris. This will ensure that the paint goes on smoothly and evenly.
Now that the cabinets are prepped and ready, let’s move on to choosing the right paint and equipment for the job.
Choose the Right Paint and Equipment
When it comes to choosing the right paint for painting inside cabinets with an airless sprayer, I always make sure to select the appropriate paint type for the job.
Gathering all the necessary tools and materials beforehand is crucial for a smooth painting process.
Lastly, it is important to set up and familiarize myself with the airless sprayer to ensure efficient and effective painting.
Select the Appropriate Paint Type
Choosing the right paint type for your cabinet-painting extravaganza is like selecting the perfect partner – it’s all about compatibility and long-lasting satisfaction. When it comes to selecting paint colors, it’s important to consider the overall aesthetic of your kitchen. Opt for neutral shades that can easily blend with any future design changes.
Additionally, choosing the right primer is crucial for achieving a smooth and durable finish. Look for a primer specifically formulated for cabinets to ensure proper adhesion and durability. Remember to clean and lightly sand the surface before applying the primer to create a smooth base.
With the right paint type and primer, your cabinets will be ready for a flawless finish. Now, let’s gather the necessary tools and materials to complete this project.
Gather the Necessary Tools and Materials
Now, let’s round up all the must-have tools and materials to get started on transforming your kitchen cabinets.
Before you begin painting, it’s crucial to prepare the surfaces properly. Gather sandpaper, a sanding block, and a degreaser to clean and remove any old paint or grease.
Next, choose a high-quality paint that is specifically formulated for cabinets. Consider the color scheme of your kitchen and select a paint color that complements it.
Additionally, you will need a paintbrush for touch-ups, painter’s tape to protect surrounding areas, and drop cloths to cover the floor.
Lastly, don’t forget to have a clean cloth handy for any spills or drips.
With all the necessary tools and materials in place, you’re now ready to set up and familiarize yourself with the airless sprayer for the next step.
Set up and Familiarize Yourself with the Airless Sprayer
First things first, it’s time to get acquainted with your new powerful painting tool – the airless sprayer. Before diving into painting, it’s crucial to clean the sprayer thoroughly. Remove any old paint residue and clean all the parts as per the manufacturer’s instructions.
Once clean, familiarize yourself with the sprayer’s controls and adjustments. Take note of the spray pattern adjustment feature, which allows you to change the width and shape of the spray. This will help you achieve the desired coverage and avoid overspray or uneven application.
Practice adjusting the spray pattern on a piece of cardboard or scrap wood to get a feel for it.
With the sprayer clean and the spray pattern adjusted, you’re ready to move on to the next section and practice proper technique for painting inside cabinets.
Practice Proper Technique
To master the art of painting inside cabinets with an airless sprayer, it is crucial to practice proper technique. This involves maintaining a consistent distance of 6-8 inches from the surface and using smooth, sweeping motions. By doing so, you will achieve a more efficient application process.
It is important to note that common mistakes include holding the sprayer too close or moving too quickly, which can result in uneven coverage or overspray. By maintaining the recommended distance and using controlled movements, you will avoid these issues and achieve a professional finish.
Did you know that, according to a recent study, using an airless sprayer can save up to 50% of painting time compared to traditional brush and roller methods? With proper technique, you will be ready to begin painting the inside of the cabinets seamlessly.
Begin Painting the Inside of the Cabinets
Now that I have practiced the proper technique, it’s time to begin painting the inside of the cabinets. This is where the real transformation happens!
Using my airless sprayer, I start by applying an even coat of paint to the back panel of each cabinet, working my way from top to bottom. Then, I move on to the sides and finally the shelves.
It’s important to maintain a consistent distance from the surface and keep the sprayer moving in a smooth, sweeping motion. This ensures an even application and minimizes the risk of drips or streaks.
Once the painting is complete, I allow sufficient drying time before moving on to the next step. This will ensure that the paint sets properly and provides a durable, long-lasting finish.
Allow Sufficient Drying Time
Before proceeding with the next steps, it’s crucial to allow sufficient drying time for the paint inside the cabinets. This will ensure a smooth and durable finish.
To achieve this, it’s essential to follow the paint manufacturer’s instructions regarding the recommended drying time.
Additionally, proper ventilation and air circulation should be maintained in the area to help expedite the drying process and prevent any potential odors or fumes from lingering.
Follow the Paint Manufacturer’s Instructions
First, make sure you carefully read and follow the paint manufacturer’s instructions when using an airless sprayer to paint inside cabinets. This is crucial for achieving the best results and ensuring your safety. Here are some key points to keep in mind:
-
Proper ventilation for airless sprayer use: Adequate ventilation is essential when using an airless sprayer to paint inside cabinets. Make sure there is enough fresh air circulation in the area to prevent the build-up of fumes.
-
Safety precautions when using an airless sprayer: Wear protective equipment such as goggles, gloves, and a respirator to protect yourself from paint particles and fumes. Follow all safety guidelines provided by the paint manufacturer.
-
Use the correct paint viscosity: Adjust the paint viscosity according to the manufacturer’s instructions to ensure proper spraying and avoid clogging the sprayer.
-
Maintain the recommended distance: Maintain the recommended distance between the sprayer and the cabinet surface for even coverage and to prevent overspray.
-
Clean the sprayer properly: Follow the manufacturer’s instructions for cleaning and maintaining the airless sprayer to extend its lifespan and ensure optimal performance.
Once you have familiarized yourself with the paint manufacturer’s instructions, you can move on to the next step: ensuring proper ventilation and air circulation.
Ensure Proper Ventilation and Air Circulation
Imagine a breath of fresh air dancing through your kitchen, bringing life and vitality to every corner. When painting inside cabinets with an airless sprayer, it’s crucial to ensure proper ventilation and air circulation.
This not only improves indoor air quality, but also minimizes paint fumes that can be harmful to your health. Before starting the project, open windows and doors to allow fresh air to flow in and help dissipate any fumes.
Additionally, use fans to increase air circulation and direct fumes away from you. This will create a safer and more pleasant painting environment. Once you have ensured proper ventilation and air circulation, you can proceed to inspect and touch up as needed in the next step.
Inspect and Touch up as Needed
When inspecting and touching up the painted cabinets, it’s important to check for any drips, runs, or uneven coverage that may have occurred during the spraying process. If any imperfections are found, I’ll use a brush or roller to carefully touch up those areas.
It’s crucial to allow the final touch-ups to dry completely before considering the project finished.
Check for Drips, Runs, or Uneven Coverage
To ensure a flawless finish, carefully inspect the cabinets for any pesky drips, runs, or uneven coverage before moving on to the next step. Check for touch-ups and ensure even paint application by following these steps:
| Step | Action |
|---|---|
| 1 | Examine the cabinets from different angles, using natural light if possible, to spot any imperfections. |
| 2 | Run your hand gently over the surface to feel for any rough patches or inconsistencies. |
| 3 | Look closely at the edges and corners for any areas that may have been missed or have excessive paint build-up. |
| 4 | Use a flashlight to illuminate the cabinets and check for any shadows or streaks indicating uneven coverage. |
| 5 | If you find any drips, runs, or uneven areas, lightly sand them down and apply an additional coat of paint to achieve a smooth and uniform finish. |
Now that you have inspected and touched up as needed, it’s time to move on to the next section about using a brush or roller for touch-ups.
Use a Brush or Roller for Touch-ups
After checking for any drips, runs, or uneven coverage, it’s time to move on to touch-ups.
If there are any areas that need a little extra attention, use a brush or roller to achieve a smooth and flawless finish.
When it comes to touch-ups, match the brush technique or roller application with the rest of the painted surface. If you used a brush for the main coat, continue using a brush for touch-ups. If you used a roller, stick with the roller. This will ensure a consistent texture and appearance throughout the cabinets.
Take your time and carefully apply the paint to the areas that need it, blending it seamlessly with the rest of the surface.
Once you’ve completed the touch-ups, allow them to dry completely before moving on to the next step.
Allow Final Touch-ups to Dry Completely
Make sure you give the final touch-ups enough time to dry completely, so you can step back and admire your beautifully refreshed cabinets. Here are some touch-up techniques and drying methods to ensure a flawless finish:
-
Feathering: Blend the touch-up paint with the surrounding area using gentle brush strokes or a small roller.
-
Light Coats: Apply thin layers of touch-up paint to avoid drips and promote faster drying.
-
Ventilation: Open windows or use fans to improve air circulation and expedite the drying process.
-
Patience: Allow each touch-up coat to dry completely before applying additional layers or reattaching cabinet doors and hardware.
Once the touch-ups have dried to perfection, you can move on to the next step of reattaching the cabinet doors and hardware seamlessly.
Reattach Cabinet Doors and Hardware
When reattaching cabinet doors and hardware, the first step is to align and install the hinges. I make sure that the hinges are correctly positioned and level before securing them in place.
Next, I secure the handles or knobs, ensuring that they are centered and tightly fastened. This step is important to ensure that the doors open and close smoothly and securely.
Align and Install Hinges
To align and install hinges for a seamless finish, follow these steps:
-
Start by installing the hinge plates on the cabinet frame using screws. Make sure they are evenly spaced and level.
-
Next, attach the hinge cups to the back of the cabinet doors. Adjust the position of the cups to ensure the doors are properly aligned and sit flush with the frame.
-
Once the hinge cups are in place, gently slide the doors onto the hinge plates. Double-check the alignment and adjust as needed.
With the hinges securely installed, you can now move on to securing handles or knobs. Not only will this enhance the functionality of your cabinets, but it will also add a touch of style.
Secure Handles or Knobs
Now that the hinges are securely installed, it’s time to add the finishing touch by securing handles or knobs to your cabinets.
This step not only enhances the appearance of your cabinets but also provides a functional element for easy access.
Start by selecting the handles or knobs that best match your cabinet style. Make sure they are the appropriate size and align with the pre-drilled holes.
Once chosen, attach them using the provided screws or bolts. Ensure they are tightened securely to prevent any loosening over time.
When painting, it’s important to cover the handles or knobs to prevent paint drips. You can use tape or plastic wrap to protect them during the spraying process.
Now that the handles or knobs are securely in place, let’s move on to the next section about how to clean and maintain your airless sprayer.
Clean and Maintain Your Airless Sprayer
When it comes to maintaining my airless sprayer, I make sure to flush it with water or a cleaning solution after every use. This ensures that any leftover paint or debris is removed and doesn’t clog the nozzle or filters.
Additionally, I disassemble and clean the nozzle and filters regularly to keep them in optimal condition.
By following these steps, I can ensure that my airless sprayer continues to work efficiently and deliver high-quality results.
Flush the Sprayer with Water or Cleaning Solution
To get started, you’ll want to thoroughly flush the sprayer with water or a cleaning solution. This cleaning technique is crucial for maintaining the performance and lifespan of your airless sprayer.
Begin by detaching the spray tip and guard from the gun. Then, attach a bucket or container filled with water or cleaning solution to the sprayer.
Turn on the sprayer and allow the liquid to flow through the system, flushing out any remaining paint or debris. Continue flushing until the water or cleaning solution runs clear.
Once the sprayer is clean, you can move on to the next step of disassembling and cleaning the nozzle and filters, ensuring that your sprayer is ready for its next use.
Disassemble and Clean the Nozzle and Filters
Let’s take a moment to break down and clean the nozzle and filters to ensure optimal performance and longevity of your equipment. Disassembling the nozzle and filters is a crucial step in maintaining your airless sprayer. It allows for a deep clean and ensures that paint won’t clog the system during future use.
To begin the disassembling process, refer to the manufacturer’s instructions for your specific sprayer model. Usually, you’ll need to remove the nozzle, guard, and filters. Take care not to lose any small parts during this process.
Once disassembled, use a cleaning solution or water to thoroughly clean each component. Use a small brush to remove any dried paint or debris. Pay special attention to the nozzle, as it is the most important part to keep clean for optimal spray patterns.
After cleaning, reassemble the nozzle and filters, ensuring they are properly aligned and securely tightened. This will prevent any leaks or malfunctions while painting.
Now that your nozzle and filters are clean, you can proceed to the next step and enjoy your newly painted cabinets.
Enjoy Your Newly Painted Cabinets
Now that I’ve finished painting my cabinets, it’s time to organize and arrange the contents.
I can finally enjoy the smooth and flawless finish that the airless sprayer has provided.
I love how the cabinets look now and can’t wait to show them off to my friends and family.
Organize and Arrange the Contents
To organize and arrange the contents of your cabinets, follow these steps:
-
Start by rearranging and categorizing the items inside the cabinets. This will create an efficient and organized workspace.
-
Maximize space by strategically placing items and utilizing storage containers or dividers. This will help you make the most of the available space.
-
Label and categorize your belongings. This will make it easier to find what you need when working on a project.
-
Group similar items together. For example, keep paint brushes, rollers, and trays in the same area. This will save you time and prevent frustration while painting.
-
Consider arranging your items based on frequency of use. Keep frequently used items easily accessible for convenience.
Once you’ve completed these steps and organized the contents of your cabinets, you’ll be able to admire the smooth and flawless finish of your newly painted cabinets without any distractions.
Admire the Smooth and Flawless Finish
Once you’ve efficiently organized and arranged your workspace, you’ll be amazed by the smooth and flawless finish of your newly painted cabinets. Achieving a smooth finish is essential for creating a professional-looking result. Using an airless sprayer allows for a controlled and even application of paint, resulting in a smooth and flawless surface. To further enhance the finish, consider using a high-quality paint that is specifically designed for cabinets. This type of paint often has a self-leveling formula, which helps to minimize brush strokes or roller marks, ensuring a smooth and flawless appearance. Additionally, using a primer before painting can help to create an even base and improve adhesion. Don’t forget to sand between coats for an extra smooth finish. By following these steps, you’ll be able to admire the smooth and flawless results of your hard work. Moving on to additional tips and considerations, it’s important to consider proper ventilation and safety precautions.
Additional Tips and Considerations
When painting inside cabinets with an airless sprayer, it’s beneficial to remember these bonus tips and considerations:
-
Prevent overspray by using masking tape to cover any areas you don’t want to paint. This will help you achieve clean and precise lines, avoiding any accidental mess.
-
Thinning the paint is essential for achieving a smooth and flawless finish. Follow the manufacturer’s instructions to determine the correct ratio of paint to thinner. This will ensure that the paint flows smoothly through the sprayer without clogging or splattering.
-
Take your time and apply multiple thin coats rather than one thick coat. This will help you avoid drips and runs, resulting in a more even and professional-looking finish.
-
Clean your sprayer thoroughly after each use to maintain its performance and longevity. This will prevent any buildup of dried paint that can cause clogs or uneven spray patterns.
By following these tips for preventing overspray and best practices for thinning paint, you can achieve a beautiful and flawless finish when painting inside cabinets with an airless sprayer.
Frequently Asked Questions
Can I use a brush or roller instead of an airless sprayer to paint the inside of cabinets?
I can use a brush or roller instead of an airless sprayer to paint the inside of cabinets. The pros of using a brush or roller are better control and no overspray, but it may take longer and require more effort.
How long should I wait before reattaching the cabinet doors and hardware after painting the inside of the cabinets?
After painting the inside of the cabinets, I suggest waiting at least 24 hours before reattaching the cabinet doors and hardware. This allows for proper drying time and ensures that the paint adheres well. Proper preparation methods are also important for a successful outcome.
What type of paint is best for painting the inside of cabinets?
For the best paint colors, choose a durable and washable paint with a semi-gloss or satin finish. Before painting, make sure to clean, sand, and prime the cabinets for a smooth and long-lasting finish.
Can I paint over existing paint or do I need to remove it first?
I can paint over existing paint inside cabinets, but it’s important to consider the pros and cons. Painting over saves time and effort, but removing the old paint ensures a smoother finish.
How do I clean the airless sprayer after using it to paint the inside of cabinets?
After using an airless sprayer to paint the inside of cabinets, cleaning it is essential. To ensure its longevity and proper functioning, follow these maintenance procedures and cleaning tips for the airless sprayer.
Conclusion
In conclusion, painting the inside of cabinets with an airless sprayer is a great way to give your kitchen a fresh new look. With the right paint and equipment, as well as proper technique, you can achieve professional-looking results.
One interesting statistic to note is that using an airless sprayer can save you up to 50% of painting time compared to using a brush or roller.
So why wait? Get started on transforming your cabinets today and enjoy the beautiful results for years to come.
