Preparing to use an airless sprayer for indoor painting requires some important steps. First, gather all necessary supplies like the airless sprayer, paint, drop cloths, painter’s tape, and maybe a ladder. Having all your materials ready beforehand will not only save time but also ensure a smooth painting process.
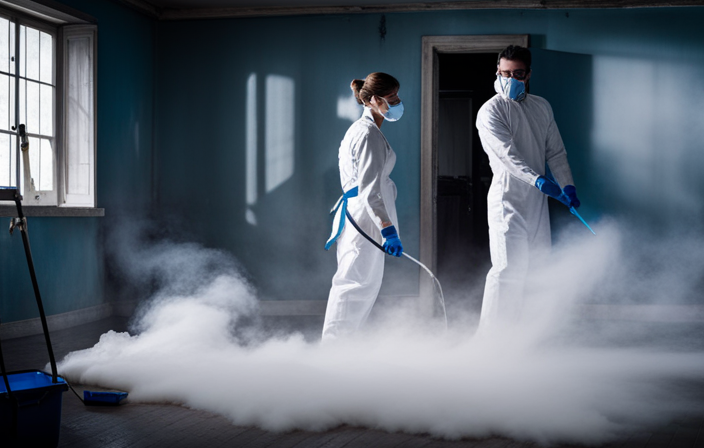
Next, it’s important to protect yourself and the environment. Wear proper protective gear such as goggles, a mask, and gloves to shield yourself from paint fumes and potential splatters. Open windows and provide adequate ventilation to minimize the inhalation of fumes. Cover furniture and floors with drop cloths or plastic sheets to prevent accidental paint spills or drips.
Before you start painting, make sure to clean the walls thoroughly. Dust, dirt, and grime can affect the smoothness of the paint finish. Use a mild detergent and water to wash the walls, and then allow them to dry completely before proceeding.
Once the walls are clean and dry, it’s time to mix the paint. Follow the manufacturer’s instructions for the specific type of paint you are using. Use a stir stick to mix the paint thoroughly, ensuring that all the pigments are well blended.
Lastly, before you begin spraying, take the time to tape off any areas you don’t want to be painted, such as trim, windows, or door frames. Painter’s tape provides a clean line and prevents paint from bleeding onto unwanted surfaces.
By following these steps and preparing properly, you’ll be ready to tackle your indoor painting project with confidence and achieve professional-looking results. So, grab your airless sprayer and let the painting adventure begin!
Key Takeaways
- Gathering necessary materials is essential for preparing to paint inside with an airless sprayer, including an airless sprayer, paint, drop cloths, and painter’s tape.
- It is important to protect yourself and the environment by wearing goggles, a mask, and gloves, providing ventilation, and covering furniture and floors with drop cloths or plastic sheets.
- Cleaning the walls before painting is crucial, using mild detergent and water and ensuring that the walls are dry.
- Mixing the paint according to the manufacturer’s instructions and using a stir stick to blend pigments is necessary for achieving the desired color.
Gather the Necessary Materials
Now, gather all the materials you’ll need and get ready to experience the thrill of transforming your space with a powerful airless sprayer!
The first step in preparing to paint inside with an airless sprayer is to choose the right paint color. Consider the mood and atmosphere you want to create in the room and select a color that aligns with that vision.
Next, it’s important to select the appropriate paint finish. Different finishes, such as matte or satin, will determine the level of sheen and durability of the paint. Take into account the room’s purpose and traffic level when making this decision.
Once you have chosen the perfect color and finish, you can move on to preparing the room for painting.
Prepare the Room
When preparing the room for painting with an airless sprayer, the first step is to remove all furniture and cover any remaining items with plastic or drop cloths to protect them from paint splatter.
Next, it’s important to clean the surfaces that will be painted to ensure proper adhesion of the paint. Any damages or imperfections should be repaired before painting, and if necessary, a primer should be applied to create a smooth and even surface.
Lastly, I recommend taping off edges and trim with painter’s tape to achieve clean and precise lines.
Remove furniture and cover remaining items
First things first, let’s quickly clear out the furniture and cover any remaining items before we dive into the exciting world of airless spraying for our indoor painting project.
When it comes to furniture protection, it’s crucial to move it out of the room completely. This not only ensures that it won’t get accidentally sprayed but also allows for easier access to all the walls and corners.
For the remaining items like light fixtures or outlets, cover them with plastic or tape to prevent any paint splatters.
Additionally, it’s important to cover the floor with drop cloths or plastic sheets to protect it from paint drips and spills.
Now that we’ve taken care of furniture and surface covering, we can move on to the next step of cleaning the surfaces to ensure a smooth and flawless paint job.
Clean the surfaces
To ensure a flawless paint job, start by thoroughly cleaning the surfaces, using a damp cloth to wipe away any dust or dirt that may interfere with the adhesion of the paint. Proper surface preparation is crucial for achieving a professional finish. Here are some surface preparation techniques to consider:
| Surface Preparation Techniques | Benefits |
|---|---|
| Sanding | Smoothens rough surfaces and promotes paint adhesion |
| Patching and Filling | Repairs cracks, holes, and imperfections |
| Priming | Creates a uniform surface and enhances paint durability |
| Taping and Masking | Protects areas that shouldn’t be painted |
| Caulking | Seals gaps and cracks for a seamless look |
By following these steps, you will create a clean and smooth canvas for your paint application. Once the surfaces are properly prepared, you can proceed to the next section about repairing any damages, ensuring a flawless result.
Repair any damages
Before moving on to the next step, it is important to fix any damages, such as cracks or holes. Repairing cracks is crucial for achieving a smooth and flawless paint job. Start by thoroughly inspecting the walls and ceilings for any visible cracks. Use a putty knife to slightly widen the cracks, which will help the filler adhere better. Apply a high-quality crack filler using a putty knife, ensuring that the cracks are completely filled. Allow the filler to dry according to the manufacturer’s instructions. Once dry, gently sand the filled areas to create a smooth surface.
In the case of holes, use a patching compound or spackle to fill in any small holes or dents. Smooth out the surface with a putty knife and let it dry.
Transitioning into the next section, applying primer if necessary will ensure better adhesion for the paint.
Apply primer if necessary
If there are any areas on the walls or ceilings that have stains or are discolored, it’s important to apply primer before moving on to the next step. The right type of primer is crucial for achieving a smooth and even paint finish. It helps to hide stains, prevent bleed-through, and improve the adhesion of the paint.
When choosing a primer, consider the surface you are working with. For example, if you have water stains, a stain-blocking primer is recommended. To apply primer smoothly and evenly, follow these tips:
1) Start by cleaning the surface thoroughly to remove any dirt or grease.
2) Use a high-quality brush or roller to apply the primer in thin, even coats.
3) Allow each coat to dry completely before applying the next one.
By applying primer correctly, you’ll create a solid foundation for your paint job.
Now, let’s move on to the next section and discuss how to tape off edges and trim without any paint bleed.
Tape off edges and trim
Before moving on to the current subtopic, it’s crucial to ensure that the primer has been applied if necessary. Applying primer helps create a smooth and even surface for the paint to adhere to.
Now, let’s discuss the proper technique for taping off edges and trim when painting with an airless sprayer. This step is essential to achieve clean lines and prevent overspray on areas that don’t require painting.
Start by using high-quality painter’s tape and carefully apply it along the edges and trim, ensuring it adheres firmly. Take your time to ensure that the tape is straight and free of bubbles or wrinkles. This will create a barrier that protects those areas from accidental paint application.
Once the taping is complete, you can move on to the next section about protecting yourself and the environment. Here, we will discuss safety measures and eco-friendly practices.
Protect Yourself and the Environment
To ensure a safe and eco-friendly painting experience, it’s crucial to protect both yourself and the environment when using an airless sprayer. Here are some key safety precautions to keep in mind:
-
Wear protective clothing, including goggles, gloves, and a mask, to shield yourself from paint fumes and potential splatter.
-
Before starting, cover nearby furniture and floors with drop cloths or plastic sheeting to prevent paint damage and make clean-up easier.
-
Ensure proper ventilation by opening windows and using fans to circulate fresh air, reducing the environmental impact of paint fumes.
-
Dispose of paint waste responsibly by following local regulations and avoiding pouring excess paint down drains or into the environment.
By taking these safety precautions and being mindful of the environmental impact, you can have a successful painting experience with your airless sprayer.
Now, let’s move on to the next step: mixing and diluting the paint.
Mix and Dilute the Paint
Mixing and diluting the paint is a crucial step in achieving the perfect consistency for a flawless application. To achieve a smooth finish, it is important to choose the right paint for your project. Consider the type of surface you’ll be painting and the desired finish. For smoother surfaces, a thinner paint may be necessary, while rougher surfaces may require a thicker paint. Additionally, read the manufacturer’s instructions on the paint can to determine if any specific mixing ratios are recommended.
When mixing the paint, start by pouring a small amount into a clean container. Gradually add the recommended amount of water or thinner, stirring continuously until the paint reaches the desired consistency. Be cautious not to over-dilute the paint, as it may affect the coverage and durability of the finish.
With the paint properly mixed and diluted, you can now transition into the subsequent section about testing the sprayer.
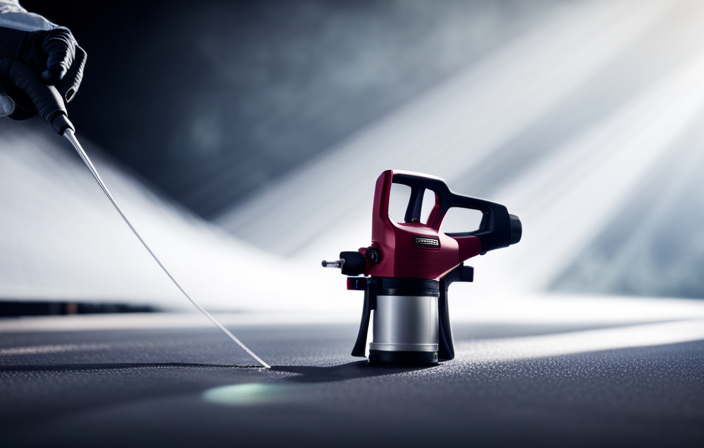
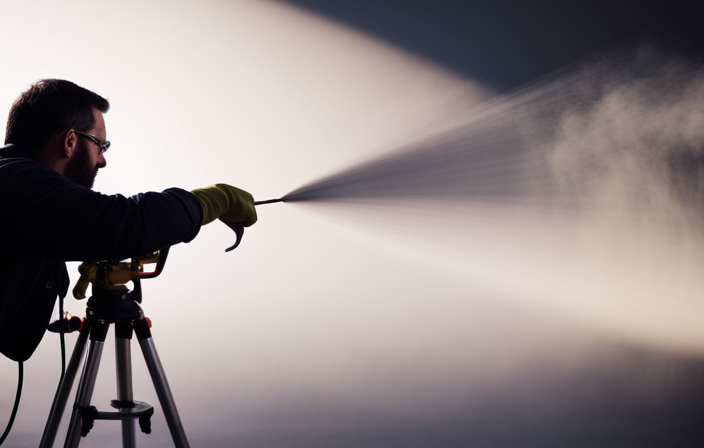
Test the Sprayer
Before starting to paint, it’s important to test the sprayer to make sure it’s set up correctly. Here’s how to do it:
-
Set up the sprayer following the manufacturer’s instructions. This includes connecting the hoses and priming the pump.
-
Adjust the spray pattern and pressure to achieve the desired coverage and finish. This step is crucial for getting the best results.
-
Practice on a test surface. This allows you to ensure that the sprayer is working properly and also helps you get a feel for the spray pattern and pressure before you start painting the actual surface.
Testing the sprayer is an essential step that shouldn’t be skipped. By following these steps, you can ensure that your sprayer is ready to deliver a smooth and even coat of paint.
Set up the sprayer
First, make sure you have prepared the area by covering any furniture or surfaces that you don’t want to get paint on. This step is crucial to avoid any unwanted mess or damage.
Now, let’s move on to setting up the sprayer.
- Start by checking the sprayer’s maintenance needs. Ensure that it’s clean and in good working condition.
- Familiarize yourself with the troubleshooting tips in case any issues arise during the painting process. It’s always better to be prepared.
Next, assemble the sprayer according to the manufacturer’s instructions. Take your time to ensure that all parts are securely attached.
Once everything is set up, test the sprayer by spraying water onto a practice surface. This will help you get familiar with the sprayer’s operation and make any necessary adjustments.
Now that the sprayer is set up, let’s move on to adjusting the spray pattern and pressure to achieve the desired results.
Adjust the spray pattern and pressure
Once the sprayer is properly set up, it’s essential to fine-tune the spray pattern and pressure to achieve optimal results.
Spray pattern adjustments are crucial to ensure an even and smooth application of paint on the surface. To adjust the spray pattern, start by holding the sprayer about 12 inches away from the test surface and aim at a target area. Then, twist the nozzle or use the pattern adjustment knob to widen or narrow the spray pattern until it covers the desired area effectively.
Additionally, pressure control in airless sprayers is key to controlling the flow of paint. Adjust the pressure settings according to the manufacturer’s guidelines and the thickness of the paint being used. This will help avoid overspray or uneven coverage.
Once the spray pattern and pressure are adjusted, it’s time to practice on a test surface to ensure everything is working smoothly.
Practice on a test surface
Get ready to hone your skills and perfect your technique by practicing on a test surface – it’s time to unleash your creativity and see your vision come to life! When it comes to painting with an airless sprayer, practicing on a test surface is crucial. Not only does it allow you to get comfortable with the sprayer and adjust the spray pattern and pressure, but it also helps you understand how different surfaces and materials react to the paint.
Choosing the right test surface is important. Ideally, it should be similar in texture and material to the actual surface you plan to paint. This will give you a realistic idea of how the paint will adhere and dry. Additionally, using a test surface allows you to experiment with different settings and techniques without the fear of ruining your final project.
With your test surface ready, you can start painting with confidence, knowing that you have practiced and perfected your skills. So, let’s move on to the next section and begin bringing your vision to life!
Start Painting
When starting to paint, I always begin with the ceilings to ensure a smooth and even finish.
I work in sections, starting from one corner and moving across the room, to maintain control over the application.
If the color requires it, I apply multiple coats, allowing each coat to dry before proceeding.
Throughout the process, it is important to maintain a consistent distance and speed to achieve a professional-looking result.
Begin with the ceilings
Begin by reaching for the sky and painting the ceilings with the grace of a soaring bird.
When it comes to painting ceilings with an airless sprayer, there are a few techniques you should keep in mind.
First, make sure to choose the right paint color that complements the walls and overall aesthetics of the room. Lighter colors can help create a sense of space and openness, while darker colors can add depth and warmth.
Additionally, it’s important to use proper technique when painting the ceilings. Start by cutting in the edges with a brush, then move on to spraying the larger areas with the airless sprayer in smooth, even strokes.
Work in sections to ensure even coverage and avoid drips or uneven lines.
With these ceiling painting techniques mastered, you can seamlessly transition into the subsequent section about working in sections.
Work in sections
After completing the ceilings, it’s time to move on to the walls. When working with an airless sprayer, it’s important to work in sections to ensure an even and efficient application. Start by dividing the walls into manageable areas, such as one wall at a time or sections between windows and doors. This approach allows you to focus on each section and avoid overspray, ensuring a clean and professional finish.
To work efficiently, follow these three key steps:
-
Prep the area: Before starting, cover any furniture, floors, or fixtures that you don’t want to get paint on. Use masking tape and drop cloths to protect these surfaces.
-
Prime the walls: Apply a primer coat to ensure better adhesion and a smoother finish. This step is especially important if you’re painting over a darker color or a porous surface.
-
Paint in overlapping strokes: Hold the sprayer about 12-18 inches away from the wall and use smooth, overlapping strokes to apply the paint. Start at the top and work your way down, maintaining a consistent distance from the surface.
By working in sections and following these steps, you’ll be able to paint the walls efficiently while avoiding overspray.
Now, let’s move on to applying multiple coats if necessary.
Apply multiple coats if necessary
If you want a flawless and professional finish, it may be necessary to apply multiple coats of paint. Applying additional layers ensures that the color is even and covers any imperfections.
Before applying another coat, it is important to let the previous one dry completely. This usually takes about 24 hours, but it’s best to check the paint can for specific drying times.
Once the paint is dry, lightly sand the surface between coats to create a smooth and uniform finish. This helps the new coat adhere better and eliminates any brush marks or drips.
After sanding, remove any dust with a damp cloth before applying the next coat. By following these steps and maintaining a consistent distance and speed, you can achieve a professional-looking paint job.
Maintain a consistent distance and speed
To achieve a flawless and professional finish, it’s important to maintain a consistent distance and speed while applying multiple coats of paint. This will create a smooth and uniform look that will make your walls shine.
When using an airless sprayer, you need to keep a consistent distance between the sprayer and the surface being painted. This ensures an even application and prevents streaks or uneven patches.
In addition to distance, speed control is crucial. Moving the sprayer too quickly can result in thin coverage, while moving too slowly can cause drips and excess paint buildup.
By maintaining a steady pace and distance, you’ll achieve a consistent and beautiful finish.
Now, let’s move on to the next step and learn how to clean the sprayer for future use.
Clean the Sprayer
To clean the sprayer, the first step is to empty any remaining paint from the system. This can be done by spraying clean water through the sprayer until the paint is fully flushed out.
Next, it’s important to disassemble the components and clean them thoroughly to remove any paint residue.
Finally, make sure to store the sprayer properly to prevent any damage or clogging.
Empty remaining paint
First things first, let’s get rid of that pesky leftover paint and make room for some fresh, vibrant colors!
To start, it’s important to remove any excess paint from the sprayer. This can be done by emptying the remaining paint back into its original container or a designated waste disposal container. Make sure to dispose of the paint properly according to local regulations.
Once the excess paint has been removed, it’s time to flush the system with clean water. This step is crucial to ensure that no traces of the previous color are left behind and to prevent any clogs or blockages in the sprayer.
By following these steps, you’ll be well on your way to achieving a flawless paint job with your airless sprayer.
Flush the system with clean water
Now, let’s move on to the next section where we will discuss how to disassemble and clean the components. But before that, it’s important to give your system a good flush with clean water. This step ensures a smooth and seamless transition between colors, and it can actually improve paint application by up to 20%. So, let’s go through the cleaning process and maintenance tips:
- First, remove the paint container and attach a clean water source to the sprayer.
- Turn on the sprayer and let the clean water flow through the system, flushing out any remaining paint.
- Next, release the trigger and allow the water to run until it comes out clear.
- Once the water runs clear, turn off the sprayer and detach the water source.
- Properly dispose of the water and ensure that all connections are tightened.
Following these cleaning steps will help ensure the longevity of your airless sprayer and prevent any clogs or issues during your painting project.
Disassemble and clean the components
Begin by carefully disassembling and thoroughly cleaning the various components of your airless sprayer. Cleaning the components is essential to ensure optimal performance and longevity of your sprayer. There are several cleaning methods and maintenance tips that can help you achieve this.
To effectively clean the components, you can refer to the following table that outlines the specific parts to focus on and the recommended cleaning methods:
| Component | Cleaning Method |
|---|---|
| Spray Gun | Soak in warm soapy water |
| Nozzle | Use a small brush |
| Pump | Flush with clean water |
| Filter | Replace with a new one |
| Hose | Rinse with water |
By following these cleaning methods and maintenance tips, you can ensure that your airless sprayer remains in excellent condition and delivers consistent, high-quality results. Once you have finished cleaning, you can proceed to the next step of storing the sprayer properly to maintain its functionality and prolong its lifespan.
Store the sprayer properly
To ensure the longevity of your sprayer, it’s crucial to store it properly. Improper storage can lead to damage and decreased performance. According to a study, properly storing your sprayer can extend its lifespan by up to 50%.
Proper storage starts with cleaning the sprayer thoroughly. Remove any paint residue and ensure all components are dry. Once disassembled and cleaned, store the sprayer in a cool, dry place. Keep it away from direct sunlight and extreme temperatures. Avoid storing it near heat sources or flammable materials.
Additionally, it’s a good idea to cover the sprayer with a protective cover or bag. This will prevent dust and debris from accumulating. By following these proper storage and maintenance tips, you can keep your sprayer in optimal condition for years to come.
Now, let’s move on to the next step: removing protective coverings.
Remove Protective Coverings
Now that the painting is complete, it’s time to remove the protective coverings.
Start by carefully peeling off the tape and folding up the drop cloths. Make sure to dispose of any paint-soaked materials properly.
Next, take the time to clean and return any furniture that was moved or covered during the painting process.
Finally, inspect the painted surfaces to ensure a smooth, even finish. Make any necessary touch-ups.
Remove tape and drop cloths
Carefully remove the tape and drop cloths, revealing the clean and freshly painted walls underneath. When it comes to removing tape and drop cloths, it is important to do so with caution to avoid any damage to the newly painted surface. Start by peeling off the tape slowly and at a 45-degree angle to ensure clean lines. If any paint seeped under the tape, use a razor blade or a putty knife to carefully scrape it off. As for the drop cloths, shake them outside to remove any loose paint chips or dust. If they are reusable, fold them neatly for future projects. If not, dispose of them properly. Now that the protective coverings are gone, it’s time to clean and return the furniture to its original place, completing the transformation of your freshly painted space.
Clean and return furniture
Once the tape and drop cloths are removed, it’s time to give your furniture a good cleaning and place it back where it belongs. Cleaning your furniture is an important step to ensure a fresh and polished look for your newly painted space. Here are some effective cleaning methods to consider:
-
Dusting: Start by dusting off any loose debris using a soft cloth or a duster. This will help remove any dirt or dust that may have accumulated during the painting process.
-
Vacuuming: Use a vacuum cleaner with a brush attachment to thoroughly clean upholstered furniture. This will help remove any leftover paint particles or dust that may have settled on the fabric.
-
Spot Cleaning: For stubborn stains or spills, use a mild detergent or upholstery cleaner to gently remove the dirt without damaging the furniture.
-
Wood Care: If you have wooden furniture, make sure to use a wood cleaner or polish to restore its shine and protect it from any potential damage.
-
Protecting Furniture: Consider using furniture protectors or coasters to prevent any accidental damage or scratches from everyday use.
Now that your furniture is clean and ready, it’s time to inspect the painted surfaces and ensure a flawless finish.
Inspect the painted surfaces
Upon completion of the cleaning process, it is crucial to assess the painted surfaces with a discerning eye to ensure a flawlessly executed finish. Inspecting the painted walls allows me to evaluate the paint adhesion and identify any areas that may require touch-ups. To give you a clear picture, let me provide a table outlining the key aspects I focus on during the inspection:
| Aspects to Inspect | Observations |
|---|---|
| Paint Quality | Check for any peeling, cracking, or bubbling. |
| Color Consistency | Ensure the paint is evenly applied without any variations in shade. |
| Surface Smoothness | Look for any rough patches or imperfections. |
By carefully examining these aspects, I can determine the condition of the painted surfaces and address any issues before proceeding with the touch-up and finishing stage. This ensures a flawless and professional end result.
Touch Up and Finish
When it comes to touch up and finishing, it’s important to inspect the painted surface for any missed spots or imperfections. If I notice any areas that need touch up, I make sure to address them promptly.
Once all touch ups are complete, I allow the paint to dry and cure fully before considering the project finished.
Inspect for any missed spots or imperfections
Before painting with the airless sprayer, it is crucial to inspect the walls for any missed spots or imperfections. Take the time to examine the entire surface carefully, paying attention to corners, edges, and any other areas that may have been overlooked. Repair techniques, such as patching holes or smoothing rough surfaces, should be implemented as needed before proceeding.
Proper surface preparation is essential for a professional-looking paint job. By addressing any imperfections beforehand, you can ensure that the paint will adhere smoothly and evenly. Once all repairs and touch-ups have been completed, you can move on to the next step of the process: touch up as needed, making sure to cover any remaining flaws or missed spots.
Touch up as needed
Go ahead and take a closer look at the walls, focusing on those areas that may need a little extra attention.
When it comes to touch up techniques, there are a few things to keep in mind.
First, make sure you have the right paint color on hand. You can use a small brush or a sponge to apply the paint, carefully blending it with the surrounding area. Be mindful of the texture and thickness of the paint to achieve a seamless finish.
Secondly, take your time and work in small sections, allowing each touch-up to dry before moving on to the next. This will help you ensure that the colors blend well and any imperfections are hidden.
Finally, step back and assess your work from different angles to make sure everything looks even. Once you’re satisfied, allow the paint to dry and cure before proceeding to the next step.
Allow paint to dry and cure
Once the touch-up is complete, you can simply relax and let the paint dry and cure before moving on to the next step. Properly allowing the paint to dry is crucial for achieving a flawless finish. The drying time will depend on factors such as humidity, temperature, and the type of paint used. To ensure an efficient drying process, it is important to provide proper ventilation by opening windows or using fans. This aids in the evaporation of solvents and allows fresh air to circulate, facilitating faster drying. It is recommended to wait at least 24 hours before applying additional coats or moving furniture back into the space. Once the paint is completely dry and cured, you can proceed to the next section about clean up and enjoy your newly painted space seamlessly.
Clean Up and Enjoy Your Newly Painted Space
Now that you’ve finished painting, it’s time to sit back, relax, and bask in the beauty of your newly painted space. There’s nothing quite like enjoying the transformation that a fresh coat of paint can bring to a room.
But before you fully immerse yourself in your new surroundings, it’s important to take a few moments to clean up and maintain a clean and organized workspace.
Start by carefully cleaning your airless sprayer, making sure to remove any excess paint and properly store it for future use.
Next, gather all your tools and materials and return them to their designated places. This will not only keep your workspace tidy, but it will also make it easier for you to find everything when you’re ready to paint again.
Finally, take a moment to appreciate the hard work you’ve put into creating your dream space. Sit back, relax, and enjoy the fruits of your labor.
Frequently Asked Questions
How do I choose the right type of paint for my project?
To choose the right type of paint for your project, consider factors such as the surface you’re painting, the desired finish, and any specific requirements like durability or moisture resistance. Proper paint selection ensures a successful and long-lasting result.
What safety precautions should I take when using an airless sprayer?
When using an airless sprayer, it is crucial to prioritize safety. To protect my respiratory system, I always wear proper respiratory protection. Additionally, I ensure there is proper ventilation in the area to prevent any potential health hazards.
How do I troubleshoot common issues with the airless sprayer?
When troubleshooting common airless sprayer issues, I’ve found that a touch of magic is sometimes needed. But fear not! With a few simple troubleshooting tips, like checking for clogs or adjusting pressure settings, you’ll be back to painting in no time.
Can I use an airless sprayer to paint textured surfaces?
Yes, an airless sprayer can be used to paint textured surfaces. Proper airless sprayer techniques and maintenance are crucial for achieving a smooth and even finish on these surfaces.
How do I properly store and maintain the airless sprayer after use?
After using an airless sprayer, it’s vital to properly clean and maintain it for long-lasting performance. I recommend thoroughly flushing the system with water and using a cleaning solution. Store the sprayer in a cool, dry place to prevent damage.
Conclusion
So there you have it, folks! Painting with an airless sprayer may seem daunting at first, but with the right preparation and equipment, it can be a breeze.
By following these steps, you’ll be able to transform your space in no time.
-
Gather the materials: Before you begin, make sure you have all the necessary materials on hand. This includes the airless sprayer, paint, primer, drop cloths, masking tape, and any other tools or supplies you may need.
-
Prepare the area: Start by clearing the room of any furniture or objects that could get in the way. Cover the floors and any remaining furniture with drop cloths to protect them from paint splatters. Use masking tape to protect trim, windows, and other areas you don’t want to paint.
-
Prep the walls: Inspect the walls for any imperfections, such as cracks or holes. Fill them in with spackle or putty and sand them smooth once dry. Clean the walls thoroughly to remove any dirt or grease.
-
Prime the walls: Apply a coat of primer to the walls to ensure better adhesion and a more even finish. This step is especially important if you’re painting over a darker color or if the walls have stains or marks.
-
Mix the paint: Follow the manufacturer’s instructions to properly mix the paint. Stir it well to ensure an even consistency.
-
Test the sprayer: Before you start painting, test the sprayer on a piece of cardboard or scrap material to get a feel for how it works and adjust the spray pattern if needed.
-
Start painting: Begin at one corner of the room and work your way across in a smooth and even motion. Keep the sprayer at a consistent distance from the wall for a uniform coat of paint.
-
Apply multiple coats: Depending on the color and coverage you desire, you may need to apply multiple coats of paint. Allow each coat to dry completely before applying the next.
-
Clean up: Once you’ve finished painting, clean the sprayer thoroughly according to the manufacturer’s instructions. Remove any masking tape and drop cloths, and return furniture and objects to their original places.
-
Enjoy the results: Step back and admire your freshly painted walls! Take a moment to appreciate the transformation and enjoy the new look of your space.
Each step is crucial in achieving a professional finish. So get ready to unleash your inner artist and let the magic of an airless sprayer bring your walls to life. Happy painting!