Airless Paint Sprayers
How to Properly Store Leftover Paint for Your Airless Sprayer
Find out how to effectively store leftover paint for your airless sprayer to maintain quality and performance; discover essential tips inside!
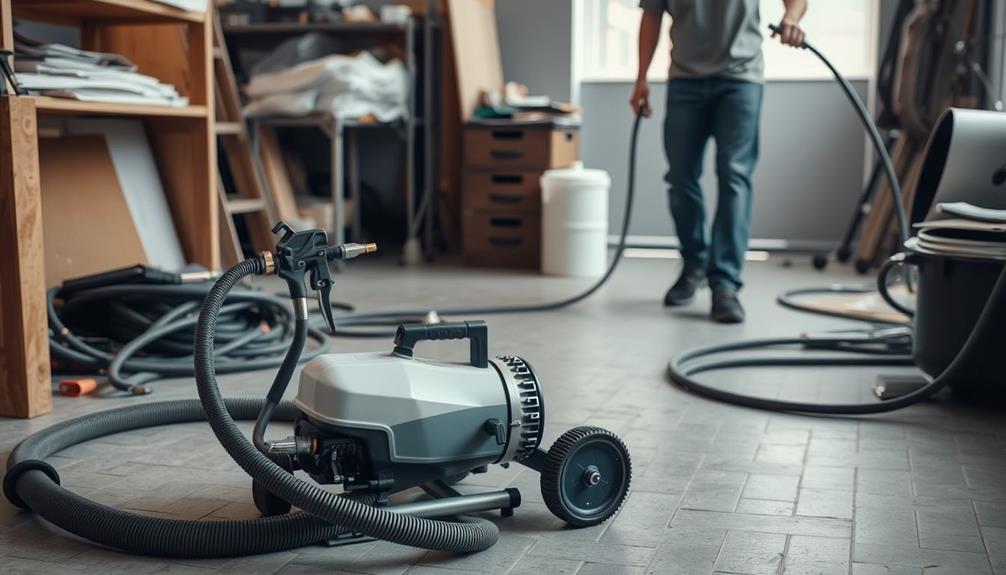
To properly store leftover paint for your airless sprayer, seal the containers tightly right after use. Use lined metal or glass containers to minimize spoilage. Keep them in a dry area away from direct sunlight, ideally between 60-80°F. Inspect for leaks and signs of spoilage regularly. For longer storage, consider using preservative products like Graco Pump Armor or a DIY mineral spirits mix. Additionally, confirm your sprayer is clean and depressurized before storage. Following these tips will help maintain paint quality and sprayer performance, and you'll discover even more effective storage techniques as you explore further!
Key Takeaways
- Seal paint containers tightly using plastic wrap and check for leaks to prevent air exposure and spoilage.
- Store paint in lined metal cans or glass containers at 60-80°F (15-27°C) in a dry area away from sunlight.
- Regularly inspect stored paint for spoilage signs like sour odors or inconsistent texture, especially for opened paints lasting about two years.
- Clean the sprayer thoroughly with lacquer thinner, and use preservation products like Graco Pump Armor before long-term storage.
- Limit container sizes to reduce air exposure and maintain paint quality during both short and long-term storage.
Importance of Proper Storage
Proper storage of leftover paint is essential for maintaining its quality and guaranteeing your airless sprayers stay in top shape. When you store paint correctly, you help prevent corrosion and clogging caused by dried paint residue.
Airless paint sprayers are particularly sensitive to paint quality, so using lined metal cans or glass containers is a smart choice; they keep your paint fresh and reduce spoilage risk.
Make certain to store paint in a dry area, away from direct sunlight. Keeping it within a temperature range of 60-80°F (15-27°C) will greatly prolong its usability. It's also important to limit the sizes of your containers and reseal paint cans immediately after use. This minimizes air exposure, which is a key factor in paint degradation.
Regularly check your stored paint for signs of spoilage, like sour odors or inconsistent texture. By doing this, you guarantee that only usable paint gets applied, ultimately protecting your sprayer's functionality.
Recommended Pump Preservers
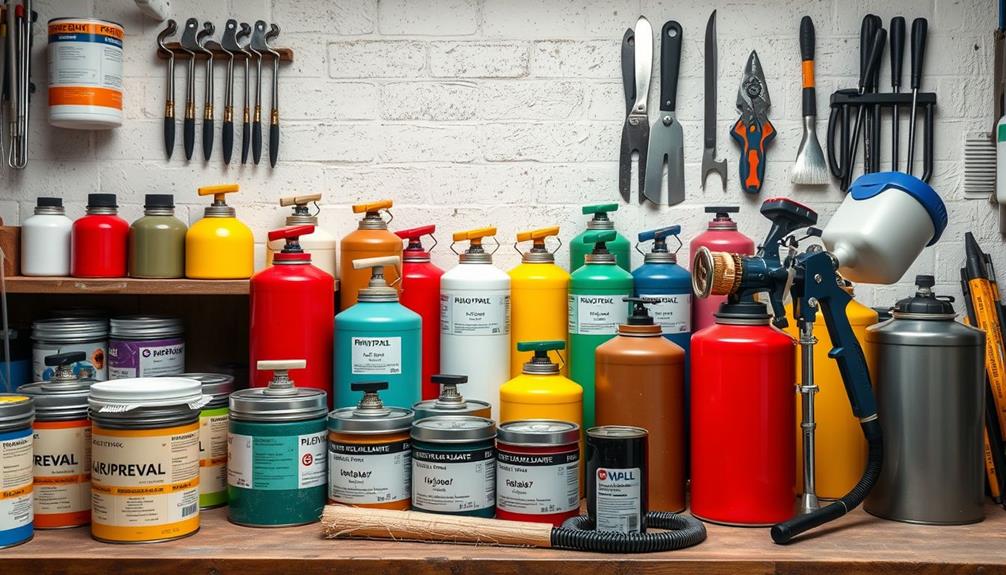
When it comes to preserving your airless sprayer, choosing the right pump preserver is essential. One of the top recommendations is Graco Pump Armor. This product effectively protects your sprayer from freezing and corrosion during storage, guaranteeing it remains in peak condition when you're ready to use it again.
Additionally, many budget-friendly options provide high performance without breaking the bank, making it easier to maintain your equipment. If you're in milder conditions, Titan Liquid Shield can also work, though keep in mind it's not freeze-proof.
For those who prefer a more DIY approach, mineral spirits can be used alone or mixed with engine oil to preserve your pump. Just make certain not to leave it in the hoses for too long, as that can lead to issues down the line.
If safety is a concern, there are non-flammable options available that enhance safety during storage and maintenance.
Ultimately, your choice of pump preserver should depend on your specific storage conditions, especially if you expect freezing temperatures. By selecting the right product, you can guarantee your airless sprayer stays protected and ready to tackle your next painting project.
Short-Term Storage Techniques
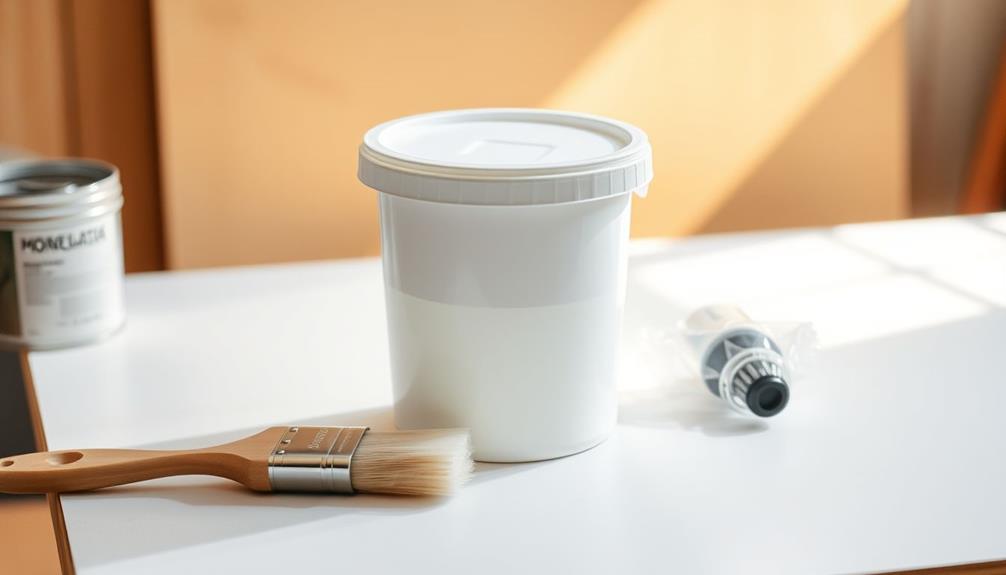
When you're storing leftover paint for a short period, it's crucial to cover the containers securely to prevent drying.
Utilizing proper filtration and pump protection can also enhance your sprayer's performance when you decide to use the paint again.
Using plastic wrap can create an airtight seal, keeping your paint fresh.
Also, make sure to keep the paint in a stable temperature range to maintain its quality.
Cover Paint Containers Securely
Your leftover paint deserves the best care to maintain its quality, and securely covering the containers is crucial. After you finish painting, make certain to seal your paint containers tightly right away. This prevents air exposure, which can dry out or spoil your paint. For short-term storage (up to a week), consider using a piece of plastic wrap. Cover the can with it before replacing the lid to create an airtight seal that minimizes evaporation.
Here's a quick reference table to help you remember the best practices for covering paint containers:
Action | Description | Importance |
---|---|---|
Seal Immediately | Close the lid tightly right after use. | Prevents air exposure |
Use Plastic Wrap | Place a piece of plastic wrap before the lid. | Creates an airtight seal |
Check Seal Integrity | Inspect for leaks before storage. | Guarantees paint longevity |
Store in Dry Area | Keep paint in a dry, temperate environment. | Maintains consistency |
Avoid Sunlight | Keep containers away from direct sunlight. | Prevents quality degradation |
Maintain Ideal Temperature Range
Maintaining the ideal temperature range for leftover paint is vital for preserving its quality and usability. Store your paint in a temperate environment, ideally between 60-80°F (15-27°C). This range helps prevent spoilage and guarantees that the paint remains consistent and ready for your airless sprayer when you need it.
Regular maintenance of your equipment, like making sure your airless sprayer is clean and functional, also plays a significant role in achieving the best results in your painting projects, similar to how air purifiers improve indoor air quality.
Avoid exposing your paint to extreme temperature fluctuations, as this can negatively impact its performance. Direct sunlight is another enemy; keep your paint containers away from it to prevent drying out and degradation.
If you're working with oil-based paint, it's especially important to maintain this temperature range to make certain the pump operates smoothly without clogging.
Limiting the size of your paint containers can also work in your favor. Smaller containers reduce air exposure, helping to prevent thickening or drying out. Always seal your paint containers tightly after each use.
This simple step minimizes air exposure and maintains the integrity of your leftover paint during storage. By keeping your paint at the right temperature, you're setting yourself up for better results in your next project.
Use Plastic Wrap Seal
A simple yet effective technique for short-term storage of leftover paint involves using plastic wrap to seal the paint can and hoses tightly. This method minimizes air exposure, reducing the risk of skin formation on the paint's surface. To keep your paint fresh and ready for the next use, submerge the suction and drain tubes in the paint can before wrapping everything up.
Additionally, maintaining a clean workspace and having the right tools can notably improve your painting experience, making it easier to manage leftover materials effectively, similar to how one should consider key factors in choosing a home cleaning service.
While you're working, remember to release pressure from your Graco sprayer and keep the gun submerged in water during short breaks. This prevents clogging and guarantees smooth operation when you return. Just be cautious—avoid using this plastic wrap method in freezing temperatures, as the water can freeze and damage your sprayer components.
The effectiveness of this technique can vary based on heat and humidity, so try to apply it in a controlled environment for the best results. If you notice the paint thickening or drying out, you can always add a little paint thinner to restore its consistency before your next project.
This simple storage solution can save you time and hassle, keeping your airless sprayer ready for action.
Medium to Long-Term Storage
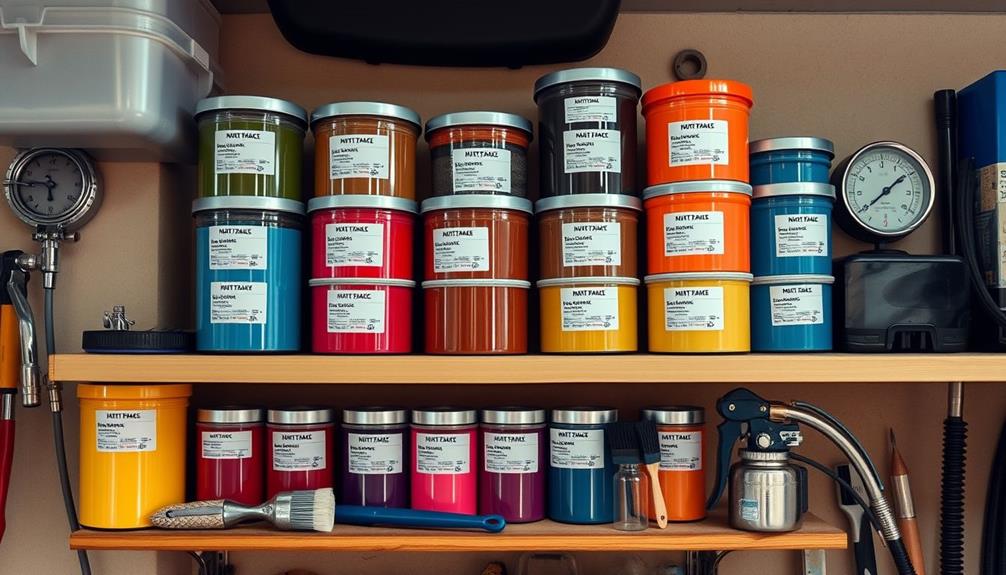
When you're storing paint for the medium to long term, proper cleaning and preparation are essential.
It's important to guarantee that the environment where you're storing the paint is free from strong odors that could affect the quality of the paint, as 10 smells cats hate may also impact the storage area.
You'll want to use the right storage solutions to keep your sprayer in top shape and prevent any corrosion.
Let's go through the steps you need to follow for effective storage.
Cleaning and Preparation Steps
To secure your airless sprayer remains in top condition for future use, proper cleaning and preparation are vital before storing it for the medium to long term. Start by thoroughly cleaning your sprayer with lacquer thinner, confirming no residue is left in the pump. This step is essential to prevent clogs that could compromise functionality. Before storage, relieve pressure by pulling the gun trigger to avoid potential damage from trapped pressure.
Next, use fresh mineral spirits or a pump preservative like Graco Pump Armor to protect internal components from corrosion and freezing. As you cycle the preservative through the system, apply several drops of Graco Throat Seal Liquid (TSL) to lubricate and protect all seals.
Finally, when you turn off the sprayer after applying the protectant, make sure the sprayer rod is in the down position. This positioning helps maintain proper seal integrity.
Step | Importance | Emotional Impact |
---|---|---|
Clean with lacquer | Prevents clogs | Guarantees smooth operation |
Use Graco Pump Armor | Protects from corrosion | Safeguards your investment |
Secure seals | Maintains functionality | Peace of mind for future use |
Recommended Storage Solutions
For medium to long-term storage of leftover paint, choosing the right containers and conditions is vital. Start by using lined metal cans, glass, or plastic containers that can be sealed tightly. This minimizes air exposure, helping preserve the quality of the paint you plan to use with your paint sprayer later.
Incorporating unique cultural experiences into your home can also inspire your color choices and painting projects. A mix of mineral spirits and 30-weight oil can further protect the paint from corrosion.
Maintain a temperature range of 60-80°F (15-27°C) during storage. This prevents the paint from freezing or degrading due to extreme temperatures. To limit air exposure, opt for smaller containers whenever possible, and always inspect the seals of your containers to verify they're airtight.
Regularly check your stored leftover paint for signs of spoilage, like a sour smell or inconsistent texture. Most opened paints have a shelf life of about two years, so keeping tabs on their condition is important.
Very Long-Term Storage Tips
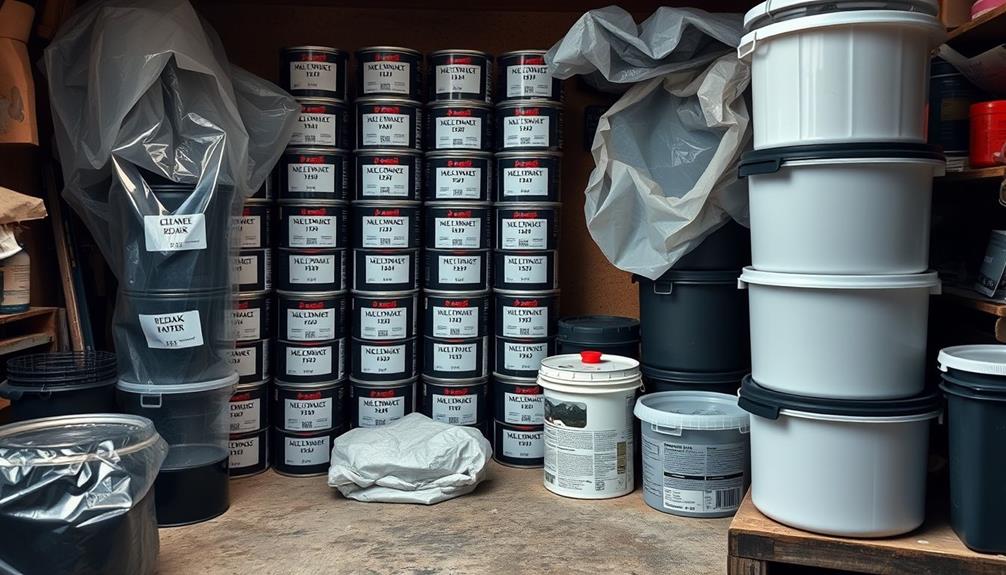
If you're looking to store leftover paint for an extended period, taking the right steps is essential to maintain its quality and protect your equipment.
Start by draining all water from your airless sprayer. This prevents corrosion and damage over time. For ideal preservation, mix mineral spirits with 30wt oil—use several cap-fulls of oil per quart of mineral spirits. This combination helps protect the pump and seals effectively.
Additionally, investing in a security system can further safeguard your tools and home during the storage period.
When you finish applying your protectants, keep the rod in the down position to avoid internal damage. Additionally, consider using specialized products like Graco Pump Armor or glycol-based anti freeze. These can provide enhanced protection against freezing conditions, ensuring your paint and equipment remain in top shape.
Here are some key tips for very long-term storage:
- Store the airless sprayer indoors in a climate-controlled environment.
- Avoid extreme temperatures and humidity to maintain paint quality.
- Regularly check the condition of the paint and equipment during storage.
Maintenance and Cleaning Procedures
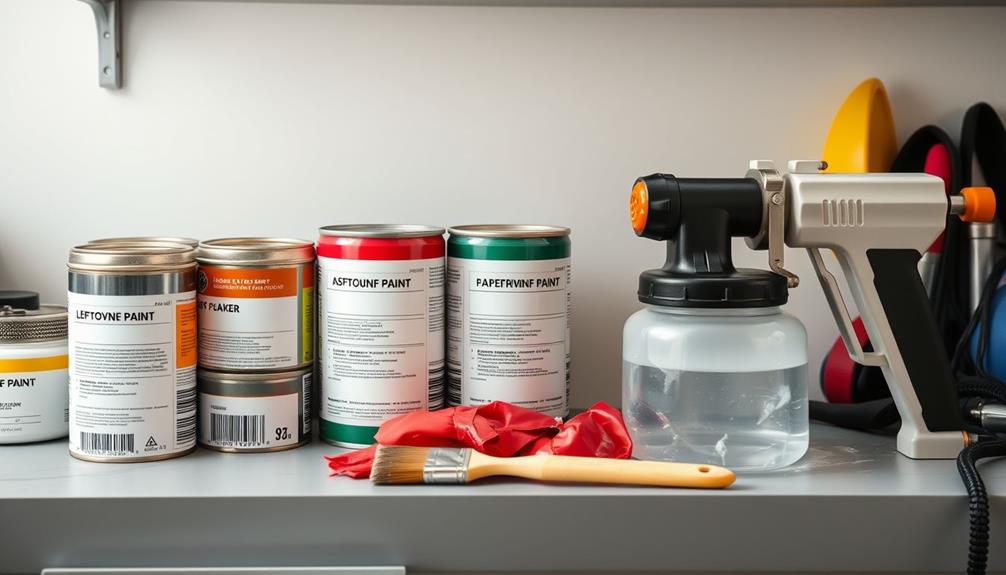
After guaranteeing your airless sprayer is properly stored for the long term, focusing on maintenance and cleaning procedures is essential for its longevity and performance.
Start by cleaning your sprayer thoroughly after each use. Flush it with a mixture of water and Dawn soap to remove any paint residues that could cause clogs. Additionally, it's important to contemplate energy consumption of appliances when using equipment like airless sprayers, as they can contribute to overall energy costs.
Once you've cleaned it, run clean water through the system to eliminate any soap residue, which can affect your future paint applications.
Regular maintenance includes checking and cleaning filters, spray tips, and the main gun. This practice helps maintain peak performance and reduces the risk of operational issues.
For deeper cleaning, think about running mineral spirits or a similar solvent through the system periodically, but make sure you don't leave it in the pump during storage.
Lastly, if you don't use your sprayer frequently, try to operate it every 4-5 years. This helps prevent pump seizure and keeps everything functioning smoothly.
Common Issues and Challenges
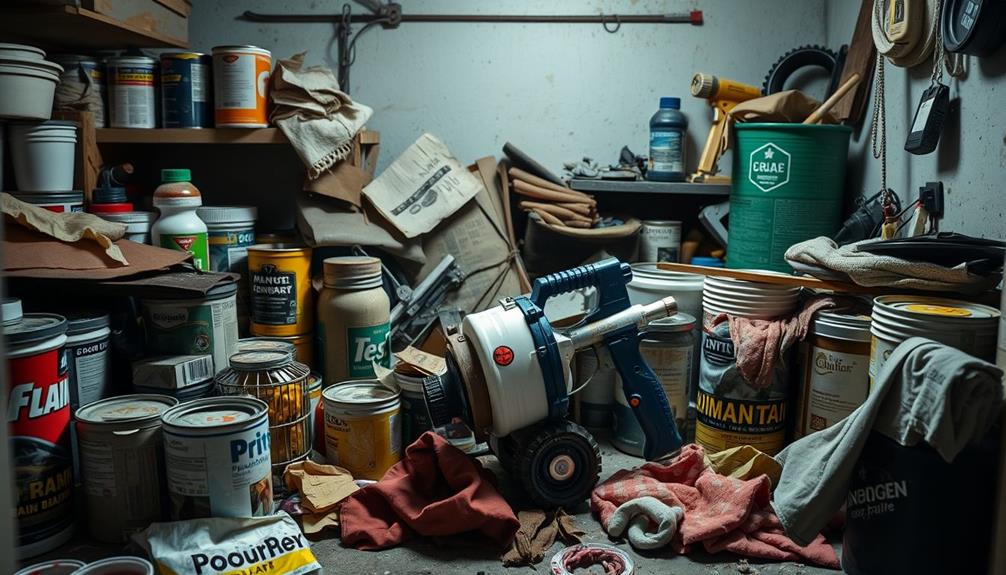
Storing leftover paint presents several common issues and challenges that can impact both your paint and equipment. If you don't take proper precautions, you might find yourself facing clogs in your airless sprayer. Dried residue can harden in hoses and tips, rendering them unusable.
Additionally, if you leave water in the system during colder months, it can freeze, damaging the pump assembly and leading to expensive repairs. To avoid these issues, it's essential to maintain your equipment, similar to how safety features in garage door openers enhance home security by preventing operational failures.
To help you navigate these challenges, consider the following:
- Properly seal paint containers to prevent spoilage and air exposure, which can alter paint consistency.
- Clean filters, spray tips, and hoses after use to avoid performance issues caused by dried paint residue.
- Regularly check stored paint and sprayers to identify potential issues early, ensuring peak performance.
Frequently Asked Questions
How Long Can Paint Be Left in an Airless Sprayer?
You can leave paint in an airless sprayer for about 1 hour to 3 days during breaks. However, avoid freezing temperatures, as they can damage the paint and the sprayer's internal components.
How Long Can You Leave Paint in a Sprayer Between Coats?
When you're in a pickle between coats, you shouldn't leave paint in the sprayer for more than an hour. Otherwise, it could clog up and cause you headaches during your project. Keep it clean!
How Do You Store an Airless Sprayer Between Coats?
To store your airless sprayer between coats, leave the suction and drain tubes submerged in paint, cover everything tightly with plastic wrap, and release pressure by pulling the trigger to protect the pump and seals.
Can You Leave Paint in Graco Sprayer?
You shouldn't leave paint in a Graco sprayer for long. It can clog and damage components. If you must take a break, keep the tubes submerged and cover the paint can tightly to reduce air exposure.
Conclusion
Properly storing your leftover paint isn't just about saving money; it's about preserving quality for your next project. While short-term techniques might seem easy, neglecting medium to long-term storage can lead to frustrating results. Just as a well-maintained airless sprayer guarantees a smooth finish, careful storage safeguards your paint's integrity. By following these tips, you can avoid the mess of dried-out paint and enjoy the satisfaction of a perfectly executed job every time.
Whether it’s a step-by-step tutorial on achieving flawless finishes or an in-depth analysis of the latest airless paint sprayer models, Joe’s ability to articulate complex ideas in a simple and engaging manner resonates with our diverse audience. His practical tips and techniques empower readers to tackle their projects with confidence.
Airless Paint Sprayers
Airless Paint Sprayer Maintenance: Lubricating Moving Parts
Clean and lubricate your airless paint sprayer’s moving parts for optimal performance—discover essential tips to keep your equipment running smoothly!
Lubricating the moving parts of your airless paint sprayer is essential for peak performance and longevity. You should use specific lubricants, like Fusion Quick-Shot Gun Grease, to maintain o-rings and seals. Make it a daily routine to grease these components and guarantee effective grease distribution by purging air from the system. Always clean the manifold sealing faces before applying grease to prevent buildup and operational issues. By consistently following a lubrication protocol, you can minimize unexpected downtime and maintain efficiency. There are even more techniques and tips that'll enhance your maintenance regimen for better performance.
Key Takeaways
- Incorporate daily lubrication using Fusion Quick-Shot Gun Grease for moving parts and o-rings to ensure optimal performance.
- Clean fluid manifold sealing faces with a compatible solvent before applying grease to avoid contamination.
- Purge air from the system to ensure effective grease circulation during lubrication.
- Regularly lubricate threads and seals during rebuilds to maintain functionality and prevent leaks.
- Tailor lubrication techniques to specific gun models for enhanced longevity and efficiency.
Importance of Regular Lubrication
Regular lubrication is vital for keeping your airless paint sprayer running smoothly. By applying the right gun lube regularly, you minimize maintenance costs and unexpected downtime. When you grease the moving parts and seals properly, you greatly prolong the lifespan of your spray equipment, preventing premature repairs and failures.
Regular maintenance and cleaning tips are important for guaranteeing ideal performance and longevity of your sprayer, as mentioned in maintenance and cleaning tips.
You should make it a habit to apply lubricants like Fusion Quick-Shot Gun Grease daily. This practice helps maintain the integrity of o-rings and seals, ensuring that everything operates at peak efficiency. Neglecting lubrication, on the other hand, can lead to overspray buildup, making disassembly difficult and increasing the risk of operational issues.
Always opt for manufacturer-specific lubricants, such as TSL or Titan Piston Lube, to assure compatibility with your equipment. Using unsuitable oils can cause damage that may not be immediately apparent but could lead to costly repairs down the line.
Selecting the Right Grease
When it comes to selecting the right grease for your airless paint sprayer, understanding the various types is essential.
Choosing a lubricant that caters to the specific needs of your equipment can greatly enhance its performance, much like the importance of HVAC maintenance in guaranteeing a comfortable environment.
You'll want to apply the right lubrication techniques and confirm compatibility with your equipment to avoid any damage.
Let's explore these vital points to keep your sprayer in top shape.
Grease Types Overview
Selecting the right grease for your airless paint sprayer is essential for maintaining ideal performance and prolonging its lifespan. Understanding the different grease types can help you make informed choices. Regular maintenance, much like general air purifier usage, is critical to guarantee optimal functionality.
One popular option is Fusion Lubrication Gun Grease, which is lithium-based and designed specifically for lubricating moving parts and o-rings. This type of grease guarantees optimal performance and longevity of your spray gun.
On the other hand, Fusion Quick-Shot Gun Grease is petroleum-based and recommended for end-of-day maintenance. It offers high adhesion and water-resistant properties, making it suitable for all types of spray guns.
However, it's essential to avoid using petroleum or vegetable-based lubricants in certain cartridges, as they can lead to tool failure and decreased performance. Regular greasing with the appropriate type of grease not only minimizes maintenance costs but also reduces unexpected downtime, extending the lifespan of your equipment.
Properly lubricating o-rings, seals, and threads with the correct grease during rebuilds and daily maintenance is critical. By selecting the right grease types, you'll guarantee your airless paint sprayer operates reliably and efficiently.
Application Techniques
Understanding how to apply grease effectively is essential to keeping your airless paint sprayer in top shape. For regular maintenance, you should use Fusion Lubrication Gun Grease. This lithium-based grease is specifically formulated for peak performance in spray guns, particularly around the gun head and other moving parts.
Additionally, using the correct oil for your sprayer is vital, as it guarantees peak performance and longevity, while reducing wear and tear on internal components correct oil selection.
At the end of each day, apply Fusion Quick-Shot Gun Grease. This petroleum-based option offers high adhesion and water-resistant properties, making it suitable for all spray guns.
During your maintenance routine, avoid petroleum or vegetable-based lubricants for specific cartridges, as they can cause damage and reduce the lifespan of your equipment.
When lubricating, focus on important components like o-rings, seals, and threads. Confirming these parts are well-greased will help maintain the functionality and efficiency of your sprayer.
Don't forget to purge air through the gun to carry grease mist into internal components. This step guarantees thorough lubrication and prevents overspray buildup, enhancing the overall performance of your airless paint sprayer.
Compatibility Considerations
Your airless paint sprayer's performance hinges on using the right grease for its specific components. For superior results, you should use lithium-based Fusion Lubrication Gun Grease for lubricating moving parts and o-rings in your spray gun. This type of grease enhances both performance and longevity, keeping your equipment running smoothly.
Additionally, incorporating diversification of retirement portfolio into your financial strategy can be akin to confirming your tools are well-maintained; both approaches aim to minimize risks and maximize efficiency.
For end-of-day maintenance, Fusion Quick-Shot Gun Grease is an effective, petroleum-based option. However, be cautious: it's not suitable for cartridges that need a non-petroleum lubricant. Always check your manufacturer's manual to verify you're using a compatible solvent for your specific gun model.
Regularly greasing seals, threads, and moving parts with the appropriate grease prevents overspray buildup and makes disassembly easier during maintenance.
Avoid petroleum or vegetable-based lubricants entirely, as they can lead to tool failure and degrade your spray gun's functionality. By selecting the right grease and following these guidelines, you can guarantee that your airless paint sprayer operates at peak efficiency, prolonging its lifespan and improving your painting projects.
Step-by-Step Greasing Procedures
To keep your airless paint sprayer running smoothly, you'll want to establish a daily lubrication routine.
This includes applying grease specifically formulated for your gun to protect and maintain its moving parts.
Regular maintenance, similar to understanding home cleaning service costs, can save you money in the long run.
Daily Lubrication Routine
While maintaining your airless paint sprayer, incorporating a daily lubrication routine is essential for peak performance. Start by using Fusion Quick-Shot Gun Grease to keep the moving parts and o-rings in top shape. Follow these steps for effective greasing:
Step | Action |
---|---|
1. Purge Air | Remove air from the system to guarantee grease circulates effectively. |
2. Clean Manifold | Use a compatible solvent to clean the fluid manifold sealing faces. |
3. Apply Grease | Coat exposed surfaces, o-rings, seals, and threads with grease. |
Gun-Specific Greasing Techniques
Maintaining the longevity and performance of your airless paint sprayer involves specific greasing techniques tailored to each gun model.
Keeping your tools in top shape is vital, much like guaranteeing a serene atmosphere in a Modern Farmhouse Bedroom.
For the Fusion CS Gun, start by lubricating the o-rings and seals regularly. Apply Fusion Quick-Shot Gun Grease daily to guarantee peak performance.
The Fusion AP Gun follows similar greasing practices; daily grease application is important to keep moving parts functioning smoothly.
When it comes to the Fusion PC Gun, don't skip regular lubrication of o-rings and seals. Again, daily greasing is recommended to prevent wear and confirm that everything operates without a hitch.
The Probler P2 Gun requires the same protocols as the CS and AP models, emphasizing the necessity of daily lubrication for reliable functionality.
Gun-Specific Maintenance Tips
Taking care of your spray gun is important for peak performance and longevity. Each model has specific maintenance needs to keep it running smoothly. Here are some key tips for various spray guns:
Spray Gun Model | Maintenance Tip | Frequency |
---|---|---|
Fusion CS, AP, PC | Lubricate o-rings and seals with Quick-Shot | Regularly |
Probler P2 | Daily greasing with Quick-Shot is essential | Daily |
Fusion MP | Apply Quick-Shot to moving parts to minimize costs | Daily |
All Models | Lubricate threads and seals during rebuilds | When rebuilding |
All Models | Clean sealing faces with solvent and grease them | Regularly |
Before you apply grease, always purge air from the system to guarantee the lubricant reaches all internal components. This step is crucial for maintaining effective operation. Additionally, protecting the fluid manifold sealing faces with grease helps guard against moisture, which is important for all gun models. Following these gun-specific maintenance tips will help extend the life and efficiency of your spray gun.
Cleaning Protocols for Longevity
Proper maintenance of your spray gun sets the stage for effective cleaning protocols, which are essential for ensuring longevity. Just like how garage door openers enhance home security with modern technology, a well-maintained airless paint sprayer will perform efficiently and effectively.
After each use, you should thoroughly clean your airless paint sprayer by removing heavy paint from the gun and cup. Follow this by applying 3 to 4 oz. of a compatible solvent for internal cleaning. Percolate the spray gun with low pressure—5 psi or less—and repeat the cleaning process until the solvent runs clear. This step is vital for eliminating all residual paint and debris.
Next, wipe the exterior of the spray gun with solvent and blow-dry it. Once dry, it's essential to apply lubricant to all moving parts, as this helps maintain performance and prevents wear.
Remember to avoid submerging the spray gun in cleaning solutions unless you're performing a complete overhaul, which can damage internal components. Regularly inspect the air cap, soaking it in a compatible cleaning solution. Use soft tools like wooden toothpicks to clean orifices without causing damage.
Performance Insights and User Feedback
User experiences highlight that diligent maintenance practices, including regular lubrication and thorough cleaning, greatly boost the performance of airless paint sprayers. Many users report that meticulous lubrication directly enhances their sprayer's efficiency, leading to smoother application and fewer operational issues.
For instance, initial trials with cabinet paint showed that proper lubrication allowed sprayers to function without needing to thin the paint, streamlining the painting process. Additionally, effective keyword and content strategy can provide insights into ideal maintenance practices, helping users maximize their equipment's performance.
Feedback consistently points out that neglecting recommended lubrication practices can lead to tool failure and decreased performance. This underscores the essential nature of maintenance. While users often express satisfaction with their sprayer's performance on small projects, they also note limitations during larger tasks, emphasizing the need to follow maintenance guidelines for best results.
Community insights reveal that consistent lubrication, especially of the throat seal and moving parts, is crucial for extending the sprayer's lifespan and ensuring reliable operation. By prioritizing lubrication, you can avoid common pitfalls and enjoy a more effective painting experience.
Ultimately, investing time in proper maintenance will pay off, allowing you to tackle any project with confidence and ease.
Safety Precautions During Maintenance
Before diving into maintenance tasks, it's important to prioritize safety to prevent accidents and injuries. Start by always disengaging the trigger lock and aiming the sprayer away from people. This simple step can prevent accidental discharges that could cause harm.
Additionally, ensuring that your workspace is well-lit and organized can help you avoid mishaps while working on the sprayer, as proper visibility reduces the risk of accidents. Remember that using a reliable home security system can also enhance your safety by deterring potential intruders while you focus on your maintenance tasks.
Next, inspect the hoses for any signs of damage. Even minor flaws can lead to dangerous high-pressure leaks, so don't skip this critical precaution.
While working, avoid increasing pressure unnecessarily; maintaining consistent pressure levels is important for safety.
Ensure all attachments are securely fastened before you perform any work on the sprayer. Loose attachments can result in leaks or accidents that put you at risk.
Troubleshooting Common Issues
Airless paint sprayers can sometimes throw you a curveball with issues like spitting or inconsistent spray patterns. When this happens, the first step is to check for clogs in the filter or any air supply issues. It's often best to address these minor problems before considering a complete disassembly of the sprayer.
Regularly lubricating all moving parts of your spray gun with the right lubricant helps prevent wear and keeps everything running smoothly.
If you notice your sprayer isn't building pressure, inspect the seals and packing for any signs of wear. These components are essential for proper operation, and neglecting them can lead to bigger issues down the line.
When troubleshooting, keep track of any problems and their occurrences; this can help identify patterns that might reveal underlying issues more effectively.
Also, verify that all cleaning solutions you use during maintenance are compatible with your sprayer's materials. Using incompatible products could cause damage and result in malfunctions.
Frequently Asked Questions
How to Lube an Airless Paint Sprayer?
To lube an airless paint sprayer, you'll want to apply TSL to the throat seal, use compatible lubricant on moving parts, and regularly grease o-rings and seals for best performance and longevity.
What Places Need to Be Lubricated on a Spray Gun?
Your spray gun's like a well-oiled machine; it needs lubrication in the o-rings, seals, piston throat, trigger mechanisms, and fluid manifold threads. Regular greasing keeps it running smoothly and extends its lifespan dramatically.
What Kind of Oil Do You Use in an Airless Sprayer?
You should use manufacturer-specific lubricants like TSL or Titan Piston Lube in your airless sprayer. Avoid motor oil, as it can damage your sprayer's performance. Always check the guidelines for the right lubricant.
How Do You Lubricate a Spray Gun?
A well-oiled machine runs smoothly. To lubricate your spray gun, apply a suitable lubricant to all moving parts after cleaning, ensuring everything's greased up, especially o-rings and seals, for peak performance and longevity.
Conclusion
So, there you have it—maintaining your airless paint sprayer isn't rocket science, but it sure can feel like it when you're knee-deep in grease. Just remember, a well-lubricated sprayer is like a happy puppy; it works better and doesn't leave a mess everywhere. If you ignore the maintenance, you might as well start a new hobby: wall art from splattered paint! Keep your sprayer in tip-top shape, and it'll thank you with smooth, flawless finishes.
Whether it’s a step-by-step tutorial on achieving flawless finishes or an in-depth analysis of the latest airless paint sprayer models, Joe’s ability to articulate complex ideas in a simple and engaging manner resonates with our diverse audience. His practical tips and techniques empower readers to tackle their projects with confidence.
Airless Paint Sprayers
How to Use an Airless Paint Sprayer for Painting Beadboard
Unlock the secrets to flawlessly using an airless paint sprayer for beadboard, and discover essential tips that will elevate your painting project.
To use an airless paint sprayer for painting beadboard, start by cleaning your surface thoroughly and filling any nail holes. Choose a high-quality, self-leveling latex or acrylic paint in a satin or semi-gloss finish. Set up your sprayer according to manufacturer guidelines, making sure to protect surrounding areas with tape and drop cloths. Hold the sprayer 6 to 12 inches from the surface, spraying in 3-foot horizontal strips and overlapping each one. Finally, inspect for missed spots or uneven coverage and touch up with a brush as needed. There's more to perfecting your technique ahead.
Key Takeaways
- Prepare the beadboard by cleaning, filling nail holes, and sanding for a smooth surface before painting.
- Choose high-quality, self-leveling latex or acrylic paint with a satin or semi-gloss finish for durability.
- Set up the sprayer by masking off areas, ensuring ventilation, and wearing protective gear to prevent overspray and exposure.
- Maintain a distance of 6 to 12 inches from the surface, spraying in overlapping horizontal strips for even coverage.
- Clean the sprayer thoroughly after use and inspect for missed spots, applying touch-ups with a brush as needed.
Understanding Airless Paint Sprayers
When considering how to achieve a flawless finish on your next painting project, have you thought about using an airless paint sprayer? These powerful tools utilize hydraulic pumps to deliver paint at high pressures, allowing you to cover large areas quickly and efficiently.
Instead of relying on air to atomize the paint, the airless sprayer forces the paint through a small tip in the spray gun, creating a fine mist that results in a smooth finish—perfect for surfaces like beadboard. Best Airless Paint Sprayer options can greatly enhance your painting experience.
However, operating an airless sprayer requires some caution. With pressures reaching up to 3,000 psi, you'll need to handle the sprayer carefully to avoid overspray and maintain safety.
Before you start, proper preparation is key. Make sure to mask off areas you don't want to paint and filter your paint to prevent clogs.
While airless sprayers are ideal for larger jobs, mastering their use takes practice. It's a good idea to start on scrap material to refine your technique before diving into your main project.
This way, you'll be better equipped to achieve that flawless finish you desire.
Preparing the Beadboard Surface
Before you start painting, make certain to clean the beadboard surface thoroughly to remove any dust and debris.
Regular maintenance of surfaces, much like proper toilet upkeep, guarantees a better finish; for instance, clogging remedies can be effective in maintaining plumbing systems.
Next, fill in any nail holes or imperfections with putty, and let it dry completely before sanding for a smooth finish.
This preparation is essential for achieving a flawless paint application.
Cleaning the Beadboard Surface
To guarantee a successful painting project, start by thoroughly cleaning the beadboard surface to eliminate dust, dirt, and debris. This step is vital for ensuring ideal adhesion of the paint and a smooth finish.
Regular maintenance of your cleaning tools is essential for achieving the best results, as noted in essential items for a home cleaning kit.
Here's how you can effectively clean the beadboard:
- Brush with a Soft Bristle Brush: Use a soft bristle or large dry paint brush to sweep out any dust from the grooves of the beadboard. This helps prevent contamination during painting.
- Avoid Air Compressors: Don't use an air compressor for cleaning, as it can cause dust to settle on the wet paint, compromising your finish.
- Inspect for Excess Paint: Check for any excess paint or imperfections on the surface. If you find any, make a note to address those areas later.
- Prepare for Filling Holes: While it's not part of cleaning, be ready to fill any nail holes and imperfections. Allow the putty to dry fully before sanding to achieve a smooth surface.
Filling Nail Holes
Often, filling nail holes and dings in the beadboard is an important step that shouldn't be overlooked. Start by selecting a suitable putty specifically designed for wood surfaces. Applying putty not only guarantees a smooth surface for painting but also enhances the overall durability of your finish, making your project last longer.
This approach is similar to creating a serene atmosphere in a Modern Farmhouse Bedroom by focusing on the details. Apply the putty into each hole and ding, making sure it's filled to the surface level. This will create a smooth surface, which is essential for better paint adhesion.
Once you've filled the holes, allow the putty to dry completely according to the manufacturer's instructions. After it's dried, take fine-grit sandpaper and gently sand the filled areas. Your goal is to blend the filled holes seamlessly with the surrounding beadboard.
After sanding, clean the beadboard thoroughly to remove any dust or debris. This step is critical, as any particles left behind can interfere with your coat of paint.
If you want to guarantee uniformity in both texture and color, consider applying a primer over the filled areas. This will help create a consistent base before you start applying your final coat of paint. Following these steps will set you up for a smooth, professional-looking finish when you finally use your airless paint sprayer.
Choosing the Right Paint
Choosing the right paint is essential for achieving a flawless finish with your airless paint sprayer.
You'll want to select high-quality, self-leveling paint that matches the beadboard material, whether it's wood or MDF, to guarantee durability and proper adhesion.
Additionally, consider the energy consumption of your tools during this process, as many appliances draw power even when not in use, contributing to unnecessary energy waste energy consumption patterns.
Don't forget to test the color on a small section first to confirm it fits your vision before going all in.
Paint Type Selection
Selecting the right paint is essential for achieving a beautiful finish on beadboard. For the best results, consider the following points when choosing your paint:
1. Type: Opt for high-quality latex or acrylic paint. These options offer durability and a smooth finish, minimizing chipping and fading.
Additionally, using specialty beans for espresso can enhance the flavor profile of your coffee, much like selecting the right paint can elevate your beadboard project.
2. Self-Leveling: Use self-leveling paint to reduce texture and guarantee a professional appearance, especially when using an airless sprayer.
3. Finish: A satin or semi-gloss finish is ideal for beadboard. These finishes resist moisture and are easier to clean, making them perfect for areas like kitchens and bathrooms.
4. Thinning: Follow the manufacturer's recommendations for thinning your paint. This step enhances application with your airless sprayer, promoting even coverage and reducing overspray.
Before diving into your project, be certain to test the paint on a scrap piece of beadboard. This way, you can evaluate the color and finish to guarantee it meets your expectations.
Color Compatibility Considerations
When you're ready to choose the right paint color for your beadboard, consider how it harmonizes with the existing colors in the room. Color compatibility is essential for achieving a cohesive aesthetic, much like how butter enhances flavor in cooking.
Grab some color swatches and test them in the space before making your final decision. This will help you see how different hues interact with your furniture and decor.
For a farmhouse aesthetic, soft, muted colors or classic whites work well. These shades complement the beadboard texture without overwhelming the space, allowing the natural grain of the wood to shine through.
High-quality latex or acrylic paints are ideal for beadboard, as they offer durability and a smooth finish.
Don't forget about self-leveling paints, which help minimize visible brush or roller marks, ensuring a professional-looking result.
Once you've selected a paint, always test it on a small, inconspicuous area of the beadboard. This step allows you to assess the color under various lighting conditions, ensuring it meets your expectations before you proceed with the entire project.
Taking these steps will guarantee a beautiful, harmonious finish that enhances your beadboard.
Setting Up the Sprayer
How do you guarantee a smooth painting experience with an airless paint sprayer? Setting up your sprayer correctly is key to making certain everything goes off without a hitch. Follow these steps to make the process much easier:
1. Mask Off Areas: Use tape and drop cloths to protect windows, floors, and hardware from overspray. This will save you a lot of cleanup time later.
Additionally, make sure that your workspace is free of any audio distractions, as a well-organized environment enhances focus and efficiency during the painting process. Consider using a headphone amplifier to enjoy your favorite tunes while working.
2. Ventilation: Keep at least one window open and set up exhaust fans. Proper ventilation is vital for your safety and comfort during the spraying process.
3. Wear Protective Gear: Don a mask, hat, long sleeves, and old clothes. This helps safeguard you against paint particles and overspray.
4. Filter the Paint: Before using the sprayer, filter your paint through a nylon stocking or a paint filter. This prevents clogs in the sprayer and guarantees a smooth application.
Lastly, familiarize yourself with the manufacturer's guidelines for pressure settings and paint thickness adjustments. This attention to detail will lead to ideal results and a smoother painting experience.
Application Techniques
Achieving a flawless finish with an airless paint sprayer hinges on mastering effective application techniques. First, maintain a distance of 6 to 12 inches from the beadboard surface while spraying. This distance guarantees even coverage without excessive overspray.
Additionally, using the right garage door openers can enhance the security of your workspace, allowing you to focus on your painting project without worry. Next, paint in 3-foot horizontal strips, overlapping each strip by one-third to one-half. This overlap is critical for achieving a uniform finish across the beadboard panels.
To avoid paint buildup and potential drips, always release the trigger before stopping movement. This technique promotes a smooth application and prevents unsightly marks on your work.
Additionally, adjust the paint thickness and pressure settings according to the manufacturer's guidelines. This adjustment is especially important when working with textured surfaces like beadboard.
Before diving into the actual project, practice on scrap material. This practice helps you gain confidence and control over the airless sprayer.
If you need to touch up areas later, consider using a nap roller for a seamless blend. By following these application techniques, you'll guarantee a professional-looking finish that enhances the beauty of your beadboard.
Safety Precautions
Using an airless paint sprayer can considerably enhance your painting project, but it also comes with safety responsibilities that shouldn't be overlooked.
Since these sprayers operate at high pressures—up to 3,000 psi—it's essential to follow specific safety precautions to prevent injuries. Additionally, ensuring good indoor air quality is important during painting, as volatile organic compounds (VOCs) can be released.
Consider using an air purifier to help mitigate these harmful particles in your workspace.
Here are four essential safety tips to keep in mind:
- Engage the Safety Lock: Always engage the spray gun's safety lock when not in use to avoid any accidental discharge of paint.
- Maintain Distance: Keep a safe distance from the spray tip while clearing clogs. Never use your fingers or hands while spraying to prevent serious injuries.
- Ensure Ventilation: Make sure your workspace is well-ventilated. Keep at least one window open and set up exhaust fans to disperse potentially harmful fumes.
- Disconnect Power: Before performing any cleaning or maintenance, always disconnect the sprayer from the power source. This step is essential for ensuring your safety during these procedures.
Maintenance and Cleanup
Proper maintenance and cleanup of your airless paint sprayer are vital for its longevity and best performance.
To clean your sprayer, start by reversing the paint pumping process and flushing the system with the appropriate solvent. This will help remove any residual paint that could clog the system later. Always release all pressure from the sprayer before disassembling any parts to avoid accidents during maintenance.
Regularly inspect and clean the filters to guarantee consistent paint flow while you're working. Clogged filters can lead to uneven application, so it's important to keep them in top shape.
When storing solvents, make sure to keep them in shaded areas, away from direct sunlight, to maintain their effectiveness and prevent degradation.
For safety, always keep all equipment, including sprayers and solvents, out of reach of children and pets to avoid accidental spills or misuse.
Final Touches and Tips
After you've cleaned and maintained your airless paint sprayer, it's time to focus on the final touches for your painting project. Ensuring your beadboard looks its best is essential, so follow these tips:
- Inspect Thoroughly: Check the beadboard for any missed spots or uneven coverage. Use a brush for precise touch-ups wherever needed.
- Drying Time: Allow the paint on the beadboard to dry completely between coats. This step is critical for achieving a smooth, durable finish. Always follow the manufacturer's recommended drying times.
- Quality Matters: For the final coat, use a high-quality paint. This choice not only enhances appearance but also increases the longevity of your finish. Remember, much paint is wasted on poor-quality products.
- Seal for Protection: Consider applying a clear topcoat or sealant, especially in high-traffic areas or spots prone to moisture. This extra layer protects your work and keeps it looking fresh.
With these final touches, your project won't only look great but also stand the test of time. Happy painting!
Frequently Asked Questions
Can You Paint Beadboard With a Sprayer?
Yes, you can definitely paint beadboard with a sprayer. It provides quick coverage and a smooth finish. Just make sure to mask off areas, maintain the right distance, and practice on scrap materials first.
Do You Have to Prime Beadboard Before Painting?
Yes, you should definitely prime beadboard before painting. Priming seals the surface, prevents discoloration, and improves paint adhesion. It guarantees a smooth, even finish and helps hide knots or imperfections in the wood.
What Is the Best Paint Finish for Beadboard?
Choosing the perfect finish for beadboard is like selecting the right outfit for an occasion. You'll want a matte or satin finish for charm and durability, ensuring your beadboard shines beautifully in any room.
How Do You Get a Smooth Finish With an Airless Sprayer?
To get a smooth finish with an airless sprayer, maintain 6 to 12 inches from the surface, spray in overlapping strips, and adjust paint thickness and pressure according to the manufacturer's guidelines to guarantee even application.
Conclusion
With your newly painted beadboard gleaming like fresh snow under a winter sun, take a moment to admire your work. The smooth, even finish showcases the beauty of your space, transforming it into a cozy retreat. Remember, the right prep and technique make all the difference. So, as you step back and enjoy the fruits of your labor, keep these tips in mind for your next project—your walls will thank you, and your creativity will soar.
Whether it’s a step-by-step tutorial on achieving flawless finishes or an in-depth analysis of the latest airless paint sprayer models, Joe’s ability to articulate complex ideas in a simple and engaging manner resonates with our diverse audience. His practical tips and techniques empower readers to tackle their projects with confidence.
Airless Paint Sprayers
Airless Paint Sprayer Safety: Avoiding Tripping Hazards
Understand the essential safety tips for using an airless paint sprayer to avoid tripping hazards—your project’s success depends on it.
To avoid tripping hazards when using an airless paint sprayer, keep your work area organized and clear of loose hoses, cords, and debris. Regularly check that hoses are coiled and secured, preventing them from becoming obstacles. Avoid placing equipment in high-traffic areas and use designated walking paths. Mark potential hazards with brightly colored tape or cones for visibility. Maintain a clean workspace and guarantee easy access around ladders. By following these practices, you'll greatly reduce the risk of accidents. Discover more tips to enhance your airless sprayer safety and create a safer environment for your painting projects.
Key Takeaways
- Keep hoses and power cords neatly coiled and secured to prevent tripping hazards in the work area.
- Designate clear walking paths by positioning equipment away from high-traffic zones to ensure safe movement.
- Regularly clear away loose materials, such as debris and hoses, to maintain an organized and safe workspace.
- Use brightly colored tape or cones to mark potential hazards and improve visibility in the work area.
- Conduct routine inspections to identify and remove any tripping hazards before starting work with the airless paint sprayer.
Importance of Safety Procedures
Safety is paramount when using airless paint sprayers, and understanding the importance of safety procedures can greatly reduce the risk of accidents. Familiarizing yourself with the owner's manual is essential, as it provides critical safety precautions specific to your airless spray equipment. By knowing these guidelines, you not only protect yourself but also guarantee efficient operation.
Implementing a thorough documentation process for your safety protocols can further enhance your preparedness. Identifying potential tripping hazards is a key aspect of safety procedures. Make sure to keep hoses, cables, and other equipment organized to prevent accidents during operation. Regularly reviewing and adhering to the safety protocols outlined in the instruction manual helps maintain a safer working environment.
Engaging in safety training sessions can further enhance your understanding of essential safety devices and procedures. This proactive approach fosters a culture of safety awareness among you and your team.
Identifying Common Hazards
When using an airless paint sprayer, it's essential to keep your work area organized to avoid common hazards.
Maintaining a clean space not only enhances safety but also improves efficiency during your painting projects. Loose hoses, cords, and debris can create tripping risks, so be certain to clear your space regularly.
Establish a designated walking path and securely place your equipment to minimize accidents while you work.
Additionally, consider implementing safety protocols similar to those used in home cleaning services to guarantee a safer environment.
Work Area Organization
A well-organized work area is vital for preventing accidents and ensuring efficiency. When using airless sprayers, a cluttered environment can increase the risk of tripping hazards. To minimize accidents, keep tools, hoses, and materials neatly organized.
Make sure hoses are coiled and secured properly; this prevents them from becoming a tripping hazard as you move around your workspace. Regular maintenance and inspection of equipment, like ensuring proper water levels in toilets, can also contribute to overall safety by eliminating unnecessary distractions in your work area proper disposal methods.
Designate specific areas for equipment and materials, ensuring nothing is left on walkways or high-traffic zones. This simple step can greatly reduce the likelihood of trips and falls.
Utilize brightly colored tape or cones to mark where hoses or equipment are laid out; this alerts others to potential hazards and keeps everyone safe.
Regularly inspect and maintain your work area, removing any debris and ensuring clear pathways. A clean and organized environment promotes safety for all workers involved.
Equipment Placement Strategy
Organizing your work area sets the foundation for an effective equipment placement strategy. To prevent tripping hazards when using your airless sprayer, follow these guidelines:
Hazard Type | Prevention Strategy | Tips for Implementation |
---|---|---|
Hoses & Power Cords | Neatly organize and secure | Use cable ties or clips |
High-Traffic Areas | Avoid placing equipment in pathways | Keep doorways clear |
Ladders | Guarantee clear access around ladders | Survey area before moving |
Loose Materials | Regularly inspect and remove debris | Conduct checks before starting |
Fire and Explosion Prevention
To assure your safety while using an airless paint sprayer, it's crucial to minimize the risk of fire and explosion. Proper precautions can greatly reduce these hazards, assuring a safer work environment.
Here are some key practices for fire and explosion prevention:
- Always spray in well-ventilated areas to reduce flammable vapors, similar to how ozone air purifiers help maintain air quality by reducing airborne pollutants.
- Remove all ignition sources, like cigarettes and electric appliances, from the spraying area.
- Use gas-powered sprayers outdoors and verify they're properly grounded to avoid static electricity buildup.
- Maintain a clean work environment by keeping the spraying area free of debris and flammable materials.
- Regularly inspect and use grounded hoses to confirm electrical continuity and prevent static discharge.
Preventing Fluid Injection
When using an airless paint sprayer, understanding its safety features is vital in preventing fluid injection injuries.
These sprayers operate under high pressure, making it necessary to familiarize yourself with airless paint sprayer basics to guarantee safe operation.
Always remember to relieve pressure before maintenance and to handle the equipment responsibly.
Safety Features Overview
Airless paint sprayers come equipped with several essential safety features designed to prevent fluid injection injuries, which can be severe. Understanding and utilizing these features is important for your safety during spraying operations.
Proper equipment maintenance is also significant, similar to how you'd care for a projector maintenance tips to guarantee peak performance.
- Tip Guards: These create a barrier between the spray tip and you, greatly reducing the risk of high-pressure fluid injection.
- Trigger Safety: Engaging the trigger safety on your spray gun when it's not in use is critical. It helps prevent accidental activation, which can lead to injuries.
- Regular Checks: Always check the functionality of the trigger safety features. Confirm they're operational before starting any painting job.
- Pressure Relief: Always relieve fluid pressure before performing maintenance or cleaning on your equipment. This practice greatly decreases the chance of accidental injection injuries.
- Safe Handling: Treat your airless spray gun as a hazardous tool. Never aim it at yourself or others; this fundamental principle is essential to avoiding severe injuries.
Importance of Pressure Relief
Relieving fluid pressure is an essential step in guaranteeing your safety when using an airless paint sprayer. Always remember to relieve pressure before performing any maintenance or cleaning. This simple action can prevent accidental injection injuries that may cause severe harm.
Engaging the trigger safety feature on your airless spray gun is significant; it minimizes the risk of unintentional spraying when the equipment isn't in use. Additionally, implementing safety measures, much like those in home security systems, can help create a safer working environment.
While operating the sprayer, always point the spray gun away from yourself and others. High-pressure fluid can be dangerous, and being mindful of your surroundings is important. Regularly check the functionality of the trigger safety and tip guards to confirm they effectively mitigate risks of fluid injection.
After each use, it's imperative to relieve pressure by following the manufacturer's flushing methods. This practice helps prevent pressure buildup, which can lead to potential accidents.
Prioritizing pressure relief and understanding its significance not only keeps you safe but also enhances the longevity of your equipment. By taking these precautions, you're not just protecting yourself; you're also guaranteeing a safer working environment for everyone around you.
Handling Equipment Responsibly
Understanding how to handle your equipment responsibly is key to preventing fluid injection injuries. Airless paint sprayers operate under high pressure, making it crucial to follow safety practices.
Additionally, ensuring that your workspace is free from any tripping hazards can prevent accidents while you operate the sprayer. Regular maintenance of your tools, similar to the importance of HVAC maintenance, can also enhance their performance and your safety.
Here are some essential tips for sprayer safety:
- Always relieve fluid pressure in the airless paint sprayer before cleaning or servicing.
- Engage the spray gun's trigger safety when not in use to minimize accidental discharge.
- Handle the spray gun and hoses carefully to prevent kinks and leaks that can lead to high-pressure fluid injection injuries.
- Use tip guards on airless spray guns to reduce the risk of serious injuries from accidental contact with the spray tip.
- Treat all airless spray guns as hazardous tools; never aim them at yourself or others during operation.
Safety Responsibilities
Guaranteeing safety during the operation of airless paint sprayers is a shared responsibility among all stakeholders involved. Manufacturers like Graco are committed to providing reliable products and essential safety information that help mitigate risks.
In addition to proper equipment, having adequate safety gear, such as safety glasses, can further protect you while working. You, as a user, should always read and adhere to the safety warnings and precautions outlined in the equipment's instruction manual. This guarantees you maintain a safe working environment.
Sales teams have an important role, too. They demonstrate safety devices and procedures during product demonstrations, guaranteeing you're aware of how to operate the equipment safely.
Distributors also contribute considerably by training staff in the safe handling and operation of airless spray equipment. With proper training, you can prevent accidents and injuries.
Moreover, establishing a true earth ground for your equipment is essential to avoid electrical hazards. This is part of your safety responsibility, guaranteeing that the equipment functions correctly and safely.
Familiarization With Safety Information
To guarantee your safety while using an airless paint sprayer, it's vital to familiarize yourself with the instruction manual. This manual contains essential safety information, including hazard icons that highlight potential risks.
Additionally, taking the time to understand the equipment and its features can help you avoid common pitfalls, such as tripping over hoses or other obstacles. Regularly reviewing these guidelines not only keeps you informed but also helps prevent accidents on the job.
For more tips on maintaining a safe work environment, consider outdoor ceiling fan installation.
Importance of Instruction Manuals
When you pick up an airless paint sprayer, the instruction manual should be your first resource. This essential document contains vital safety information that can guide you through airless spraying with confidence.
Familiarizing yourself with the manual enhances your understanding of proper operation and maintenance, ultimately promoting a safer working environment.
Here are some key points to remember about instruction manuals:
- Identify Hazards: Understand potential risks associated with airless paint sprayers.
- Safety Protocols: Follow guidelines to minimize accidents and injuries.
- Emergency Procedures: Know what to do in case of an emergency related to spraying.
- Maintenance Tips: Learn how to properly care for your equipment to guarantee safe operation.
- Regular Review: Keep up-to-date with instructions and safety measures by revisiting the manual.
Keeping the instruction manual accessible is essential.
Regularly reviewing its contents helps you stay informed on safety protocols and operational techniques, greatly mitigating risks during your spraying tasks.
Hazard Icons Usage
Familiarity with hazard icons in your airless paint sprayer's instruction manual is vital for safe operation. These icons help you quickly identify safety risks like fire, toxicity, and injection hazards associated with spray painting. Each icon comes with a description, guiding you to important safety information. This knowledge reduces the chances of accidents and injuries.
To help you navigate these icons, here's a quick reference table:
Hazard Icon | Meaning | Action Required |
---|---|---|
![Fire Icon] | Potential fire hazard | Keep flammable materials away |
![Toxicity Icon] | Toxic fumes or chemicals | Use a respirator and guarantee ventilation |
![Injection Icon] | Risk of injection injury | Avoid pointing sprayer at yourself |
Always keep your instruction manual accessible during operations to reference these hazard icons and related safety guidelines. The more aware you are of the hazards, the safer your spray painting experience will be. Remember, knowledge of these hazard icons reinforces the motto, "Spray It Safe."
Regular Manual Review
Regularly reviewing your owner's manual is essential for understanding the safety protocols associated with airless paint sprayers.
This practice not only enhances your awareness of specific hazards but also helps you stay informed about equipment safety. You'll find that the manual includes icons indicating various hazards, guiding you to critical safety information.
Familiarizing yourself with these guidelines can greatly reduce the risk of injuries, especially related to tripping hazards.
To guarantee a safer workspace, consider these key points:
- Identify and understand hazard icons in the manual.
- Maintain a clean and organized workspace to prevent tripping.
- Keep hoses and equipment neatly arranged to avoid accidents.
- Regularly consult your manual for safety procedures.
- Store the manual in an easily accessible location for quick reference.
Proper Equipment and Maintenance
How can you guarantee safety while using airless paint sprayers? The key lies in ensuring you have proper equipment and performing regular maintenance.
Start by inspecting hoses and connections for any signs of wear or leaks. Damaged equipment can create tripping hazards, so replace any faulty components immediately.
Next, make sure all electrical cords are properly secured and kept out of walkways. This minimizes the risk of tripping while you're focused on your painting task.
When you're done for the day, store your paint sprayer and related gear in designated areas, keeping pathways clear to avoid clutter that could lead to falls.
Utilize cable ties or hose reels to neatly organize hoses and cords. This simple step greatly reduces the chances of tripping over tangled or loose equipment.
Additionally, conduct routine maintenance checks—tighten loose parts and replace worn-out items to keep your equipment safe and functional.
Assessing Risks of Solvents
When working with airless paint sprayers, evaluating the risks of solvents is essential for your safety. High airborne exposure can occur, especially when using volatile solvents like Dichloromethane (DCM) in enclosed spaces.
Spraying high solvent products in poorly ventilated areas increases inhalation risks. To minimize these hazards, consider the following:
- Use local exhaust systems to ventilate the work area.
- Segregate workspaces to limit non-essential personnel's exposure to solvent vapors.
- Be mindful of wind direction when working outdoors, as it can impact safety.
- Choose low solvent products for short-duration applications when possible.
- Implement proper Respiratory Protective Equipment (RPE) that matches the solvent exposure levels.
Ventilation and Air Quality
Effective ventilation is vital for maintaining a safe working environment during airless paint spraying. You need to guarantee that harmful fumes and airborne particles are effectively dispersed to minimize respiratory issues.
Opening doors and windows can greatly improve air quality by allowing fresh air to circulate, helping to remove volatile organic compounds (VOCs) emitted by paint.
In enclosed spaces, consider using mechanical ventilation systems or local exhaust ventilation to keep air quality at safe levels, especially when you're using high-solvent products.
According to OSHA guidelines, you should aim for an air change rate of at least 10 to 12 air changes per hour in areas where spray painting takes place. This helps reduce inhalation exposure to hazardous substances.
Regularly monitoring air quality in your workspace is vital. It can help you identify potential hazards and guarantee compliance with safety standards, protecting you and your coworkers from the risks associated with poor ventilation.
By taking these steps, you'll create a healthier environment and reduce the likelihood of health issues linked to air quality during airless paint spraying.
Ladder Safety Tips
Using a ladder safely is essential when working with an airless paint sprayer, as it guarantees both your safety and the quality of your work.
Here are some key ladder safety tips to keep in mind:
- Check Stability: Always inspect your ladder for stability and integrity before use. A damaged ladder can lead to serious accidents.
- Secure the Ladder: Position it on a stable, flat surface. Avoid leaning too far to maintain your balance while spraying.
- Avoid Overreaching: Move the ladder frequently instead of stretching to reach. This reduces the risk of losing balance.
- Use a Ladder Hook: Secure your airless sprayer with a ladder hook or similar device when it's not in use. This prevents it from falling and creating tripping hazards.
- Manage Hose Length: Ascertain the hose length accommodates the full height of the ladder. This helps avoid tangling or tripping while you work.
Frequently Asked Questions
What Are Some Hazards When Using an Airless Spray Gun?
When using an airless spray gun, you might encounter hazards like tangled hoses, falling equipment, and slips from debris. Always stay aware of your surroundings and maintain a clear workspace to minimize these risks effectively.
What Is the Number One Rule When Using Airless Spray Guns?
When using airless spray guns, the number one rule's essential: always point the gun away from yourself and others. One wrong move can turn a fun project into a disaster. Stay safe, stay aware!
What Is a Safety Feature of Airless Spray Guns?
One important safety feature of airless spray guns is the trigger safety lock. It prevents accidental spraying when you're not actively using the gun, helping you maintain control and reducing the risk of unintended incidents.
What Are the Dangers With Airless Air Assisted Airless Spray Guns?
When using airless spray guns, you've got to watch for slippery spots and tangled cords. These beauties can be bulky, making maneuvering tricky. Stay alert, and keep your workspace tidy to avoid unnecessary tumbles.
Conclusion
In the midst of a busy painting project, one small trip could lead to a major accident. By keeping safety procedures front and center, you can dodge those lurking hazards. Always remember, a well-maintained airless paint sprayer isn't just about efficiency; it's about your safety too. With proper precautions, you can create a beautiful finish without the worry of spills or slips. So, gear up, stay alert, and let your creativity flow—safely!
Whether it’s a step-by-step tutorial on achieving flawless finishes or an in-depth analysis of the latest airless paint sprayer models, Joe’s ability to articulate complex ideas in a simple and engaging manner resonates with our diverse audience. His practical tips and techniques empower readers to tackle their projects with confidence.
-
Airless Paint Sprayer Reviews and Comparisons3 months ago
VONFORN Paint Sprayer Review: 700W HVLP Spray Gun (2023)
-
Airless Paint Sprayers FAQs4 months ago
How To Clean Graco Airless Sprayer After Using Oil Based Paint
-
Airless Paint Sprayers FAQs3 months ago
How To Make A Homemade Airless Paint Sprayer
-
Airless Paint Sprayers FAQs4 months ago
How To Clean My Airless Paint Sprayer Once I Used Oil Based Paint
-
Airless Paint Sprayers FAQs4 months ago
What Paint Recommended To Use In Graco Airless Paint Sprayer
-
Airless Paint Sprayer Reviews and Comparisons3 months ago
InoKraft MaXpray M1: High-Efficiency Paint Sprayer (2023)
-
Airless Paint Sprayers FAQs3 months ago
How To Clean Dried Paint From Airless Sprayer Hose
-
Airless Paint Sprayers FAQs4 months ago
How To Lubricate An Airless Paint Sprayer