You may believe that bringing back to life a paint sprayer that has been sitting idle for a long time is a daunting task. I know that feeling very well. But I want to assure you that with the right information and some effort, it is completely possible to revive your sprayer and start painting again quickly.
In this article, I will guide you through the step-by-step process of repairing your airless paint sprayer after it has been sitting idle. We will start by identifying the problem, cleaning the sprayer thoroughly, and checking for any clogged or damaged filters.
Then, we will inspect and replace any worn or damaged spray tips, lubricate the moving parts and seals, and test the sprayer with water or paint to ensure it is working properly.
By following these instructions and practicing proper storage and maintenance techniques, you can save yourself the time and money of buying a new sprayer or hiring a professional.
So let’s get started and get that airless paint sprayer back in action!
Key Takeaways
- Adjust pressure settings and test with water or paint for smooth application
- Proper storage in a clean and dry place
- Regular cleaning to remove paint residue
- Seek professional help for complex issues
Identify the Problem with Your Airless Paint Sprayer
Now it’s time for me to figure out what’s going wrong with my airless paint sprayer.
When troubleshooting the sprayer, there are a few common issues that could be causing the problem. First, check if the sprayer isn’t primed properly. If it isn’t, the paint won’t flow smoothly.
Another issue could be a clogged nozzle. Paint buildup can obstruct the nozzle, impacting the spray pattern.
Additionally, a worn or damaged piston could cause a drop in pressure.
Lastly, make sure the filters are clean and unclogged.
These troubleshooting tips will help identify the problem with your airless paint sprayer. After figuring out the issue, we can move on to cleaning the sprayer thoroughly and removing any obstructions in the system.
Clean the Sprayer Thoroughly
First, make sure you’ve thoroughly cleaned the sprayer. Cleaning techniques are crucial for maintaining the functionality of your airless paint sprayer. To clean the sprayer, follow these troubleshooting tips:
-
Flush the sprayer with clean water: Start by removing the spray tip and guard, then run clean water through the sprayer for a few minutes. This will help remove any leftover paint residue.
-
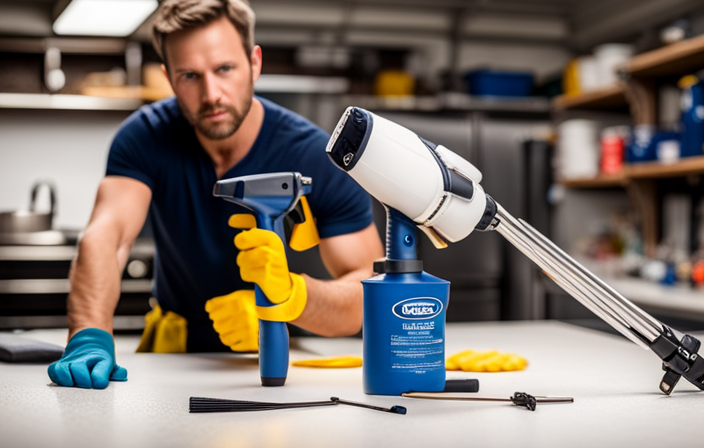
Disassemble and clean the components: Take apart the sprayer and clean each component individually. Use a brush or cloth to remove any paint buildup or debris.
-
Check and clean the filters: Inspect the filters for clogs or damage. Clean or replace them if necessary to ensure proper paint flow.
By thoroughly cleaning the sprayer, you can prevent clogs and damage, ensuring optimal performance. Now, let’s move on to the next step: checking and replacing clogged or damaged filters.
Check and Replace Clogged or Damaged Filters
To ensure optimal performance, it’s essential that you check and replace any clogged or damaged filters in your sprayer. When using an airless paint sprayer, it’s common for filters to become clogged with debris or paint particles, which can hinder the flow of paint and result in uneven application.
By regularly inspecting and cleaning your filters, you can prevent these issues and keep your sprayer in top condition. Start by removing the filters and thoroughly cleaning them with warm soapy water or a specialized filter cleaner. If the filters are damaged or cannot be cleaned, it’s important to replace them with new ones.
Troubleshooting tips for common filter problems include checking for suction issues, ensuring proper filter installation, and using the correct filter size for your paint type.
Inspect and replace worn or damaged spray tips to maintain optimal performance.
Inspect and Replace Worn or Damaged Spray Tips
Make sure to regularly check and replace any worn or damaged spray tips to keep your sprayer working at its best. Spray tip maintenance is crucial for achieving optimal spray patterns and preventing uneven paint application.
Common spray tip problems include clogs, worn or damaged orifices, and excessive wear on the fan pattern. Inspect the spray tip for any signs of wear, such as a distorted or irregular spray pattern, reduced paint flow, or excessive overspray. If you notice any of these issues, it’s important to replace the spray tip immediately.
To ensure proper functioning, choose a spray tip that matches the material and desired spray pattern. With regular inspection and prompt replacement of worn or damaged spray tips, you can maintain the performance and longevity of your airless paint sprayer.
Moving on to the next section, it’s also essential to lubricate the moving parts and seals to keep the sprayer running smoothly.
Lubricate Moving Parts and Seals
Once you’ve inspected and replaced worn or damaged spray tips, it’s time to ensure smooth operation by lubricating the moving parts and seals. Proper lubrication techniques are essential to maintain the longevity and efficiency of your airless paint sprayer.
Start by identifying the specific points that require lubrication, such as the piston rod, piston, and packings. Apply a thin coat of lubricant to these areas using a clean cloth or brush. This will minimize friction and reduce wear on the moving parts.
Additionally, lubricating the seals is crucial to prevent common seal problems such as leakage and uneven spray patterns. Be sure to use a compatible lubricant that’s recommended by the manufacturer.
Once the moving parts and seals are properly lubricated, you can proceed to the next step of flushing the system with a cleaning solution to ensure optimal performance.
Flush the System with Cleaning Solution
Before you continue, it’s important to flush the system with a cleaning solution to ensure optimal performance and prevent any clogs or blockages.
To do this, first detach the paint container and spray gun from the sprayer.
Next, pour a suitable cleaning solution into the container and attach it back to the sprayer.
Turn on the sprayer and allow the cleaning solution to flow through the system. This will help remove any residual paint or debris that may have accumulated during previous use.
While flushing the system, pay attention to any troubleshooting tips such as checking for leaks or unusual noises.
Common mistakes to avoid include using the wrong type of cleaning solution or failing to flush the system thoroughly.
Once the system is clean, you can proceed to test the sprayer with water or paint to ensure it’s working properly.
Test the Sprayer with Water or Paint
Now that you’ve thoroughly cleaned the system, it’s time to put it to the test and see how it performs with either water or paint. Testing the sprayer is crucial to ensure that it’s functioning properly before you start your painting project.
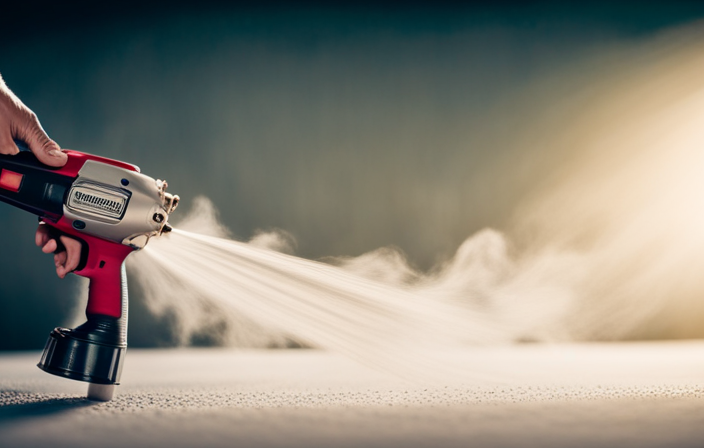
To test the sprayer with water, fill the paint container with clean water and attach it to the sprayer. Turn on the sprayer and check for any leaks or irregular spraying patterns. If everything looks good, you can move on to testing with paint.
Fill the container with your desired paint and run the sprayer again, paying attention to the consistency of the spray and any clogs that may occur. If there are any issues, refer to the troubleshooting tips in the next section.
Once you’re satisfied with the results, you can adjust the pressure and flow settings to optimize your painting experience.
Adjust Pressure and Flow Settings
To optimize your painting experience, it’s important to fine-tune the pressure and flow settings of the sprayer, which can significantly impact the quality and efficiency of your work. According to a recent study, adjusting the pressure and flow settings can increase paint coverage by up to 20%.
-
Adjust the nozzle: Start by checking the nozzle for any clogs or blockages. Use a small brush or pin to clean out any debris that may be obstructing the flow of paint. Ensure that the nozzle is securely attached to prevent any leaks or uneven spray patterns.
-
Troubleshoot problems: If you encounter any issues with the pressure or flow, first check the sprayer’s manual for troubleshooting tips. Common problems can include inconsistent spray, overspray, or uneven coverage. Adjust the pressure settings accordingly and test the sprayer with water or paint to ensure smooth and even application.
-
Practice proper storage and maintenance techniques: After adjusting the pressure and flow settings, it’s essential to practice proper storage and maintenance techniques. This will prolong the lifespan of your sprayer and prevent any future issues. Regularly clean the sprayer, remove any paint residue, and store it in a clean and dry place.
By following these steps, you can ensure optimal performance and longevity of your airless paint sprayer.
Transitioning into the next section, let’s now discuss how to practice proper storage and maintenance techniques for your sprayer.
Practice Proper Storage and Maintenance Techniques
Taking care of your sprayer and ensuring its longevity is crucial, so let’s delve into the best practices for storing and maintaining it.
Proper storage techniques are essential to prevent damage and ensure optimal performance of your airless paint sprayer. After each use, thoroughly clean the sprayer by flushing it with water or a cleaning solution. Make sure to remove any excess paint or debris from the system, including the gun, hose, and filters.
Once cleaned, store the sprayer in a dry and well-ventilated area, away from extreme temperatures. Additionally, preventing paint buildup is key to maintaining the sprayer’s functionality. Regularly inspect and clean the filters, nozzles, and tips to prevent clogs and blockages.
Remember, proper storage and maintenance will extend the life of your sprayer and ensure consistent performance. If you encounter any issues beyond your expertise, seek professional help.
Seek Professional Help if Necessary
If you’re in a sticky situation with your sprayer, don’t hesitate to call in the pros for expert help. Seeking professional advice can save you time and frustration when it comes to repairing your airless paint sprayer.
Here are some troubleshooting tips to make the most of their expertise:
-
Provide a detailed description of the problem: When contacting a professional, be prepared to explain the issue you’re facing with your sprayer. The more information you can provide, the better they’ll be able to diagnose and fix the problem.
-
Follow their instructions: Once you’ve sought professional help, make sure to carefully follow any instructions they give you. This may include adjusting settings, replacing parts, or performing maintenance tasks.
-
Ask for clarification: If you don’t understand something, don’t be afraid to ask for clarification. Professionals are there to help and want to make sure you have a clear understanding of what needs to be done.
-
Consider preventative maintenance: In addition to fixing the immediate problem, professionals can also provide valuable advice on how to prevent future issues. Take their recommendations seriously and implement any necessary maintenance routines to keep your sprayer in top condition.
By seeking professional help and following their guidance, you can quickly and effectively repair your airless paint sprayer, ensuring it continues to work at its best.
Frequently Asked Questions
How do I troubleshoot a paint sprayer that won’t turn on?
To troubleshoot a paint sprayer that won’t turn on, check the power source, ensure the power switch is on, inspect the power cord for damage, and confirm the motor is not overheated. These are common paint sprayer issues.
Can I use regular water to clean my airless paint sprayer, or do I need a specific cleaning solution?
Regular water is not sufficient for cleaning an airless paint sprayer. It is important to choose the right cleaning solution to effectively remove paint residue and prevent clogs. Using the correct solution will ensure optimal performance and longevity of your sprayer.
Is it normal for the spray pattern to be uneven or splotchy after using an airless paint sprayer?
Common causes of an uneven spray pattern with an airless paint sprayer include clogged nozzle, improper paint thinning, or worn-out spray tip. To prevent this, properly maintain and clean the sprayer by following manufacturer guidelines.
What should I do if the paint sprayer is leaking paint during operation?
During operation, if the paint sprayer is leaking paint, it may be due to a clogged nozzle. To fix this issue, I will explain how to fix a clogged paint sprayer nozzle and what to do if the paint sprayer is not spraying evenly.
How often should I replace the spray tips on my airless paint sprayer?
I replace spray tips on my airless paint sprayer when they become worn or damaged. Proper spray tip maintenance is important to ensure optimal performance. Inspect the tips regularly and replace them as needed to achieve the best results.
Conclusion
In conclusion, repairing an airless paint sprayer after it’s been sitting requires thorough cleaning. Additionally, it involves checking and replacing filters and spray tips, lubricating moving parts and seals, and testing with water or paint. It’s crucial to adjust pressure and flow settings for optimal performance.
Moreover, practicing proper storage and maintenance techniques is essential to prevent future issues. Remember, if you encounter any difficulties, seeking professional help is always a wise decision. By following these steps, you can ensure your airless paint sprayer is in top condition for your next painting project.

