Are you frustrated with a malfunctioning airless paint sprayer? Don’t worry! This article will guide you on replacing faulty parts on your airless paint sprayer to ensure it works like new.
Just like any other machine, airless paint sprayers can experience wear and tear over time, causing certain parts to become damaged or worn out. Rather than shelling out money for a brand-new sprayer, learning how to replace these parts can save you both time and money.
By following a few simple steps, you’ll be able to:
- Identify the parts that need replacement
- Gather the necessary tools and replacement parts
- Install the new parts with ease
I’ll even provide tips for troubleshooting common issues and maintaining your sprayer to extend its lifespan.
So, let’s get started and get your airless paint sprayer back in tip-top shape!
Key Takeaways
- Regularly inspect and identify worn-out or damaged parts on the airless paint sprayer
- Follow the manufacturer’s recommendations for replacement intervals and keep spare parts on hand for quick replacements
- Properly replace worn-out seals, hoses, and nozzles to maintain proper sealing and ensure consistent paint flow and pressure
- Replacing worn or damaged parts promptly enhances the sprayer’s performance and helps avoid potential damage.
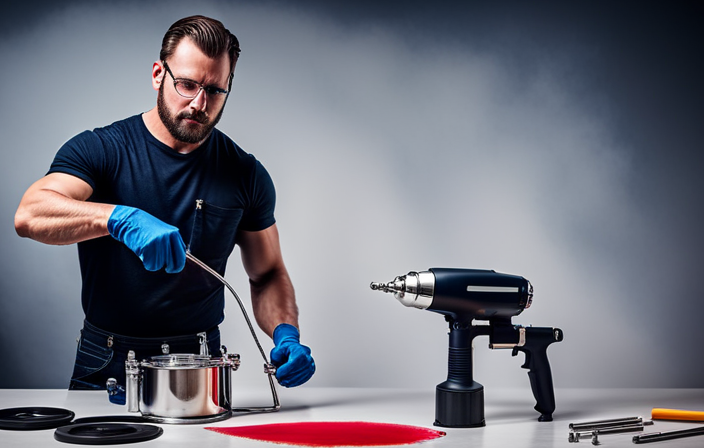
Identify the Parts That Need Replacement
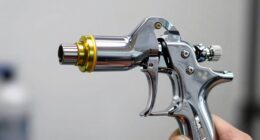
Let’s now examine the airless paint sprayer to identify the specific parts that need replacement. When maintaining your airless paint sprayer, it’s crucial to identify the parts that need replacement to ensure optimal performance. The key replacement parts to look out for are the spray gun, tip, filter, and pump.
The spray gun is responsible for delivering the paint, while the tip controls the spray pattern and flow rate. The filter is essential in preventing any debris from clogging the system, and the pump acts as the heart of the sprayer by pressurizing the paint.
Regularly inspecting and replacing these essential components will help prolong the life of your airless paint sprayer and achieve professional-quality results.
Now, let’s move on to gathering the necessary tools and replacement parts.
Gather the Necessary Tools and Replacement Parts
First, make sure you have all the essential tools and key components required to breathe new life into your paint sprayer. When it comes to replacing airless paint sprayer parts, it is crucial to have the right tools at hand. Some of the tools you will need include a wrench, screwdriver, pliers, and a clean cloth.
Additionally, gather the replacement parts you will need, such as filters, nozzles, hoses, and seals. Maintaining airless paint sprayer tools is essential for their longevity and optimal performance. Regularly inspecting and replacing worn-out parts is key to preventing any issues during your painting projects.
Once you have all the necessary tools and replacement parts, you can move on to the next step of turning off and disconnecting the paint sprayer.
Turn Off and Disconnect the Paint Sprayer
Before moving forward, it’s important to power down and detach your painting tool from its power source. This is a critical step in ensuring your safety and preventing any accidents.
When disconnecting a paint sprayer, there are a few common mistakes you should avoid. First, make sure to turn off the power switch and unplug the sprayer from the outlet.
Next, relieve any pressure in the system by triggering the spray gun until no more paint comes out. Once the sprayer is depressurized, disconnect the hose from the spray gun and remove the spray tip carefully.
Lastly, detach the suction tube from the paint container.
By following these safety precautions and steps, you can now move on to the next section and remove the old parts of your airless paint sprayer.
Remove the Old Parts
After disconnecting and powering down your paint sprayer, you can proceed to remove the worn-out components.
To begin, locate the specific parts that need replacement. Refer to the user manual or consult an expert if you’re unsure.
Start by removing any screws or bolts that secure the old parts in place using the appropriate tools. Gently detach the old components, taking care not to damage any surrounding parts. Keep track of the order in which you remove the parts to ensure proper reassembly later.
Avoid using excessive force, as this can lead to breakage or misalignment of the new parts. Additionally, be cautious of any fragile or delicate components that may be attached nearby.
Once all the old parts have been safely removed, you can proceed to the next step of installing the new components.
Install the New Parts
To enhance the performance of your paint sprayer, you can begin by installing the brand new components.
When replacing nozzles on an airless paint sprayer, it is crucial to choose the right replacement parts. Start by selecting a nozzle that matches the size and type of paint you will be using. Consult the manufacturer’s guide or speak to a professional for guidance if needed.
Once you have the correct nozzle, carefully remove the old nozzle by unscrewing it counterclockwise. Then, take the new nozzle and screw it on clockwise until it is securely in place. Make sure to tighten it properly to prevent any leaks.
With the new nozzle installed, you are now ready to reassemble the paint sprayer and continue with the next steps.
Reassemble the Paint Sprayer
Now that you’ve successfully upgraded your paint sprayer with new components, it’s time to put everything back together and unleash the power of your newly improved tool.
The reassembling process is crucial to ensure proper functioning and avoid any issues. Start by carefully placing the housing back onto the main body of the sprayer, making sure all the screws align properly.
Next, reattach the nozzle and secure it tightly to prevent any leaks. Pay close attention to the connections and ensure that all the parts are securely fastened. One common mistake is not properly aligning the housing, which can cause misalignment of the internal components.
Once everything is reassembled, you’re ready to move on to the next step: testing the sprayer to ensure it is functioning correctly.
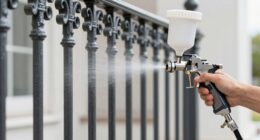
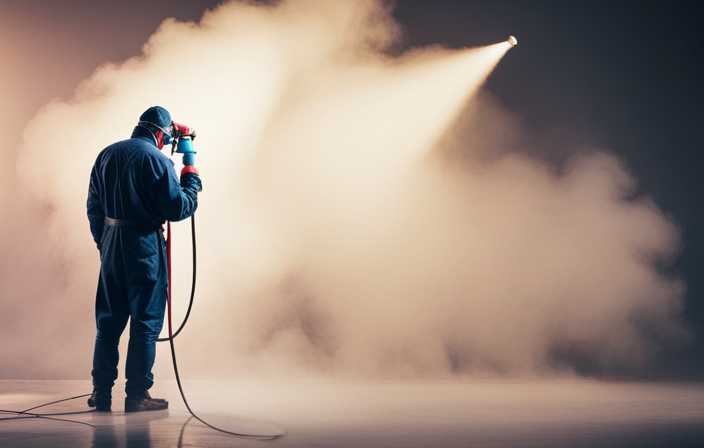
Test the Sprayer to Ensure Proper Functioning
Make sure you’re ready to witness the impressive power and flawless performance of your newly upgraded paint sprayer by putting it to the test and experiencing the sheer satisfaction of a job well done. To ensure proper functioning, it is essential to test the sprayer before using it on your next project. Below is a table outlining sprayer maintenance and troubleshooting techniques that may come in handy during the testing process.
| Maintenance Tips | Troubleshooting Techniques |
|---|---|
| Clean the sprayer thoroughly after each use | Check for clogs in the nozzle or hose |
| Inspect the hose for any signs of wear and tear | Adjust the pressure settings if the spray pattern is uneven |
| Lubricate the moving parts regularly | Ensure the power source is properly connected |
By following these maintenance and troubleshooting techniques, you can ensure that your sprayer functions flawlessly. Now, let’s move on to the next section about how to clean and maintain the sprayer regularly to prolong its lifespan.
Clean and Maintain the Sprayer Regularly
To keep your sprayer in top condition, it is important to clean and maintain it regularly. This will ensure its longevity and optimal performance. Proper cleaning techniques are crucial to prevent any clogs or malfunctions in your airless paint sprayer.
Start by flushing out any remaining paint or debris from the system. You can do this by running clean water or solvent through the sprayer. Pay close attention to the nozzle and filters, as these are common areas for buildup. Use a soft brush or toothbrush to gently remove any stubborn residue.
In addition to cleaning, it is important to inspect the hoses and connections for any leaks or damage. If you notice any worn-out parts, be sure to replace them as necessary. Avoid using harsh chemicals or excessive force, as this may damage the sprayer.
By following these cleaning and maintenance practices, you can ensure that your sprayer operates smoothly and efficiently. Taking care of your sprayer will save you time and money in the long run.
Troubleshooting Common Issues
If you’re experiencing issues with your sprayer, troubleshooting common problems is essential to ensure smooth and efficient operation. When troubleshooting common issues with an airless paint sprayer, it’s important to first check for common maintenance mistakes that could be causing the problem.
One common issue is a clogged nozzle, which can be resolved by removing the nozzle and cleaning it thoroughly with warm water or a cleaning solution.
Another common problem is inadequate pressure, which can be caused by a worn or damaged piston. In this case, replacing the piston will likely resolve the issue.
Additionally, leaks can occur due to worn seals or fittings, so inspecting and replacing any damaged components is necessary.
By addressing these common issues, you can ensure optimal performance of your airless paint sprayer.
Now, let’s move on to the next section about tips for extending the lifespan of your airless paint sprayer.
Tips for Extending the Lifespan of Your Airless Paint Sprayer
To maximize the lifespan of your airless paint sprayer, it’s important to take steps for regular maintenance and proper care. Here are some essential tips to extend the longevity of your equipment:
-
Clean your sprayer thoroughly after every use to prevent clogs and buildup.
-
Use a high-quality paint filter to remove debris and impurities from the paint, protecting your sprayer’s internal components.
-
Store your sprayer in a clean and dry environment to avoid rust and corrosion.
-
Regularly inspect and replace worn-out or damaged parts, such as seals, hoses, and nozzles, to ensure optimal performance.
-
Follow the manufacturer’s guidelines for maintenance and servicing, including oiling the pump and checking for leaks.
By following these maintenance tips, you can keep your airless paint sprayer in excellent condition, prolonging its lifespan and ensuring consistent, high-quality results.
Frequently Asked Questions
How often should I replace the parts on my airless paint sprayer?
I replace parts on my airless paint sprayer when they start wearing out, like a well-worn paintbrush. Signs of worn out parts include decreased performance, clogs, leaks, or irregular spray patterns.
Can I use any type of replacement parts for my airless paint sprayer?
You should not use just any type of replacement parts for your airless paint sprayer. It is important to use the correct parts specifically designed for your model. Using the wrong parts can lead to poor performance and potential damage. Common mistakes to avoid include using incompatible parts or not properly aligning and securing the new parts.
How do I know if a specific part needs to be replaced?
To determine if a specific part needs replacing on an airless paint sprayer, look for signs of worn out parts such as leaks or decreased performance. Follow these steps to diagnose faulty parts and ensure optimal functioning.
Are there any safety precautions I should take when replacing parts on my airless paint sprayer?
When replacing parts on an airless paint sprayer, it is important to take safety precautions to avoid potential risks. This includes wearing protective gear, ensuring the machine is turned off and depressurized, and following the manufacturer’s instructions carefully.
Can I hire a professional to replace the parts on my airless paint sprayer?
Hiring professionals for airless paint sprayer part replacements is a wise choice. They possess the expertise to ensure precise and flawless work, saving you time and potential errors. DIY replacement can be risky and may result in further damage.
Conclusion
After successfully replacing the parts on my airless paint sprayer, I was amazed at the transformation. The sprayer now hums with efficiency, its components working in harmony like a symphony.
Gone are the days of clogged nozzles and sputtering paint. With regular maintenance and care, this reliable tool will continue to deliver flawless results, leaving a trail of vibrant colors in its wake.
Trust me, investing time in understanding and replacing the parts of your airless paint sprayer is a decision that will bring you joy and satisfaction for years to come.