The Magnum X7 Airless Paint Sprayer is the top choice for professional painters and DIY enthusiasts alike. Its ability to complete painting tasks quickly and accurately makes it a powerful tool.
In this article, I’ll be your guide on how to use the Magnum X7 effectively.
We’ll start by unboxing and assembling the sprayer, making sure we understand all the key features and functions.
Then, I’ll walk you through the process of preparing your painting surface for the best results.
We’ll also discuss how to adjust the pressure settings for different projects and the proper technique for holding and operating the sprayer.
Cleaning and maintenance are crucial for the longevity of your Magnum X7, so I’ll show you how to keep it in top shape.
And don’t worry, I’ll cover common troubleshooting issues too.
Safety is a priority, so I’ll share some important precautions to follow.
By the end of this article, you’ll be ready to tackle any painting project with confidence using the Magnum X7 Airless Paint Sprayer. Let’s get started!
Key Takeaways
- Troubleshoot common issues such as paint clogging and uneven paint distribution
- Follow safety precautions when using the Magnum X7, including wearing safety gear and inspecting the sprayer for damaged parts
- Take advantage of the benefits of using the Magnum X7, such as quick and efficient coverage, adjustable pressure control, and a professional-looking finish
- Follow the step-by-step guide for achieving professional results with the Magnum X7, including preparing the surface, choosing the appropriate spray tip size, adjusting the pressure, and maintaining a consistent spraying motion.

MaXpray M1 Airless Paint Sprayer, Highly Efficient Thinning-Free Minimal Overspray for Up to 10 Gallon DIY Painting Projects Home Interior & House Exterior, Comes with Sprayer Accessories
Your DIY Partner - All DIY Homeowners, upgrade your DIY game with the MaXpray M1 airless paint sprayer—far...
As an affiliate, we earn on qualifying purchases.
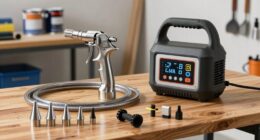
Unboxing and Assembly of the Magnum X7 Airless Paint Sprayer
Now that you’ve got your hands on the Magnum X7 Airless Paint Sprayer, let’s dive into the exciting unboxing and assembly process!
The Magnum X7 airless paint sprayer comes neatly packaged with all the necessary components. Start by carefully opening the box and removing the sprayer, hose, and gun.
The next step is to attach the hose to the sprayer using the provided fittings. Make sure to tighten them securely to prevent any leaks.
Once the hose is attached, connect the gun to the other end of the hose. It simply screws on and locks into place.
Lastly, plug in the sprayer and you’re ready to start painting!
With the unboxing and assembly process complete, let’s move on to understanding the key features and functions of the Magnum X7 airless paint sprayer.

Gyfent X9 Airless Paint Sprayer, 0.39GPM Paint Sprayer for Home Interior 650W 3000psi Airless Sprayer with Low Overspray Adjustable Pressure & Motor Speed for House Painting DIY Garage
X9 Airless Paint Sprayer: This airless paint sprayer has soft spraying effect, which can make the paint spray...
As an affiliate, we earn on qualifying purchases.
Understanding the Key Features and Functions of the Magnum X7
Understanding the key features and functions of the Magnum X7 can greatly enhance your painting experience, making your projects more efficient and saving you valuable time. Here are four essential aspects to consider:
-
Pressure Control: The Magnum X7 offers precise pressure control, allowing you to adjust the spray pattern according to your needs. This feature ensures even coverage and minimizes overspray, giving you a professional finish every time.
-
Paint Flow: With the Magnum X7, you can easily regulate the paint flow, enabling you to achieve the desired thickness and consistency. Whether you’re working with thin or thick paints, this feature ensures smooth and consistent application.
-
Easy Cleanup: The Magnum X7 includes a power flush adapter that connects to a standard garden hose, making cleanup a breeze. Simply attach the adapter and flush out any remaining paint from the system, saving you time and effort.
-
Durability and Longevity: Built with high-quality materials, the Magnum X7 is designed to withstand frequent use and provide years of reliable performance.
Understanding these key features and functions of the Magnum X7 will help you prepare your painting surface for the airless paint sprayer, ensuring optimal results without any hassle.

Graco Magnum 257025 Project Painter Plus Paint Sprayer
Ideal for projects up to 5 gallons in size, allowing you to tackle a range of projects every...
As an affiliate, we earn on qualifying purchases.
Preparing Your Painting Surface for the Airless Paint Sprayer
Get ready to transform your painting surface into a masterpiece with these easy steps for preparing it before you start using the airless paint sprayer! Surface preparation is crucial to achieve a smooth and long-lasting finish.
Begin by thoroughly cleaning the surface to remove any dirt, grease, or loose particles. Use a mild detergent and water solution or a pressure washer if necessary.
Next, inspect the surface for any cracks, holes, or imperfections, and repair them using appropriate fillers or patching compounds.
Once the surface is clean and repaired, it’s time to choose the right paint. Consider the type of surface you are painting on, whether it’s wood, metal, or concrete, and select a paint that is suitable for that material.
With the surface prepared and the right paint selected, you are now ready to adjust the pressure settings for different painting projects, ensuring optimal results and a professional finish.

VEVOR 750W Stand Airless Paint Sprayer, 3000PSI High Efficiency Electric Airless Sprayer, Fine and Even Painting Effect, Handheld Paint Sprayers for Home Interior and Exterior Furniture and Fences
Efficient Painting: Our stand airless paint sprayer is equipped with a powerful 750W motor, capable of delivering up...
As an affiliate, we earn on qualifying purchases.
Adjusting the Pressure Settings for Different Painting Projects
Achieve the perfect balance of control and precision by adjusting the pressure settings on your artistic wand, allowing your creativity to flow effortlessly onto the canvas.
When using the Magnum X7 airless paint sprayer, it is crucial to adjust the pressure according to the specific painting project. The pressure settings determine the flow of paint and can greatly affect the overall finish.
To begin, consider the type of surface you are painting and the desired paint consistency. For larger surfaces, such as walls, higher pressure settings may be necessary to ensure even coverage. On the other hand, for more intricate projects or delicate surfaces, lower pressure settings are recommended to prevent overspray and maintain finer details.
By adjusting the pressure settings, you can tailor the paint flow to your specific needs.
Now that you understand the importance of pressure adjustment, let’s move on to the proper technique for holding and operating the Magnum X7.
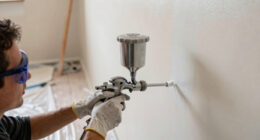
Proper Technique for Holding and Operating the Magnum X7
Master the art of holding and operating the powerful Magnum X7 with finesse and ease.
When it comes to the holding technique, make sure to hold the sprayer firmly with both hands, maintaining a stable grip. Your dominant hand should be on the handle, and the other hand on the trigger. This allows for better control and accuracy while painting.
As for the operating instructions, start by priming the pump and adjusting the pressure settings according to the project requirements. Once the paint is properly mixed, hold the sprayer about 12 inches away from the surface and move it in a smooth, continuous motion. Remember to overlap each stroke to ensure even coverage.
By mastering these techniques, you’ll be well on your way to achieving smooth and even paint coverage with the airless sprayer.
Tips for Achieving Smooth and Even Paint Coverage with the Airless Sprayer
Enhance your painting skills by following these helpful tips to ensure a flawless and polished finish with the powerful Magnum X7.
-
Adjust the pressure: Set the pressure on the sprayer to achieve a smooth finish. Too high pressure can cause overspray, while too low pressure may result in an uneven coat.
-
Maintain the correct distance: Hold the sprayer about 12 inches away from the surface to achieve optimal coverage. This distance ensures even paint distribution and prevents overspray.
-
Overlap strokes: To avoid streaks and missed spots, overlap each stroke by about 50%. This technique ensures consistent coverage and a seamless finish.
Achieving a smooth finish and avoiding overspray is crucial for professional-looking results.
Now, let’s move on to the next section about cleaning and maintenance of the Magnum X7 for longevity.
Cleaning and Maintenance of the Magnum X7 for Longevity
To ensure the longevity of your powerful paint-spraying tool, it’s important to properly clean and maintain the Magnum X7. Much like taking care of a reliable car engine, these steps will keep it running smoothly for years to come.
Cleaning techniques for the airless paint sprayer include flushing the system with water or an appropriate cleaning solution after each use. This helps remove any leftover paint or debris that could clog the sprayer and affect its performance.
Additionally, it’s crucial to regularly inspect and clean the filters. They play a crucial role in preventing clogs and maintaining even paint flow.
Maintenance involves following a schedule that includes checking for loose or worn parts, lubricating moving components, and ensuring the motor is running smoothly.
By following these cleaning techniques and maintenance schedule, you can keep your Magnum X7 in optimal condition for flawless paint spraying.
Moving on to troubleshooting common issues with the airless paint sprayer…
Troubleshooting Common Issues with the Airless Paint Sprayer
One common issue with this powerful tool is when it experiences clogging due to leftover debris or paint. To troubleshoot this problem, you can follow the steps outlined in the table below:
| Issue | Possible Cause | Solution |
|---|---|---|
| Paint Clogging | Debris or dried paint in the nozzle or hose | Clean the nozzle and hose thoroughly with a cleaning agent or solvent |
| Uneven Paint Distribution | Incorrect pressure setting or worn-out nozzle | Adjust the pressure according to the paint manufacturer’s recommendations or replace the nozzle |
By taking these troubleshooting steps, you can ensure that your Magnum X7 airless paint sprayer continues to operate smoothly and efficiently. It’s important to address these issues promptly to avoid any delays or disruptions in your painting project. In the next section, we will discuss the safety precautions to follow when using the Magnum X7.
Safety Precautions to Follow When Using the Magnum X7
Ensure your safety and protect yourself from potential hazards by following these important precautions when using the powerful Magnum X7.
-
Wear proper safety gear, including safety glasses, a respirator mask, and gloves. These will shield you from any airborne particles or fumes that may be released during the spraying process.
-
Thoroughly inspect the sprayer for any damaged or worn-out parts before starting any painting project. This is important as it can affect the sprayer’s performance and pose a safety risk.
-
Always operate the Magnum X7 in a well-ventilated area to minimize exposure to paint vapors.
-
Familiarize yourself with the user manual and follow the manufacturer’s guidelines for safe and proper use of the sprayer.
With these safety precautions in mind, let’s explore some examples of painting projects made easy with the Magnum X7.
Examples of Painting Projects Made Easy with the Magnum X7
Painting projects become a breeze with the powerful and user-friendly Magnum X7, making your creative endeavors effortless and enjoyable. The advantages of using an airless paint sprayer for large scale projects are numerous.
- Firstly, the Magnum X7 allows for quick and efficient coverage, saving you valuable time and effort.
- Its high-pressure system ensures an even and smooth application, resulting in a professional-looking finish.
- Additionally, the X7’s adjustable pressure control allows for customization based on the project’s requirements, whether it’s a small touch-up or a full-scale renovation.
To achieve professional-looking results with the Magnum X7, follow this step-by-step guide:
1) Prepare the surface by cleaning and repairing any imperfections.
2) Choose the appropriate spray tip size for your paint type and desired coverage.
3) Adjust the pressure to achieve optimal flow and atomization.
4) Start spraying in a steady, overlapping motion, keeping the sprayer at a consistent distance from the surface.
5) Maintain a consistent speed and angle to ensure an even application.
6) Allow the paint to dry thoroughly before applying additional coats if necessary.
With the Magnum X7, your painting projects will be completed with ease and precision.
Frequently Asked Questions
Can the Magnum X7 Airless Paint Sprayer be used for outdoor painting projects?
Using the Magnum X7 airless paint sprayer for outdoor projects offers several benefits. It provides a smooth and even finish, saves time and paint, and allows for easy coverage of large areas. To achieve optimal results, follow these tips: adjust the pressure, maintain a consistent distance, and overlap each pass.
Are there any specific paint types that should not be used with the Magnum X7?
To avoid damaging the Magnum X7 airless paint sprayer, it is important to avoid using certain paint types. Specifically, avoid using flammable or combustible materials, as well as any paint that contains corrosive substances. Take proper precautions to ensure safe and effective use of the sprayer.
How long does it typically take for the paint to dry after using the Magnum X7?
To speed up the drying process of paint after using the Magnum X7, ensure proper ventilation and use a dehumidifier if necessary. Cleaning the Magnum X7 effectively involves flushing the sprayer with water or a recommended cleaning solution.
Can the Magnum X7 be used for smaller, detailed painting tasks?
Sure, the Magnum X7 is perfect for small scale painting tasks. Its precision spraying allows for detailed work, making it great for intricate designs and fine lines. It’s a versatile tool for all your painting needs!
Is it necessary to wear protective gear when using the Magnum X7?
It is necessary to wear protective gear when using the Magnum X7. Wearing gear such as goggles, a respirator, gloves, and coveralls provides benefits like protecting against paint fumes and overspray. Safety precautions include reading the manual, using the sprayer in a well-ventilated area, and avoiding contact with skin.
Conclusion
Using the Magnum X7 Airless Paint Sprayer is a game-changer for painting projects. The unboxing and assembly process is straightforward. The key features and functions are easy to understand. Adjusting the pressure settings is not a concern because they are adjustable. Achieving professional-looking results on various surfaces is possible. Proper technique and maintenance ensure the longevity of the Magnum X7. Troubleshooting common issues is a breeze. With safety precautions in place, the Magnum X7 makes painting projects easier and more efficient.